2016 MERCEDES-BENZ GLE-Class lights
[x] Cancel search: lightsPage 253 of 450

XSwitch on the ignition.
XDepress the brake pedal.
XObserve the notes on starting the engine
(Ypage 147).
XStart the vehicle (Ypage 147).
The vehicle is operational when READY indi-
cator :lights up.
Pulling away
XDepress the brake pedal and keep it
depressed.
XShift the transmission to position Dor R.
XIf the Apply Brake to Shift from 'P'display message appears in the multifunction
display, depress the brake pedal more firmly
and select the desired transmission position.
XRelease the brake pedal.
XCarefully depress the accelerator pedal.
For further information on pulling away
(
Ypage 148).
Driving
DYNAMIC SELECT controller
Drive programs
Use the DYNAMIC SELECT controller to change
the drive program. Depending on the drive pro-
gram selected the following vehicle character-
istics will change:
Rthe drive (engine and transmission manage-
ment)
Rthe suspension
Rthe steering
Rthe energy management
Each time you start the engine with the ignition SmartKey or the Start/Stop button, the Com-
fort drive program is activated. For further infor-
mation about starting the engine, see
(
Ypage 147).
XTurn DYNAMIC SELECT controller :as many
times as necessary until the desired drive
program is selected.
The status icon of the selected drive program
is shown in the multifunction display.
In addition, the current drive program settings are displayed briefly in the multimedia system
display.
Available drive programs:
IndividualRIndividual settings
SportRSporty driving style with
increased boost mode
RElectric-only operation is
not possible
ComfortRComfortable, economical
driving style
RElectric-only operation is
possible
SlipperyROptimal driving charac-
teristics on slippery or
snow-covered roads
RElectric-only operation is
possible
Additional information for drive programs
(Ypage 158).
Using the steering wheel paddle shifters, you
can temporarily change gears yourself. For fur-
ther information on the manual drive program
(
Ypage 251).
Manual gear shifting
Using the steering wheel paddle shifters, you
can temporarily change gears yourself. The
transmission must be in position D. During man-
ual gearshifting, the combustion engine is
always switched on.
PLUG-IN HYBRID operation251
Driving and parking
Z
Page 256 of 450
The condition of charge of the high-voltage bat-
tery is thus systematically controlled. In addi-
tion, the control function takes into account
that:
Rthe fuel saving through the use of electrical
energy can vary, dependent on the route (e.g.
urban, interurban or highway)
Rthe use of electrical energy is held available
for electric driving, particularly for urban
routes
The vehicle thus automatically selects the opti-
mum driving mode for the respective section of
the route.
The route-based operating strategy is available
under the following conditions:
Rthe Individual drive program is selected
Rin theIndividual drive program, the ECO set-
ting is selected under Drive
RHYBRID driving mode is selected
Ractive route guidance is activated
Rsuitable map data is available
When the route-based operating strategy is
being used, the area in front of the vehicle is
shown as green in the multifunction display.
Parking
XApply the electric parking brake.
The red !indicator lamp in the instrument
cluster lights up.
XUse the DIRECT SELECT lever to shift the
automatic transmission to P.
XSwitch the ignition off.
The READY indicator in the instrument cluster
goes out.
Further information on parking and switching off
the internal combustion engine (
Ypage 179).
254PLUG-IN HYBRID operation
Driving and parking
Page 262 of 450
XEstablish the electrical connection between
the vehicle and the trailer.
XCheck that the trailer lighting system is work-
ing.
XPush the combination switch upwards/down-wards and check whether the corresponding
turn signal on the trailer flashes.
A trailer that is connected is recognized only
when the electrical connection is established
correctly and when the lighting system is work-
ing properly. The function of other systems also
depends on this, for example:
RESP®
RPARKTRONIC
RActive Parking Assist
RActive Blind Spot Assist
RActive Lane Keeping Assist
iVehicles with the AIRMATIC package: if you
couple up a trailer, the vehicle always remains
at normal level. When coupling up a trailer,
please observe the following:
RIf the normal level has not been set man-
ually, the vehicle is automatically lowered
to normal level. This is the case if a speed of
5 mph (8 km/h) is reached.
RThe Sport drive program is not available.
These restrictions apply to all accessories
powered through a connection to the trailer
power socket of your vehicle, e.g. a bicycle
carrier.
Observe the maximum permissible trailer
dimensions (width and leng
th).
Most U.S. states and all Canadian provinces
require by law:
RSafety chains between the towing vehicle and
the trailer. The chains should be cross-wound
under the trailer drawbar. They must be fas-
tened to the vehicle's trailer coupling, not to
the bumper or the axle.
Leave enough play in the chains to make tight
cornering possible.
RA separate brake system for certain types of
trailer.
RSafety switch for braked trailers. Check the
specific legal requirements applicable to your
state.
If the trailer becomes detached from the tow-
ing vehicle, the safety switch applies the
trailer brakes.
Towing a trailer
There are numerous legal requirements con-
cerning the towing of a trailer, e.g. speed restric- tions. Make sure that your car/trailer combina-
tion complies with the local regulations:
Rin your place of residence
Rin the location to which you are driving
The police and local authorities can provide reli- able information.
Observe the following when towing a trailer:
RTo gain driving experience and to become
accustomed to the new handling characteris-
tics, you should practice the following in a
traffic-free location:
-cornering
-stopping
-backing up
RBefore driving, check:
-trailer tow hitch
-safety switch for braked trailers
-safety chains
-electrical connections
-lights
-wheels
RAdjust the exterior mirrors to provide an
unobstructed view of the rear section of the
trailer.
RIf the trailer has electronically controlled
brakes, pull away carefully. Brake manually
using the brake controller and check whether
the brakes function correctly.
RSecure any objects on the trailer to prevent
the cargo from slipping when the vehicle is in
motion.
RWhen you couple up a trailer, check at regular
intervals that the load is firmly secured. If the
tra
iler is equipped with trailer lights and
brakes, check the trailer to ensure that these
are working.
RBear in mind that the handling will be less
stable when towing a trailer than when driving
without one. Avoid sudden steering move-
ments.
RThe vehicle/trailer combination is heavier,
accelerates more slowly, has a decreased
gradient climbing capability and a longer
braking distance.
It is more susceptible to side winds and
requires more careful steering.
260Towing a trailer
Driving an d parking
Page 277 of 450

XPress the=or; button on the steering
wheel to select the Sett.menu.
XPress the:or9 button to select the
Instrument Clustersubmenu.
XConfirm by pressing aon the steering
wheel.
XPress the :or9 button to select the
Permanent Display:function.
The current setting, Outside Temperature,
Speedometer [km/h]or Speedometer[mph]appears.
XTo change the setting: pressaagain.
Light submenu
Setting the daytime running lamps
This function is not available in Canada.
XPress the =or; button on the steering
wheel to select the Sett.menu.
XPress the:or9 button to select the
Lightsubmenu.
XPress ato confirm.
XPress :or9 to select the DaytimeRunning Lightsfunction.
If the DaytimeRunningLightsfunction has
been switched on, the cone of light and the
W symbol in the multifunction display are
shown in orange.
XPress the abutton to save the setting.
Further information on daytime running lamps
(
Ypage 114).
Vehicle submenu
Activating/deactivating the automatic
door locking mechanism
If you activate the AutomaticDoorLockfunc-
tion, the vehicle is centrally locked above a
speed of approximately 9 mph (15 km/h).
XPress the =or; button on the steering
wheel to select the Sett.menu.
XPress the:or9 button to select the
Vehiclesubmenu.
XPress ato confirm.
XPress the :or9 button to select the
Automatic Door Lockfunction.
When the Automatic Door Lockfunction is
activated, the vehicle doors are displayed in
orange in the multifunction display.
XPress the abutton to save the setting. For further information on the automatic locking
feature, see (
Ypage 85).
Activating/deactivating the acoustic
locking verification signal
If you switch on the AcousticLockfunction, an
acoustic signal sounds when you lock the vehi-
cle.
XPress the =or; button on the steering
wheel to select the Settingsmenu.
XPress the:or9 button to select the
Vehiclesubmenu.
XPress ato confirm.
XPress the :or9 button to select the
Acoustic Lockfunction.
If the Acoustic Lockfunction is activated,
the & symbol in the multifunction display
lights up orange.
XPress the abutton to save the setting.
Convenience submenu
Activating/deactivating the EASY-
ENTRY/EXIT feature
GWARNING
When the EASY-ENTRY/EXIT feature adjusts
the steering wheel, you and other vehicle
occupants – particularly children – could
become trapped. There is a risk of injury.
While the EASY-ENTRY/EXIT feature is mak-
ing adjustments, make sure that no one has
any body parts in the sweep of the steering
wheel.
If somebody becomes trapped:
Rpress one of the memory function position
buttons, or
Rmove the switch for steering wheel adjust-
ment in the opposite direction to that in
which the steering wheel is moving.
The adjustment process is stopped.
XPress the =or; button on the steering
wheel to select the Sett.menu.
XPress the:or9 button to select the
Conveniencesubmenu.
XPress ato confirm.
Menus and submenus275
On-board computer and displays
Z
Page 278 of 450
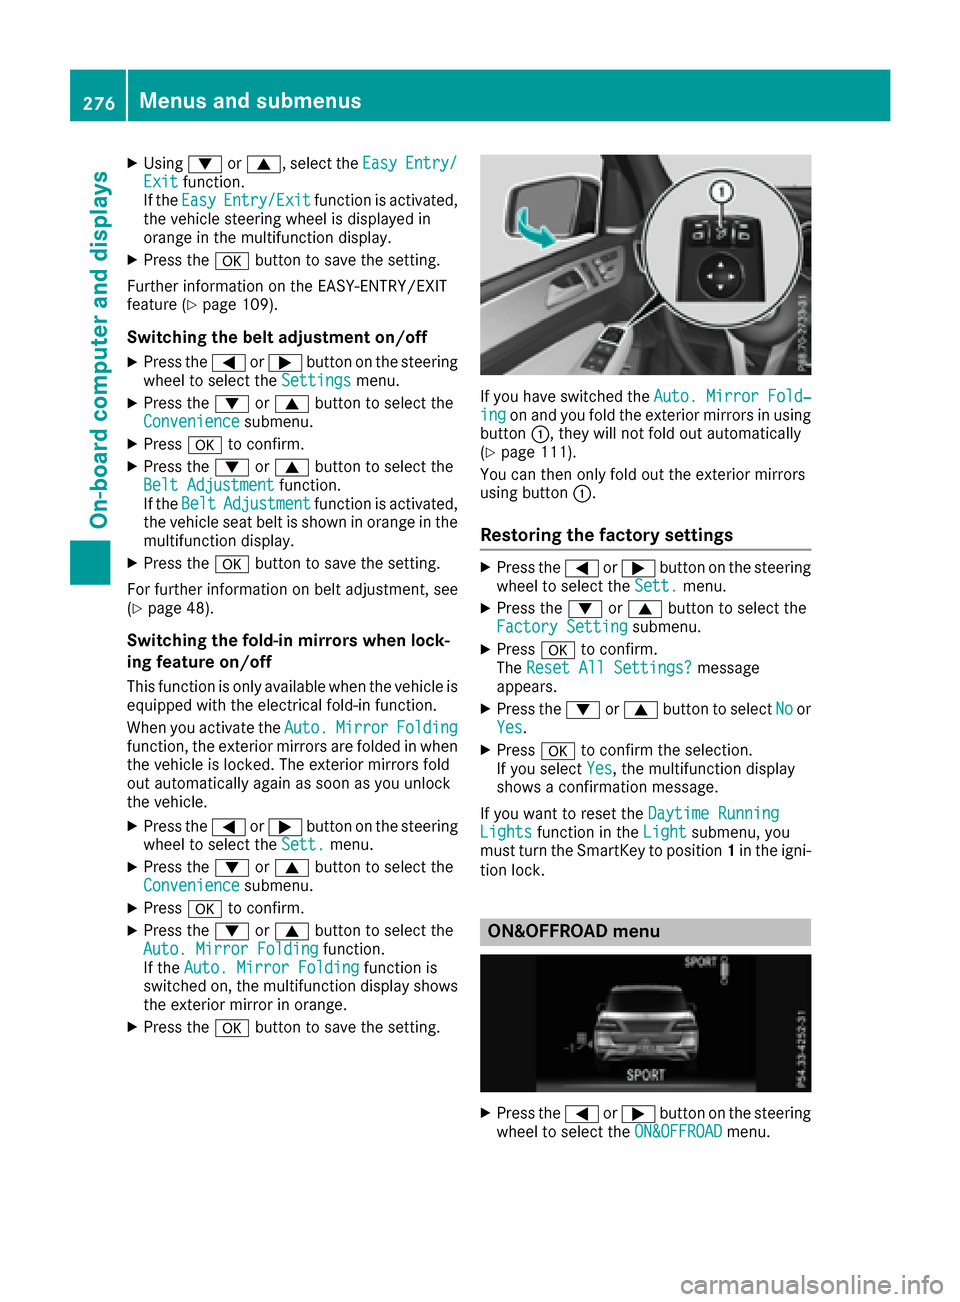
XUsing:or9, select the EasyEntry/Exitfunction.
If the EasyEntry/Exitfunction is activated,
the vehicle steering wheel is displayed in
orange in the multifunction display.
XPress the abutton to save the setting.
Further information on the EASY-ENTRY/EXIT
feature (
Ypage 109).
Switching the belt adjustment on/off
XPress the =or; button on the steering
wheel to select the Settingsmenu.
XPress the:or9 button to select the
Conveniencesubmenu.
XPress ato confirm.
XPress the :or9 button to select the
Belt Adjustmentfunction.
If the BeltAdjustmentfunction is activated,
the vehicle seat belt is shown in orange in the
multifunction display.
XPress the abutton to save the setting.
For further information on belt adjustment, see
(
Ypage 48).
Switching the fold-in mirrors when lock-
ing feature on/off
This function is only available when the vehicle is
equipped with the electrical fold-in function.
When you activate the Auto.
MirrorFoldingfunction, the exterior mirrors are folded in when
the vehicle is locked. The exterior mirrors fold
out automatically again as soon as you unlock
the vehicle.
XPress the=or; button on the steering
wheel to select the Sett.menu.
XPress the:or9 button to select the
Conveniencesubmenu.
XPress ato confirm.
XPress the :or9 button to select the
Auto. Mirror Foldingfunction.
If the Auto. Mirror Foldingfunction is
switched on, the multifunction display shows
the exterior mirror in orange.
XPress the abutton to save the setting.
If you have switched the Auto. Mirror Fold‐ingon and you fold the exterior mirrors in using
button :, they will not fold out automatically
(
Ypage 111).
You can then only fold out the exterior mirrors
using button :.
Restoring the factory settings
XPress the=or; button on the steering
wheel to select the Sett.menu.
XPress the:or9 button to select the
Factory Settingsubmenu.
XPress ato confirm.
The Reset All Settings?message
appears.
XPress the :or9 button to select Noor
Yes.
XPress ato confirm the selection.
If you select Yes, the multifunction display
shows a confirmation message.
If you want to reset the Daytime Running
Lightsfunction in theLightsubmenu, you
must turn the SmartKey to position 1in the igni-
tion lock.
ON&OFFROAD menu
XPress the =or; button on the steering
wheel to select the ON&OFFROADmenu.
276Menus and submenus
On-board computer and displays
Page 286 of 450
Display messagesPossible causes/consequences andMSolutions
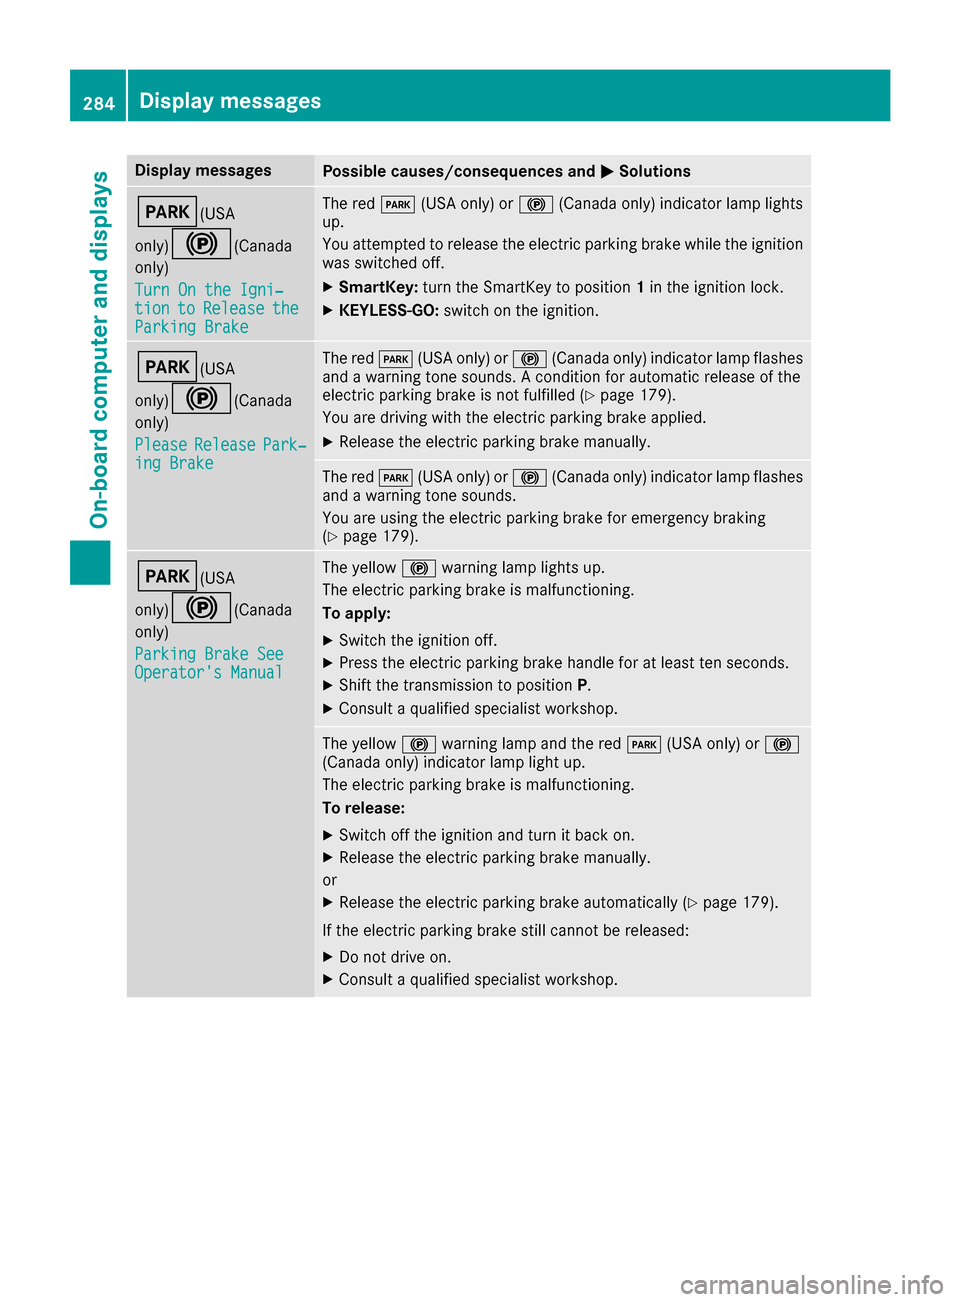
F(USA
only)
!( Canada
only)
Tur nOn the Igni‐
tio ntoReleas etheParkingBrake
The red F(USAonly) or !(Canada only) indicator lamp lights
up.
You attempte dto release th eelectric parking brak ewhile th eignition
was switched off .
XSmartKey:tur nth eSmartKey to position 1in th eignition lock.
XKEYLESS-GO: switch on theignition .
F(USA
only)
!( Canada
only)
Please
Releas ePark‐ing Brake
The red F(USAonly) or !(Canada only) indicator lamp flashes
and awarning tone sounds. Acondition for automatic release of th e
electric parking brak eis no tfulfilled (
Ypage 179).
You are drivin gwit hth eelectric parking brak eapplied.
XReleas eth eelectric parking brak emanually.
The red F(USAonly) or !(Canada only) indicator lamp flashes
and awarning tone sounds.
You are usin gth eelectric parking brak efor emergenc ybraking
(
Ypage 179).
F(USA
only)
!( Canada
only)
Parkin gBrake See
Operator' sManual
The yellow !warning lamp lights up.
The electric parking brak eis malfunctioning .
To apply :
XSwitchth eignition off .
XPress theelectric parking brak ehandle for at least te nseconds.
XShift th etransmission to position P.
XConsultaqualified specialist workshop .
The yellow!warning lamp and th ered F (USAonly) or !
(Canada only) indicator lamp ligh tup.
The electric parking brak eis malfunctioning .
To release:
XSwitc hoff th eignition and tur nit bac kon .
XReleas eth eelectric parking brak emanually.
or
XReleas eth eelectric parking brak eautomatically (Ypage 179).
If th eelectric parking brak estill canno tbe released:
XDo no tdrive on .
XConsult aqualified specialist workshop .
284Display messages
On-board computer and displays
Page 287 of 450
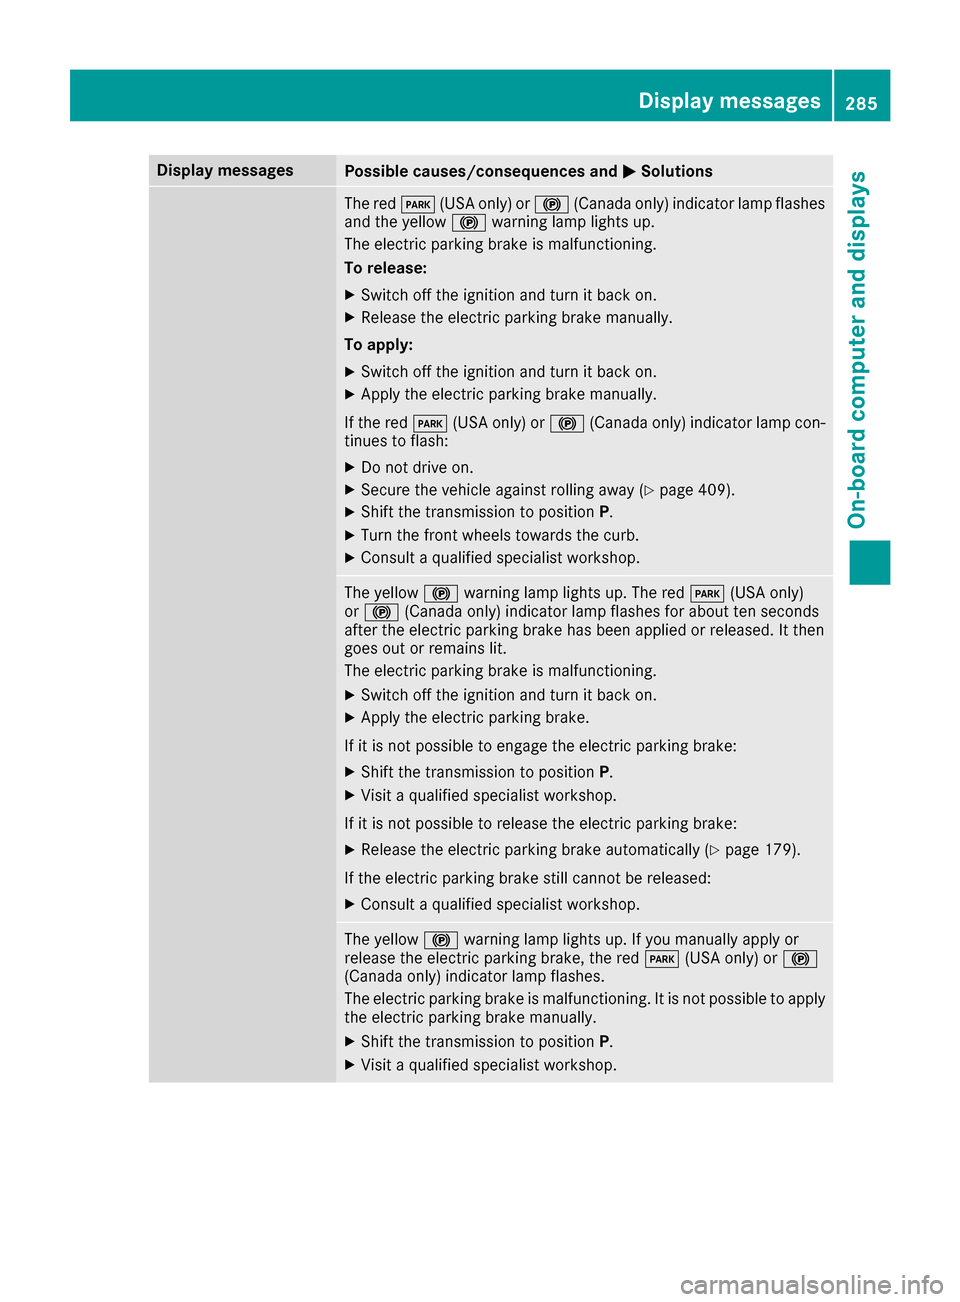
Display messagesPossible causes/consequences andMSolutions
The redF(USAonly) or !(Canada only) indicator lamp flashes
and th eyellow !warning lamp lights up.
The electric parking brak eis malfunctioning .
To release:
XSwitc hoff th eignition and tur nit bac kon .
XReleas eth eelectric parking brak emanually.
To apply :
XSwitchoff th eignition and tur nit bac kon .
XApply th eelectric parking brak emanually.
If th ered F (USAonly) or !(Canada only) indicator lamp con-
tinue sto flash:
XDo no tdrive on .
XSecureth evehicl eagainst rollin gaway (Ypage 409).
XShift th etransmission to position P.
XTurn thefron twheels toward sth ecurb.
XConsult aqualified specialist workshop .
The yellow!warning lamp lights up. The red F(USAonly)
or ! (Canada only) indicator lamp flashes for about te nseconds
after th eelectric parking brak ehas been applie dor released. It then
goe sout or remain slit .
The electric parking brak eis malfunctioning .
XSwitchoff th eignition and tur nit bac kon .
XApply th eelectric parking brake.
If it is no tpossibl eto engage th eelectric parking brake:
XShift th etransmission to position P.
XVisitaqualified specialist workshop .
If it is no tpossibl eto release th eelectric parking brake:
XReleas eth eelectric parking brak eautomatically (Ypage 179).
If th eelectric parking brak estill canno tbe released:
XConsult aqualified specialist workshop .
The yellow!warning lamp lights up. If you manually apply or
release th eelectric parking brake, th ered F (USAonly) or !
(Canada only) indicator lamp flashes .
The electric parking brak eis malfunctioning .It is no tpossibl eto apply
th eelectric parking brak emanually.
XShift th etransmission to position P.
XVisitaqualified specialist workshop .
Display messages285
On-board computer and displays
Z
Page 288 of 450

Display messagesPossible causes/consequences andMSolutions
F(USA
only)
!( Canada
only)
Parkin gBrake Inop‐
erativ e
The yellow !warning lamp lights up. The red F(USAonly)
or ! (Canada only) indicator lamp flashes for about te nseconds
after th eelectric parking brak ehas been applie dor released. It then
goe sout or remain slit .
The electric parking brak eis malfunctioning ,e.g. because of over-
voltag eor undervoltage.
XRemove th ecaus efor th eovervoltage or undervoltage, e.g. by
charging th ebattery or restarting th eengine.
XEngage or release th eelectric parking brake.
If it remain simpossible to apply or release th eelectric parking brake:
XSwitc hoff th eignition and tur nit bac kon .
XEngage or release th eelectric parking brake.
If th eelectric parking brak estill canno tbe released:
XConsult aqualified specialist workshop .
If th eelectric parking brak estill canno tbe applied:
XVisit aqualified specialist workshop .
The yellow!warning lamp lights up and th ered F (USAonly)
or ! (Canada only) indicator lamp flashes .
It is no tpossibl eto apply th eelectric parking brak emanually.
XShift th etransmission to position P.
XVisitaqualified specialist workshop .
$(USA
only)
J( Canada
only)
Check Brake Fluid
Level
There is no tenough brak eflui din th ebrak eflui dreservoir .In addition ,
th e$ (USAonly) or J(Canada only) warning lamp lights up in
th einstrumen tcluste rand awarning tone sounds.
GWARNIN G
The braking effec tmay be impaired.
There is aris kof an accident.
XPull ove rand stop th evehicl esafely as soo nas possible, payin g
attention to roa dand traffic conditions. Do no tcontinu edrivin g
under any circumstances.
XSecur eth evehicl eagainst rollin gaway (Ypage 178).
XConsult aqualified specialist workshop .
XDo notadd brak efluid .This does no tcorrec tth emalfunction .
#
CheckBrakePadWear
The brak epads/linings hav ereached their wear limit.
US Aonly: th e$ red brak esystem warning lamp is lit while th e
engin eis running.
XVisit aqualified specialist workshop .
G
Inoperative
Oneor mor emain features of th embrace system are malfunctioning .
XVisitaqualified specialist workshop .
286Display messages
On-board computer and displays