Page 357 of 418

life span also depends on use, care, stor-
age, etc.
RThe reflective safety jackets should be dis-posed of and replaced with new ones:
-after 15 washes, and/or
-if the reflective strips have become
scratched, and/or
-if the backing material and/or reflective
strips have become soiled and cannot becleaned off, and/or
-the fluorescence of a reflective safety
vest has faded e.g. due to the effects of
sunlight
RDispose of reflective safety jackets in an
environmentally responsible manner. To do
so, contact your local waste disposal com- pany.
Vehicle tool kit
General notes
The towing eye is located in the left-hand
stowage well under the cargo compartment
floor.
Apart from certain country-specific varia-
tions, the vehicles are not equipped with a
tire-change tool kit.
Some tools for changing a wheel are specific
to the vehicle. For more information on which tire changing tools are required and approved
to perform a wheel change on your vehicle,
consult a qualified specialist workshop.
Tools required for changing a wheel may
include, for example:
RJack
RWheel chock
RLug wrench
RRatchet wrench
RAlignment bolt
Towing eye
XOpen the tailgate.
XOpen the cargo compartment floor
(
Ypage 316).
The towing eye is located in the left-hand
stowage well under the cargo compartment
floor.
Vehicles with a TIREFIT kit
Example
XOpen the tailgate.
XOpen the cargo compartment floor
(
Ypage 316).
XPush retaining clamps :on the cover
downwards so as to release them.
XFold up cover in the direction of arrow ;.
XRemove tire inflation compressor=and
tire sealant bottle ?.
Where will I find...?355
Breakdown assistance
Page 358 of 418

Vehicles with a tire-change tool kit
Example: equipment and country-specificvariations possible
:Ratchet
;Lug wrench
=Jack
?Alignment bolt
ASocket
BFolding wheel chock
The tire-change tool kit is located in the left-
hand stowage well, under the cargo compart-
ment floor.
On vehicles with aluminum hub caps, the tire-
change tool kit also contains a socket.
Depending on the vehicle equipment, this is in
the left stowage net or under the cargo com-
partment floor.
XOpen the tailgate.
XOpen the cargo compartment floor
(
Ypage 316).
Flat tire
Preparing the vehicle
Your vehicle may be equipped with:
RMOExtended tires (tires with run-flat prop-
erties) (
Ypage 357)
Vehicle preparation is not necessary on
vehicles with MOExtended tires
Ra TIREFIT kit (Ypage 355)
Vehicles equipped with MOExtended tires are
not equipped with a TIREFIT kit at the factory. It is therefore recommended that you addi-
tionally equip your vehicle with a TIREFIT kit if
you mount tires that do not feature run-flat
properties, e.g. winter tires. A TIREFIT kit may
be obtained from a qualified specialist work-
shop.
Information on changing and mounting
wheels (
Ypage 395).
XStop the vehicle on solid, non-slippery and
level ground, as far away as possible from
traffic.
XSwitch on the hazard warning lamps.
XSecure the vehicle against rolling away
(
Ypage 172).
XIf possible, bring the front wheels into the
straight-ahead position.
XSwitch off the engine.
XRemove the SmartKey from the ignition
lock.
or, in vehicles with KEYLESS-GO start-func-
tion or KEYLESS ‑GO
XOpen the driver's door.
The on-board electronics now have status
0. This is the same as the SmartKey having
been removed.
XRemove the Start/Stop button from the
ignition lock (
Ypage 153).
XMake sure that the engine cannot be star-
ted via your smartphone (
Ypage 156).
XMake sure that the passengers are not
endangered as they do so. Make sure that
no one is near the danger area while a
wheel is being changed. Anyone who is not
directly assisting in the wheel change
should, for example, stand behind the bar-
rier.
XGet out of the vehicle. Pay attention to traf-
fic conditions when doing so.
XClose the driver's door.
356Flat tire
Breakdo wn assis tance
Page 400 of 418

XTurn ratchet wrench?until jack =sits
completely on jacking point ;and the
base of the jack lies evenly on the ground.
XTurn ratchet wrench ?until the tire is
raised a maximum of 1.2 in (3 cm) off the
ground.
Removing a wheel
!Do not place wheel bolts in sand or on a
dirty surface. The bolt and wheel hub
threads could otherwise be damaged when
you screw them in.
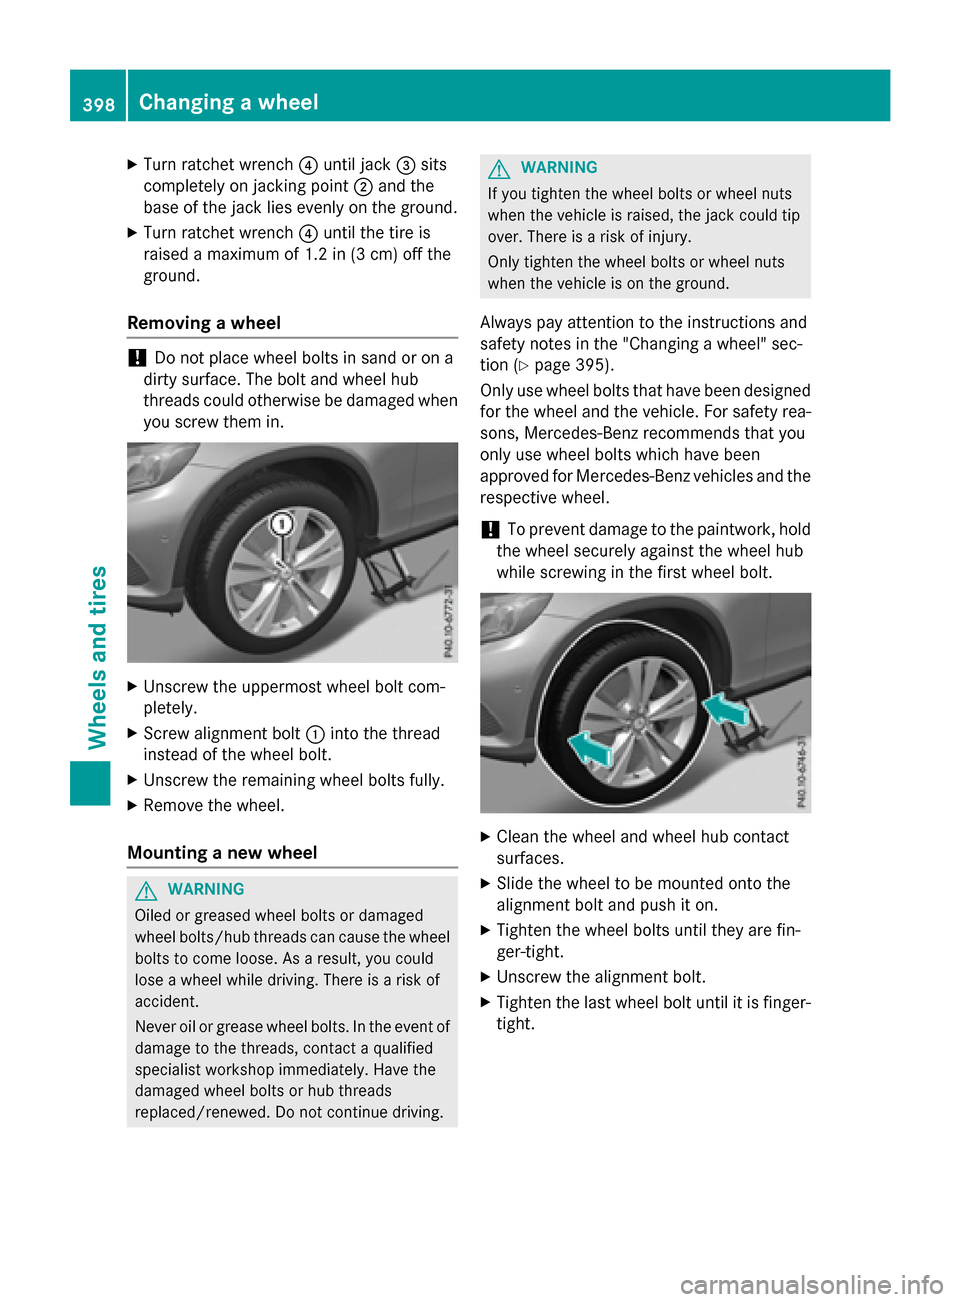
XUnscrew the uppermost wheel bolt com-
pletely.
XScrew alignment bolt :into the thread
instead of the wheel bolt.
XUnscrew the remaining wheel bolts fully.
XRemove the wheel.
Mounting a new wheel
GWARNING
Oiled or greased wheel bolts or damaged
wheel bolts/hub threads can cause the wheel bolts to come loose. As a result, you could
lose a wheel while driving. There is a risk of
accident.
Never oil or grease wheel bolts. In the event of
damage to the threads, contact a qualified
specialist workshop immediately. Have the
damaged wheel bolts or hub threads
replaced/renewed. Do not continue driving.
GWARNING
If you tighten the wheel bolts or wheel nuts
when the vehicle is raised, the jack could tip
over. There is a risk of injury.
Only tighten the wheel bolts or wheel nuts
when the vehicle is on the ground.
Always pay attention to the instructions and
safety notes in the "Changing a wheel" sec-
tion (
Ypage 395).
Only use wheel bolts that have been designed for the wheel and the vehicle. For safety rea-
sons, Mercedes-Benz recommends that you
only use wheel bolts which have been
approved for Mercedes-Benz vehicles and the
respective wheel.
!To prevent damage to the paintwork, hold
the wheel securely against the wheel hub
while screwing in the first wheel bolt.
XClean the wheel and wheel hub contact
surfaces.
XSlide the wheel to be mounted onto the
alignment bolt and push it on.
XTighten the wheel bolts until they are fin-
ger-tight.
XUnscrew the alignment bolt.
XTighten the last wheel bolt until it is finger-
tight.
398Changing a wheel
Wheels and tires