2016 MERCEDES-BENZ GL-Class ESP
[x] Cancel search: ESPPage 183 of 246
Permissible bit and sampling rates
COMAND supports MP3 files of the following
types:
Rfixed and variable bit rates from 32 kbit/s
to 320 kbit/s
Rsampling rates of 8 kHz to 48 kHz
COMAND supports WMA files of the following
types:
Rfixed bit rates from 5 kbit/s to 384 kbit/s
Rsampling rates of 8 kHz to 48 kHz
COMAND does not support WMA files of the
following types:
RDRM (Digital Rights Management) encryp-
ted files
Rvariable bit rate
RWMA Pro
R5.1 surround sound
iOnly use tracks with a bit rate of at least
128 kbit/s and a sampling rate of at least
44.1 kH z.Lower rates can cause a notice-
able deterioration in quality. This is espe-
cially the case if you have activated a sur-
round sound function.
Selecting an active partition (USB mass
storage devices only)
You can select this function for USB storage
devices when the storage device is parti-
tioned. Up to 9 partitions (primary or logical,
FAT, FAT32, exFAT and NTFS) are supported.
Selecting an active partition
XTo select Optionsin the media menu bar:
turn and press the controller.
XSelect Select Active Partition.
Notes on copyright
Audio/video files that you create or repro-
duce yourself for playback are generally sub-
ject to copyright protection.
In many countries, reproductions, even for
private use, are not permitted without the
prior consent of the copyright holder. Make sure that you know about the applicable
copyright regulations and that you comply
with these.
Notes on CDs/DVDs
!COMAND is designed to play discs that
comply with the EN 60908 standard. There-
fore, you can only use discs with a maxi-
mum thickness of 1.3 mm.
If you insert thicker discs, e.g. those that
contain data on both sides (DVD on one
side and audio data on the other), they can-
not be ejected and can damage the device.
Only use round discs with a diameter of
12 cm. Do not use discs with a diameter of
8 cm, even with an adapter.
Discs with copy protection are not compati-
ble with the audio CD standard and therefore
may not be able to be played by COMAND.
Playback problems may occur when playing
copied discs.
There may be playback problems if you play
CDs that you have copied yourself with a stor-
age capacity of more than 700 MB.
Menu overview
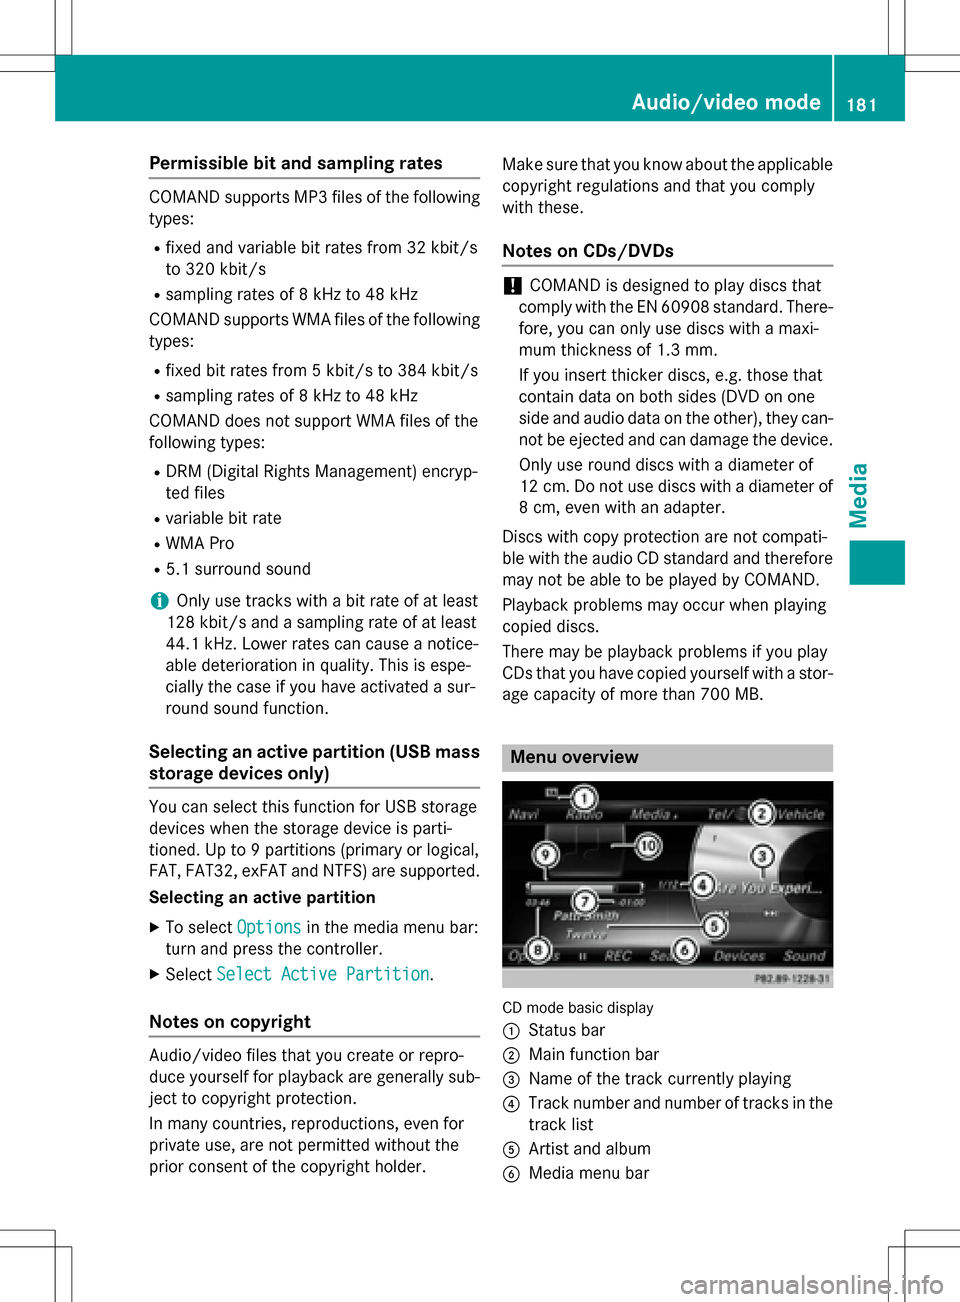
CD mode basic display
:
Status bar
;Main function bar
=Name of the track currently playing
?Track number and number of tracks in the
track list
AArtist and album
BMedia menu bar
Audio/video mode181
Media
Z
Page 184 of 246
CRemaining playingtime of th ecurren t
track
DElapse dplaybac ktime for th ecurren t
track
EGraphic time display
FAlbum cover (if available)
Inserting and removing adis c fr om
th esingle CD/DVD dr ive
XTo insert:press theþ buttonon th e
single drive.
If there is adisc already inserted, it will be
ejected.
XInser t adisc into th edisc slot wit hth eprin-
te dside facin gupwards.
The drive closes and th edisc is played .
If th eCD/DV Dis operate din Medi amode,
th ecorrespondin gbasic men uwill be
shown. If th eCD/DV Dis started usin g
another application (e.g. navigation), th e
display will no tchange.
iThe drive may no tbe able to play disc s
wit hcopy protection .
XTo remove:press theþ button.
The drive ejects th edisc .
XRemove th eejecte ddisc from th eslot .
If you do no ttak eth edisc out of th eslot ,it
is draw nin again automatically after ashort
while .
Inserting discs int oth eDVD changer
The DV Dchanger has amagazine wit hsix
trays.
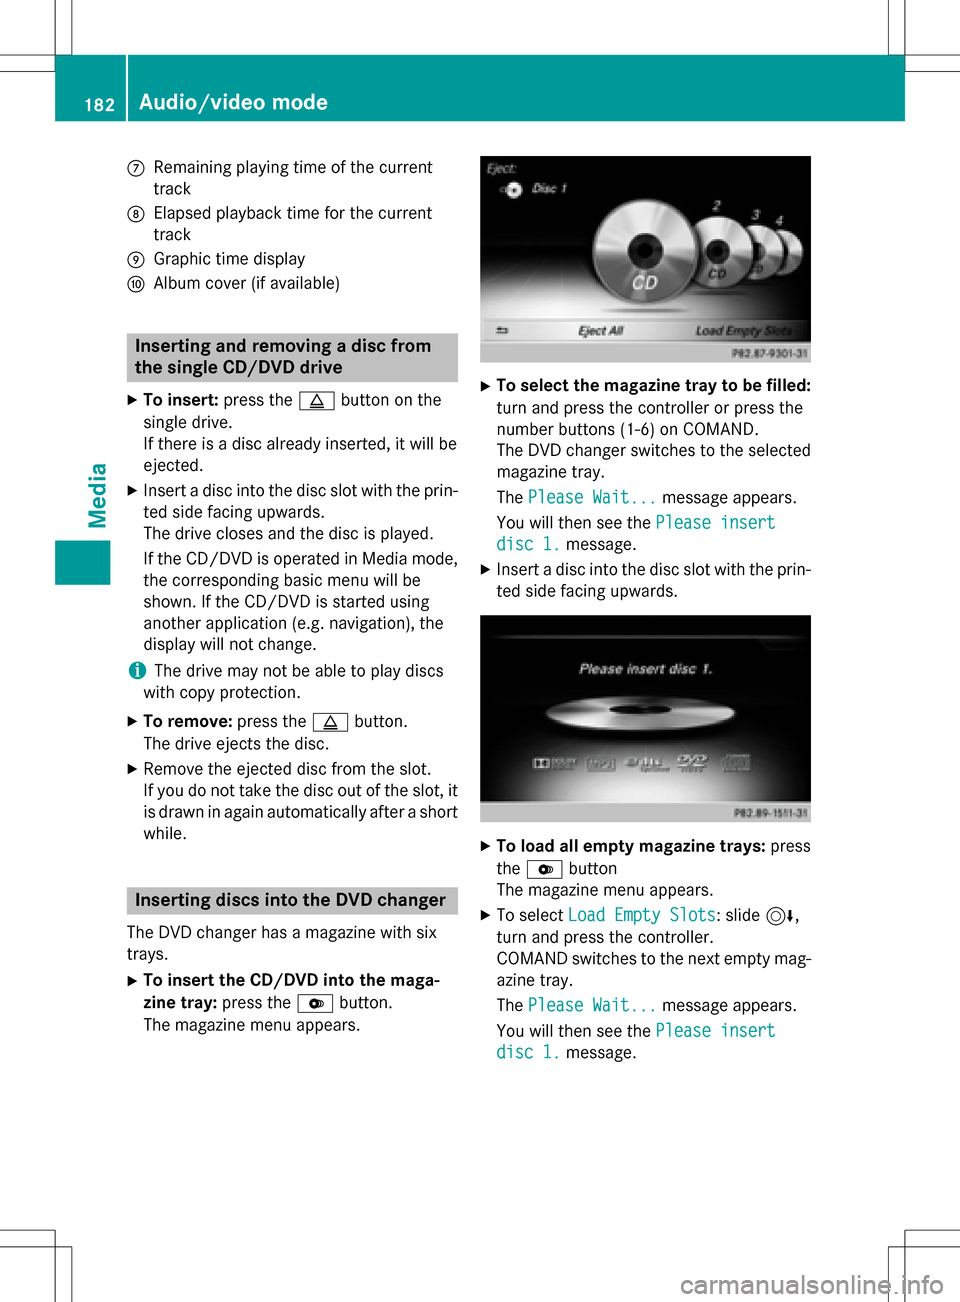
XTo inser tth eCD/DVD int oth emaga-
zin etray :press th eV button.
The magazine men uappears.
XTo select th emagazine tray to be filled:
tur nand press th econtroller or press th e
number buttons (1-6) on COMAND .
The DV Dchanger switches to th eselected
magazine tray.
The Please Wait.. .
message appears.
You will then see th ePlease insert
dis c1.message .
XInsert adisc into th edisc slot wit hth eprin-
te dside facin gupwards.
XTo load all empt ymagazine trays: press
th eV button
The magazine men uappears.
XTo select LoadEmpty Slots:slid e6,
tur nand press th econtroller .
COMAND switches to th enext empty mag -
azine tray.
The Please Wait.. .
message appears.
You will then see th ePlease insert
dis c1.message .
182Audio/video mode
Media
Page 186 of 246
The side with the contacts must face down-
wards.
The music is played while the files are loa-
ded in the background. If there are no sup-
ported audio/video files, you will see a
message to this effect.
Ejecting an SD memory card
XPress the memory card.
The memory card is ejected.
XRemove the memory card.
Connecting USB devices
There are two USB ports in the stowage space
under the armrest.
XConnect the USB device to the USB port.
If the corresponding media display is visi-
ble, the medium is played and the files are
loaded in the background. Otherwise, the
system does not automatically switch to
USB. If there are no supported audio or
video files, you will see a message to this
effect.
iMP3 players must support Media Transfer
Protocol (MTP).
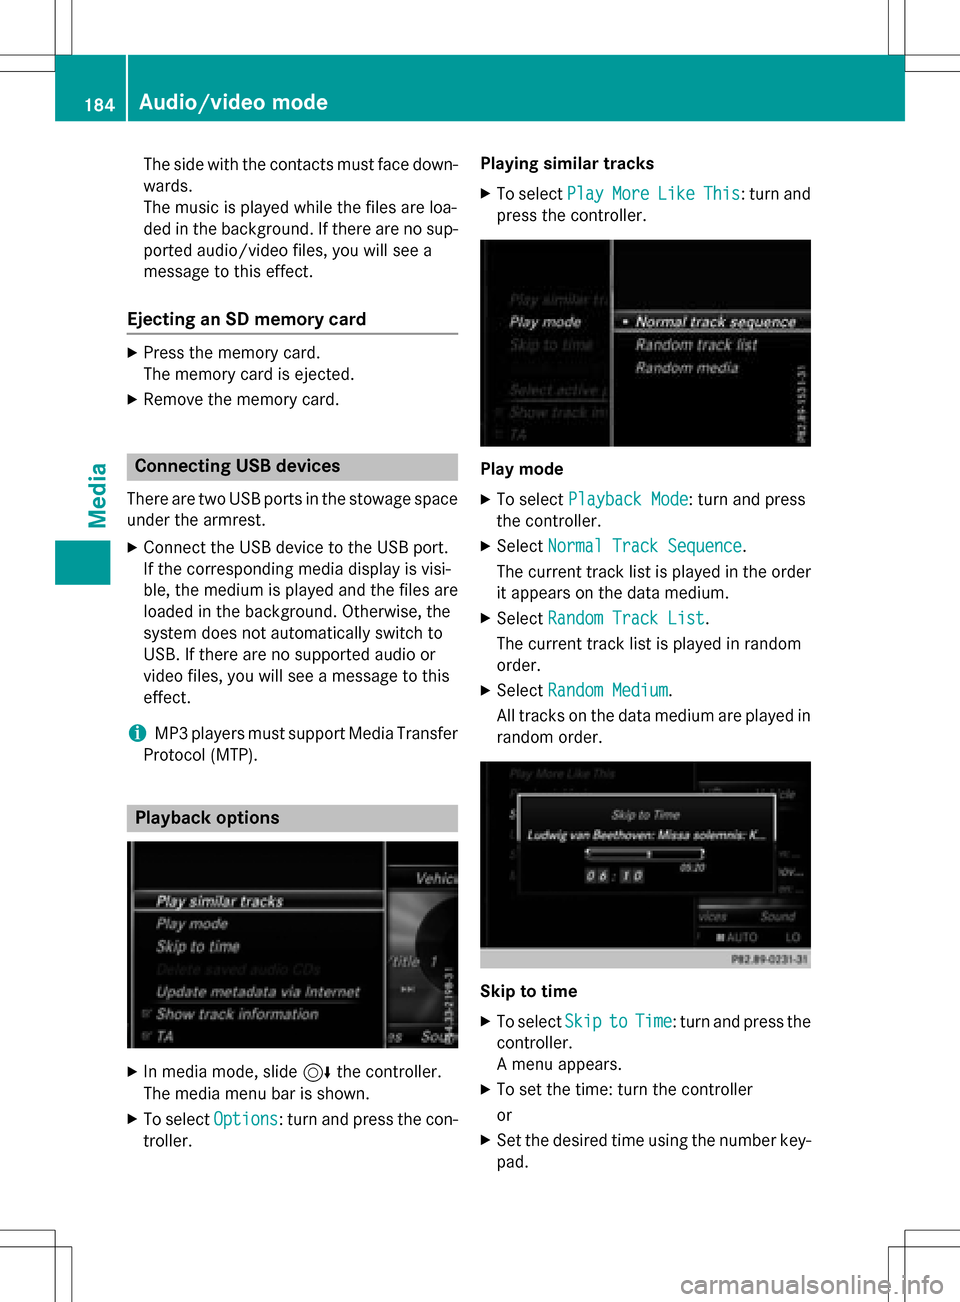
Playback options
XIn media mode, slide 6the controller.
The media menu bar is shown.
XTo select Options: turn and press the con-
troller. Playing similar tracks
XTo select
PlayMoreLikeThis: turn and
press the controller.
Play mode
XTo select Playback Mode: turn and press
the controller.
XSelect Normal Track Sequence.
The current track list is played in the order
it appears on the data medium.
XSelect Random Track List.
The current track list is played in random
order.
XSelect Random Medium.
All tracks on the data medium are played in
random order.
Skip to time
XTo select SkiptoTime: turn and press the
controller.
A menu appears.
XTo set the time: turn the controller
or
XSet the desired time using the number key- pad.
184Audio/video mode
Media
Page 189 of 246
If the copying process is successful, the
Music files copied.
message appears
XTo cancel copying: selectCancel.
The files copied up to the point of cancel-
lation are lost.
iDuring the copying process, you can
switch to another function (e.g. radio) or to
another media source (e.g. USB). The copy-
ing procedure continues in the back-
ground. It is however not possible to select
another CD in the CD changer.
Playing audio CDs
XIn Media mode, slide 6the controller.
The media menu bar appears.
XTo select Search: turn and press the con-
troller.
The category list appears.
XTo select Stored Audio CDsin the cate-
gory list: turn and press the controller.
A selection list for the copied audio CDs is
displayed.
XTo select the desired audio CD: turn and
press the controller.
The track list is displayed.
XTo select a track: turn the controller and
press to confirm.
The tracks on the stored audio CDs can also
be found and played using other media search functions (
Ypage 187).
Deleting stored audio CDs
The function for deleting saved audio CDs is
available if music is played from the stored
audio CDs.
XIn media mode, slide 6the controller.
The media menu bar appears.
XTo select Options: turn and press the con-
troller.
XTo select DeleteSavedAudioCDs: press
the controller.
A selection list for the stored audio CDs is
displayed.
XTo select the desired audio CD: turn and
press the controller.
The audio CD is deleted.
Media search
General notes
COMAND plays back files from the following
data media:
RDisc (CD/DVD)
RMemory card
RUSB storage device
RApple®devices (folder, year and photos are
not available)
The categories are shown according to the
data available, whereby a database is created
for iPod
®and for all the other media sources
(CD, USB, SD card) respectively. During the
search the relevant database is accessed
depending on the active media source.
Starting the media search
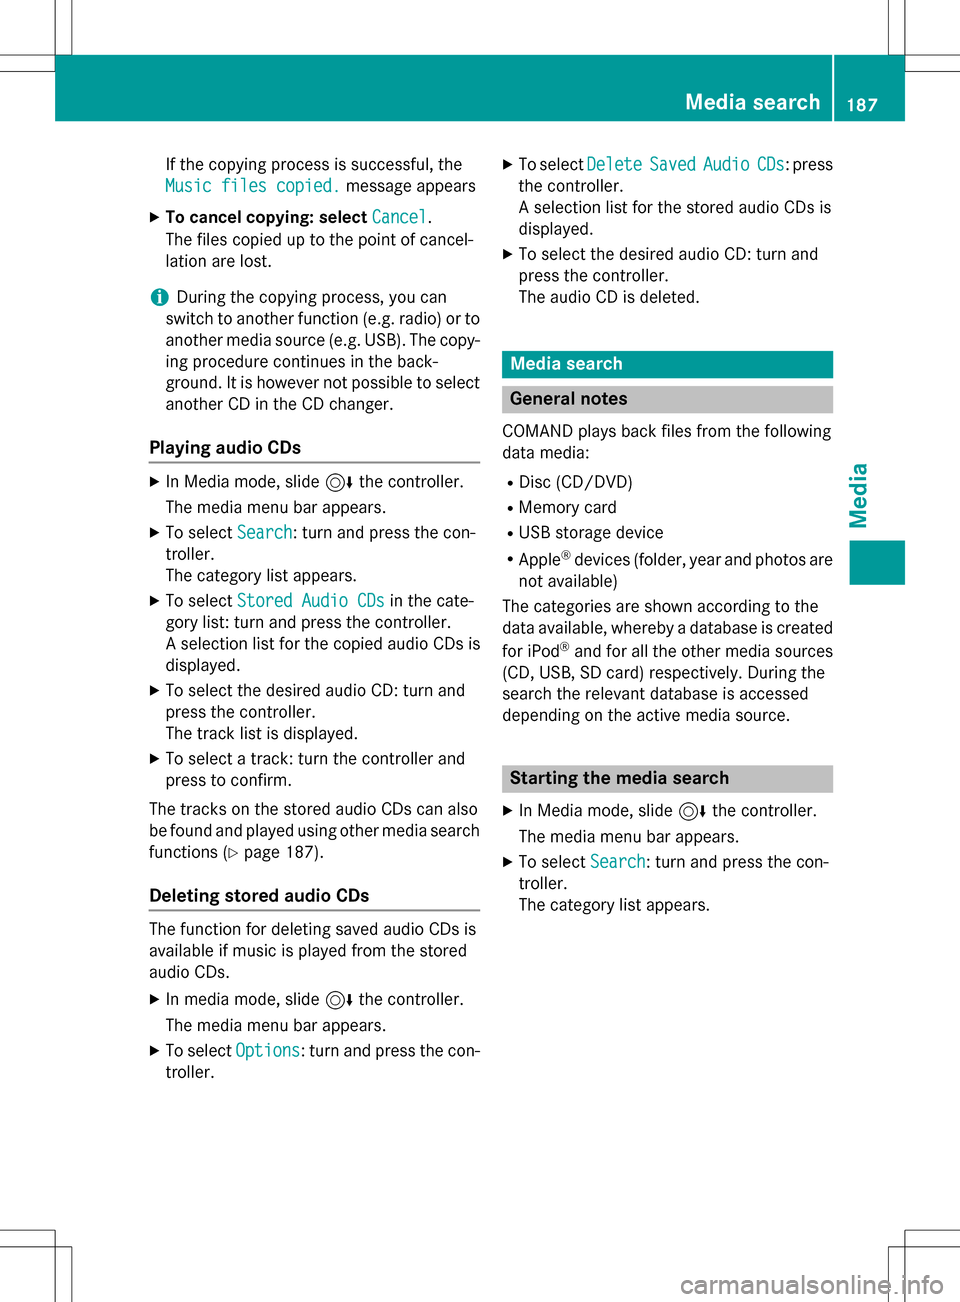
XIn Media mode, slide 6the controller.
The media menu bar appears.
XTo select Search: turn and press the con-
troller.
The category list appears.
Media search187
Media
Z
Page 196 of 246
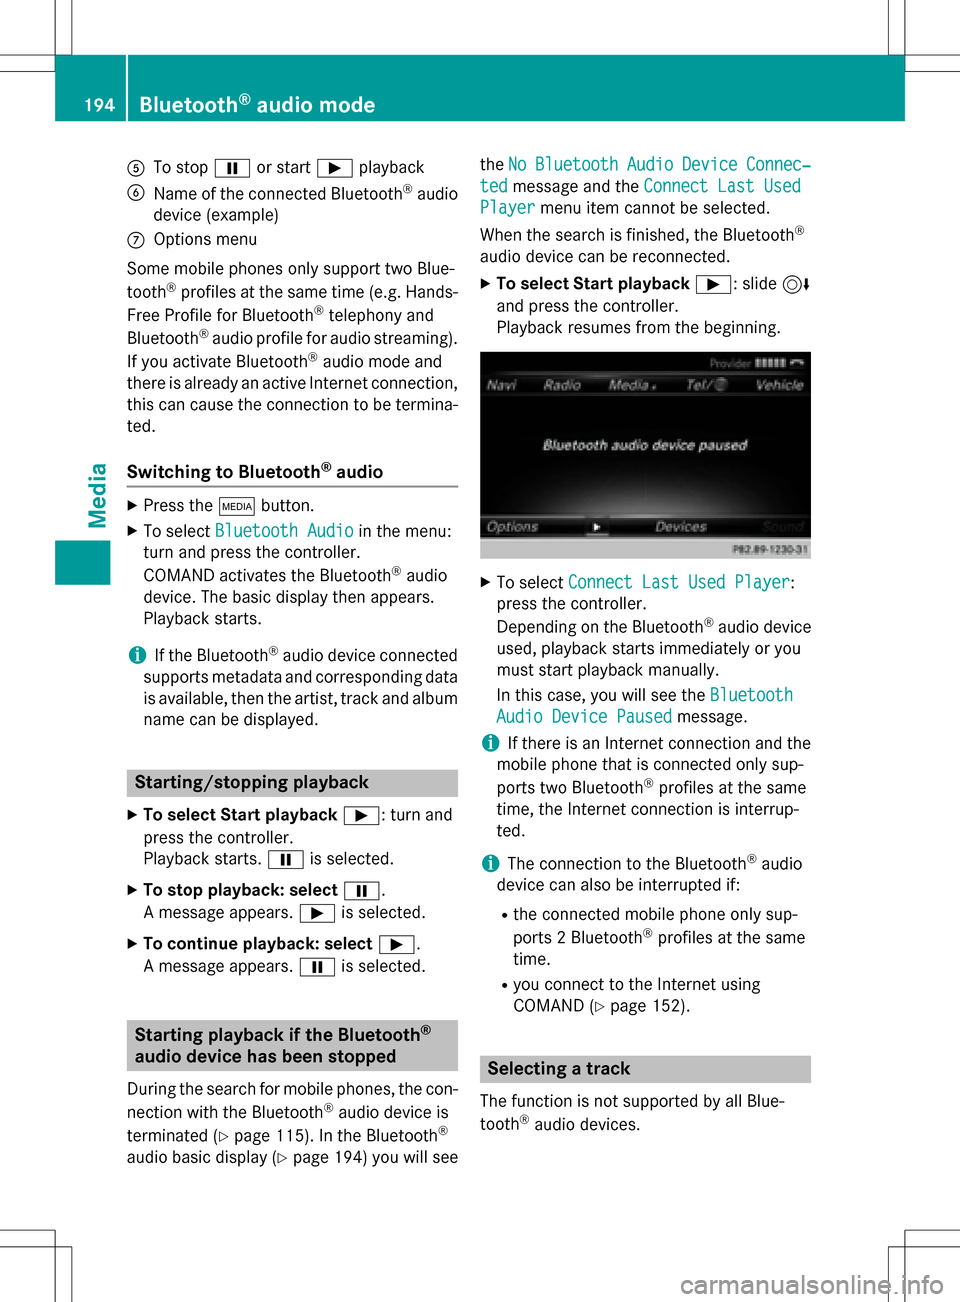
ATo stopËor start Ìplayback
BName of the connected Bluetooth®audio
device (example)
COptions menu
Some mobile phones only support two Blue-
tooth
®profiles at the same time (e.g. Hands-
Free Profile for Bluetooth®telephony and
Bluetooth®audio profile for audio streaming).
If you activate Bluetooth®audio mode and
there is already an active Internet connection, this can cause the connection to be termina-
ted.
Switching to Bluetooth®audio
XPress the Õbutton.
XTo select Bluetooth Audioin the menu:
turn and press the controller.
COMAND activates the Bluetooth
®audio
device. The basic display then appears.
Playback starts.
iIf the Bluetooth®audio device connected
supports metadata and corresponding data
is available, then the artist, track and album
name can be displayed.
Starting/stopping playback
XTo select Start playback Ì: turn and
press the controller.
Playback starts. Ëis selected.
XTo stop playback: select Ë.
A message appears. Ìis selected.
XTo continue playback: select Ì.
A message appears. Ëis selected.
Starting playback if the Bluetooth®
audio device has been stopped
During the search for mobile phones, the con-
nection with the Bluetooth®audio device is
terminated (
Ypage 115). In the Bluetooth®
audio basic display (Ypage 194) you will see the
No
BluetoothAudioDeviceConnec‐
tedmessage and the Connect Last Used
Playermenu item cannot be selected.
When the search is finished, the Bluetooth
®
audio device can be reconnected.
XTo select Start playback Ì: slide6
and press the controller.
Playback resumes from the beginning.
XTo select Connect Last Used Player:
press the controller.
Depending on the Bluetooth
®audio device
used, playback starts immediately or you
must start playback manually.
In this case, you will see the Bluetooth
Audio Device Pausedmessage.
iIf there is an Internet connection and the
mobile phone that is connected only sup-
ports two Bluetooth
®profiles at the same
time, the Internet connection is interrup-
ted.
iThe connection to the Bluetooth®audio
device can also be interrupted if:
Rthe connected mobile phone only sup-
ports 2 Bluetooth®profiles at the same
time.
Ryou connect to the Internet using
COMAND (
Ypage 152).
Selecting a track
The function is not supported by all Blue-
tooth®audio devices.
194Bluetooth®audio mode
Media
Page 197 of 246

Some mobile phones impair function with
regard to the following criteria:
Rthe number of tracks that can be selected
Rthe time period until the next or previous
track is played
XSwitch the multifunction steering wheel to
the media menu (see the vehicle Operator's
Manual).
XTo skip forwards or backwards to a
track:press the 9or: button on
the multifunction steering wheel.
XRapid scroll: press and hold the 9
or : button on the multifunction steer-
ing wheel until the desired track is reached.
If you press and hold the 9or:
buttons, the rapid scrolling speed increa-
ses after a short time.
Further ways to select tracks (
Ypage 185).
iIn rapid scroll, track names are not
shown, but instead only Track1, Track2 etc.
The playback times for the tracks played
are not displayed. This is available as an
optional function starting with AVRCP Ver-
sion 1.3. There is also no music search
option available with Bluetooth
®Audio.
Selecting playback options
If the Bluetooth®audio device supports the
corresponding function, the following options
are available:
RNormal Track Sequence: the tracks are
played in the normal order (e.g. track 1, 2, 3
etc.).
Audio data playback is determined by the
order in which the tracks are written to the
data medium. Alphabetical order is the
most common. Once all the tracks in a folder have been played, the tracks in the
next folder are played.
RRandomTrackList: the current track list
is played in random order (e.g. 3, 8, 5 etc.).
RRandom Medium: all tracks on the data
medium are played in random order (e.g.
track 3, 8, 5 etc.).
Playback options are optional functions
and are not, or only partially, supported by
Bluetooth
®audio devices.
Selecting playback options
XTo select Options: turn and press the con-
troller.
XSelect Playback Mode.
A # dot indicates the current setting.
XSelect the desired option.
If you select Random Track List
you will
see a corresponding message in the display
or selection window.
Increasing the volume on COMAND
XTo select Options: slide6and press the
controller.
XTo select Volume: turn and press the con-
troller.
A menu appears. The #dot indicates the
current setting.
XSelect StandardorBoost.
Information on sound settings
(
Ypage 206).
Operation with the Media Interface
General notes
Media Interface is a universal interface for the
connection of mobile audio and video devi-
ces. Media Interface in COMAND has two
USB connections.
The USB connection sockets are located in
the stowage compartment under the armrest.
Operation with the Media Interface195
Media
Z
Page 208 of 246
Your COMANDequipment
i
These operatin ginstruction sdescribe all
th estandar dan doptional equipmen tof
your COMAN Dsystem, as available at th e
time of going to print .Country-specifi cdif -
ference sare possible. Bear in min dthat
your vehicle may no tfeature all function s
described here. Thi salso applies to safety-
relevant systems an dfunctions.
iRead th einformation on qualified special-
ist workshop sin th evehicle Operator's
Manual.
Sound settings
Calling up th esound menu
You can mak evarious soun dsetting sfo rth e
differen taudio an dvideo sources. It is possi-
ble to set more bass fo rradio mode than fo r
audio CD mode, fo rexample. The respective
soun dmen ucan be called up from th emen u
of th edesire dmode.
XSwitch to radio mode (Ypage 166).
or
XSwitch to media mode (Ypage 178).
XTo display themen ubars: slid e6 the
controller .
XTo selectSoundin th emen ubar :turn an d
press th econtroller .
The men uappears wit hth elast setting
accessed, e.g. Balance/Fade r
.
Sound men uoverview
FunctionOptions
EqualizerSets treble ,mid -
range an dbase
Balance/faderAdjust sth evolume :
right/lef tan d
front/rea r
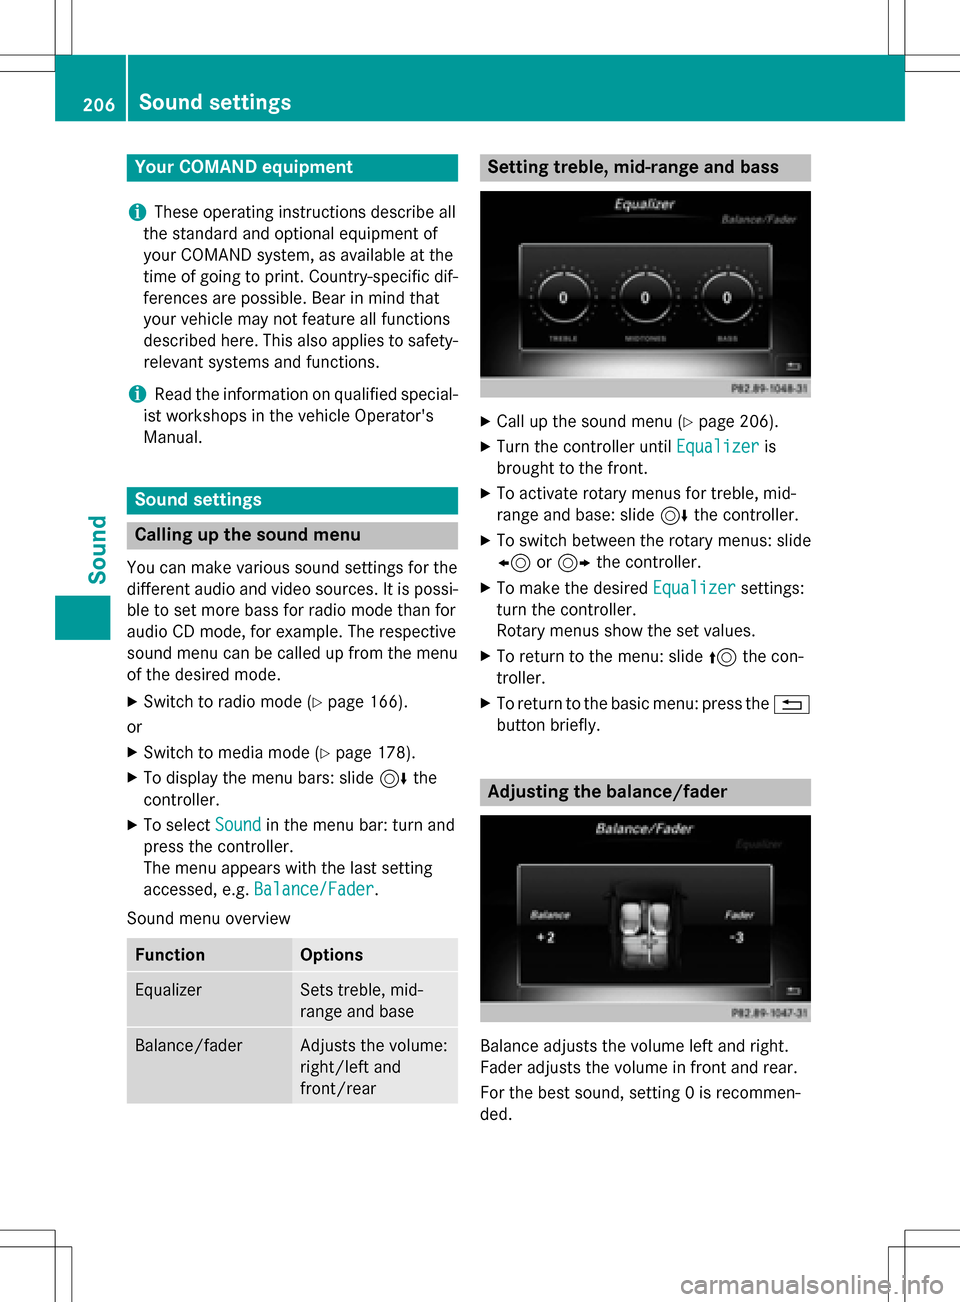
Setting treble, mid-range an dbass
XCall up th esoun dmen u (Ypage 206).
XTurnth econtroller until Equalizeris
brought to th efront.
XTo activat erotary menus fo rtreble ,mid -
range an dbase :slid e6 thecontroller .
XTo switch between th erotary menus: slid e
8 or9 thecontroller .
XTo maketh edesire dEqualize rsettings:
turn th econtroller .
Rotary menus sho wtheset values.
XTo return to th emenu: slid e5 thecon-
troller.
XTo return to th ebasi cmenu: press th e%
butto nbriefly.
Adjusting th ebalance/fader
Balance adjust sth evolume lef tan dright .
Fader adjust sth evolume in fron tan drear.
Fo rth ebes tsound, setting 0is recommen -
ded.
206Sound settings
Sound
Page 209 of 246
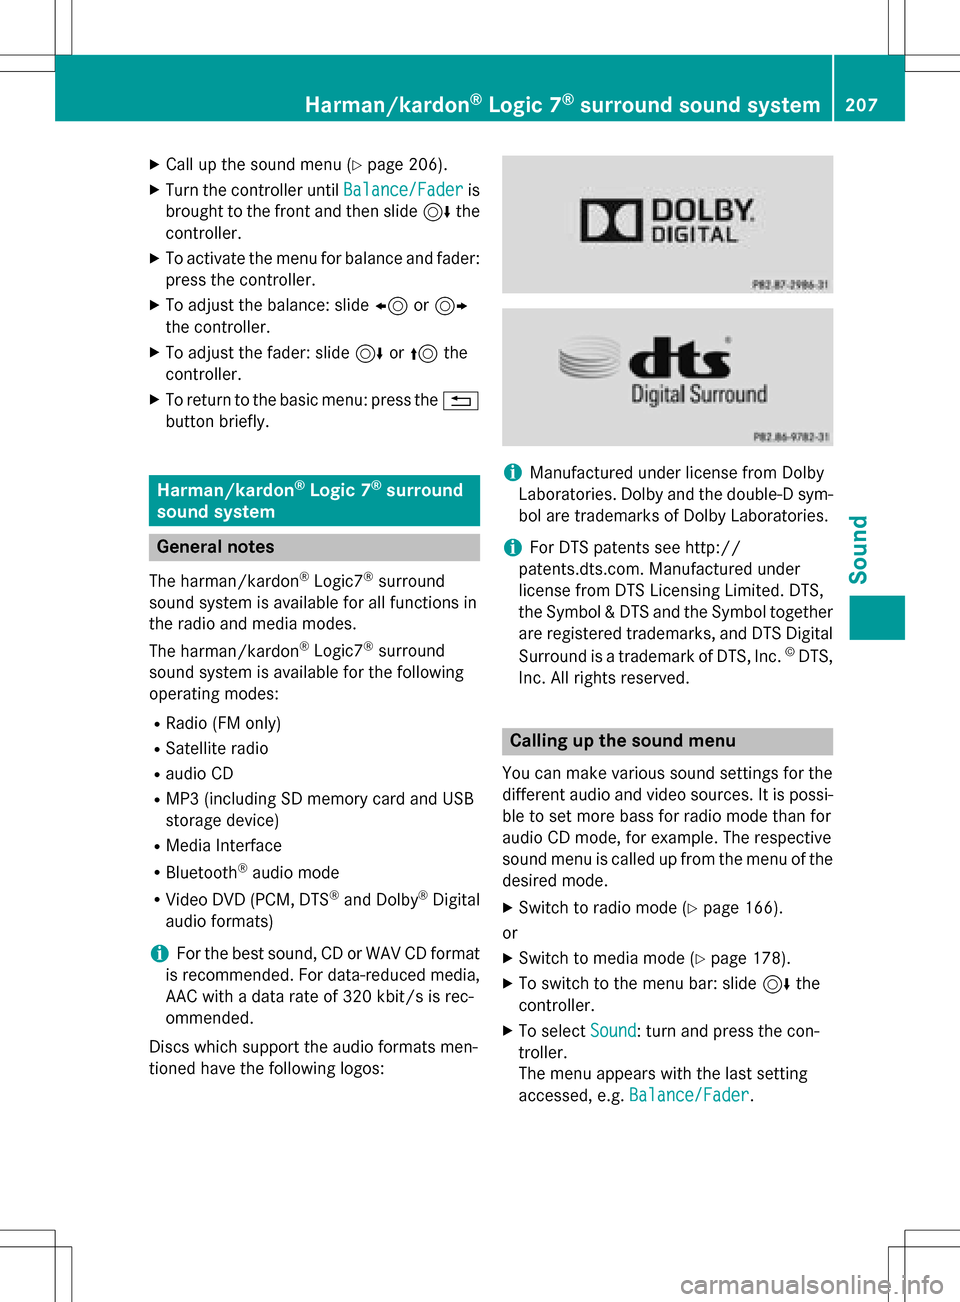
XCallup the sound menu (Ypage 206).
XTurn the controller until Balance/Faderis
brought to the front and then slide 6the
controller.
XTo activate the menu for balance and fader:
press the controller.
XTo adjust the balance: slide 8or9
the controller.
XTo adjust the fader: slide 6or5 the
controller.
XTo return to the basic menu: press the %
button briefly.
Harman/kardon®Logic 7®surround
sound system
General notes
The harman/kardon®Logic7®surround
sound system isavailab lefor all functions in
the radio and media modes.
The harman/kardon
®Logic7®surround
sound system isavailab lefor the following
operating modes:
RRadio (FM only)
RSatellit e radio
Raudio CD
RMP3 (including SDmemory card and USB
storage device)
RMedia Interface
RBluetooth®audio mode
RVide o DVD (PCM, DTS®and Dolby®Digital
audio formats)
iFor the best sound, CD or WAV CD format
is recommended. For data-reduced media,
AAC with a data rate of 320 kbit/s isrec-
ommended.
Discs which support the audio formats men-
tioned have the following logos:
iManufactured under license from Dolby
Laboratories. Dolby and the double-D sym-
bol are trademarks of Do lbyLaboratories.
iFor DTS patents see http://
patents.dts.com. Manufactured under
license from DTS Licensing Limit ed. DTS,
the Symbol & DTS and the Symbol together
are registered trademarks, and DTS Dig ital
Surround isa trademark of DT S, Inc.
©DTS,
In c. All rights reserved.
Calling up the sound menu
You can make various sound settings for the
diff erent audio and video sources. It ispossi-
ble to set more bass for radio mode than for
audio CDmode, for example. The respecti ve
sound menu iscalled up from the menu of the
desired mode.
XSwit ch to radio mode (Ypage 166).
or
XSwit ch to med iamode (Ypage 178).
XTo switch to the menu bar: slide 6the
controller.
XTo select Sound: turn and press the con-
troller.
The menu appears with the last setting
accessed, e.g. Balance/Fader
.
Harman/kardon®Logic 7®surround sound system207
Sound