2016 MERCEDES-BENZ G-CLASS SUV door lock
[x] Cancel search: door lockPage 213 of 261
The socket is located in the luggage compart-
ment on the left-hand-side when viewed in the
direction of travel, next to the rear door.
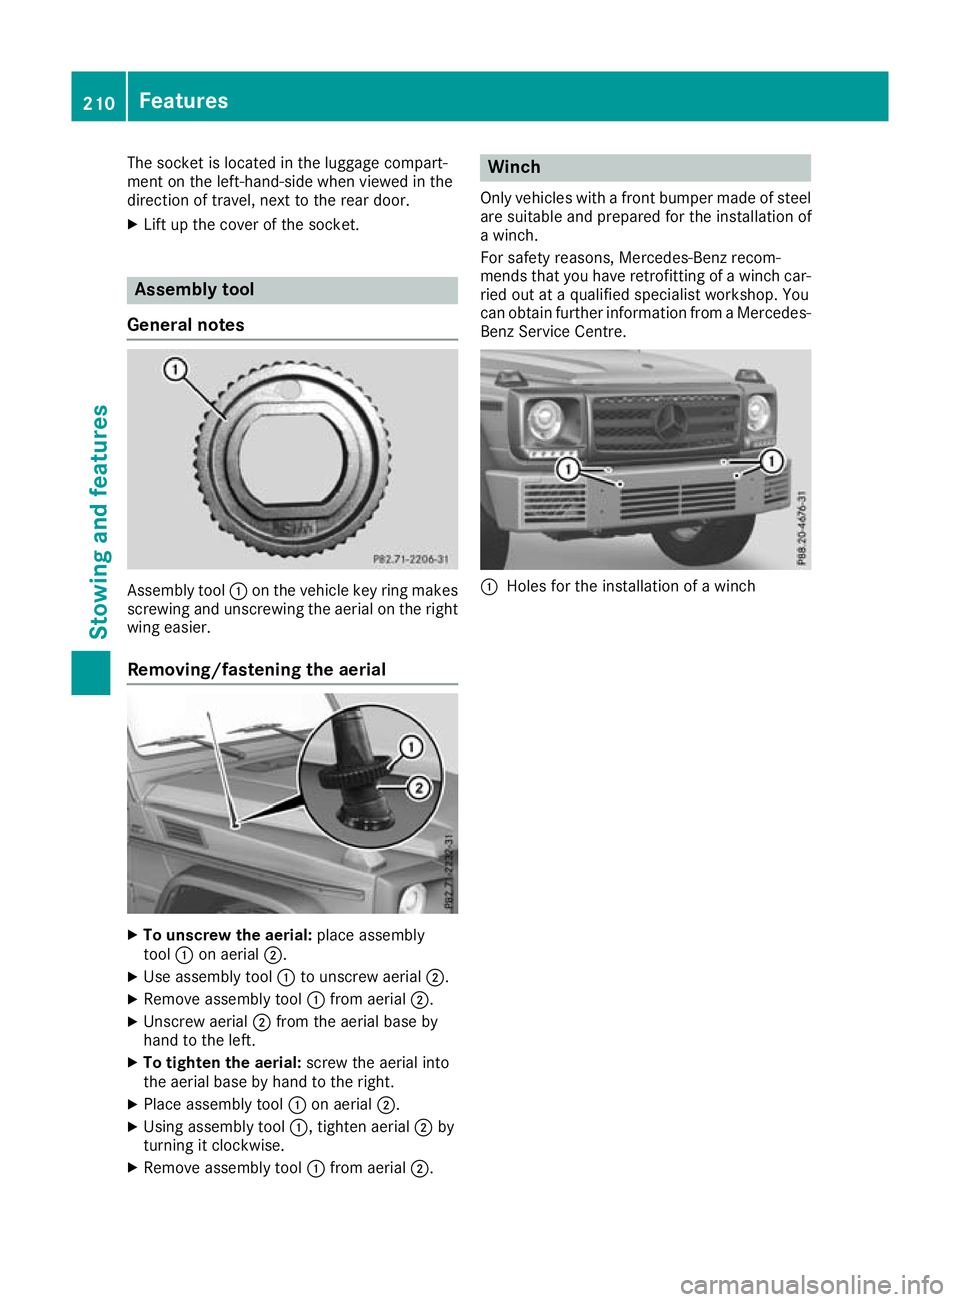
X Lift up the cover of the socket. Assembly tool
Genera lnotes Assembly tool
:on th evehicl ekey ring makes
screwing and unscrewing the aeria lonthe right
wing easier.
Removing/fastening the aerial X
To unscre wthe aerial: place assembly
tool :on aerial ;.
X Use assembl ytool :to unscrew aerial ;.
X Remove assembl ytool :from aerial ;.
X Unscrew aerial ;from the aeria lbaseby
hand to the left.
X To tighten the aerial: screwthe aeria linto
the aeria lbasebyh andtot he right.
X Place assembl ytool :on aerial ;.
X Using assembl ytool :,t ighten aerial ;by
turning it clockwise.
X Remove assembl ytool :from aerial ;. Winch
Only vehic lesw ithafront bumper made of steel
are suitabl eand prepared for the installation of
aw inch.
For safety reasons, Mercedes-Benz recom-
mends that you have retrofitting of awinch car-
ried out at aqualified specialist workshop. You
can obtai nfurther information from aMercedes-
Benz Service Centre. :
Holes for the installation of awinch 210
FeaturesStowing and features
Page 225 of 261
Where will
Ifind...? Warning triangle
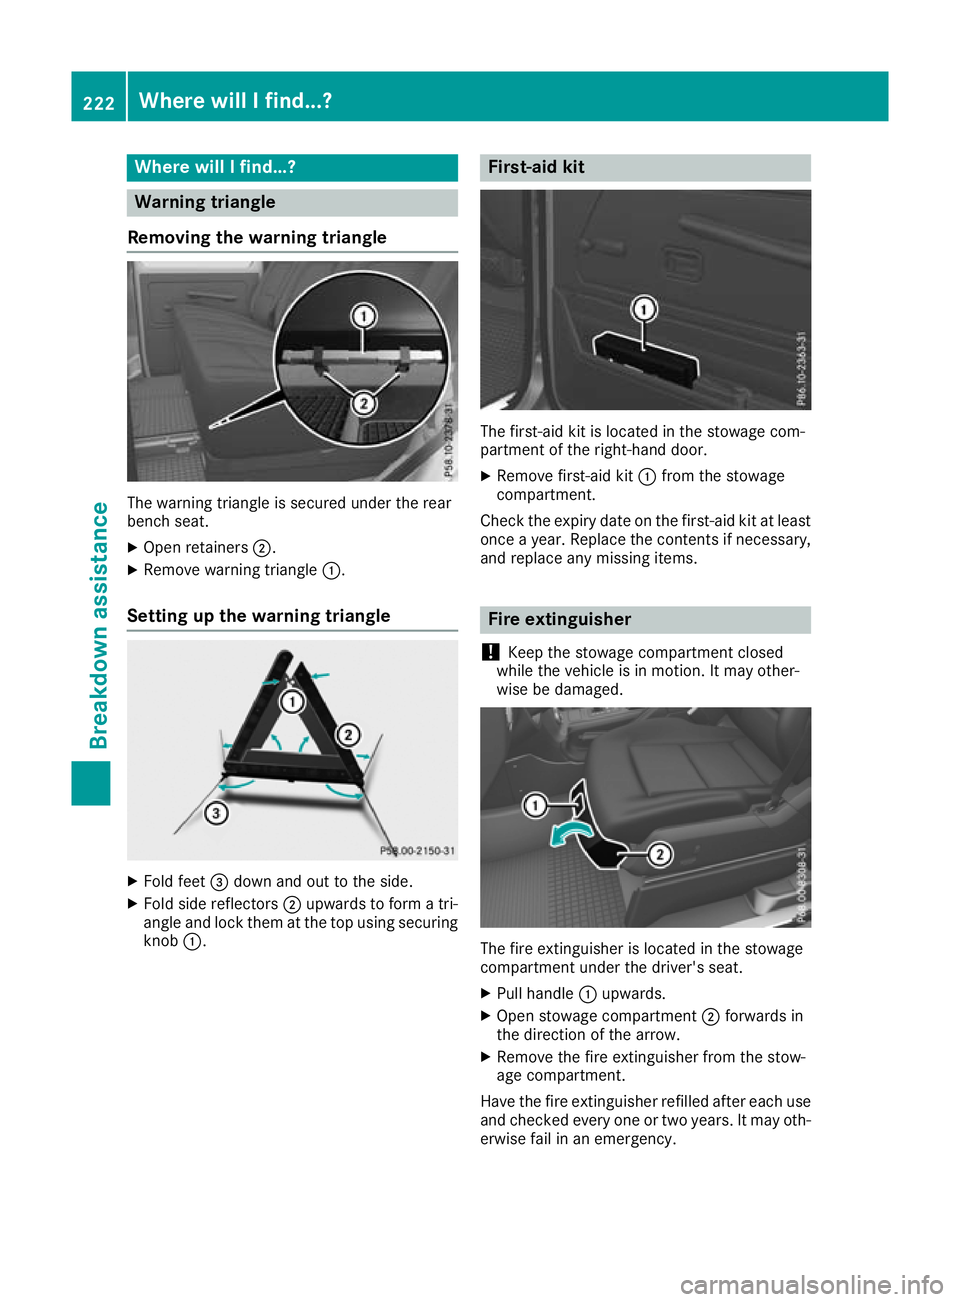
Removing the warning triangle The warning triangle is secured unde
rthe rear
bench seat.
X Open retainers ;.
X Remove warning triangle :.
Setting up the warning triangle X
Fol dfeet =dow nand ou ttothe side.
X Fold sid ereflectors ;upwards to form atri-
angl eand lock them at the top using securing
knob :. First-aid kit
The first-aid kit is locate
dinthe stowage com-
partmen tofthe right-hand door.
X Remove first-aid kit :from the stowage
compartment.
Check the expiry date on the first-aid kit at least
once ayear. Replace the contents if necessary,
and replace any missing items. Fire extinguisher
! Keep the stowage compartment closed
whilet hevehicl eisinm otion.Itm ay other-
wise be damaged. The fire exti
nguisher is located in the stowage
compartment under the driver's seat.
X Pull handle :upwards.
X Open stowage compartment ;forwards in
the direction of the arrow.
X Remove the fire extinguisher from the stow-
age compartment.
Have the fire extinguisher refilled after each use and checked every one or two years. It may oth-
erwise fail in an emergency. 222
Where will
Ifind...?Breakdowna ssistan ce
Page 227 of 261
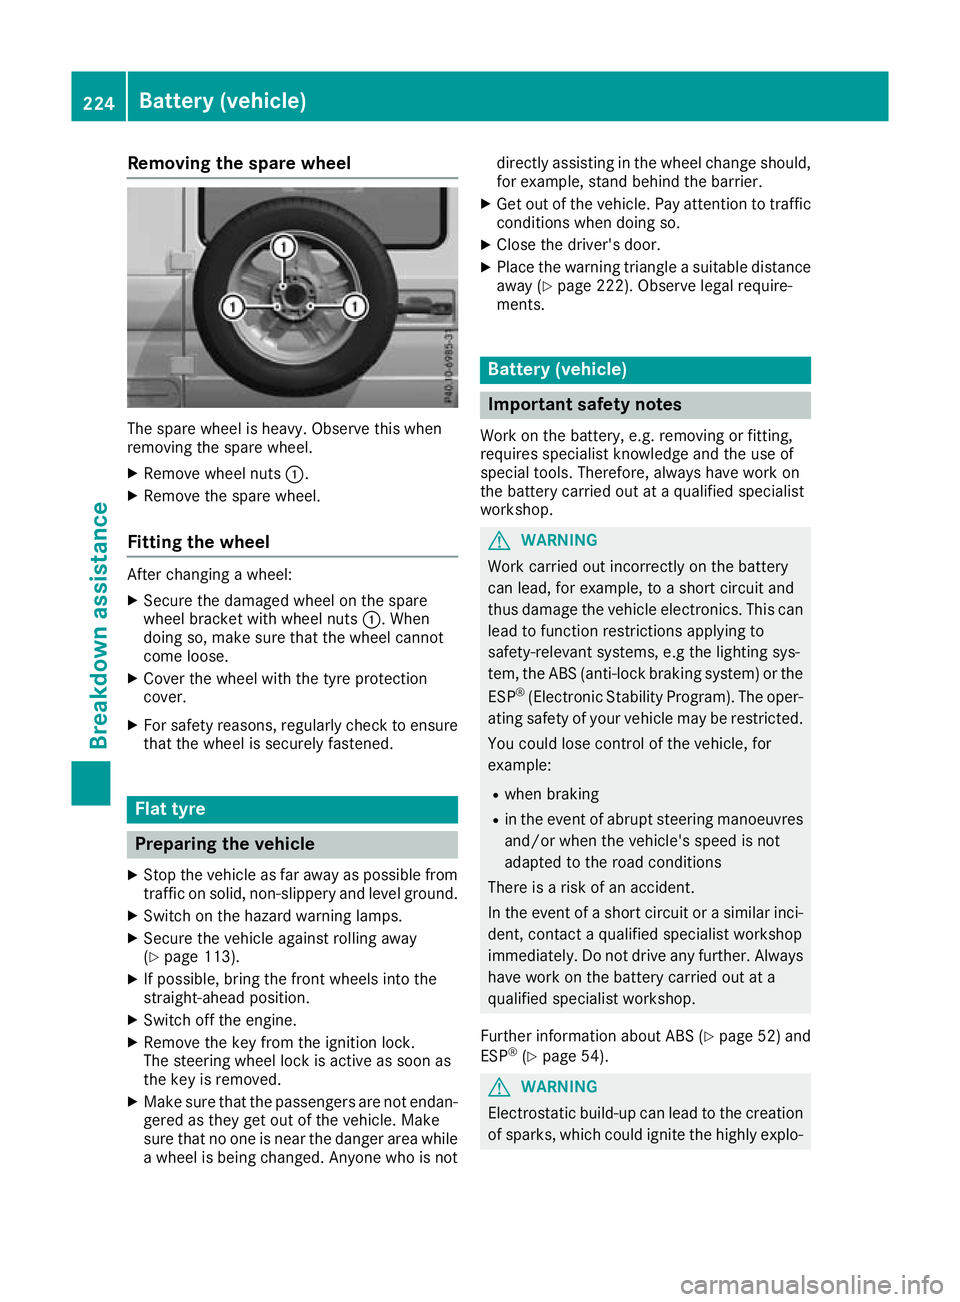
Removin
gthe spare wheel The spare wheel is heavy. Observ
ethis when
removing the spare wheel.
X Remove wheel nuts :.
X Remove the spare wheel.
Fitting the wheel After changing
awheel:
X Secure the damaged whee lonthe spare
whee lbracket with whee lnuts :.W hen
doing so, make sure tha tthe whee lcannot
come loose.
X Cover the whee lwitht he tyr eprotection
cover.
X For safety reasons ,regularly check to ensure
tha tthe whee lissecurel yfastened. Flat tyre
Preparing the vehicle
X Sto pthe vehicle as far away as possible from
traffic on solid, non-slippery and level ground.
X Switch on the hazard warning lamps.
X Secure the vehicle against rolling away
(Y page 113).
X If possible, bring the front wheels into the
straight-ahead position.
X Switch off the engine.
X Remove the key from the ignition lock.
The steering wheel lock is active as soon as
the key is removed.
X Make sure that the passengers are not endan-
gered as they get out of the vehicle. Make
sure that no one is near the danger area while
aw heel is being changed. Anyone who is not directly assisting in the wheel change should,
for example, stand behind the barrier.
X Get out of the vehicle. Pay attention to traffic
condition swhen doing so.
X Close the driver' sdoor.
X Place the warning triangle asuitable distance
away (Y page 222). Observe legal require-
ments. Batter
y(vehicle) Importan
tsafety notes
Wor kont hebattery, e.g. removing or fitting,
require sspecialist knowledge and th euse of
special tools. Therefore, always have wor kon
th eb attery carrie dout at aqualified specialist
workshop. G
WARNING
Work carried ou tincorrectly on the battery
can lead, for example, to ashort circui tand
thus damage the vehicl eelectronics. This can
leadtof unction restrictions applying to
safety-relevant systems ,e.g the lighting sys-
tem, the ABS (anti-lock braking system) or the
ESP ®
(Electronic Stability Program). The oper-
ating safety of yourv ehiclemay be restricted.
You coul dlose control of the vehicle, for
example:
R when braking
R in the event of abrupt steering manoeuvres
and/or when the vehicle's spee disnot
adapted to the road conditions
There is arisk of an accident.
In the event of ashort circui torasimilar inci-
dent, contact aqualified specialist workshop
immediately. Do not drive any further. Always have work on the battery carrie dout at a
qualified specialist workshop.
Further information about ABS (Y page52) and
ESP ®
(Y page5 4). G
WARNING
Electrostatic build-u pcan leadtot he creation
of sparks, which coul dignite the highly explo- 224
Battery (vehicle)Breakdown assistance
Page 233 of 261
(30
x30c m). This will make othe rroad
users aware that avehicle is being towed.
R Only secure the tow cable to the towing
eyes or, if available, to the trailer tow hitch.
R Observ ethe brake lamps of the towing
vehicle while driving. Always maintain adis-
tance adistance so that the tow rope does
not sag.
R Do not use steel cables or chain stotow
your vehicle. You could otherwise damage
the vehicle.
! Do not use the trailer tow hitc
hfor recovery
or towing. Do not use the towin geye for
recovery. This could damage the vehicle. If in
doubt, have the vehicle recovered using a
crane.
! When towing, pull away slowly and
smoothly. If the tractive power is too high, the
vehicles could be damaged.
! Your vehicles is equipped with an automatic
transmission .Therefore, you must not have
the vehicle tow-started. The transmission
may otherwise be damaged.
Observ ethe legal requirementsine ach individ-
ual country when towing.
It is better to have the vehicle transported than
to have it towed.
If the transfer case can be shifted int othe Neu-
tral position, you can tow away the vehicle.
If the transfer case cannot be shifted int othe
Neutral position, you can tow away the vehicle
with one axle raised. Please bear the following in
mind:
R remov ethe propeller shaft from between the
transfer case and the rolling axle.
R turn the key to position 1in the ignition lock.
The battery must be connected and charged.
Otherwise, you:
R cannot turn the key to position 2in the igni-
tion lock
R cannot shift the automatic transmission to
position i To
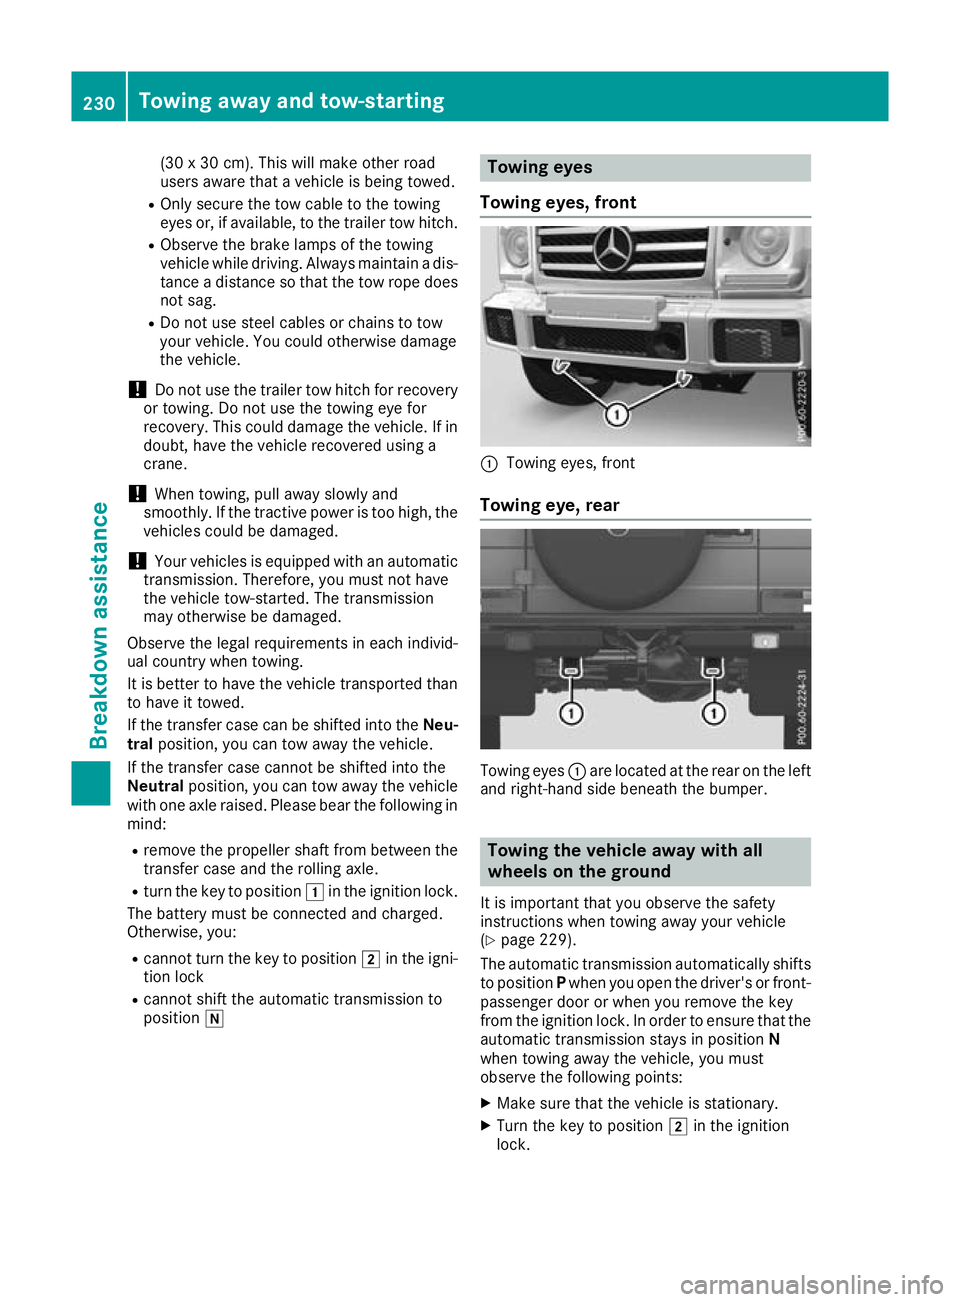
wing eyes
Towin geyes, front :
Towing eyes ,front
Towing eye, rear Towing eyes
:are located at the rear on the left
and right-hand side beneath the bumper. To
wing the vehicle away with all
wheels on the ground
It is important tha tyou observe the safety
instructions when towing away your vehicle
(Y page 229).
The automatic transmission automaticall yshifts
to position Pwhen yo uopenthe driver's or front-
passenge rdoororw heny ou remove the key
fro mt he ignition lock. In order to ensur etha tthe
automatic transmission stays in position N
when towing away the vehicle, yo umust
observe the following points:
X Make sure tha tthe vehicl eisstationary.
X Turn the key to position 2in the ignition
lock. 230
Towing away an
dtow-startingBreakdowna ssistan ce
Page 247 of 261
X
Stop the vehicl eonsolid,non-slipper yand
level ground.
X Appl ythe parking brake.
X Move the front wheel stothe straight-ahead
position.
X Shif tthe automatic transmissio ntoposition
P.
X Switch off the engine.
X Ifat raile risc oupled to the vehicle, uncouple
it.
X Remove the vehicl etool sand jack from the
vehicl e(Ypage 223).
X Remove the spare wheel from the spare wheel
bracket (Y page 223).
X Secure the vehicl eagains trolling away.
Securing the vehicle against rolling
away X
Place chocks or other suitable items under
the front and rea rofthe wheel that is diago-
nally opposite the wheel you wish to change.
Raising the vehicle G
WARNING
If you do not position the jack correctl yatthe
appropriate jacking point of the vehicle, the
jack coul dtip over with the vehicl eraised.
There is arisk of injury.
Only position the jack at the appropriate jack-
ing point of the vehicle. The base of the jack
must be positioned vertically,d irectly under
the jacking point of the vehicle.
! Only position the jack at the appropriate
jacking point of the vehicle. Otherwise, you
coul ddamage the vehicle.
Observe the following whenr aisingthe vehi-
cle:
R Use only the vehicle-specific jack that has
been tested and approved by Mercedes-Benz
to rais ethe vehicle. If the jack is used incor-
rectly, it coul dtip over while the vehicl eis
raised.
R The jack is designed only to rais ethe vehicle
for ashort time while awhee lisb eing
changed .Itisnot permissible to use it to per-
form maintenance work under the vehicle. R
Avoid changing the whee lonuphilland down-
hill slopes.
R Before raising the vehicle, secur eitagainst
rolling away by applying the parking brake and
positioning whee lchocks. Do not release the
parking brake whil ethe vehicl eisraised.
R The jack must be place donafirm, flatand
non-slip surface. On aloo se surface, alarge,
fla tload-beari ng underlay must be used .Ona
slippery surface, anon-slip underlay must be
used ,e.g.u se arubber matont iles.
R Do not us ewoode nblocks or similar objects
as ajack underlay .Otherwise, the jack will not
be able to achieve its load-bearing capacity
du etot he restricte dheight.
R Ensure tha tthe distance between the under-
side of the tyr eand the ground does not
exceed 3cm.
R Do not place your hands or fee tunder the
raised vehicle.
R Do not li eunder the raised vehicle.
R Do not start the engine when the vehicl eis
raised.
R Do not open or close adoorw hent he vehicle
is raised.
R Ensure tha tnopersons ar epresent in the
vehicl ewhenr aisin gthe vehicle. X
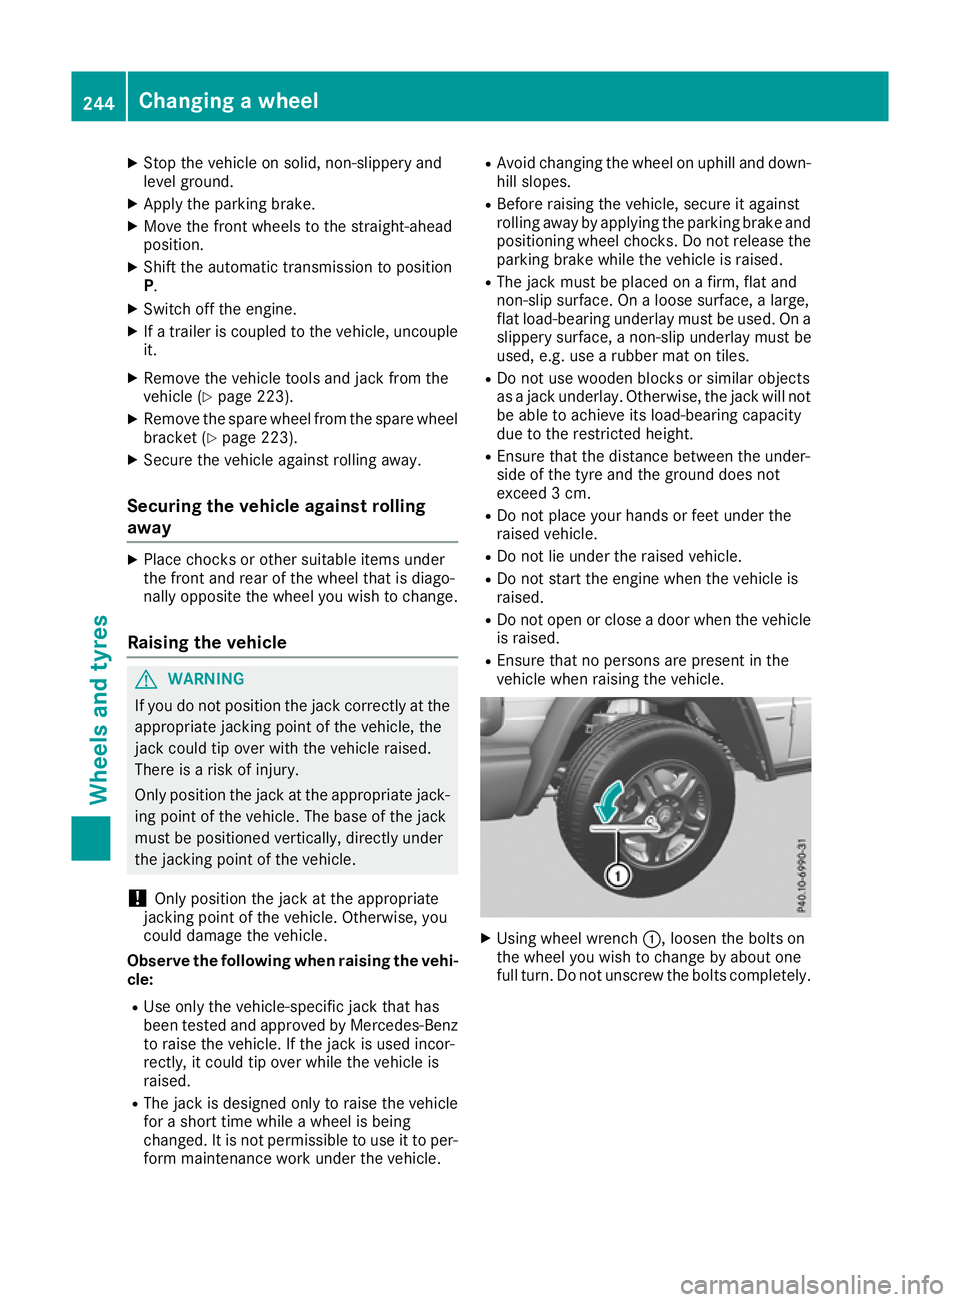
Using wheel wrench :,loosen the bolts on
the wheel you wish to change by abouto ne
full turn. Do not unscrew the bolts completely. 244
Changing
awheelWheels and tyres