2016 MERCEDES-BENZ G-CLASS SUV brake
[x] Cancel search: brakePage 57 of 261
4ETS (Electronic Traction System)
i
Observ
ethe "Important safety notes" sec-
tion (Y page 52).
4ETS traction control is part of ESP ®
.
4ETS traction control is no longer active above a
speed of approximately 60 km/h.
Traction control brakes the drive wheels indi-
vidually if they spin. This enables you to pull
awaya nd accelerate on slippery surfaces, e.g. if
the road surface is slippery on one side. In addi-
tion, more drive torque is transferred to the
wheel or wheels with traction.
Traction control remains active if you deactivate
ESP ®
.
Important safety notes i
Observe the "Important safety notes" sec-
tion (Y page 52). G
WARNING
If ESP ®
is malfunctioning, ESP ®
is unable to
stabilise the vehicle. In addition, other driving
safety systems are switched off. This increa-
ses the risk of skidding and an accident.
Drive on carefully.H ave ESP®
checked at a
qualified specialist workshop.
! Only operate the vehicl
efor am aximu mof
ten seconds on abrake dynamometer. Switch
off the ignition.
Application of the brakes by ESP ®
may oth-
erwise destroy the brake system.
! Af
unction or performance test should only
be carrie dout on atwin-axle dynamometer.
Before you operate the vehicl eonsuch a
dynamometer, please consult aqualified
workshop. You coul dotherwise damage the
drive train or the brake system.
If the å ESP®
OFF warning lamp lights up
continuously,E SP®
is deactivated.
If the ÷ ESP®
warning lamp lights up contin-
uously,E SP®
is not available due to amalfunc-
tion.
Observe the information on warning lamps
(Y page1 59) and display messages which may
be displayed in the instrument cluster
(Y page1 42). Use only wheels with the recommended tyre
sizes. Only then will ESP ®
functio nproperly.
If differential locks are switched on, ABS,B AS
and ESP ®
switch off automatically.
Characteristics of ESP ® General information
If the ÷ ESP warning lamp goes out before
you begin the journey, ESP ®
is automatically
active.
If ESP ®
intervenes,t he÷ ESP®
warning lamp
flashes on the instrument cluster.
If ESP ®
intervenes:
X Do not deactivate ESP ®
under any circum-
stances.
X When pulling away, depress the accelerator
pedalo nly as far as is necessary.
X Adapt yourd riving style to suit the prevailing
road and weather conditions.
ECO start/stop function
The ECO start/stop function switches the
engine off automaticall yifthe vehicle stops
moving. When the vehicle pulls awaya gain, the
engine starts automatically. ESP ®
remains in its
previously selected status, e.g. if ESP ®
was
deactivated before the engine was automati-
callys witched off.
Deactivating/activating ESP ® Im
portant safety notes
i Observ
ethe "Importan tsafety notes" sec-
tio n(Ypage 52).
You can select between th efollowin gESP®
sta-
tuses:
R ESP ®
is activated
R ESP ®
is deactivated G
WARNING
If yo udeactivate ESP ®
,E SP ®
no longer sta-
bilises the vehicle. There is an increased risk
of skidding and an accident.
Only deactivate ESP ®
in the situations descri-
bed in the following. 54
Driving safety systemsSafety
Page 58 of 261
It may be best to deactivate ESP
®
in the follow-
ing situations:
R when snow chains are used
R in deep snow
R on sand or gravel
R off-road
Spinning the wheelsr esults inacutting action,
which enhances traction.
Activate ESP ®
as soon as the situations descri-
bed above no longer apply. ESP ®
willo therwise
not be abletos tabilise the vehicle if the vehicle
starts to skid or awheel starts to spin.
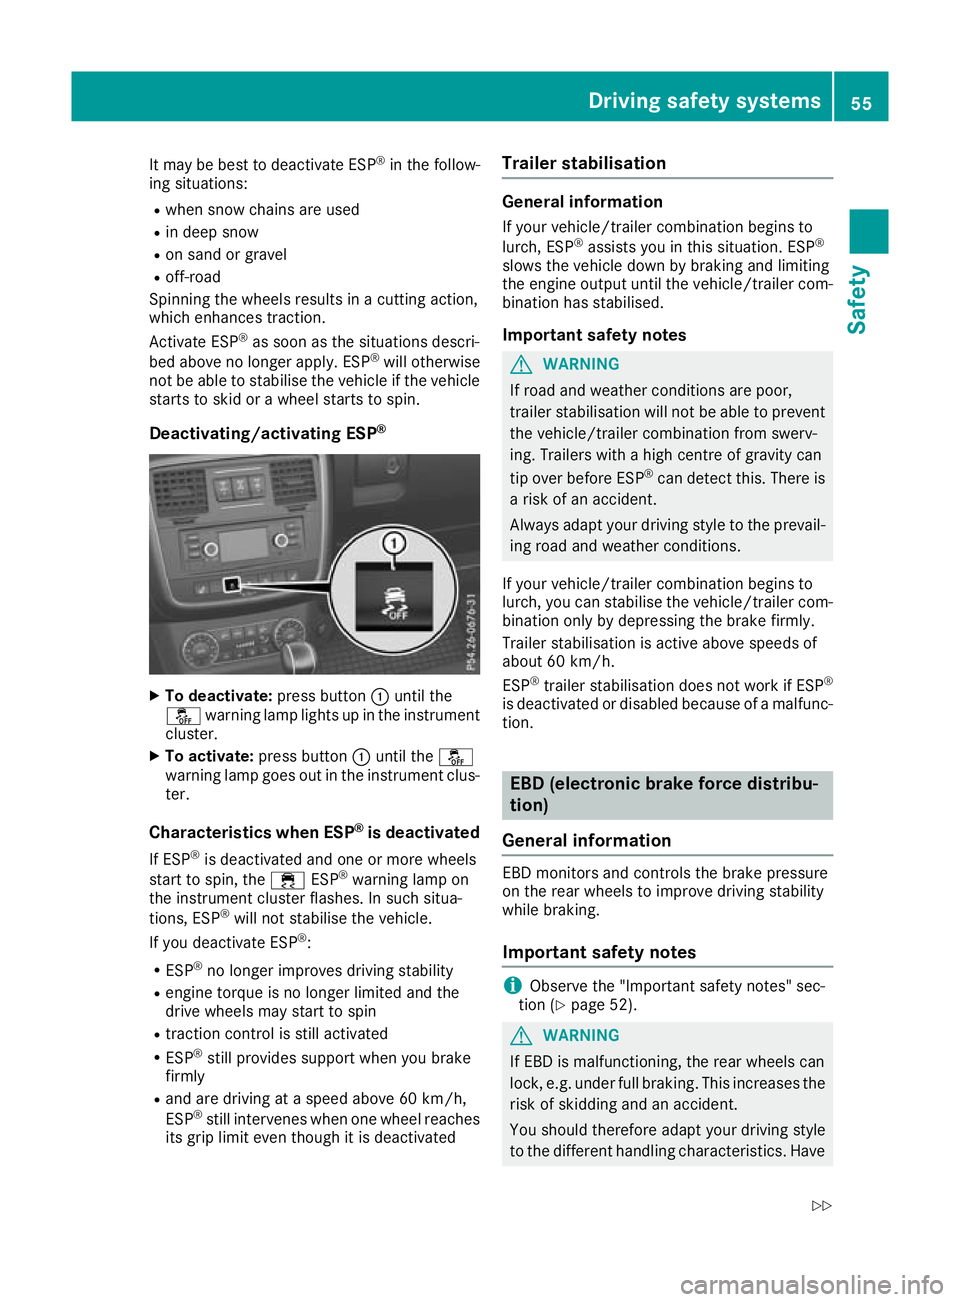
Deactivating/activating ESP ®X
To deactivate: press button:until the
å warning lamp lights up in the instrument
cluster.
X To activate: press button :until the å
warning lamp goes out in the instrument clus-
ter.
Characteristic swhenE SP®
is deactivated
If ESP ®
is deactivate dand one or more wheels
start to spin, the ÷ESP®
warning lamp on
the instrument cluster flashes. In such situa-
tions, ESP ®
will not stabilise the vehicle.
If yo udeactivate ESP ®
:
R ESP ®
no longer improve sdriving stability
R engine torque is no longer limite dand the
drive wheels may start to spin
R tractio ncontro lisstilla ctivated
R ESP ®
stil lprovides support when yo ubrake
firmly
R and are driving at aspeed above 60 km/h,
ESP ®
stil lintervene swheno ne whee lreaches
its gri plim it eve nthough it is deactivated Trailer stabilisation General information
If you rvehicle/trailer combinatio nbegins to
lurch, ESP ®
assists you in this situation. ESP ®
slowst he vehicle down by braking and limiting
the engine outpu tuntil the vehicle/trailer com-
binatio nhas stabilised.
Important safety notes G
WARNING
If road and weather conditions are poor,
trailer stabilisation willn ot be abletoprevent
the vehicle/trailer combination from swerv-
ing. Trailers with ahigh centre of gravity can
tip over before ESP ®
can detect this. There is
ar isk of an accident.
Always adapt yourd riving style to the prevail-
ing road and weather conditions.
If yourv ehicle/trailer combination begins to
lurch ,you can stabilise the vehicle/trailer com-
bination only by depressing the brake firmly.
Trailer stabilisation is active above speeds of
about 60 km/h.
ESP ®
trailer stabilisation does not work if ESP ®
is deactivated or disabledb ecause ofamalfunc-
tion. EB
D( electronic brak eforce distribu-
tion)
General information EB
Dm onitors and controls the brake pressure
on the rea rwheel stoi mprov edrivin gstability
whil ebraking.
Important safety notes i
Observ
ethe "Important safety notes" sec-
tion (Y page 52). G
WARNING
If EBD is malfunctioning, the rear wheels can
lock, e.g. under full braking. This increases the risk of skidding and an accident.
You should therefore adapt your driving style
to the different handling characteristics. Have Driving safe
tysystems
55Safety
Z
Page 59 of 261
the brake syste
mchecked at aquali fied spe-
cialist workshop.
Observe information regarding indicator and
warning lamps (Y page 158)asw ellasd isplay
message s(Ypage 143). ADAPTIV
EBRAKE
ADAPTIV EBRAKE provides increased braking
safety. In addition to th ebraking function,
ADAPTIV EBRAKE also features th eHOLDF unc-
tion (Y page 122). Protectio
nagainst theft Immobiliser
The immobiliser prevents yourv ehiclefrom
bein gstarted without th ecorrect key.
X To activate: remove thekeyfrom th eignition
lock.
X To deactivate: switch on theignition.
When leaving th evehicle, always tak ethe key
wit hyou and loc kthe vehicle. The engin ecan be
started by anyone wit havalid ke ythatisl eft
inside th evehicle.
i The immobiliser is always deactivated when
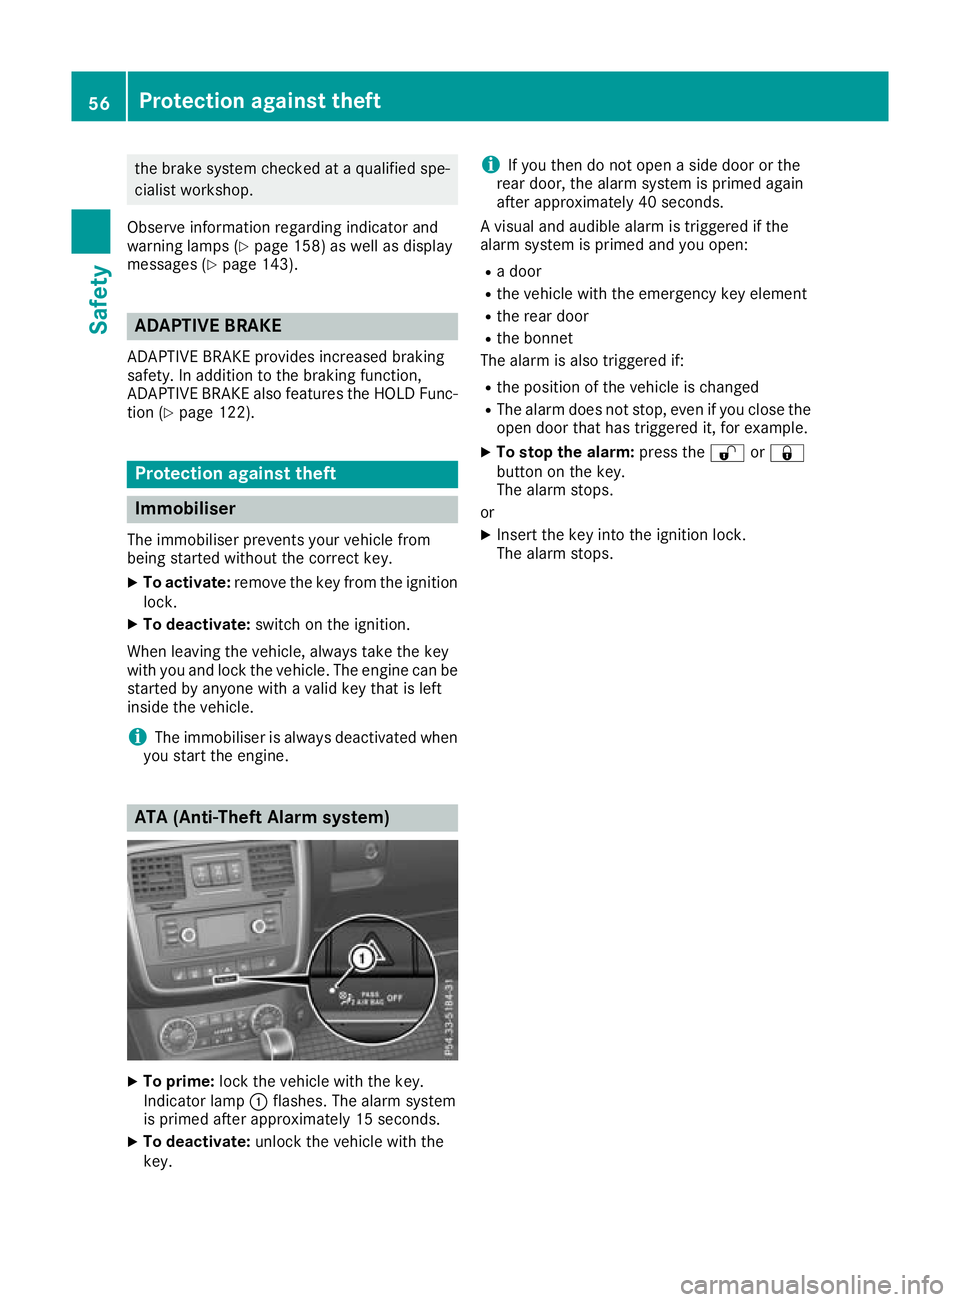
you start th eengine. ATA (Anti-Thef
tAlarms ystem) X
To prime: lockthe vehicl ewitht he key.
Indicato rlamp :flashes. The alarm system
is primed afte rapproximatel y15s econds.
X To deactivate: unlock the vehicl ewitht he
key. i
If you then do not open
aside door or the
rear door, the alarm system is primed again
after approximately 40 seconds.
Av isuala nd audible alarm is triggered if the
alarm system is primed and you open:
R ad oor
R the vehicle with the emergency key element
R the rear door
R the bonnet
The alarm is also triggered if:
R the positio nofthe vehicle is changed
R The alarm does not stop, even if you close the
open door that has triggered it, for example.
X To stop the alarm: press the%or&
button on the key.
The alarm stops.
or X Insert the key into the ignition lock.
The alarm stops. 56
Protectiona
gainst theftSafety
Page 60 of 261

Key
Important safety notes
G
WARNING
If children ar eleft unsupervised in the vehicle,
they can:
R open doors and endange rother persons or
road users
R climb out and be injured by the traffic
R operate vehicl eequipment and, for exam-
ple,t rap themselves.
Childre ncoulda lsos et the vehicl einmotion,
for exampl eby:
R releasing the parking brake
R shifting the automatic transmission out of
park position P
R starting the engine.
There is arisk of an accident and injury.
When leaving the vehicle, alwayst ake the key
with you and lock the vehicle. Never leave
children unattended in the vehicle. Always
keep the key out of reach of children. G
WARNING
If you attach heavy or larg eobjects to the key,
the key coul dbeunintentionally turned in the
ignitio nlock. This coul dcauset he engine to
be switched off. There is arisk of an accident.
Do not attach any heavy or larg eobjects to the
key. Remove any bulky keyrings before insert-
ing the key into the ignitio nlock.
! Keep the key awayf
rom strong magnetic
fields. Otherwise, the remote control function coul dbea ffected.
Strong magnetic fields can occur in the vicin-
ity of powerful electrica linstallations.
Do not keep the key: R with electronic devices, e.g. amobilephone
or another key
R with metallic objects, e.g. coins or metal foil
R insid emetallic objects, e.g. ametal case
This can impair the key's function. Ac
heck tha tperiodically establishes aradio
connectio nbetween the vehicl eand the key
determine swhethe rav alidkey is in the vehicle.
Thi so ccurs, for example:
R during engine start
R during driving
Unite dKingd om only: G
WARNING
When the double locks are activ ated, the
doors can no longer be opened from the
inside. People in the vehicl ecan no longer get
out, e.g. in hazardous situations. There is a
risk of injury.
Therefore, do not leave any people unsuper-
vised in the vehicle, particularl ychildren, eld-
erly people or people in need of special assis-
tance. Do not activate the double lock when
people are in the vehicle.
If the vehicl ehas been locked from the outside,
the double lock function is activated as stand-
ard. It is then not possible to open the doors
from insid ethe vehicle. You can deactivate the
double lock function by deactivating the interior
motion sensor (see Digita lOwner's Manual).
The doors can then be opened from the inside
after the vehicl ehas been locked from the out-
side .The anti-theft alarm system is triggere dif
the door is opened from the inside. Switch off
the alarm (Y page56). Keyf
unctions :
& Lockst he vehicle
; % Unlocks the vehicle Key
57Opening and closing Z
Page 64 of 261

Problem
Possible causes/consequences and
M
MSolutions You have lost
akey. X
Have th ekey deactivated at aqualifie dspecialist workshop.
X Report the los simmediately to the vehicle insurers.
X If necessary ,havet he locks changed as well. Yo
uh ave lost the emer-
genc ykey element. X
Report the loss immediately to the vehicl einsurers.
X If necessary, hav ethe locks changed as well. Doors
Important safety notes
G
WARNING
If children ar eleft unsupervised in the vehicle,
they can:
R open doors and endange rother persons or
road users
R climb out and be injured by the traffic
R operate vehicl eequipment and, for exam-
ple,t rap themselves.
Childre ncoulda lsos et the vehicl einmotion,
for exampl eby:
R releasing the parking brake
R shifting the automatic transmission out of
park position P
R starting the engine.
There is arisk of an accident and injury.
When leaving the vehicle, alwayst ake the key
with you and lock the vehicle. Never leave
children unattended in the vehicle. Always
keep the key out of reach of children.
Unite dKingdom only: G
WARNING
When the double locks are activated, the
doors can no longer be opened from the
inside. People in the vehicl ecan no longer get
out, e.g. in hazardous situations. There is a
risk of injury.
Therefore, do not leave any people unsuper-
vised in the vehicle, particularl ychildren, eld-
erly people or people in need of special assis-
tance. Do not activate the double lock when
people are in the vehicle. If the vehicle has been locked from the outside,
the double lock function is activated as stand-
ard. It is then not possible to open the doors
from inside the vehicle .You can deactivate the
double lock function by deactivating the interior
motion sensor (see Digital Owner's Manual).
The doors can then be opened from the inside
after the vehicle has been locked from the out-
side. The anti-theft alarm system is triggered if
the door is opened from the inside. Switch off
the alarm (Y page 56). Unlockinga
nd opening the doors
from the inside
You can open adoor from inside the vehicle
even if it has been locked. You can only open the rear doors from inside the vehicle if they are not secured by the child-proof lock s(Ypage 51). If
the vehicle has previously been locked with the
key, openin gadoor from the inside will trigger
the anti-theft alarm system .Switc hoff the alarm
(Y page 56). :
To unlock
; To lock
= Door handle
X Slide latch :upwards.
The door is unlocked and can be opened.
X Pull door handle =and open the door. Doors
61Openingand closing Z
Page 67 of 261
X
Slide latch :upwards.
The doo risunlocked.
X Pull doo rhandle =.
i If the child-proof locks are used to secure
the rea rdoor, yo ucanno topenitf rom inside
the vehicle, eve nwhenith asbee nunlocked
(Y page 51). Closin
gfromt heoutside
X Push th erear door closed from outside the
vehicle.
X Loc kthe vehicle wit hthe & buttonont he
key. Closing from insid
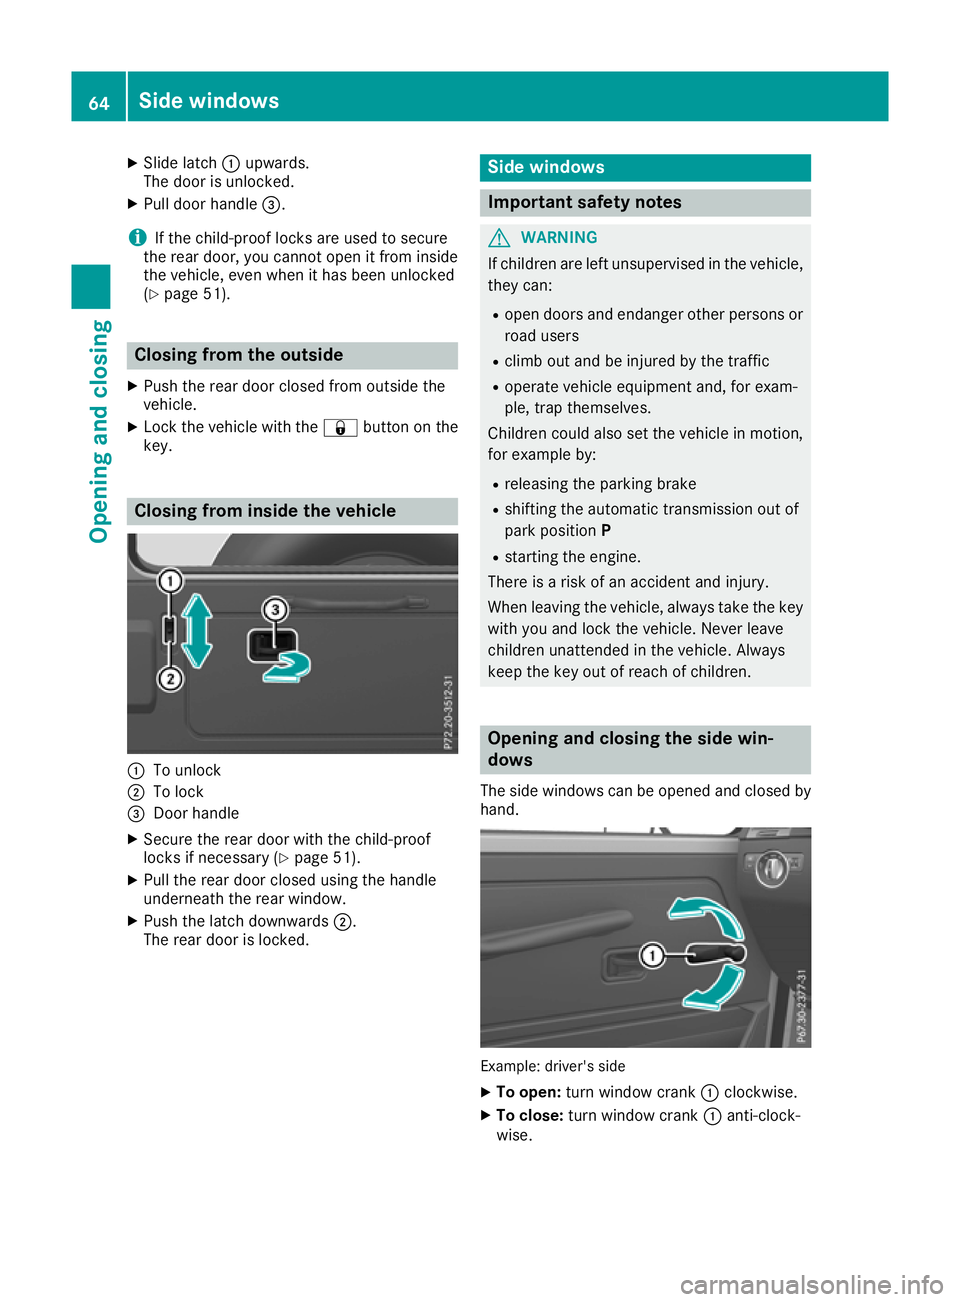
ethe vehicle :
To unlock
; To lock
= Door handle
X Secure the rear door with the child-proof
lock sifn ecessary (Y page 51).
X Pull the rear door closed using the handle
underneath the rear window.
X Push the latch downwards ;.
The rear door is locked. Side windows
Important safety notes
G
WARNING
If children are left unsupervised in the vehicle, they can:
R open doors and endanger other persons or
road users
R climb out and be injured by the traffic
R operate vehicle equipment and, for exam-
ple, trap themselves.
Children could also set the vehicle in motion, for examp leby:
R releasing the parking brake
R shifting the automatic transmission out of
park position P
R starting the engine.
There is arisk of an accident and injury.
When leaving the vehicle, alwayst ake the key
with you and lock the vehicle. Never leave
children unattended in the vehicle. Always
keep the key out of reach of children. Opening and closing the side win-
dows
The side windows can be opened and closed by hand. Example: driver's side
X To open: turn windo wcrank :clockwise.
X To close: turnw indo wc rank :anti-clock-
wise. 64
Side windowsOpeninga
nd closing
Page 82 of 261
the xeno
nbulbs carrie doutataq uali fied spe-
cialist workshop. G
WARNING
Bulbs, lamp sand plugc onnectors can
become very hot during use. When replacing a bulb, you coul dburn yourself on these com-
ponents. There is arisk of injury.
Allow these components to cool downb efore
replacing the bulb.
Do not use abulbifith as been dropped or if its
glass has been scratched.
The bulbm ay explode if:
R you touch it
R it is hot
R you drop it
R you scratch it
Use bulbs only in closed lamp sthat have been
designed for this purpose. Fit only spar ebulbs of
the same type and the specified voltage.
Marks on the glass reduce the service life of the bulbs. Do not touch the glass tube with your
bare hands. If necessary, clea nthe glass tube
when cold with alcohol or spiri tand rub it off
with alint-free cloth.
Protect bulbs from moisture during operation.
Do not allow bulbs to come into contact with
liquids.
Xeno nbulbs and LED modules: you cannot
replace xenon bulbs or LED modules yourself.
Have the following bulbs replaced at aqualified
specialist workshop:
R third brake lamp
R side lamps/parking lamp s(front)
R main-beam/dipped-beam headlamps (xenon
headlamps)
R daytime driving lights
R licence plate lamp
i Individuals
egments of the licence plate
lamp LEDs may fail without adisplay message
appearing in the multifunction display.R egu-
larl ycheck the licence plate lighting. If nec-
essary, visit aqualified specialist workshop.
You can replace the following bulbs: R turn signa llamp (front)
R brake/tai llamp
R turn signa llamp (rear) R
tail lamp/parking lamp
R reversing light
R rear foglamp
Replace only the bulb sliste d( Ypage 79).
Hav ethe bulb stha tyou cannot change yourself
replaced at aquali fied specialis tworkshop.
If yo urequire assistance replacing bulbs, con-
sult aquali fied specialis tworkshop.
If the new bulb still does not light up ,consul ta
qualified specialis tworkshop.
Headlamps and lights ar eanimportant aspect of
vehicl esafety .You must therefore make sure
tha tthese functio ncorrectl yatalltimes .Have
the headlamp setting verified regularly. Overview of bulb types
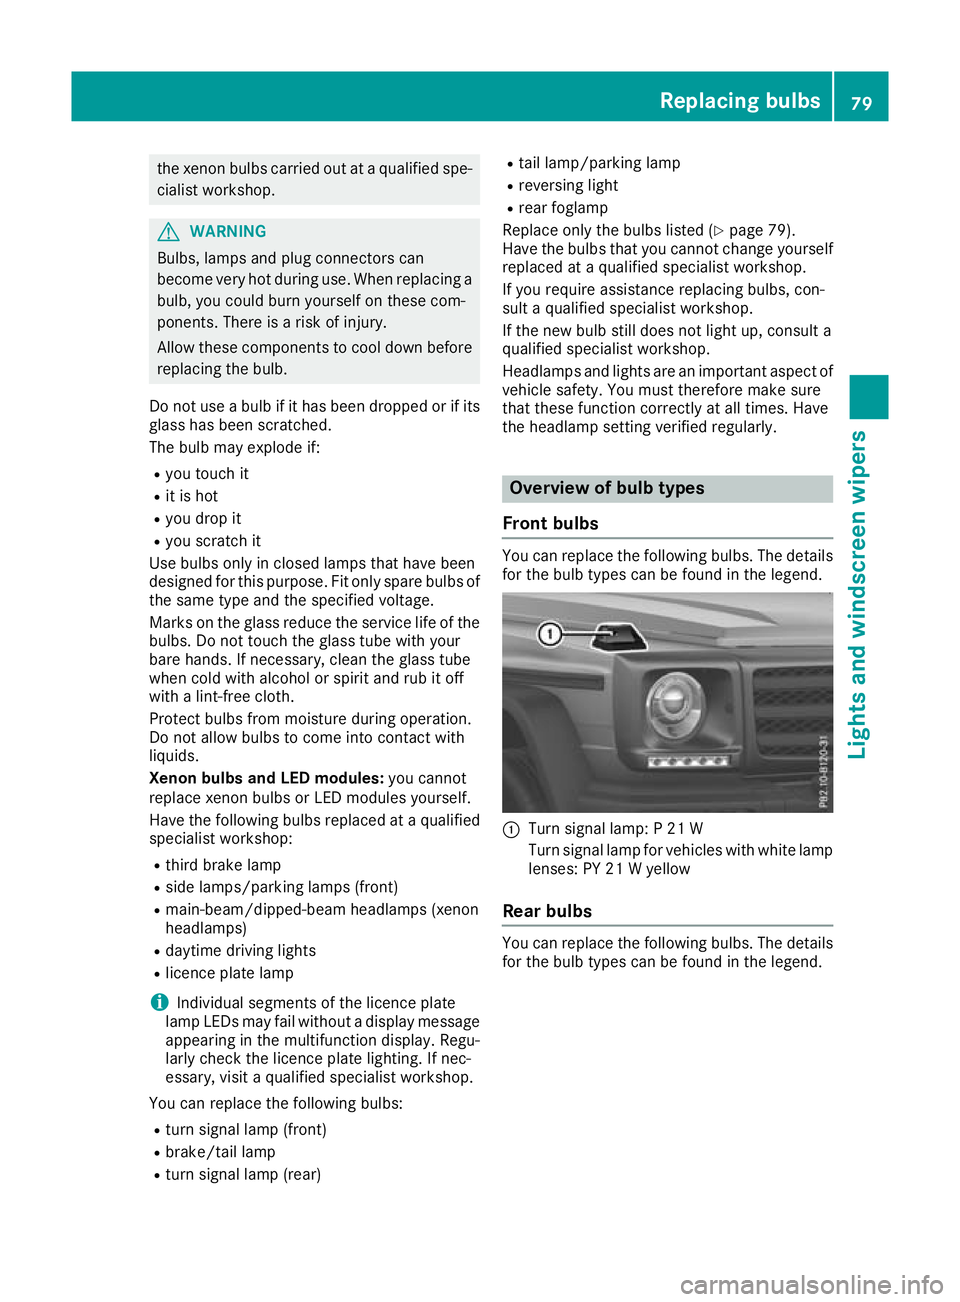
Fron tbulbs You can replace the following bulbs. The details
for the bulb types can be found in the legend. :
Turn signal lamp: P21W
Turn signal lamp for vehicles with white lamp lenses: PY 21 Wyellow
Rear bulbs You can replace the following
bulbs. The details
for the bulb types can be foun dinthe legend. Replacing bulbs
79Lights and windscreen wipers Z
Page 83 of 261
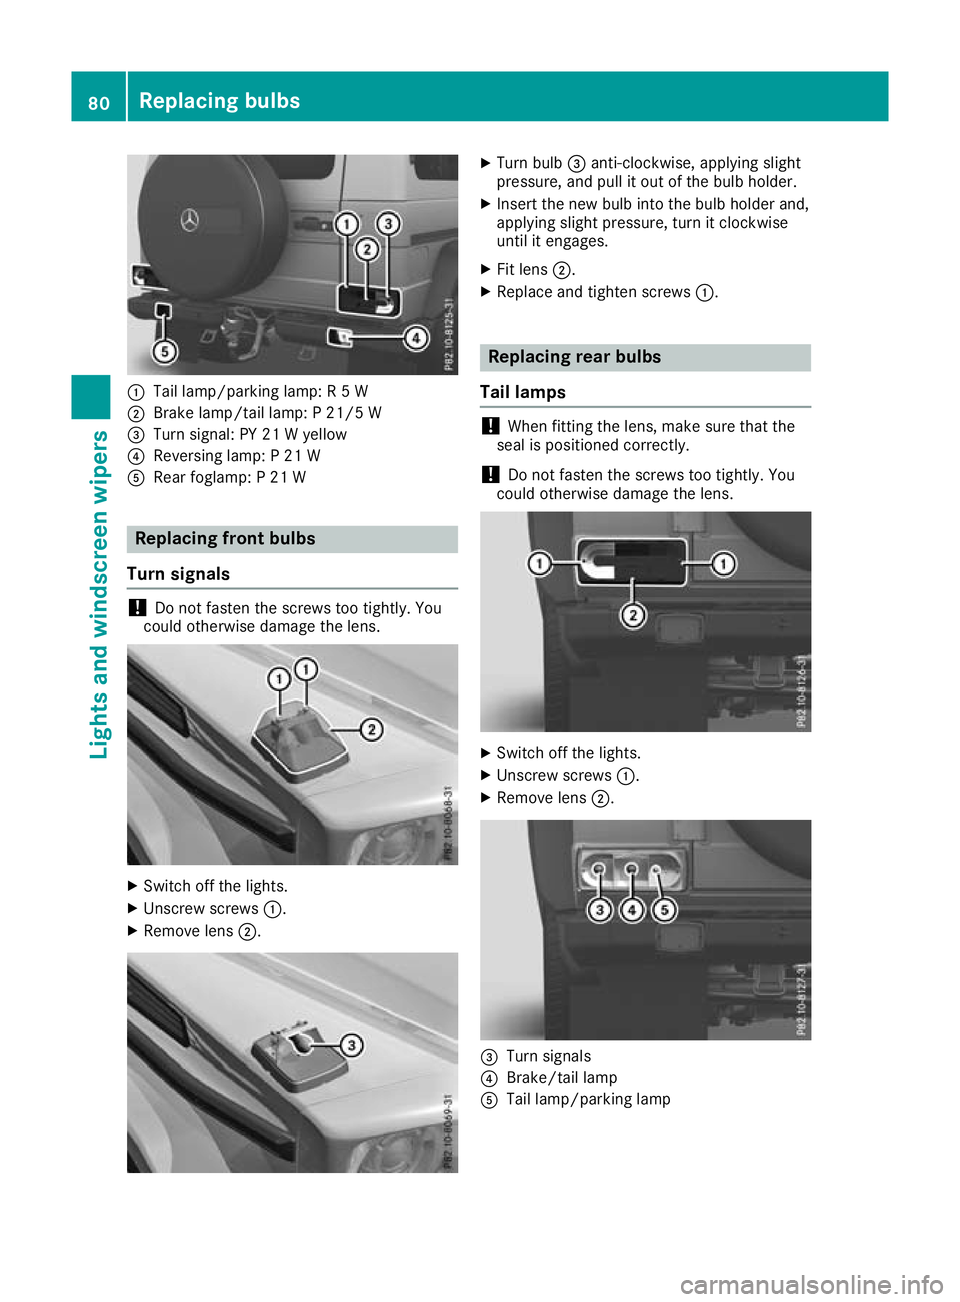
:
Tail lamp/parking lamp: R5W
; Brake lamp/tail lamp: P21/5 W
= Turn signal: PY 21 Wyellow
? Reversing lamp: P21W
A Rear foglamp: P21W Replacing fron
tbulbs
Turn signals !
Do not fasten the screws too tightly. You
coul dotherwise damage the lens. X
Switch off the lights.
X Unscrew screws :.
X Remove lens ;. X
Turn bulb =anti-clockwise, applying slight
pressure, and pull it out of the bulb holder.
X Insert the new bulb into the bulb holder and,
applying slight pressure, turn it clockwise
until it engages.
X Fit lens ;.
X Replace and tighten screws :. Replacing rear bulbs
Tail lamps !
When fitting the lens, make sure that the
seal is positioned correctly.
! Do not fasten the screws too tightly. You
could otherwise damage the lens. X
Switch off the lights.
X Unscrew screws :.
X Remove lens ;. =
Turn signals
? Brake/tail lamp
A Tail lamp/parkin glamp 80
Replacing bulbsLightsa
nd windscreen wipers