2016 MERCEDES-BENZ E-SEDAN reset
[x] Cancel search: resetPage 191 of 350
Operating the on-board computer
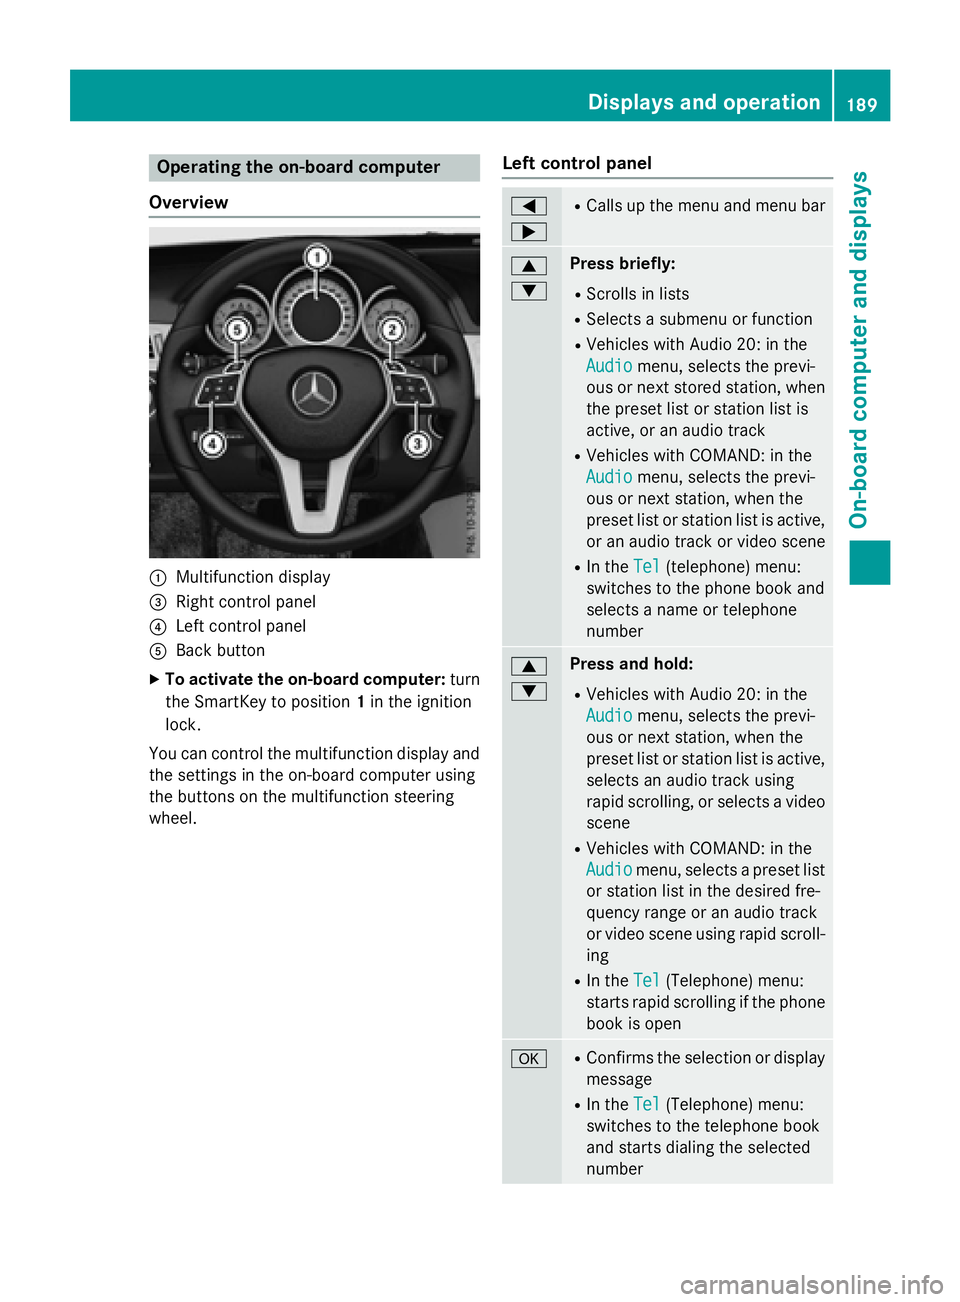
Overview
:Multifunction display
=Right control panel
?Left control panel
ABack button
XTo activate the on-board computer: turn
the SmartKey to position 1in the ignition
lock.
You can control the multifunction display and
the settings in the on-board computer using
the buttons on the multifunction steering
wheel.
Left control panel
=
;RCalls up the menu and menu bar
9
:Press briefly:
RScrolls in lists
RSelects a submenu or function
RVehicles with Audio 20: in the
Audio
menu, selects the previ-
ous or next stored station, when
the preset list or station list is
active, or an audio track
RVehicles with COMAND: in the
Audio
menu, selects the previ-
ous or next station, when the
preset list or station list is active,
or an audio track or video scene
RIn the Tel(telephone) menu:
switches to the phone book and
selects a name or telephone
number
9
:Press and hold:
RVehicles with Audio 20: in the
Audio
menu, selects the previ-
ous or next station, when the
preset list or station list is active,
selects an audio track using
rapid scrolling, or selects a video
scene
RVehicles with COMAND: in the
Audio
menu, selects a preset list
or station list in the desired fre-
quency range or an audio track
or video scene using rapid scroll-
ing
RIn the Tel(Telephone) menu:
starts rapid scrolling if the phone
book is open
aRConfirms the selection or display
message
RIn the Tel(Telephone) menu:
switches to the telephone book
and starts dialing the selected
number
Displays and operation189
On-board computer and displays
Z
Page 237 of 350
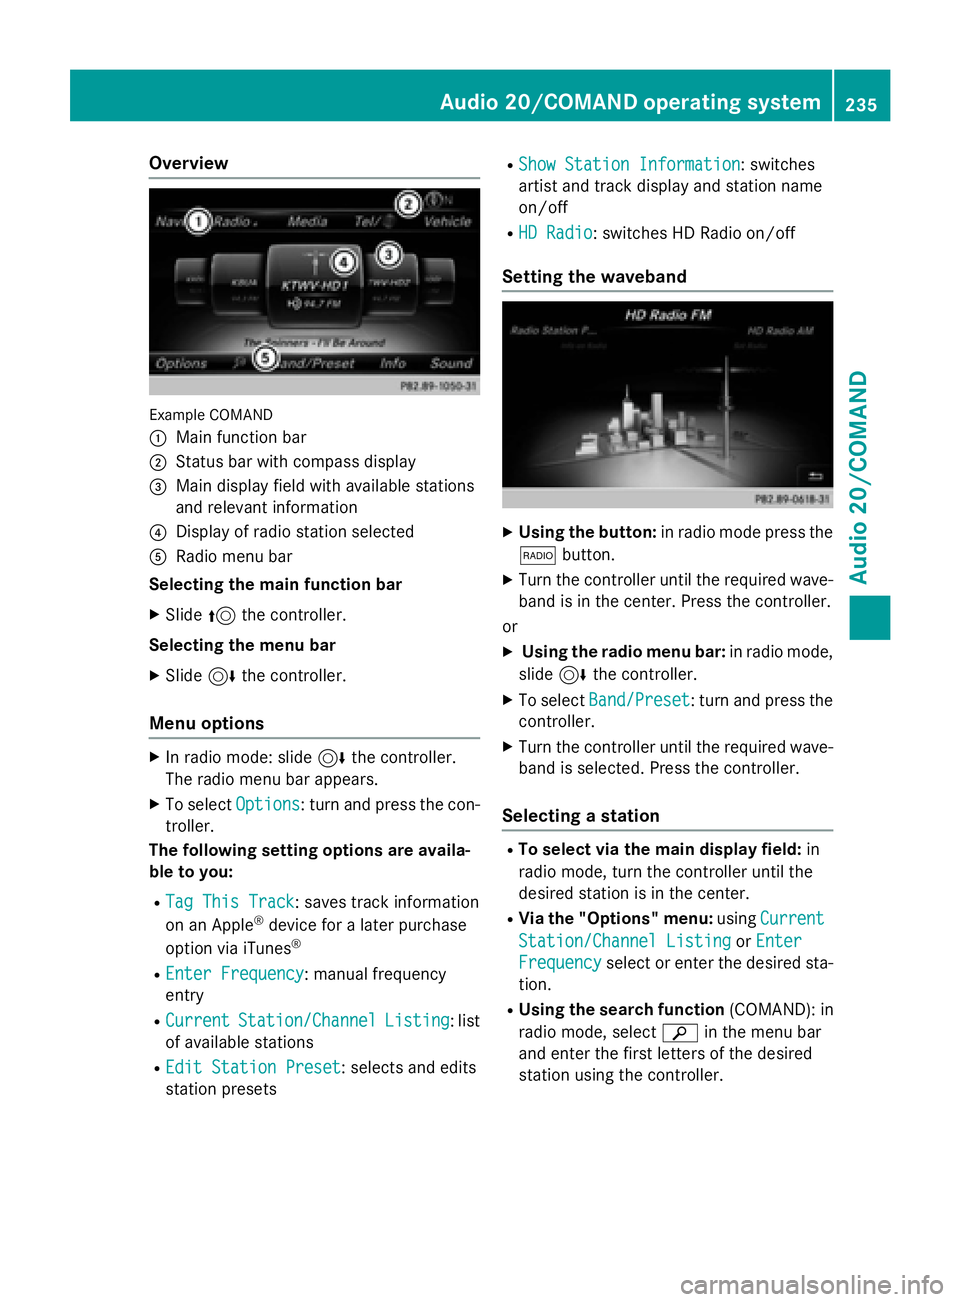
Overview
Example COMAND
:
Main function bar
;Status bar with compass display
=Main display field with available stations
and relevant information
?Display of radio station selected
ARadio menu bar
Selecting the main function bar
XSlide 5the controller.
Selecting the menu bar
XSlide 6the controller.
Menu options
XIn radio mode: slide 6the controller.
The radio menu bar appears.
XTo select Options: turn and press the con-
troller.
The following setting options are availa-
ble to you:
RTag This Track: saves track information
on an Apple®device for a later purchase
option via iTunes®
REnter Frequency: manual frequency
entry
RCurrentStation/ChannelListing: list
of available stations
REdit Station Preset: selects and edits
station presets
RShow Station Information: switches
artist and track display and station name
on/off
RHD Radio: switches HD Radio on/off
Setting the waveband
XUsing the button: in radio mode press the
$ button.
XTurn the controller until the required wave-
band is in the center. Press the controller.
or
XUsing the radio menu bar: in radio mode,
slide 6the controller.
XTo select Band/Preset: turn and press the
controller.
XTurn the controller until the required wave-
band is selected. Press the controller.
Selecting a station
RTo select via the main display field: in
radio mode, turn the controller until the
desired station is in the center.
RVia the "Options" menu: usingCurrent
Station/Channel ListingorEnter
Frequencyselect or enter the desired sta-
tion.
RUsing the search function (COMAND): in
radio mode, select èin the menu bar
and enter the first letters of the desired
station using the controller.
Audio 20/COMAND operating system235
Audio 20/COMAND
Z
Page 280 of 350
cialist workshop if you wish to leave your
vehicle parked for a long period of time.
iRemove the SmartKey if you park the
vehicle and do not require any electrical
consumers. The vehicle will then use very
little energy, thus conserving battery
power.
iIf the power supply has been interrupted,
e.g. if you reconnect the battery, you will
have to:
Rset the clock. Information on setting the
clock can be found in the Digital Opera-
tor's Manual.
On vehicles with COMAND and a naviga-
tion system, the clock is set automati-
cally.
Rreset the function for folding the exterior mirrors in/out automatically, by folding
the mirrors out once (
Ypage 117).
Charging the battery
GWARNING
During charging and jump-starting, explosive
gases can escape from the battery. There is a risk of an explosion.
Particularly avoid fire, open flames, creating
sparks and smoking. Ensure there is sufficient
ventilation while charging and jump-starting.
Do not lean over a battery.
GWARNING
Battery acid is caustic. There is a risk of injury.
Avoid contact with skin, eyes or clothing. Do
not inhale any battery gases. Do not lean over
the battery. Keep children away from batter-
ies. Wash away battery acid immediately with
plenty of clean water and seek medical atten-
tion.
GWARNING
A discharged battery can freeze at tempera-
tures below freezing point. When jump-start-
ing the vehicle or charging the battery, gases
can escape from the battery. There is a risk of an explosion.
Allow the frozen battery to thaw out before
charging it or jump-starting.
!Only use battery chargers with a maxi-
mum charging voltage of 14.8 V.
!Onlycharge the battery using the jump-
starting connection point.
The jump-starting connection point is in the
engine compartment (
Ypage 279).
XOpen the hood.
XConnect the battery charger to the positive
terminal and ground point in the same
order as when connecting the donor bat-
tery in the jump-starting procedure
(
Ypage 279).
If the indicator/warning lamps do not light up
at low temperatures, it is very likely that the
discharged battery has frozen. In this case,
you may neither charge the battery nor jump-
start the vehicle. The service life of a thawed- out battery may be shorter. The starting char-
acteristics may be impaired, especially at low
temperatures. Have the thawed-out battery
checked at a qualified specialist workshop.
Never charge a battery still installed in the
vehicle unless a battery charger unit
approved by Mercedes-Benz is being used . A
battery charger unit specially adapted for
Mercedes-Benz vehicles and tested and
approved by Mercedes-Benz is available as anaccessory. It permits the charging of the bat-
tery in its installed position. Contact an
authorized Mercedes-Benz Center for further
informa
tion and availability. Read the battery
charger's operating instructions before
charging the battery.
278Battery (vehicle)
Roadside Assistance
Page 285 of 350
XTake cover:off the opening.
XScrew in the towing eye clockwise as far as
it will go and tighten it.
Removing the towing eye
XUnscrew and remove the towing eye.
XAttach cover :to the bumper and press
until it engages.
XPlace the towing eye in the vehicle tool kit.
Towing a vehicle with both axles on
the ground
It is important that you observe the safety
instructions when towing away your vehicle
(
Ypage 281).
The automatic transmission automatically
shifts to position Pwhen you open the driver's
or front-passenger door or when you remove
the SmartKey from the ignition lock. In order
to ensure that the automatic transmission
stays in position Nwhen towing the vehicle,
you must observe the following points:
XMake sure that the vehicle is stationary and
the SmartKey in the ignition lock is in posi- tion 0.
XTurn the SmartKey to position 2in the igni-
tion lock.
On vehicles with KEYLESS-GO, use the
SmartKey instead of the Start/Stop button
(
Ypage 139).
XDepress and hold the brake pedal.
XShift the automatic transmission to posi-
tion N.
XRelease the brake pedal.
XRelease the parking brake.
XSwitch on the hazard warning lamps, see
the Digital Operator's Manual.
XLeave the SmartKey in position 2in the
ignition lock.
iWhen towing with the hazard warning
lamps switched on, use the combination
switch as usual to signal a change of direc- tion. In this case, only the indicator lamps
for the direction of travel flash. After reset-
ting the combination switch, the hazard
warning lamp starts flashing again.
Towing the vehicle with the rear axle
raised
!
Vehicles with 4MATIC must not be towed
with either the front or the rear axle raised,
as doing so will damage the transmission.
!Vehicles with automatic transmission
must not be towed with the rear axle raised.
The vehicle/trailer combination may oth-
erwise swerve or even roll over.
!The ignition must be switched off if you
are towing the vehicle with the rear axle
raised. Intervention by ESP
®could other-
wise damage the brake system.
Transporting the vehicle
!
You may only secure the vehicle by the
wheels, not by parts of the vehicle such as
axle or steering components. Otherwise,
the vehicle could be damaged.
The towing eye can be used to pull the vehicle
onto a trailer or transporter for transporting
purposes.
XTurn the SmartKey to position 2in the igni-
tion lock.
XShift the automatic transmission to posi-
tion N.
As soon as the vehicle has been loaded:
XPrevent the vehicle from rolling away by
applying the parking brake.
XShift the automatic transmission to posi-
tion P.
XTurn the SmartKey to position 0in the igni-
tion lock and remove the SmartKey from
the ignition lock.
XSecure the vehicle.
Towing and tow-starting283
Roadside Assistance
Z
Page 294 of 350
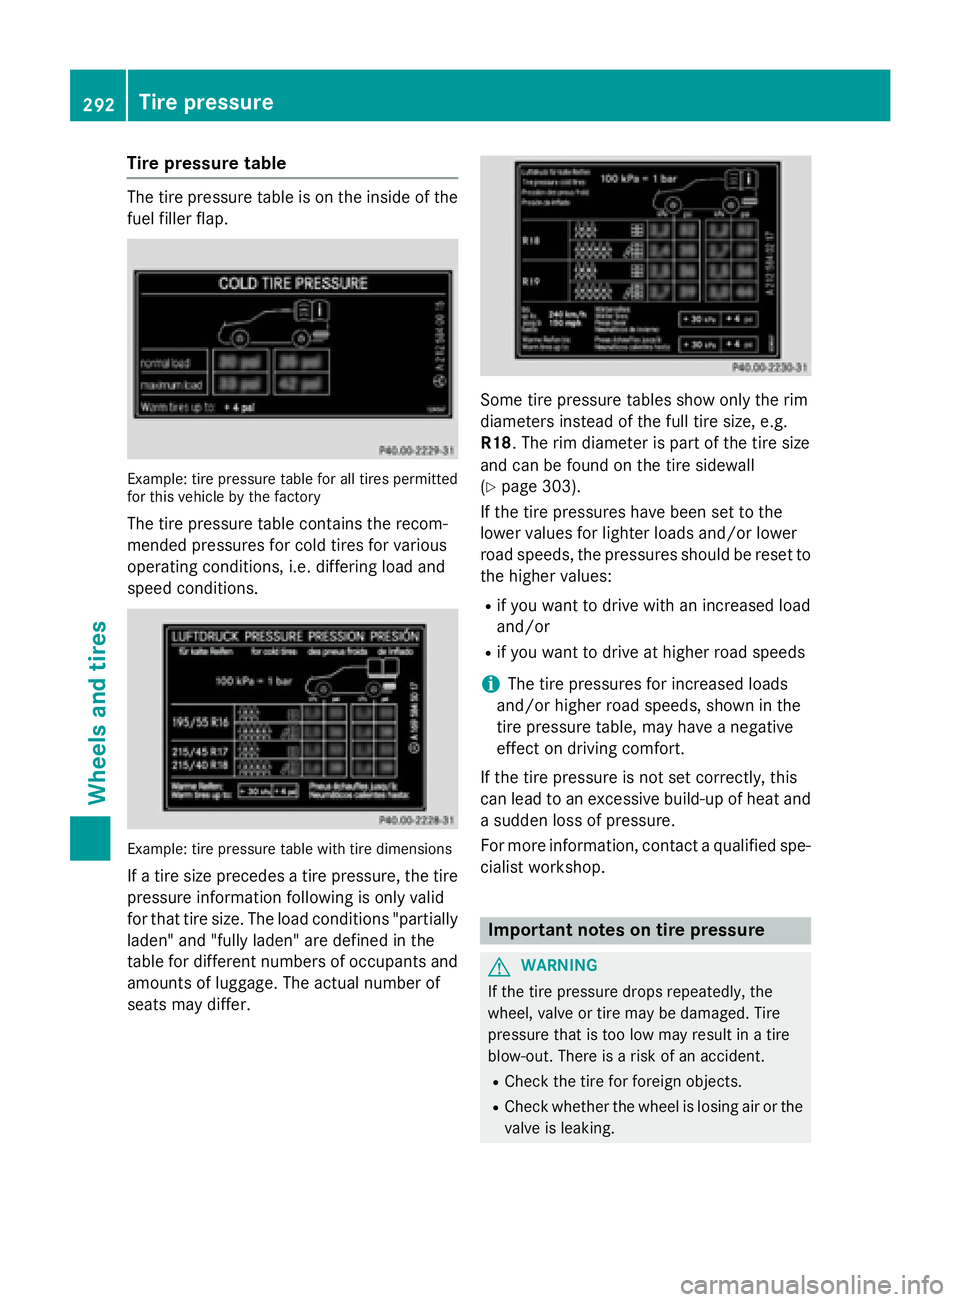
Tire pressure table
The tire pressure table is on the inside of the
fuel filler flap.
Example: tire pressure table for all tires permitted
for this vehicle by the factory
The tire pressure table contains the recom-
mended pressures for cold tires for various
operating conditions, i.e. differing load and
speed conditions.
Example: tire pressure table with tire dimensions
If a tire size precedes a tire pressure, the tire
pressure information following is only valid
for that tire size. The load conditions "partially
laden" and "fully laden" are defined in the
table for different numbers of occupants and
amounts of luggage. The actual number of
seats may differ.
Some tire pressure tables show only the rim
diameters instead of the full tire size, e.g.
R18. The rim diameter is part of the tire size
and can be found on the tire sidewall
(
Ypage 303).
If the tire pressures have been set to the
lower values for lighter loads and/or lower
road speeds, the pressures should be reset to the higher values:
Rif you want to drive with an increased load
and/or
Rif you want to drive at higher road speeds
iThe tire pressures for increased loads
and/or higher road speeds, shown in the
tire pressure table, may have a negative
effect on driving comfort.
If the tire pressure is not set correctly, this
can lead to an excessive build-up of heat and
a sudden loss of pressure.
For more information, contact a qualified spe-
cialist workshop.
Important notes on tire pressure
GWARNING
If the tire pressure drops repeatedly, the
wheel, valve or tire may be damaged. Tire
pressure that is too low may result in a tire
blow-out. There is a risk of an accident.
RCheck the tire for foreign objects.
RCheck whether the wheel is losing air or the valve is leaking.
292Tire pressure
Wheels and tires