2016 MERCEDES-BENZ CLS start stop button
[x] Cancel search: start stop buttonPage 149 of 342
To ensure that the vehicle is secured against
rolling away unintentionally: R
the parking brake must be applied. R
the transmission must be in position P and the
Smartkey must be removed from the ignition
lock. R
the front wheels must be turned towards the
curb on steep uphill or downhill gradients.
Switching off the engine
Important safety notes
G WARNING
The automatic transmission switches to neu-
tral position N when you switch off the engine.
The vehicle may roll away. There is a risk of an
accident.
After switching off the engine, always switch
to parking position P . Prevent the parked vehi-
cle from rolling away by applying the parking
brake.
Vehicles with automatic transmission X
Apply the parking brake firmly. X
All vehicles (except Mercedes-AMG vehi-
cles): shift the transmission to position P .
X
Mercedes-AMG vehicles: when the vehicle
is stationary, press button �C .X
With the Smartkey: turn the Smartkey to
position 0 in the ignition lock and remove it.
The immobilizer is activated. X
With KEYLESS-GO: press the KEYLESS-GO
Start/Stop button ( Y
page 127).
The engine stops and all the indicator lamps in
the instrument cluster go out. When the driver's door is closed, this corre-
sponds to Smartkey position 1 . When the
driver's door is open, this corresponds to
Smartkey position 0 : "Smartkey removed".
If you switch the engine off with the transmis-
sion in position R or D , the automatic transmis-
sion shifts to N automatically.
With the Smartkey: if you then open the driv-
er's door or the front-passenger door or remove
the Smartkey from the ignition, the automatic
transmission shifts to P automatically.
With KEYLESS-GO: if you then open the driver's
or front-passenger door, the automatic trans-
mission shifts to P .
If you want the automatic transmission to
remain in neutral N , e.g. when having the vehicle
cleaned in an automatic car wash with a towing
system: X
Vehicles with KEYLESS-GO: remove the
Start/Stop button from the ignition lock. X
Insert the Smartkey into the ignition lock. X
All vehicles: switch the ignition on. X
Depress the brake pedal and keep it
depressed. X
Shift to neutral N . X
Release the brake pedal. X
Release the parking brake. X
Switch off the ignition and leave the Smartkey
in the ignition lock.
The engine can be switched off while the vehicle
is in motion by pressing and holding the Start/
Stop button for about three seconds. This func-
tion operates independently of the ECO start/
stop automatic engine switch-off function.
Parking brake
G WARNING
If you must brake the vehicle with the parking
brake, the braking distance is considerably
longer and the wheels could lock. There is an
increased danger of skidding and accidents.
Only use the parking brake to brake the vehi-
cle when the service brake is faulty. Do not
apply the parking brake too firmly. If the
wheels lock, release the parking brake until
the wheels begin turning again. Parking 147
Driving and parking Z
Page 153 of 342
Wet roads If you have driven for a long time in heavy rain
without braking, there may be a delayed reac-
tion from the brakes when braking for the first
time. This may also occur after the vehicle has
been washed or driven through deep water.
You have to depress the brake pedal more
firmly. Maintain a greater distance from the
vehicle in front.
After driving on a wet road or having the vehicle
washed, brake firmly while paying attention to
the traffic conditions. This will warm up the
brake discs, thereby drying them more quickly
and protecting them against corrosion.
Limited braking performance on salt-
treated roads If you drive on salted roads, a layer of salt resi-
due may form on the brake discs and brake
pads. This can result in a significantly longer
braking distance. R
In order to prevent any salt build-up, apply the
brakes occasionally while paying attention to
the traffic conditions. R
Carefully depress the brake pedal and the
beginning and end of a journey. R
Maintain a greater distance to the vehicle
ahead.
Servicing the brakes
! The brake fluid level may be too low, if: R
if the red brake warning lamp lights up in
the instrument cluster and R
you hear a warning tone while the engine is
running
Observe additional warning messages in the
multifunction display.
The brake fluid level may be too low due to
brake pad wear or leaking brake lines.
Have the brake system checked immediately.
Consult a qualified specialist workshop to
arrange this.
! Vehicles with 4MATIC: function or per-
formance tests may only be carried out on a 2-
axle dynamometer. If you wish to operate the
vehicle on such a dynamometer, please con-
sult a qualified specialist workshop in
advance. You could otherwise damage the
drive train or the brake system. ! Vehicles with 4MATIC: as the ESP ®
sys-
tem operates automatically, the engine and
the ignition must be switched off (SmartKey in
position 0 or 1 in the ignition lock or Start/
Stop button in position 0 or 1 ) while the park-
ing brake is being tested on a brake dyna-
mometer.
Braking maneuvers triggered automatically
by ESP ®
may seriously damage the brake sys-
tem.
! Vehicles with 4MATIC: as the ESP ®
sys-
tem operates automatically, the engine and
the ignition system must be switched off
(SmartKey in position 0 or 1 in the ignition
lock or Start/Stop button in position 0 or 1 )
when: R
testing the parking brake on a brake dyna-
mometer. R
you intend to have the vehicle towed with
one of the axles raised.
Braking maneuvers triggered automatically
by ESP ®
may seriously damage the brake sys-
tem.
All checks and maintenance work on the brake
system must be carried out at a qualified spe-
cialist worksho p.
Ha ve brake pads installed and brake fluid
replaced at a qualified specialist workshop.
If the brake system has only been subject to
moderate loads, you should test the functional-
ity of your brakes at regular intervals. To do so,
press firmly on the brake pedal when driving at a
high speed. This improves the grip of the brake
pads.
You can find a description of Brake Assist (BAS)
on ( Y
page 65) or of BAS PLUS on ( Y
page 65).
The braking characteristics of the vehicle can be
seriously impaired if: R
brake pads other than those recommended
are installed R
the recommended brake fluid is not used
Safe braking can no longer be guaranteed.
AMG high-performance and ceramic
brakes
The high-performance brake system is only
installed on the Mercedes-AMG
CLS 63 S 4MATIC model. Driving tips 151
Driving and parking Z
Page 177 of 342
i Note that Active Parking Assist cannot
measure the length of a parking space if it is at
right angles to the direction of travel. You will
need to judge whether your vehicle will fit into
the parking space.
When driving at speeds below 19 mph
(30 km/h), you will see the parking symbol as a
status indicator in the instrument cluster. When
a parking space has been detected, an arrow
towards the right or the left also appears. By
default, Active Parking Assist only displays park-
ing spaces on the front-passenger side. Parking
spaces on the driver's side are displayed as
soon as the turn signal on the driver's side is
activated. When parking on the driver's side,
this must remain switched on until you acknowl-
edge the use of Active Parking Assist by press-
ing the �v button on the multifunction steer-
ing wheel. The system automatically determines
whether the parking space is parallel or at right
angles to the direction of travel.
A parking space is displayed while you are driv-
ing past it, and until you are approximately 50 ft
(15 m) away from it.
Parking
G WARNING
If you leave the vehicle when it is only being
braked by Active Parking Assist it could roll
away if: R
there is a malfunction in the system or in
the voltage supply. R
the electrical system in the engine com-
partment, the battery or the fuses have
been tampered with. R
the battery is disconnected. R
the accelerator pedal has been depressed,
e.g. by a vehicle occupant.
There is a risk of an accident.
Before leaving the vehicle, always secure it
against rolling away.
i When PARKTRONIC detects obstacles,
Active Parking Assist brakes automatically
during the parking process. You are respon-
sible for braking in good time. X
Stop the vehicle when the parking space sym-
bol shows the desired parking space in the
instrument cluster. X
Shift the transmission to position R .
The Start Park Assist? Yes: OK No:
�8 message appears in the multifunction
display. X
To cancel the procedure: press the �8
button on the multifunction steering wheel or
pull away.
or X
To park using Active Parking Assist: press
the �v button on the multifunction steering
wheel.
The Park Assist Active Accelerate
and Brake Observe Surroundings mes-
sage appears in the multifunction display. X
Let go of the multifunction steering wheel. X
Back up the vehicle, being ready to brake at all
times. When backing up, drive at a speed
below approximately 6 mph (10 km/h). Oth-
erwise Active Parking Assist will be canceled.
Active Parking Assist brakes the vehicle to a
standstill when the vehicle approaches the
rear border of the parking space.
Maneuvering may be required in tight parking
spaces.
The Park Assist Active Select D
Observe Surroundings message appears in
the multifunction display. X
Shift the transmission to position D while the
vehicle is stationary.
Active Parking Assist immediately steers in
the other direction.
The Park Assist Active Accelerate
and Brake Observe Surroundings mes-
sage appears in the multifunction display.
i You will achieve the best results by waiting
for the steering procedure to complete before
pulling away. X
Drive forwards and be ready to brake at all
times.
Active Parking Assist brakes the vehicle to a
standstill when the vehicle is in the parking
space.
The Park Assist Active Select R
Observe Surroundings message appears in
the multifunction display.
Further transmission shifts may be necessary.
As soon as the parking procedure is complete,
the Park Assist Disabled message appearsDriving systems 175
Driving and parking Z
Page 205 of 342
Rejecting or ending a call X
Press the �v button on the steering wheel
to reject or end a call.
Selecting an entry in the phone book X
Press the �Y or �e button on the steering
wheel to select the Tel menu.X
Press the �c , �d or �v button to
switch to the phone book. X
Authorize access to the phone book on the
phone. X
Press the �c or �d button to select the
desired name.
or X
To start rapid scrolling: press and hold �d
or �c for longer than one second.
The names in the phone book are displayed
quickly one after the other.
Rapid scrolling stops when you release the
button or reach the end of the list. X
If only one telephone number is stored for
a name: press the �a or �v button to
start dialing.
or X
If there is more than one number for a
particular name: press the �a or �v
button to display the numbers. X
Press the �c or �d button to select the
number you want to dial. X
Press the �a or �v button to start dialing.
or X
To exit the telephone book: press the �v
or �8 button.
Redialing The on-board computer saves the last names or
numbers dialed in the redial memory. X
Press the �Y or �e button on the steering
wheel to select the Tel menu.X
Press the �a button to switch to the redial
memory. X
Press the �c or �d button to select the
desired name or number. X
Press the �a or �v button to start dialing.
or X
To exit the redial memory: press the �v
or �8 button. Assistance menu
Introduction Depending on the equipment installed in the
vehicle, you have the following options in the
DriveAssist menu: R
Displaying the assistance graphic
( Y
page 203) R
Deactivating/activating ESP ®
(except
Mercedes ‑ AMG vehicles) ( Y
page 204)R
Activating/deactivating Steering Assist and
Stop&Go Pilot of DISTRONIC PLUS
( Y
page 204) R
Activating/deactivating PRE-SAFE ®
Brake
( Y
page 204) R
Activating/deactivating COLLISION PREVEN-
TION ASSIST PLUS ( Y
page 204)R
Activating/deactivating ATTENTION ASSIST
( Y
page 205) R
Activating/deactivating Blind Spot Assist or
Active Blind Spot Assist ( Y
page 205)R
Activating/deactivating Lane Keeping Assist
or Active Lane Keeping Assist ( Y
page 205)
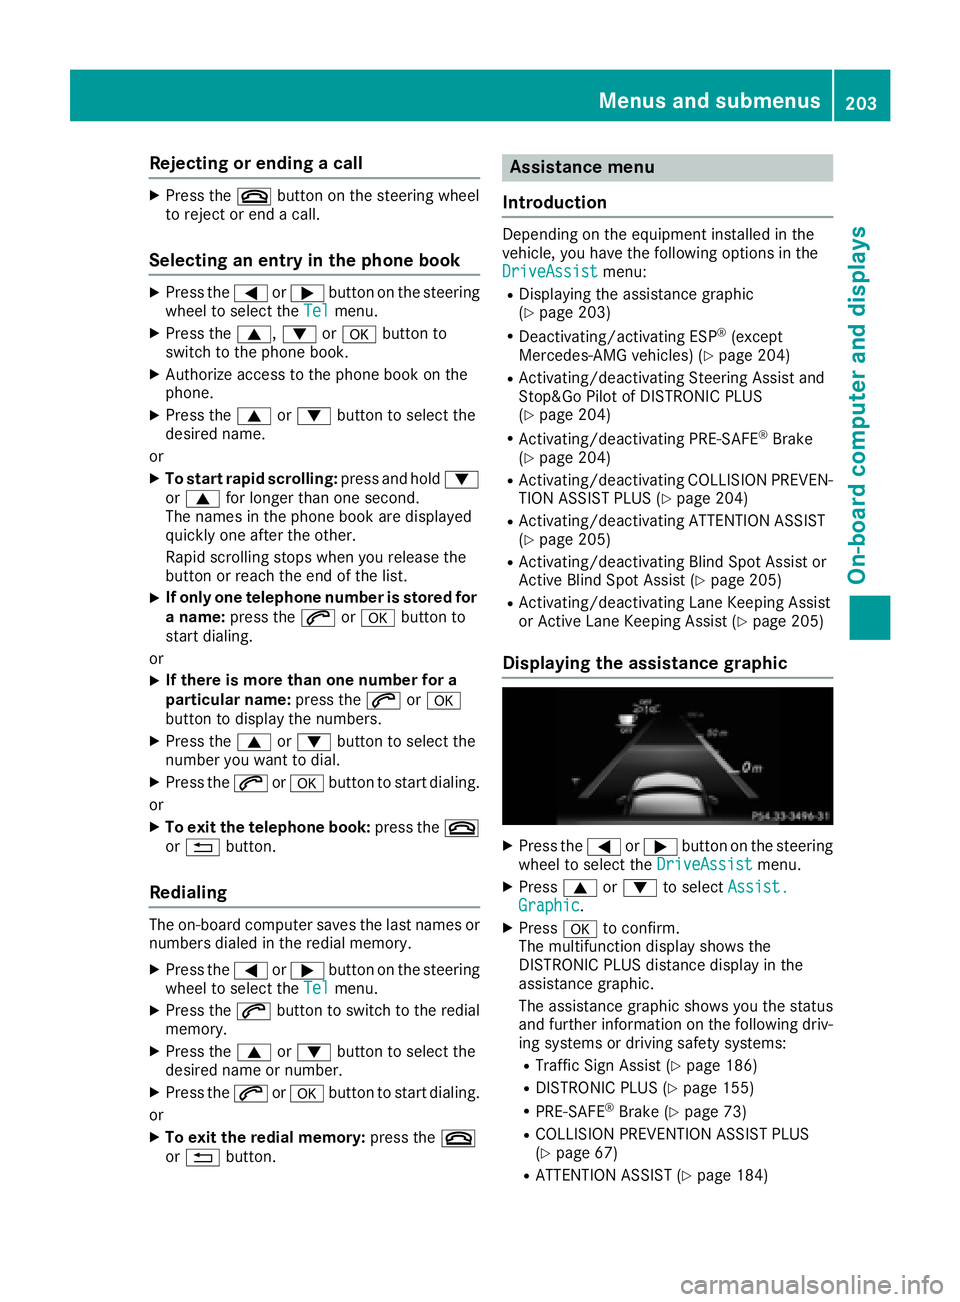
Displaying the assistance graphic X
Press the �Y or �e button on the steering
wheel to select the DriveAssist menu.X
Press �c or �d to select Assist.
Graphic . X
Press �v to confirm.
The multifunction display shows the
DISTRONIC PLUS distance display in the
assistance graphic.
The assistance graphic shows you the status
and further information on the following driv-
ing systems or driving safety systems: R
Traffic Sign Assist ( Y
page 186)R
DISTRONIC PLUS ( Y
page 155)R
PRE-SAFE ®
Brake ( Y
page 73)R
COLLISION PREVENTION ASSIST PLUS
( Y
page 67) R
ATTENTION ASSIST ( Y
page 184)Menus and submenus 203
On-board computer and displays Z
Page 279 of 342
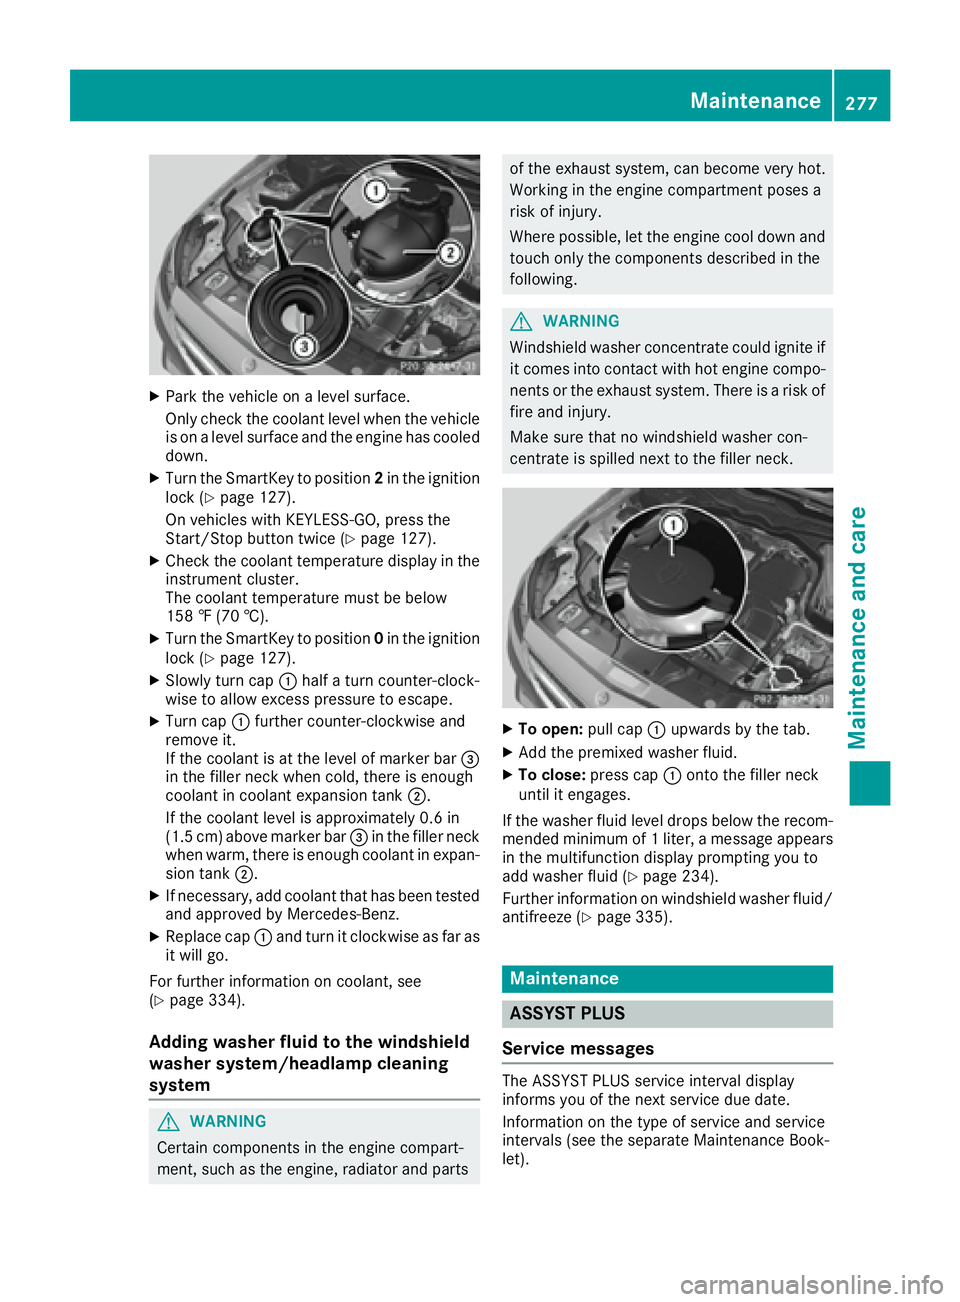
X
Park the vehicle on a level surface.
Only check the coolant level when the vehicle
is on a level surface and the engine has cooled
down. X
Turn the SmartKey to position 2 in the ignition
lock ( Y
page 127).
On vehicles with KEYLESS-GO, press the
Start/Stop button twice ( Y
page 127).X
Check the coolant temperature display in the
instrument cluster.
The coolant temperature must be below
158 ‡ (70 †). X
Turn the SmartKey to position 0 in the ignition
lock ( Y
page 127).X
Slowly turn cap �C half a turn counter-clock-
wise to allow excess pressure to escape. X
Turn cap �C further counter-clockwise and
remove it.
If the coolant is at the level of marker bar �
Page 281 of 342
Care
General notes
H Environmental note
Dispose of empty packaging and cleaning
cloths in an environmentally responsible man-
ner.
! For cleaning your vehicle, do not use any of
the following: R
dry, rough or hard cloths R
abrasive cleaning agents R
solvents R
cleaning agents containing solvents
Do not scrub.
Do not touch the surfaces or protective films
with hard objects, e.g. a ring or ice scraper.
You could otherwise scratch or damage the
surfaces and protective film.
! Do not park the vehicle for an extended
period straight after cleaning it, particularly
after having cleaned the wheels with wheel
cleaner. Wheel cleaners could cause
increased corrosion of the brake discs and
brake pads/linings. For this reason, you
should drive for a few minutes after cleaning.
Braking heats the brake discs and the brake
pads/linings, thus drying them. The vehicle
can then be parked.
Regular care of your vehicle is a condition for
retaining the quality in the long term.
Use care products and cleaning agents recom-
mended and approved by Mercedes-Benz.
Washing the vehicle and cleaning the
paintwork
Automatic car wash
G WARNING
Braking efficiency is reduced after washing
the vehicle. There is a risk of an accident.
After the vehicle has been washed, brake
carefully while paying attention to the traffic
conditions until full braking power is restored. ! If DISTRONIC PLUS or the HOLD function is
activated, the vehicle brakes automatically in
certain situations.
To prevent damage to the vehicle, deactivate
DISTRONIC PLUS and the HOLD function in
the following or other similar situations: R
when towing the vehicle R
in the car wash
! Never clean your vehicle in a Touchless
Automatic Car Wash as these use special
cleaning agents. These cleaning agents can
damage the paintwork or plastic parts.
! Make sure that: R
the side windows and the sliding sunroof
are fully closed. R
the ventilation/heating is switched off (the
OFF button has been pressed). R
the windshield wiper switch is in position 0 .
Otherwise, the vehicle might be damaged.
! In car washes with a towing mechanism,
make sure that the automatic transmission is
in transmission position N , otherwise the
vehicle could be damaged. R
Vehicles with a SmartKey:
Do not remove the SmartKey from the igni-
tion lock. Do not open the driver's door or
front-passenger door when the en gine is
switc hed off. Otherwise, the automatic
transmission selects park position P auto-
matically and locks the wheels. You can
prevent this by shifting the automatic trans-
mission to N beforehand. R
Vehicles with KEYLESS-GO:
Do not open the driver's door or front-
passenger door when the engine is
switched off. Otherwise, the automatic
transmission selects park position P auto-
matically and locks the wheels.
Observe the following to make sure that the
automatic transmission stays in position N :X
Make sure the vehicle is stationary and the
ignition is switched off. X
Turn the SmartKey to position 2 in the ignition
lock ( Y
page 127).
Use the SmartKey instead of the Start/Stop
button on vehicles with KEYLESS-GO. X
Depress and hold the brake pedal. X
Shift the automatic transmission to position
N . Care 279
Maintenance and care Z
Page 289 of 342
i Example: equipment and country-specific
variations possible.
Vehicles with alloy wheels and hub caps On vehicles with alloy wheels and hub caps, a
socket is also provided.
Flat tire
Preparing the vehicle Your vehicle may be equipped with: R
MOExtended tires (tires with run-flat proper-
ties) ( Y
page 287)
Vehicle preparation is not necessary on vehi-
cles with MOExtended tires R
a TIREFIT kit ( Y
page 286)R
an emergency spare wheel ( Y
page 326)
Vehicles equipped with MOExtended tires are
not equipped with a TIREFIT kit at the factory. It
is therefore recommended that you additionally
equip your vehicle with a TIREFIT kit if you mount
tires that do not feature run-flat properties, e.g.
winter tires. A TIREFIT kit may be obtained from
a qualified specialist workshop.
Information on changing and mounting wheels
( Y
page 320). X
Stop the vehicle on solid, non-slippery and
level ground, as far away as possible from
traffic. X
Switch on the hazard warning lamps. X
Secure the vehicle against rolling away
( Y
page 146). X
If possible, bring the front wheels into the
straight-ahead position. X
Vehicles with AIRMATIC: make sure that "nor-
mal" level is selected ( Y
page 166).X
Switch off the engine. X
Remove the SmartKey from the ignition lock.
or, on vehicles with KEYLESS ‑ GO:X
Open the driver's door.
T he on-board electronics now have status 0 .
This is the same as the SmartKey having been
removed. X
Remove the Start/Stop button from the igni-
tion lock ( Y
page 127).X
Make sure that the passengers are not endan-
gered as they do so. Make sure that no one is
near the danger area while a wheel is being changed. Anyone who is not directly assisting
in the wheel change should, for example,
stand behind the barrier. X
Get out of the vehicle. Pay attention to traffic
conditions when doing so. X
Close the driver's door.
MOExtended tires (tires with run-flat
properties)
General notes With MOExtended tires (tires with run flat char-
acteristics), you can continue to drive your vehi-
cle even if there is a total loss of pressure in one
or more tires. The affected tire must not show
any clearly visible damage.
You can recognize MOExtended tires by the
MOExtended marking which appears on the
sidewall of the tire. You will find this marking
next to the tire size designation, the load-bear-
ing capacity and the speed index ( Y
page 315).
MOExtended tires may only be used in conjunc-
tion with an active tire pressure loss warning
system or with an active tire pressure monitor.
If a pressure loss warning message appears
in the multifunction display: R
observe the instructions in the display mes-
sages ( Y
page 230). R
check the tire for damage. R
if driving on, observe the following notes.
The driving distance possible in run-flat mode is
approximately 50 miles (80 km) when the vehi-
cle is partially laden. When the vehicle is fully
laden it is approximately 19 miles (30 km).
In addition to the vehicle load, the driving dis-
tance possible depends upon: R
vehicle speed R
road condition R
outside temperature
The driving distance p ossible in run-flat mode
may be reduced by extreme driving conditions
or maneuvers, or it can be increased through a
moderate style of driving.
The driving distance possible in run-flat mode is
counted from the moment the tire pressure loss
warning appears in the multifunction display.
You must not exceed a maximum speed of
50 mph (80 km/h). Flat tire 287
Breakdown assistance
Page 300 of 342
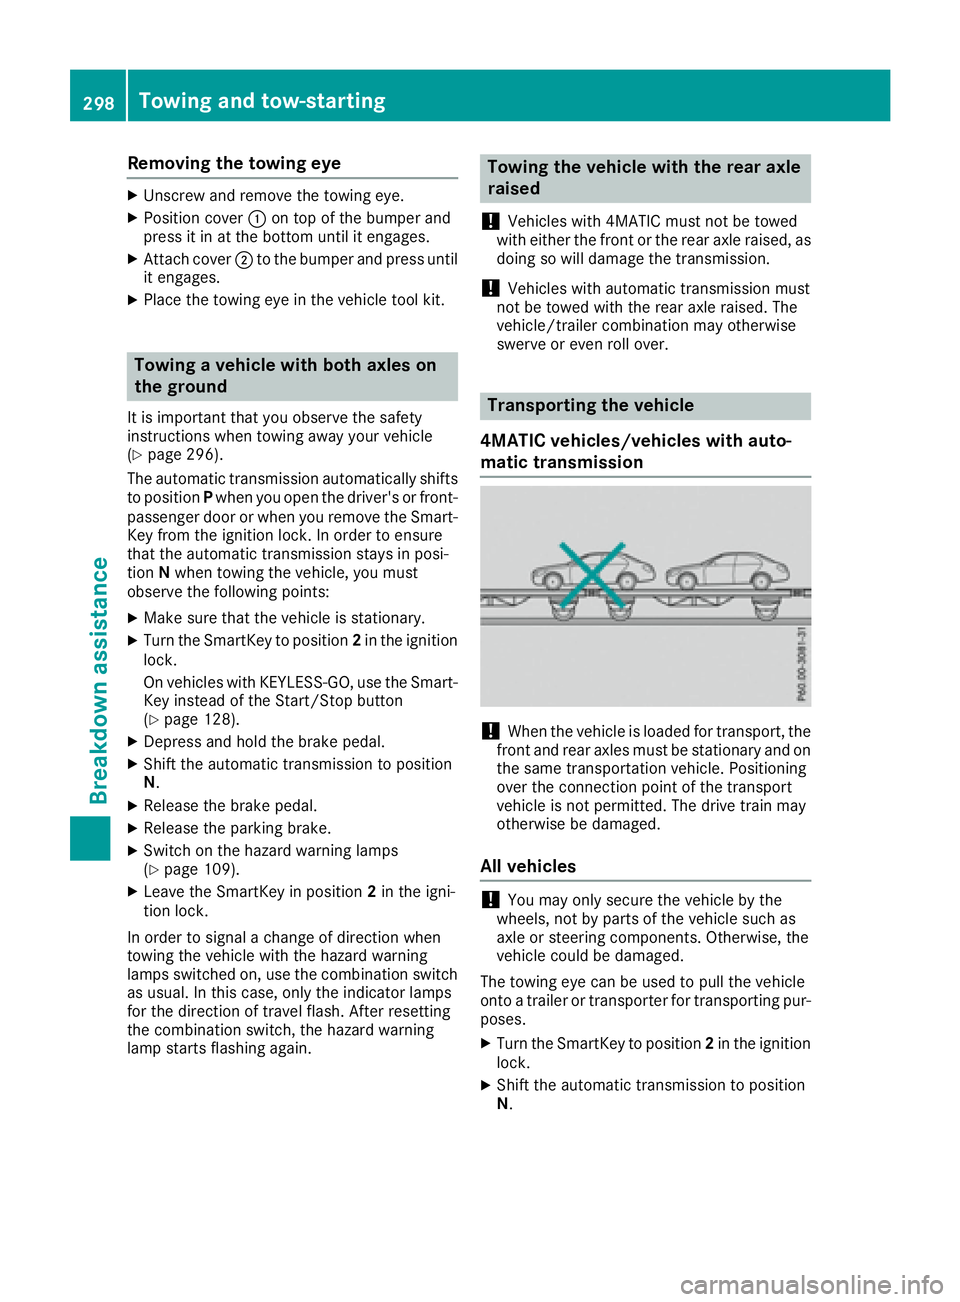
Removing the towing eye X
Unscrew and remove the towing eye. X
Position cover �C on top of the bumper and
press it in at the bottom until it engages. X
Attach cover �D to the bumper and press until
it engages. X
Place the towing eye in the vehicle tool kit.
Towing a vehicle with both axles on
the ground It is important that you observe the safety
instructions when towing away your vehicle
( Y
page 296).
The automatic transmission automatically shifts
to position P when you open the driver's or front-
passenger door or when you remove the Smart-
Key from the ignition lock. In order to ensure
that the automatic transmission stays in posi-
tion N when towing the vehicle, you must
observe the following points: X
Make sure that the vehicle is stationary. X
Turn the SmartKey to position 2 in the ignition
lock.
On vehicles with KEYLESS-GO, use the Smart-
Key instead of the Start/Stop button
( Y
page 128).X
Depress and hold the brake pedal. X
Shift the automatic transmission to position
N . X
Release the brake pedal. X
Release the parking brake. X
Switch on the hazard warning lamps
( Y
page 109).X
Leave the SmartKey in position 2 in the igni-
tion lock.
In order to signal a change of direction when
towing the vehicle with the hazard warning
lamps switched on, use the combination switch
as usual. In this case, only the indicator lamps
for the direction of travel flash. After resetting
the combination switch, the hazard warning
lamp starts flashing again. Towing the vehicle with the rear axle
raised
! Vehicles with 4MATIC must not be towed
with either the front or the rear axle raised, as
doing so will damage the transmission.
! Vehicles with automatic transmission must
not be towed with the rear axle raised. The
vehicle/trailer combination may otherwise
swerve or even roll over.
Transporting the vehicle
4MATIC vehicles/vehicles with auto-
matic transmission
! When the vehicle is loaded for transport, the
front and rear axles must be stationary and on
the same transportation vehicle. Positioning
over the connection point of the transport
vehicle is not permitted. The drive train may
otherwise be damaged.
All vehicles
! You may only secure the vehicle by the
wheels, not by parts of the vehicle such as
axle or steering components. Otherwise, the
vehicle could be damaged.
The towing eye can be used to pull the vehicle
onto a trailer or transporter for transporting pur-
poses. X
Turn the SmartKey to position 2 in the ignition
lock. X
Shift the automatic transmission to position
N .298
Towing and tow-starting
Breakdown assistance