2016 MERCEDES-BENZ CLS-Class display
[x] Cancel search: displayPage 219 of 246
XTo select state/province or city: enter the
first few letters by turning and pressing the
controller.
XTo switch to the list without the character
bar: slide5or select ok
.
XTo delete an entry: select 2in the char-
acter bar and press the controller.
Pressing briefly deletes the last letter
entered.
Pressing and holding longer deletes the
entire entry.
XTo select the state/province or city from
the list: turn and press the controller.
After selecting a state (or province) the list
of locations appears.
After selecting a location, the information
chart displays the weather forecast for the
selected location. The data is supplied by
the nearest weather station.
Option 2: selecting the area in the
weather map
XCall up the weather map (Ypage 217).
XMove the weather map so that the cross-
hair is over the desired area (
Ypage 218).
XPress the controller.
The information chart shows the weather
forecast for the selected area. The data is
supplied by the nearest weather station.
Memory functions
Storing the area in the weather memory
You can save locations that are called up fre-
quently in ten preset positions (0, 1-9) in the
weather memory.
XIn the weather memory: select the area
for the weather forecast (
Ypage 215).
The selected location appears at the top in
the status bar.
XTo select Locationin the information
chart: turn and press the controller.
XSelect Preset.
XSelect a preset using the controller.
XPress and hold the controller until you hear
a tone.
The area is entered on the selected preset.
XTo store rapidly: in the daily forecast
(
Ypage 214) press and hold a number key,
e.g. l, until the preset position number
is shown in the status bar in front of the
area name.
iYou can also use this function in the five-
day forecast (
Ypage 214), and in the
detailed information view (
Ypage 215).
Selecting an area from the weather
memory
XDirectly from the weather memory:
select Location
from the information
chart: turn and press the controller.
XSelect Preset.
XSelect the memory position which contains
the location you require.
The weather data for the selected area is
displayed.
XQuick select: if a location is stored in the
weather memory, for example when the
current forecast display is active, briefly
press a number key, e.g. l.
The weather data for the selected area is
displayed.
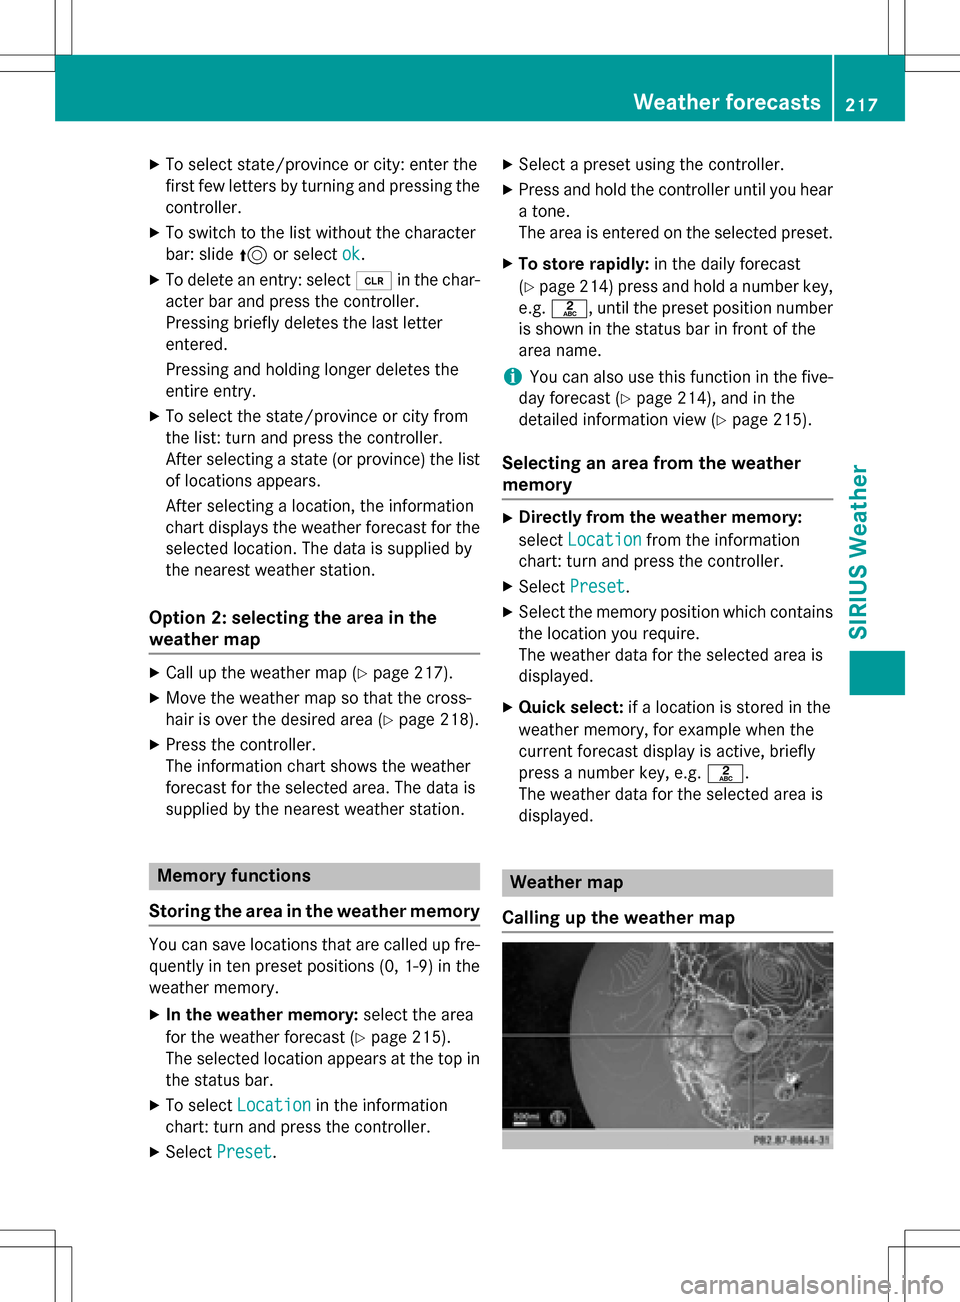
Weather map
Calling up the weather map
Weather forecasts217
SIRIUS Weather
Page 220 of 246
XTo selectMapin the information chart: turn
and press the controller.
The weather map is shown on a 500-mi
(500-km) scale. The crosshair highlights
the weather station that supplies the cur-
rent weather data.
Moving the weather map
XSlide 4 or1 the controller.
The weather map moves in the correspond-
ing direction under the crosshair.
Changing the scale
XTurn the controller.
The scale bar appears.
XTurn until the desired scale is set.
Showing/hiding the menu in the
weather map
XTo show: press the controller.
XTo hide:slide5the controller.
Selecting a weather station in the map
XMove the weather map and crosshair to the
desired position (
Ypage 218).
XTo show the menu: press the controller.
XTo select Weather Table: press the con-
troller.
COMAND receives the weather data for the
selected position from the nearest weather
station and displays it automatically as a
daily forecast.
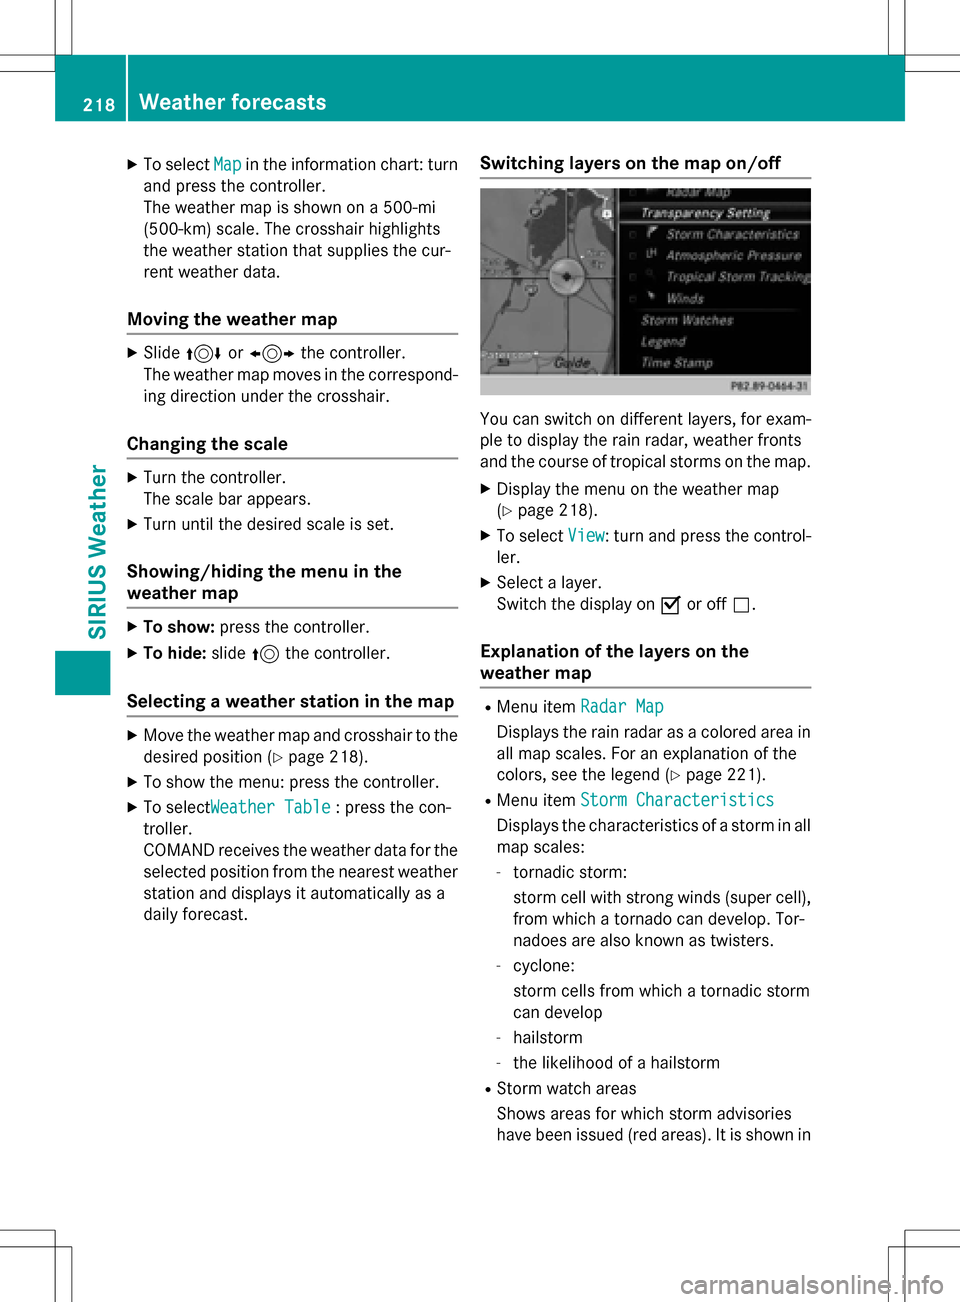
Switching layers on the map on/off
You can switch on different layers, for exam-
ple to display the rain radar, weather fronts
and the course of tropical storms on the map.
XDisplay the menu on the weather map
(
Ypage 218).
XTo select View: turn and press the control-
ler.
XSelect a layer.
Switch the display on Oor off ª.
Explanation of the layers on the
weather map
RMenu item Radar Map
Displays the rain radar as a colored area in
all map scales. For an explanation of the
colors, see the legend (
Ypage 221).
RMenu item Storm Characteristics
Displays the characteristics of a storm in all
map scales:
-tornadic storm:
storm cell with strong winds (super cell),
from which a tornado can develop. Tor-
nadoes are also known as twisters.
-cyclone:
storm cells from which a tornadic storm
can develop
-hailstorm
-the likelihood of a hailstorm
RStorm watch areas
Shows areas for which storm advisories
have been issued (red areas). It is shown in
218Weather forecasts
SIRIUS Weather
Page 221 of 246
map scales 50 mi (50 km), 200 mi (200 km)
and 500 mi (500 km).
RMenu itemAtmospheric Pressure
Shows the position of high and low-pres-
sure areas (H, L), weather fronts and iso-
bars It is shown in map scales 200 mi
(200 km) and 500 mi (500 km).
RMenu itemTropical Storm Tracking
Shows the direction and propagation speed
(track) of a tropical storm in all map scales
with information on times and strength.
RMenu item Winds
Shows the wind direction and wind speed in
map scale of 5 mi (5 km).
Sample displays of weather data in the
map
Displaying the rain radar:
XActivate the Radar Mapdisplay level
(
Ypage 218).
The rain radar image is then displayed if
weather data is available.
iYou can call up the legend for the precip-
itation radar (
Ypage 221).
The transparency of the precipitation radar
map display level can be adjusted in five
stages.
Displaying storm characteristics:
XActivate the StormCharacteristicsdis-
play level (
Ypage 218).
If weather data is available, the weather
map will then display the storm character-
istics. You can call up the legend for storms
(
Ypage 221).
The following information on a storm cell is
displayed (if available):
Rcharacteristics of the storm cell
Rdate and time of observation (time
stamp)
Rdirectional movement speed and path
Propagation speed: the speed at which the
storm cell is advancing.
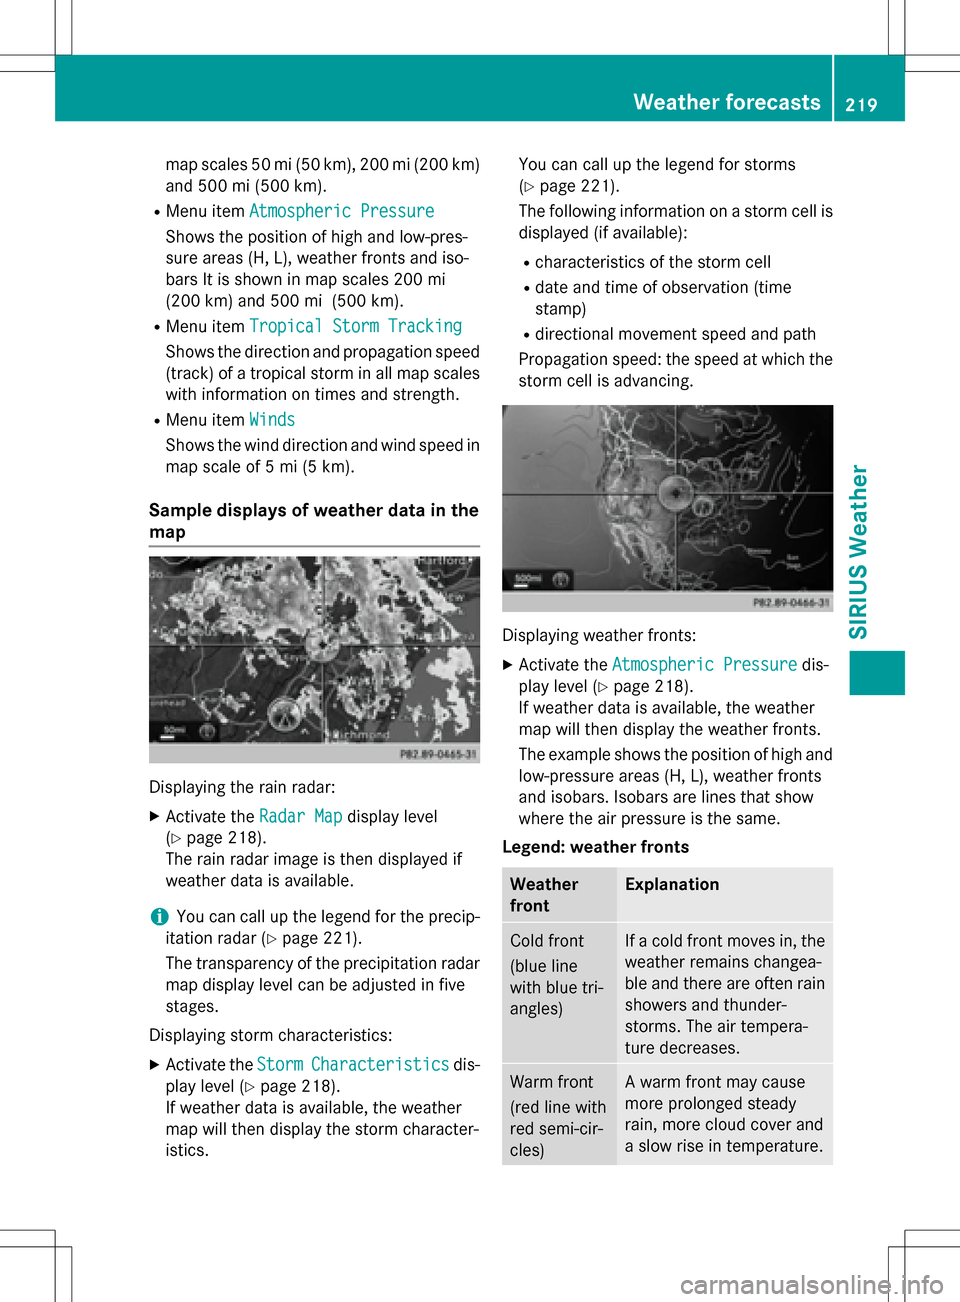
Displaying weather fronts:
XActivate the Atmospheric Pressuredis-
play level (
Ypage 218).
If weather data is available, the weather
map will then display the weather fronts.
The example shows the position of high and
low-pressure areas (H, L), weather fronts
and isobars. Isobars are lines that show
where the air pressure is the same.
Legend: weather fronts
Weather
frontExplanation
Cold front
(blue line
with blue tri-
angles)If a cold front moves in, the
weather remains changea-
ble and there are often rain
showers and thunder-
storms. The air tempera-
ture decreases.
Warm front
(red line with
red semi-cir-
cles)A warm front may cause
more prolonged steady
rain, more cloud cover and
a slow rise in temperature.
Weather forecasts219
SIRIUS Weather
Page 222 of 246
Weather
frontExplanation
Stationary
front
(red and blue
line with red
semi-circles
and blue tri-
angles)The weather front moves
minimally. The weather
remains changeable in this
area.
Occlusion
(purple line
with purple
semi-circles
and trian-
gles)When the faster cold front
catches up and joins the
warm front ahead of it, an
occluded front is formed.
The weather remains
changeable and rainy
within an occlusion.
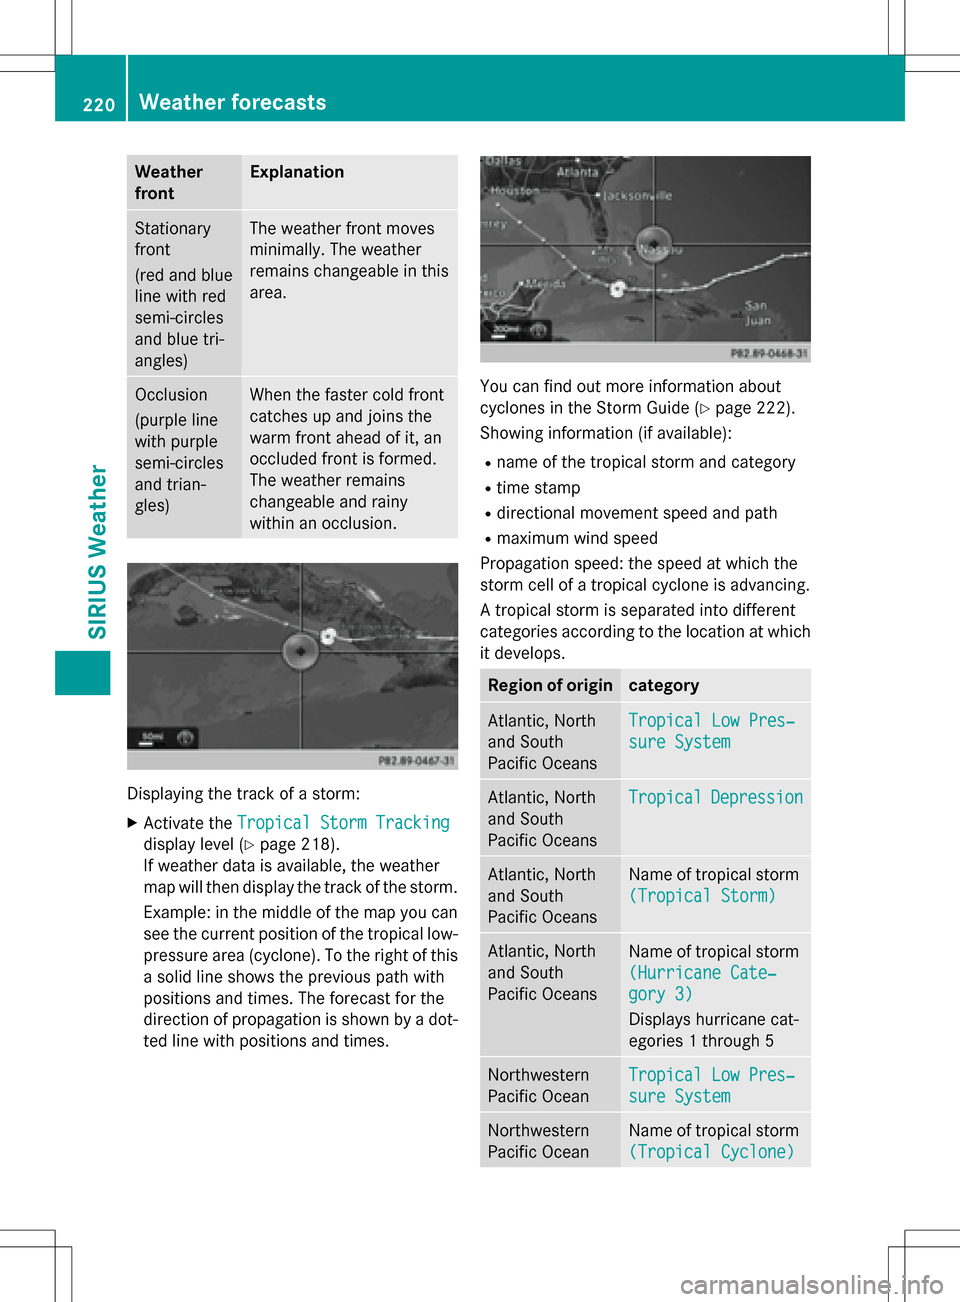
Displaying the track of a storm:
XActivate theTropical Storm Tracking
display level (Ypage 218).
If weather data is available, the weather
map will then display the track of the storm.
Example: in the middle of the map you can
see the current position of the tropical low-
pressure area (cyclone). To the right of this
a solid line shows the previous path with
positions and times. The forecast for the
direction of propagation is shown by a dot-
ted line with positions and times.
You can find out more information about
cyclones in the Storm Guide (
Ypage 222).
Showing information (if available):
Rname of the tropical storm and category
Rtime stamp
Rdirectional movement speed and path
Rmaximum wind speed
Propagation speed: the speed at which the
storm cell of a tropical cyclone is advancing.
A tropical storm is separated into different
categories according to the location at which
it develops.
Region of origincategory
Atlantic, North
and South
Pacific OceansTropical Low Pres‐
sure System
Atlantic, North
and South
Pacific OceansTropicalDepression
Atlantic, North
and South
Pacific OceansName of tropical storm
(Tropical Storm)
Atlantic, North
and South
Pacific OceansName of tropical storm
(Hurricane Cate‐
gory 3)
Displays hurricane cat-
egories 1 through 5
Northwestern
Pacific OceanTropical Low Pres‐
sure System
Northwestern
Pacific OceanName of tropical storm
(Tropical Cyclone)
220Weather forecasts
SIRIUS Weather
Page 223 of 246
Region of origincategory
Northwestern
Pacific OceanName of tropical storm
(Typhoon)
Northwestern
Pacific OceanName of tropical storm
(Super-Typhoon)
You can also see the time stamp for the
weather data on map scales of 50 miles and
smaller.
The weather map shows wind directions and
wind speeds.
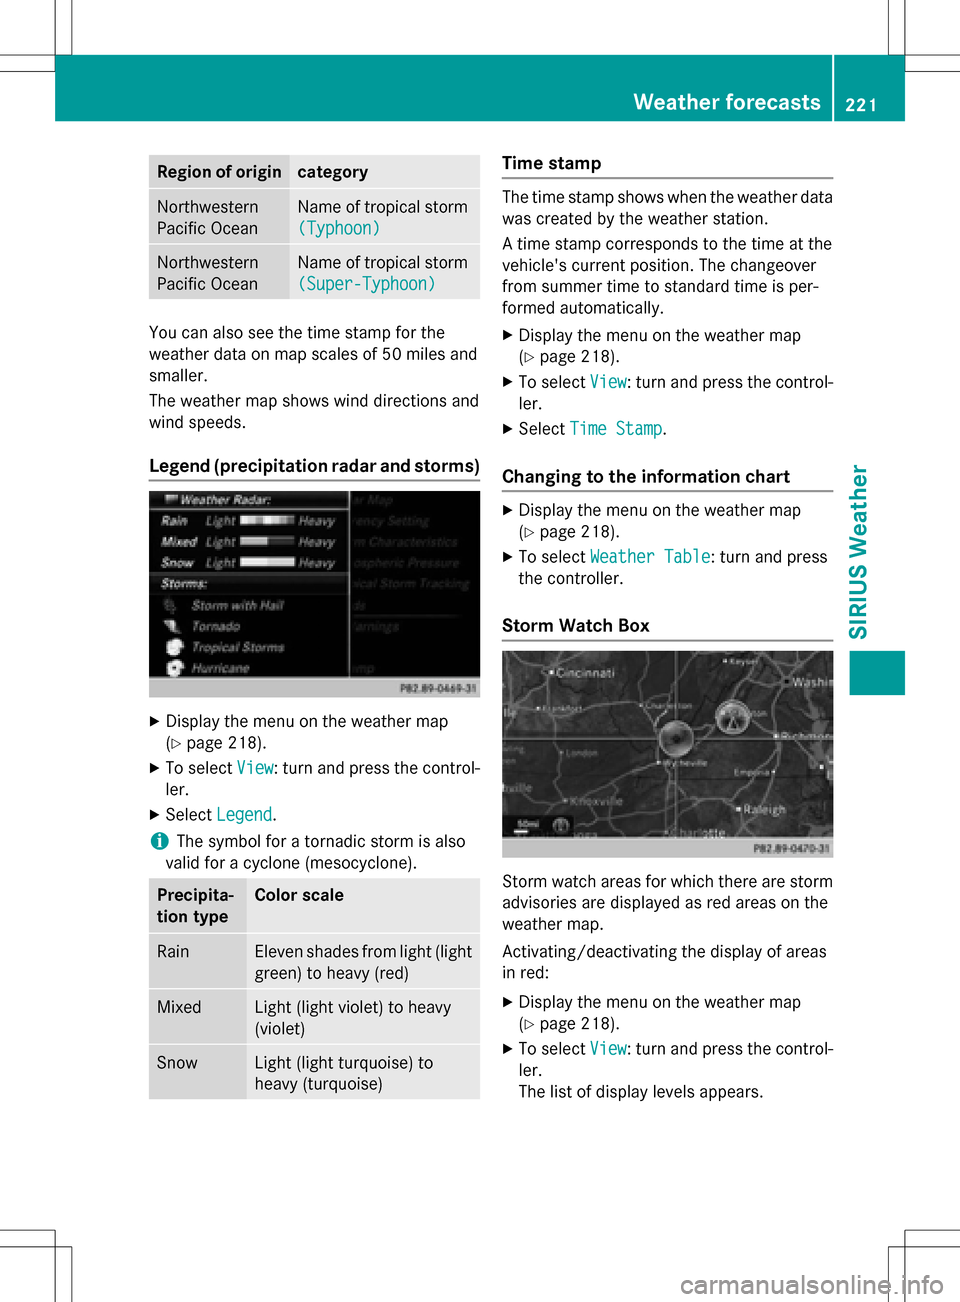
Legend (precipitation radar and storms)
XDisplay the menu on the weather map
(
Ypage 218).
XTo selectView: turn and press the control-
ler.
XSelect Legend.
iThe symbol for a tornadic storm is also
valid for a cyclone (mesocyclone).
Precipita-
tion typeColor scale
RainEleven shades from light (light
green) to heavy (red)
MixedLight (light violet) to heavy
(violet)
SnowLight (light turquoise) to
heavy (turquoise)
Time stamp
The time stamp shows when the weather data
was created by the weather station.
A time stamp corresponds to the time at the
vehicle's current position. The changeover
from summer time to standard time is per-
formed automatically.
XDisplay the menu on the weather map
(
Ypage 218).
XTo select View: turn and press the control-
ler.
XSelect Time Stamp.
Changing to the information chart
XDisplay the menu on the weather map
(
Ypage 218).
XTo select Weather Table: turn and press
the controller.
Storm Watch Box
Storm watch areas for which there are storm
advisories are displayed as red areas on the
weather map.
Activating/deactivating the display of areas
in red:
XDisplay the menu on the weather map
(
Ypage 218).
XTo select View: turn and press the control-
ler.
The list of display levels appears.
Weather forecasts221
SIRIUS Weather
Page 224 of 246

XSelectStorm Watch.
XSelectShowSym.forStormAreason
Map.
Depending on the previous setting, activate
O or deactivate ªthe display of areas in
red.
Activating/deactivating the automatic dis-
play of warning popups:
XSelect Display Storm Watch Automat‐
ically.
Depending on the previous setting, activate
O or deactivate ªthe automatic display
of warning popups.
Setting the radius for the popups:
XSelect 5 miles(5 km), 50 miles(50 km)
or 200 miles
(200 km).
Storm Guide
Displaying the Storm Guide:
XDisplay the menu on the weather map
(
Ypage 218).
XTo select Guide: turn and press the con-
troller.
A menu appears. The current storm is high-
lighted. There is information about the
storm in the status bar.
XTo select Next: turn and press the control-
ler.
The next storm is marked.
XSelect Previous.
The previous storm is highlighted. Showing storm details:
XSelect
Details.
You see detailed information about the
selected storm.
222Weather forecasts
SIRIUS Weather
Page 227 of 246
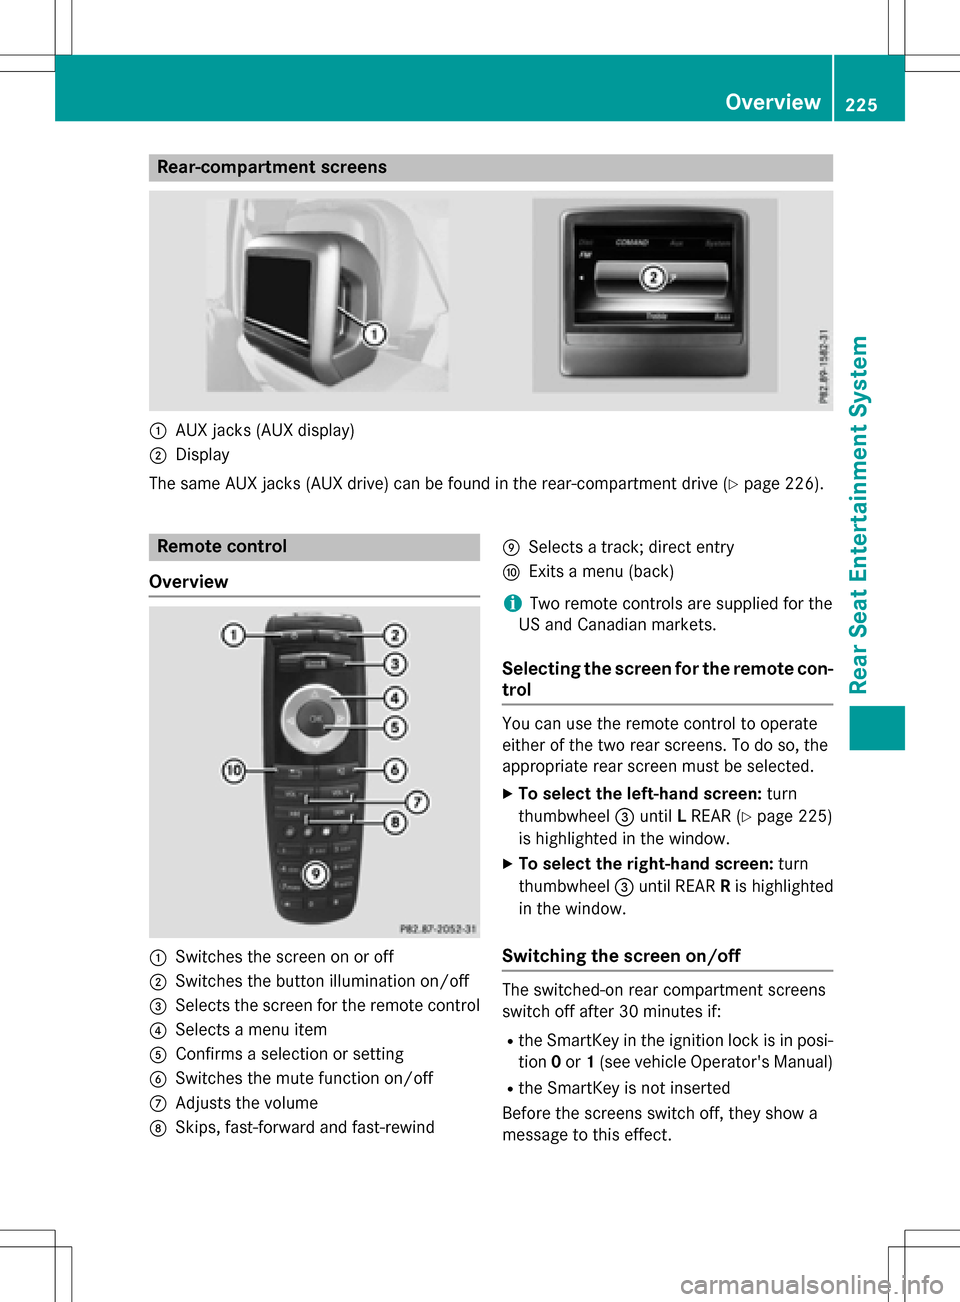
Rear-compartment screens
:AUX jacks (AUX display)
;Display
The same AUX jacks (AUX drive) can be found in the rear-compartment drive (
Ypage 226).
Remote control
Overview
:Switches the screen on or off
;Switches the button illumination on/off
=Selects the screen for the remote control
?Selects a menu item
AConfirms a selection or setting
BSwitches the mute function on/off
CAdjusts the volume
DSkips, fast-forward and fast-rewind
ESelects a track; direct entry
FExits a menu (back)
iTwo remote controls are supplied for the
US and Canadian markets.
Selecting the screen for the remote con-
trol
You can use the remote control to operate
either of the two rear screens. To do so, the
appropriate rear screen must be selected.
XTo select the left-hand screen: turn
thumbwheel =until LREAR (
Ypage 225)
is highlighted in the window.
XTo select the right-hand screen: turn
thumbwheel =until REAR Ris highlighted
in the window.
Switching the screen on/off
The switched-on rear compartment screens
switch off after 30 minutes if:
Rthe SmartKey in the ignition lock is in posi-
tion 0or 1(see vehicle Operator's Manual)
Rthe SmartKey is not inserted
Before the screens switch off, they show a
message to this effect.
Overview225
Rear Seat Entertainment System
Z
Page 228 of 246
You can switch the screens back on. How-
ever, this will discharge the starter battery.
XPoint the remote control at the rear-com-
partment screen which has been selected
for remote operation.
XPress button:on the remote control
(
Ypage 225).
The rear screen switches on or off.
Switching the button lighting on/off
XPress button ;on the remote control
(
Ypage 225).
Depending on the previous status, the but-
ton lighting is switched on or off.
iIf you do not use the remote control for
about 15 seconds, the button lighting
switches off automatically.
Switching the sound on or off
XPress button Bon the remote control
(
Ypage 225).
The sound is switched on/off.
Selecting a menu/menu item and con-
firming your selection
XSelect a menu item using the =;
9: buttons on the remote control
and press the 9button to confirm.
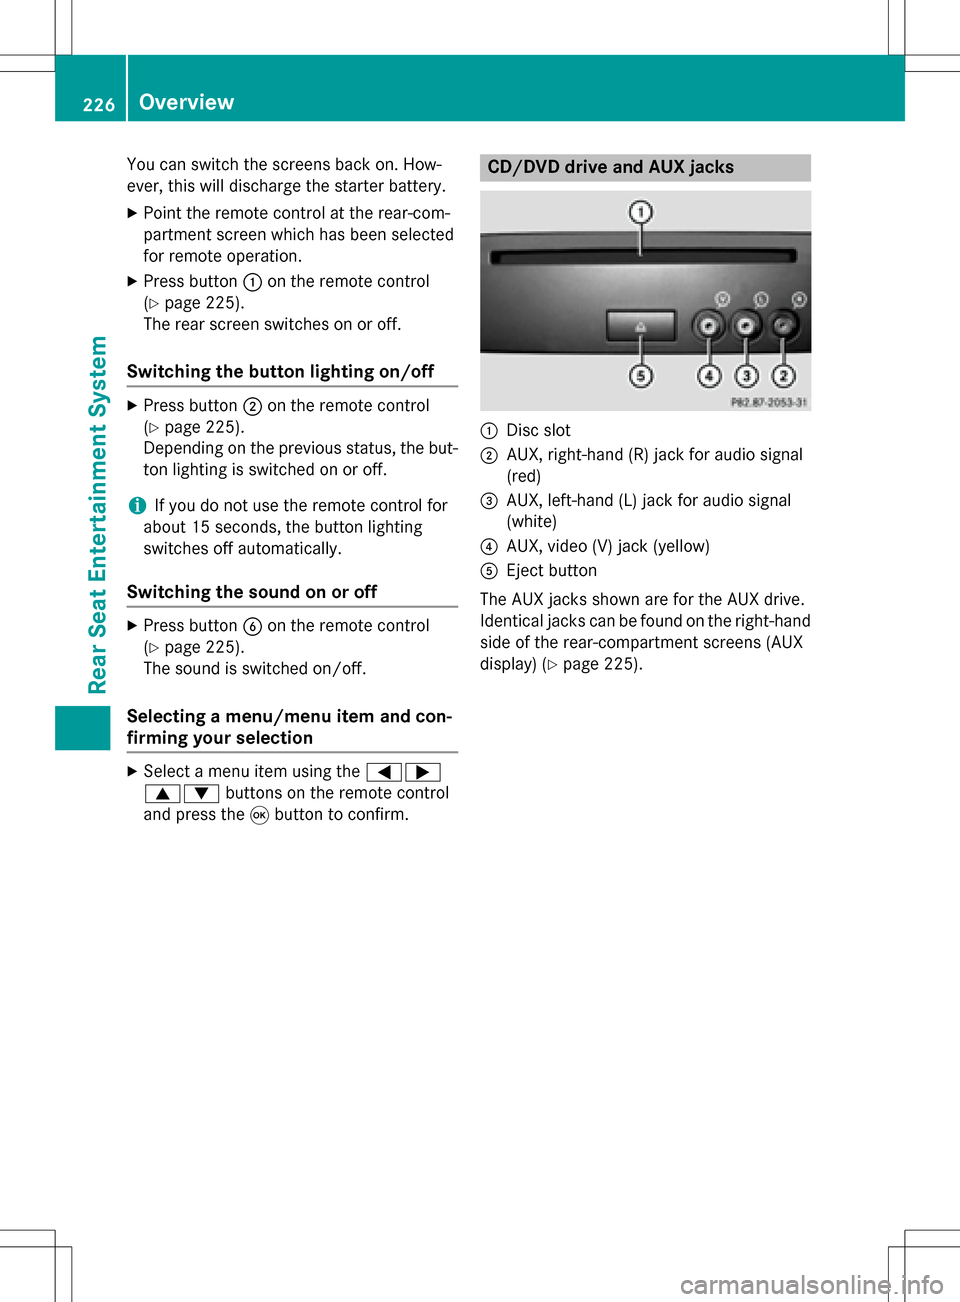
CD/DVD drive and AUX jacks
:Disc slot
;AUX, right-hand (R) jack for audio signal
(red)
=AUX, left-hand (L) jack for audio signal
(white)
?AUX, video (V) jack (yellow)
AEject button
The AUX jacks shown are for the AUX drive.
Identical jacks can be found on the right-hand
side of the rear-compartment screens (AUX
display) (
Ypage 225).
226Overview
Rear Seat Entertainment System