2016 MERCEDES-BENZ CLA flat tire
[x] Cancel search: flat tirePage 316 of 374
If a pressure of 200 kPa (2.0 bar/29 psi) has
been attained after five minutes, see "Tire
pressure reached" ( Y
page 314).
If a tire pressure of 200 kPa (2.0 bar/29 psi)
has not been attained after five minutes, see
"Tire pressure not reached" ( Y
page 314).
If tire sealant has escaped, clean it off affec-
ted areas as quickly as possible. Use plain
water if possible.
If your clothes are soiled with tire sealant,
have them cleaned with perchloroethylene at
a dry cleaner as soon as possible.
Tire pressure not reached If a tire pressure of 200 kPa (2.0 bar/29 psi)
has not been attained after ten minutes: X
Switch off the tire inflation compressor. X
Unscrew the filler hose from the valve of
the faulty tire.
Note that tire sealant may escape when you
unscrew the filler hose. X
Very slowly drive forwards or reverse
approximately 30 ft (10 m). X
Pump up the tire again.
After a maximum of ten minutes, the tire
pressure must be at least 200 kPa (2.0 bar/
29 psi).
G WARNING
If the required tire pressure is not reached
after the specified time, the tire is too badly
damaged. The tire sealant cannot repair the
tire in this instance. Damaged tires and a tire
pressure that is too low can significantly
impair the vehicle's braking and driving char-
acteristics. There is a risk of accident.
Do not continue driving. Contact a qualified
specialist workshop.
Tire pressure reached
G WARNING
A tire temporarily sealed with tire sealant
impairs the driving characteristics and is not suitable for higher speeds. There is a risk of
accident.
You should therefore adapt your driving style
accordingly and drive carefully. Do not exceed
the specified maximum speed with a tire that
has been repaired using tire sealant.
The maximum permissible speed for a tire
sealed with tire sealant is 50 mph (80 km/h).
The upper part of the TIREFIT sticker must be
affixed to the instrument cluster in the driv-
er's field of vision.
! Residue from the tire sealant may come
out of the filler hose after use. This could
cause stains.
Therefore, place the filler hose in the plastic
bag which contained the TIREFIT kit.
H Environmental note
Have the used tire sealant bottle disposed of
professionally, e.g. at a qualified specialist
workshop.
If a tire pressure of 200 kPa (2.0 bar/29 psi)
has been attained after ten minutes: X
Switch off the tire inflation compressor. X
Unscrew the filler hose from the valve of
the faulty tire. X
Stow the tire sealant bottle and the tire
inflation compressor. X
Pull away immediately .X
Stop after driving for approximately ten
minutes and check the tire pressure with
the tire inflation compressor.
The tire pressure must now be at least
130 kPa (1.3 bar/19 psi).
G WARNING
If the required tire pressure is not reached
after driving for a short period, the tire is too
badly damaged. The tire sealant cannot repair
the tire in this instance. Damaged tires and a
tire pressure that is too low can significantly
impair the vehicle's braking and driving char-
acteristics. There is a risk of accident.314
Flat tire
Breakdown assistance
Page 317 of 374
Do not continue driving. Contact a qualified
specialist workshop.
i In cases such as the one mentioned
above, contact an authorized Mercedes-
Benz Center. Or call 1-800-FOR-MERCedes
(in the USA) or 1-800-387-0100 (in Can-
ada). X
Correct the tire pressure if it is still at least
130 kPa (1.3 bar/19 psi). See the Tire and
Loading Information placard on the driver's
side B-pillar or the tire pressure table in the
fuel filler flap for values. X
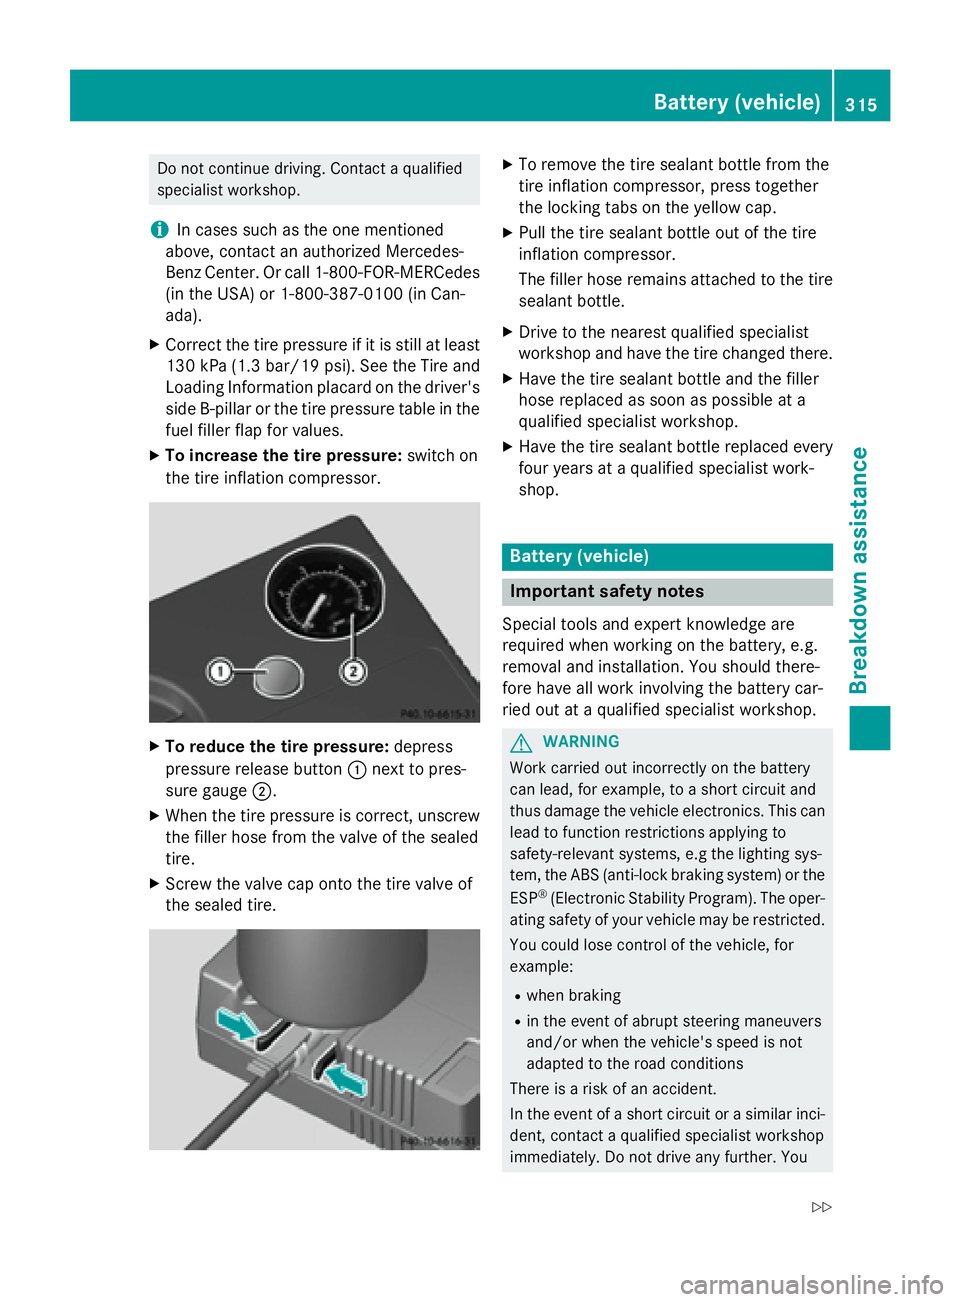
To increase the tire pressure: switch on
the tire inflation compressor.
X
To reduce the tire pressure: depress
pressure release button �C next to pres-
sure gauge �D .X
When the tire pressure is correct, unscrew
the filler hose from the valve of the sealed
tire. X
Screw the valve cap onto the tire valve of
the sealed tire. X
To remove the tire sealant bottle from the
tire inflation compressor, press together
the locking tabs on the yellow cap. X
Pull the tire sealant bottle out of the tire
inflation compressor.
The filler hose remains attached to the tire
sealant bottle. X
Drive to the nearest qualified specialist
workshop and have the tire changed there. X
Have the tire sealant bottle and the filler
hose replaced as soon as possible at a
qualified specialist workshop. X
Have the tire sealant bottle replaced every
four years at a qualified specialist work-
shop.
Battery (vehicle)
Important safety notes Special tools and expert knowledge are
required when working on the battery, e.g.
removal and installation. You should there-
fore have all work involving the battery car-
ried out at a qualified specialist workshop.
G WARNING
Work carried out incorrectly on the battery
can lead, for example, to a short circuit and
thus damage the vehicle electronics. This can
lead to function restrictions applying to
safety-relevant systems, e.g the lighting sys-
tem, the ABS (anti-lock braking system) or the
ESP ®
(Electronic Stability Program). The oper-
ating safety of your vehicle may be restricted.
You could lose control of the vehicle, for
example: R
when braking R
in the event of abrupt steering maneuvers
and/or when the vehicle's speed is not
adapted to the road conditions
There is a risk of an accident.
In the event of a short circuit or a similar inci-
dent, contact a qualified specialist workshop
immediately. Do not drive any further. YouBattery (vehicle) 315
Breakdown assistance Z
Page 325 of 374
X
Remove th e towin g eye from th e stowage
space.
The towin g eye is locate d wit h th e vehicl e
tool ki t under th e cargo compartmen t floor
( Y
page 310).
Vehicles wit h th e TIREFI T kit: th e towin g
eye is beneat h th e tire inflation compres-
sor . X
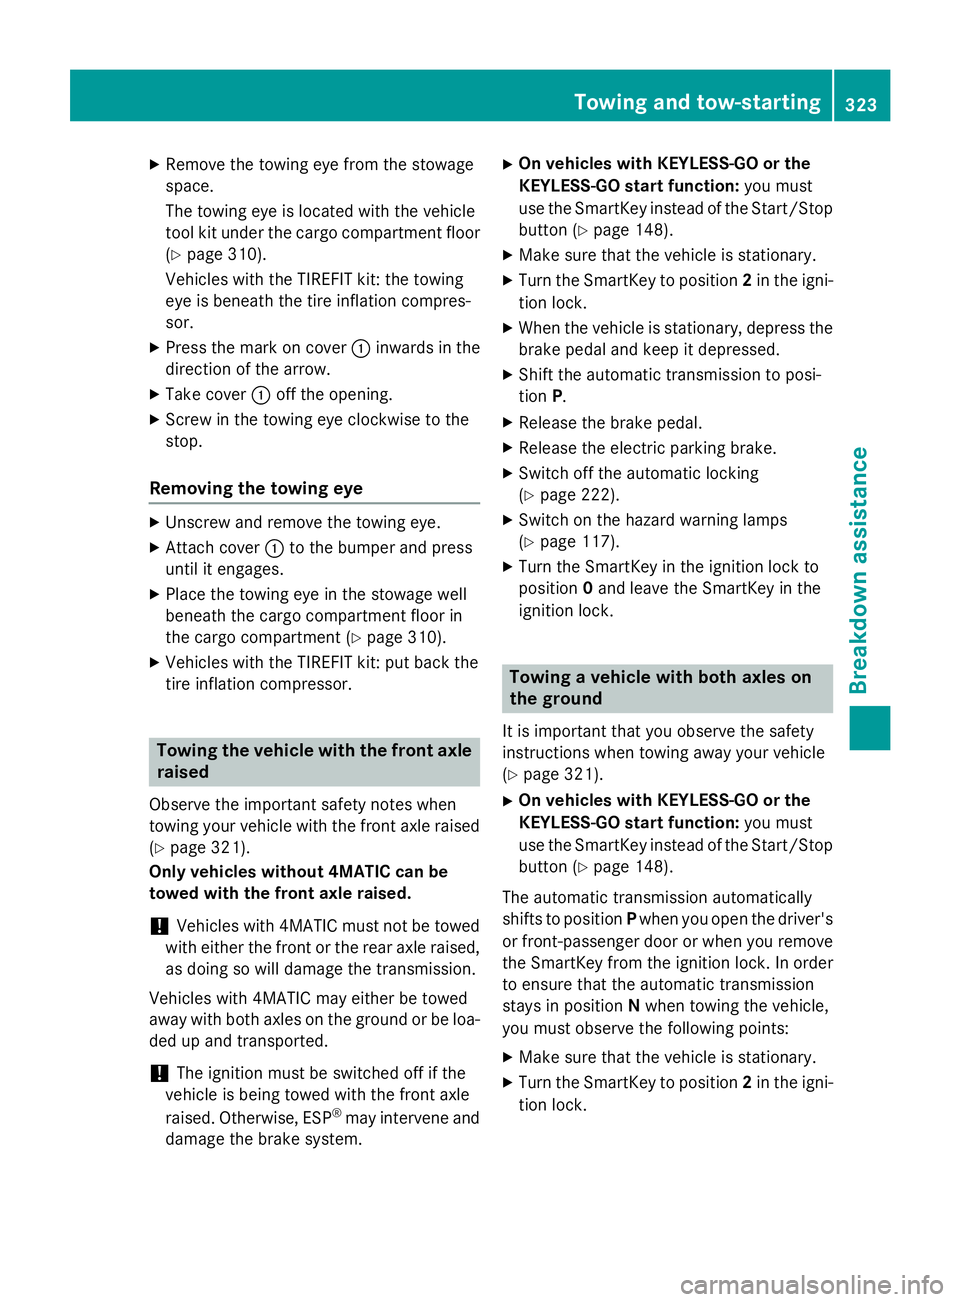
Press th e mar k on cover �C inward s in th e
direction of th e arrow.X
Tak e cover �C off th e opening.X
Screw in th e towin g eye clockwise to th e
stop.
Removin g th e towing eyeX
Unscrew and remove th e towin g eye.X
Attac h cover �C to th e bumper and press
until it engages. X
Plac e th e towin g eye in th e stowage well
beneat h th e cargo compartmen t floor in
th e cargo compartmen t ( Y
page 310).X
Vehicles wit h th e TIREFI T kit: put bac k th e
tire inflation compressor.
Towing th e veh icle wit h th e fr ont axle
raised
Observ e th e important safet y note s when
towin g your vehicl e wit h th e fron t axl e raised
( Y
page 321).
Only vehicles withou t 4MATIC can be
towe d wit h th e front axle raised .
! Vehicles wit h 4MATIC mus t no t be towed
wit h either th e fron t or th e rear axl e raised,
as doin g so will damag e th e transmission .
Vehicles wit h 4MATIC may either be towed
away wit h bot h axles on th e ground or be loa-
ded up and transported.
! The ignition mus t be switched off if th e
vehicl e is bein g towed wit h th e fron t axl e
raised. Otherwise , ES P ®
may interven e and
damag e th e brak e system. X
On vehicles wit h KEYLESS-G O or th e
KEYLESS-G O star t function: you mus t
use th e SmartKey instead of th e Start/Sto p
butto n ( Y
page 148). X
Mak e sur e that th e vehicl e is stationary.X
Turn th e SmartKey to position 2 in th e igni-
tion lock. X
Whe n th e vehicl e is stationary, depress th e
brak e pedal and keep it depressed. X
Shift th e automatic transmission to posi-
tion P . X
Releas e th e brak e pedal .X
Releas e th e electric parkin g brake.X
Switc h off th e automatic locking
( Y
page 222). X
Switc h on th e hazard warnin g lamp s
( Y
page 117). X
Turn th e SmartKey in th e ignition loc k to
position 0 and leav e th e SmartKey in th e
ignition lock.
Towing a veh icle wit h bot h axles on
th e groun d
It is important that you observ e th e safet y
instruction s when towin g away your vehicl e
( Y
page 321). X
On vehicles wit h KEYLESS-G O or th e
KEYLESS-G O star t function: you mus t
use th e SmartKey instead of th e Start/Sto p
butto n ( Y
page 148).
The automatic transmission automatically
shift s to position P when you open th e driver's
or front-passenger doo r or when you remove
th e SmartKey from th e ignition lock. In order
to ensur e that th e automatic transmission
stays in position N when towin g th e vehicle,
you mus t observ e th e followin g points :X
Mak e sur e that th e vehicl e is stationary.X
Turn th e SmartKey to position 2 in th e igni-
tion lock.Towing and tow-starting 323
Breakdown assistance Z
Page 330 of 374
Useful information
i This Operator's Manual describes all
models and all standard and optional equip-
ment of your vehicle available at the time of
publication of the Operator's Manual.
Country-specific differences are possible.
Please note that your vehicle may not be
equipped with all features described. This
also applies to safety-related systems and
functions.
i Read the information on qualified special-
ist workshops ( Y
page 25).
Important safety notes
G WARNING
If wheels and tires of the wrong size are used,
the wheel brakes or suspension components
may be damaged. There is a risk of an acci-
dent.
Always replace wheels and tires with those
that fulfill the specifications of the original
part.
When replacing wheels, make sure to use the
correct: R
designation R
model
When replacing tires, make sure to use the
correct: R
designation R
manufacturer R
model
G WARNING
A flat tire severely impairs the driving, steer-
ing and braking characteristics of the vehicle.
There is a risk of accident.
Tires without run-flat characteristics: R
do not drive with a flat tire. R
immediately replace the flat tire with your
emergency spare wheel or spare wheel, or
consult a qualified specialist workshop. Tires with run-flat characteristics: R
pay attention to the information and warn-
ing notices on MOExtended tires (tires with
run-flat characteristics).
Accessories that are not approved for your
vehicle by Mercedes-Benz or are not being
used correctly can impair the operating
safety.
Before purchasing and using non-approved
accessories, visit a qualified specialist work-
shop and inquire about: R
suitability R
legal stipulations R
factory recommendations
Information on the sizes and types of wheels
and tires for your vehicle can be found under
"Wheel/tire combinations" ( Y
page 355).
Information on tire pressure can be found: R
on the Tire and Loading Information placard
on the B-pillar on the driver's side
( Y
page 339) R
in the tire pressure table in the fuel filler flap
( Y
page 168) R
under "Tire pressure" ( Y
page 332)
Operation
Information on driving
Check the tire pressure when the vehicle is
heavily laden and adjust prior to a trip.
While driving, pay attention to vibrations,
noises and unusual handling characteristics,
e.g. pulling to one side. This may indicate that
the wheels or tires are damaged. If you sus-
pect that a tire is defective, reduce your
speed immediately. Stop the vehicle as soon
as possible to check the wheels and tires for
damage. Hidden tire damage could also be
causing the unusual handling characteristics.
If you find no signs of damage, have the tires
and wheels checked at a qualified specialist
workshop.328
Operation
Wheels and tires
Page 331 of 374
When parking your vehicle, make sure that
the tires do not get deformed by the curb or
other obstacles. If they cannot be avoided,
drive over obstacles such as curbs slowly and
at an obtuse angle. Otherwise, you may dam-
age the wheels or tires.
Regular checking of wheels and tires
G WARNING
Damaged tires can cause tire inflation pres-
sure loss. As a result, you could lose control of
your vehicle. There is a risk of accident.
Check the tires regularly for signs of damage
and replace any damaged tires immediately.
Check wheels and tires for damage at least
once a month. Check wheels and tires after
driving off-road or on rough roads. Damaged
wheels can cause a loss of tire pressure. Pay
particular attention to damage such as: R
cuts in the tires R
punctures R
tears in the tires R
bulges on tires R
deformation or severe corrosion on wheels
Regularly check the tire tread depth and the
condition of the tread across the whole width
of the tire ( Y
page 329). If necessary, turn the
front wheels to full lock in order to inspect the
inner side of the tire surface.
All wheels must have a valve cap to protect
the valve against dirt and moisture. Do not
mount anything onto the valve other than the
standard valve cap or other valve caps
approved by Mercedes-Benz for your vehicle.
Do not use any other valve caps or systems,
e.g. tire pressure monitoring systems.
Regularly check the pressure of all the tires
particularly prior to long trips. Adjust the tire
pressure as necessary ( Y
page 332). The service life of tires depends, among other
things, on the following factors: R
driving style R
tire pressure R
distance covered
Notes on tire tread
G WARNING
Insufficient tire tread will reduce tire traction.
The tire is no longer able to dissipate water.
This means that on wet road surfaces, the risk
of hydroplaning increases, in particular where
speed is not adapted to suit the driving con-
ditions. There is a risk of accident.
If the tire pressure is too high or too low, tires
may exhibit different levels of wear at differ-
ent locations on the tire tread. Thus, you
should regularly check the tread depth and
the condition of the tread across the entire
width of all tires.
Minimum tire tread depth for: R
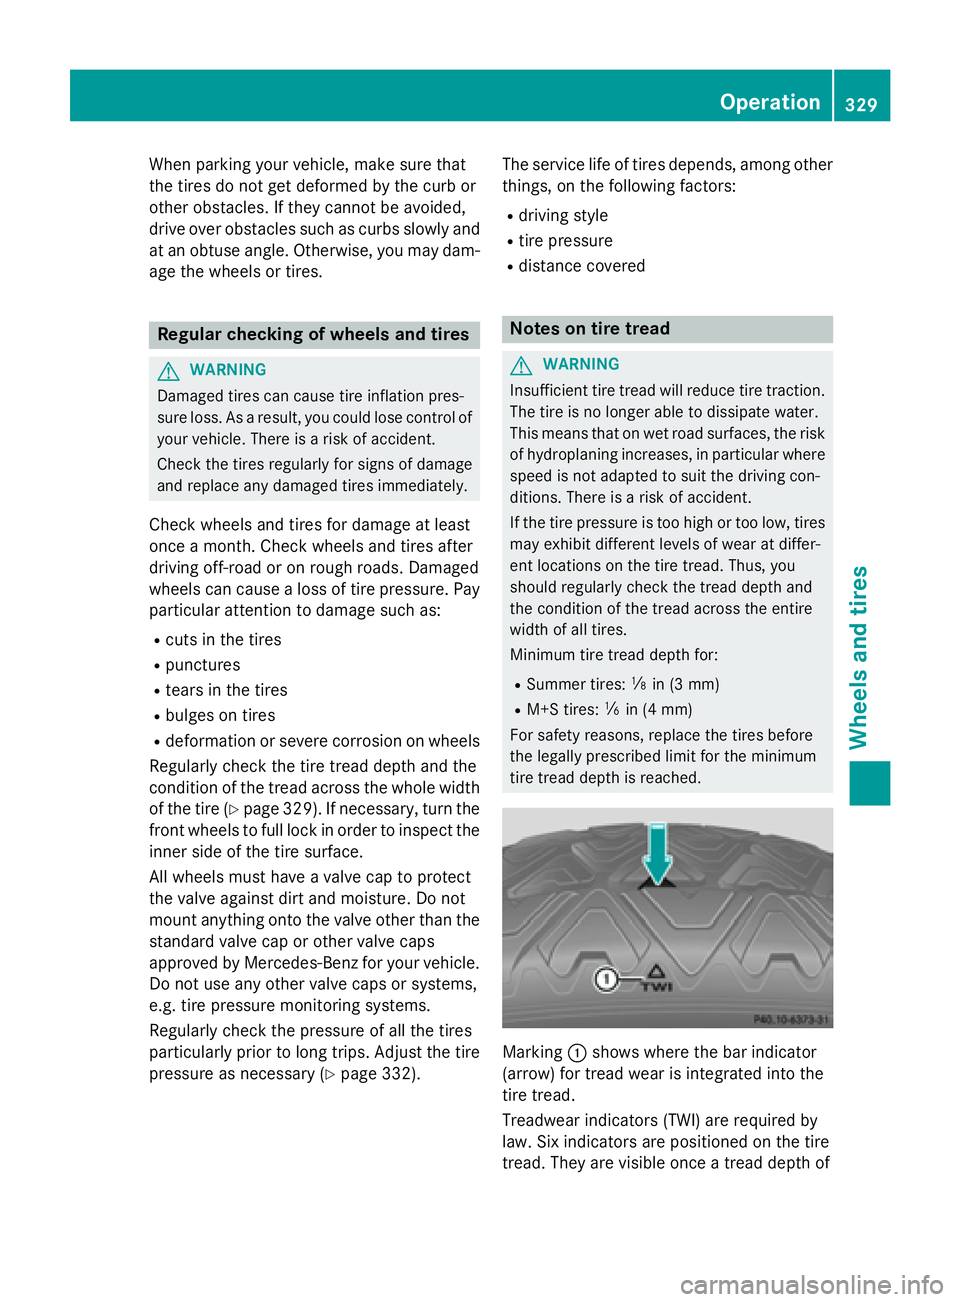
Summer tires: �
Page 334 of 374
Tire pressure
Tire pressure specifications
Important safety notes
G WARNING
Underinflated or overinflated tires pose the
following risks: R
the tires may burst, especially as the load
and vehicle speed increase. R
the tires may wear excessively and/or
unevenly, which may greatly impair tire
traction. R
the driving characteristics, as well as steer-
ing and braking, may be greatly impaired.
There is a risk of an accident.
Follow recommended tire inflation pressures
and check the pressure of all the tires includ-
ing the spare wheel: R
monthly, at least R
if the load changes R
before beginning a long journey R
under different operating conditions, e.g.
off-road driving
If necessary, correct the tire pressure.
i The data on the Tire and Loading Infor-
mation placard and tire pressure table
shown here are examples. Tire pressure
specifications are vehicle-specific and may
deviate from the data shown here. The tire
pressure specifications that are valid for
your vehicle can be found on the Tire and
Loading Information placard and tire pres-
sure table on the vehicle.
General notes
The recommended tire pressures for the tires
mounted at the factory can be found on the
labels described here.
Further information on tire pressures can be
obtained at a qualified specialist workshop. Tire and Loading Information placard
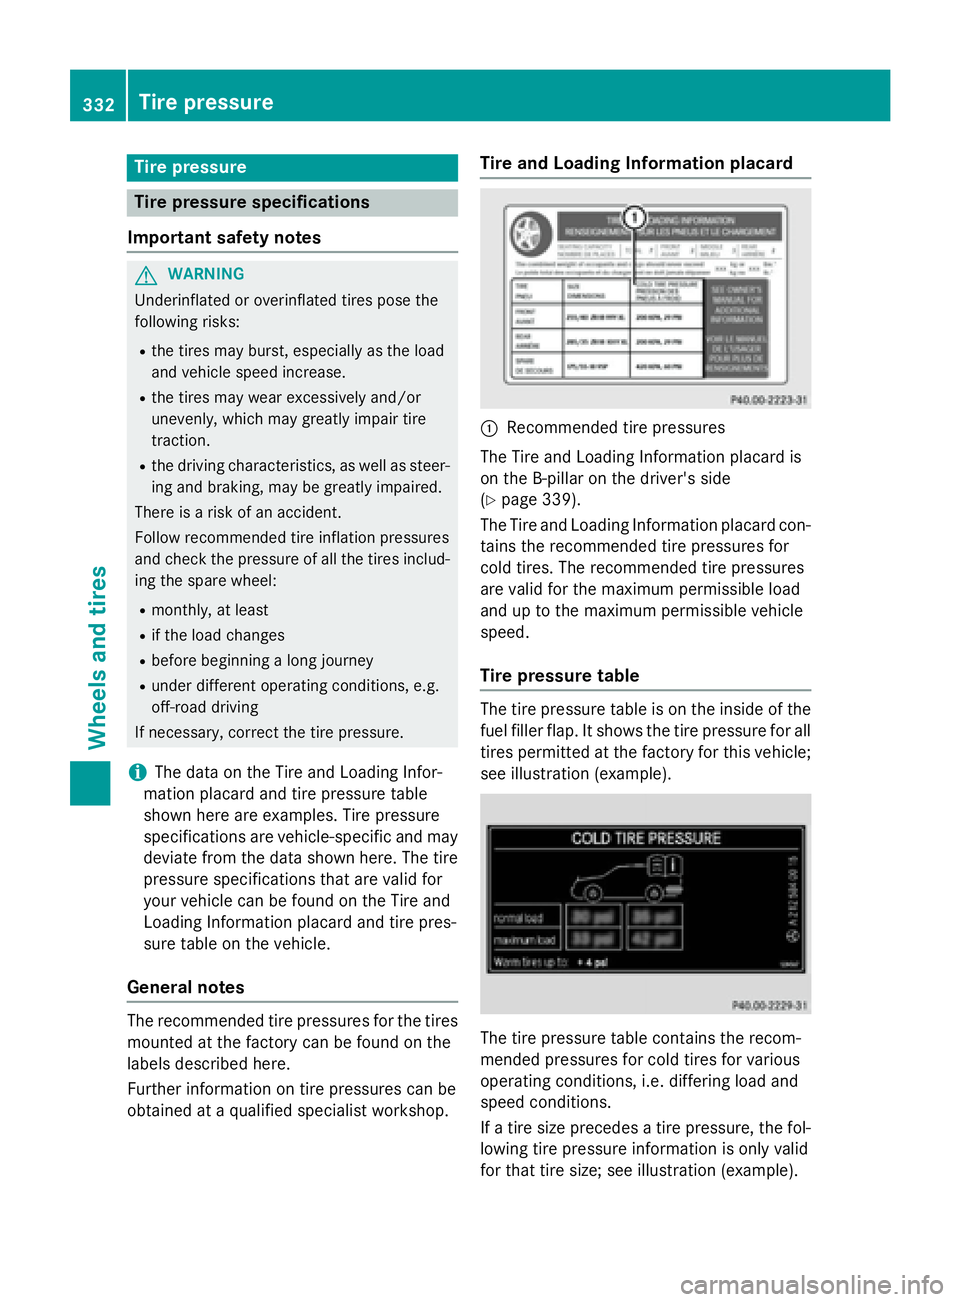
�C
Recommended tire pressures
The Tire and Loading Information placard is
on the B-pillar on the driver's side
( Y
page 339).
The Tire and Loading Information placard con-
tains the recommended tire pressures for
cold tires. The recommended tire pressures
are valid for the maximum permissible load
and up to the maximum permissible vehicle
speed.
Tire pressure table
The tire pressure table is on the inside of the
fuel filler flap. It shows the tire pressure for all
tires permitted at the factory for this vehicle;
see illustration (example).
The tire pressure table contains the recom-
mended pressures for cold tires for various
operating conditions, i.e. differing load and
speed conditions.
If a tire size precedes a tire pressure, the fol-
lowing tire pressure information is only valid
for that tire size; see illustration (example).332
Tire pressure
Wheels and tires
Page 336 of 374
The tires are cold: R
if the vehicle has been parked with the tires
out of direct sunlight for at least three
hours and R
if the vehicle has not been driven further
than 1 mile (1.6 km)
The tire temperature changes depending on
the outside temperature, the vehicle speed
and the tire load. If the tire temperature
changes by 18 ‡ (10 †), the tire pressure
changes by approximately 10 kPa (0.1 bar/
1.5 psi). Take this into account when check-
ing the pressure of warm tires. Only correct
the tire pressure if it is too low for the current
operating conditions. If you check the tire
pressure when the tires are warm, the result-
ing value will be higher than if the tires were
cold. This is normal. Do not reduce the tire
pressure to the value specified for cold tires.
The tire pressure would otherwise be too low.
Observe the recommended tire pressures for
cold tires: R
on the Tire and Loading Information placard
on the B-pillar on the driver's side R
in the tire pressure table on the fuel filler
flap ( Y
page 168)
Underinflated or overinflated tires
Underinflated tires
G WARNING
Tires with pressure that is too low can over-
heat and burst as a consequence. In addition,
they also suffer from excessive and/or irreg-
ular wear, which can severely impair the brak-
ing properties and the driving characteristics.
There is a risk of an accident.
Avoid tire pressures that are too low in all the
tires, including the spare wheel.
Underinflated tires may: R
overheat, leading to tire defects R
adversely affect handling R
wear excessively and/or unevenly R
have an adverse effect on fuel consumption
Overinflated tires
G WARNING
Tires with excessively high pressure can burst
because they are damaged more easily by
road debris, potholes etc. In addition, they
also suffer from irregular wear, which can
severely impair the braking properties and the
driving characteristics. There is a risk of an
accident.
Avoid tire pressures that are too high in all the
tires, including the spare wheel.
Overinflated tires may: R
increase the braking distance R
adversely affect handling R
wear excessively and/or unevenly R
have an adverse effect on ride comfort R
be more susceptible to damage
Maximum tire pressures
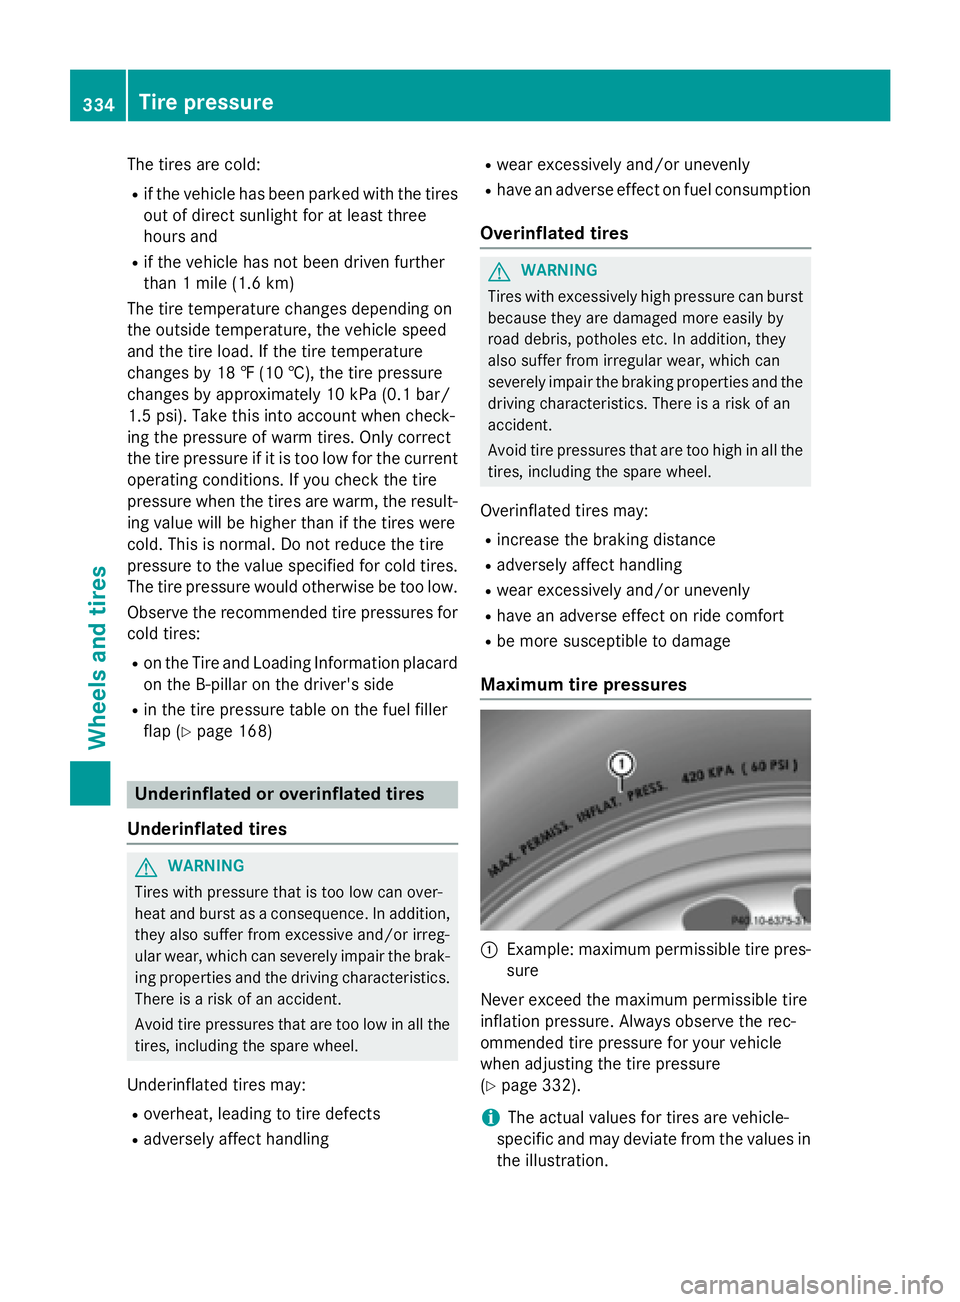
�C
Example: maximum permissible tire pres-
sure
Never exceed the maximum permissible tire
inflation pressure. Always observe the rec-
ommended tire pressure for your vehicle
when adjusting the tire pressure
( Y
page 332).
i The actual values for tires are vehicle-
specific and may deviate from the values in
the illustration.334
Tire pressure
Wheels and tires
Page 337 of 374
Checking the tire pressures
Important safety notes Observe the notes on tire pressure
( Y
page 332).
Information on air pressure for the tires on
your vehicle can be found: R
on the vehicle's Tire and Loading Informa-
tion placard on the B-pillar R
in the tire pressure table in the fuel filler flap
( Y
page 168) R
in the "Tire pressure" section
Checking tire pressures manually To determine and set the correct tire pres-
sure, proceed as follows: X
Remove the valve cap of the tire that is to
be checked. X
Press the tire pressure gauge securely onto
the valve. X
Read the tire pressure and compare it to
the recommended value on the Tire and
Loading Information placard or the tire
pressure table ( Y
page 332).X
If the tire pressure is too low, increase the
tire pressure to the recommended value. X
If the tire pressure is too high, release air.
To do so, press down the metal pin in the
valve, using the tip of a pen for example.
Then check the tire pressure again using
the tire pressure checker. X
Screw the valve cap onto the valve. X
Repeat these steps for the other tires.
Tire pressure loss warning system
General notes
While the vehicle is in motion, the tire pres-
sure loss warning system monitors the set
tire pressure using the rotational speed of the
wheels. This enables the system to detect
significant pressure loss in a tire. If the speed
of rotation of a wheel changes as a result of a loss of pressure, a corresponding warning
message will appear in the multifunction dis-
play.
You can recognize the tire pressure loss warn-
ing by the Run Flat Indicator Active
Press 'OK' to Restart message in the
multifunction display in the Serv.
menu.
Information on the message display can be
found in the "Restarting the tire pressure loss
warning system" section ( Y
page 336).
Important safety notes The tire pressure warning system does not
warn you of an incorrectly set tire pressure.
Observe the notes on the recommended tire
pressure ( Y
page 332).
The tire pressure loss warning does not
replace the need to regularly check the tire
pressure. An even loss of pressure on several
tires at the same time cannot be detected by
the tire pressure loss warning system.
The tire pressure monitor is not able to warn
you of a sudden loss of pressure, e.g. if the
tire is penetrated by a foreign object. In the
event of a sudden loss of pressure, bring the
vehicle to a halt by braking carefully. Avoid
abrupt steering movements.
The function of the tire pressure loss warning
system is limited or delayed if: R
snow chains are mounted on your vehicle's
tires. R
road conditions are wintry. R
you are driving on sand or gravel. R
you adopt a very sporty driving style (cor-
nering at high speeds or driving with high
rates of acceleration). R
you are driving with a heavy load (in the
vehicle or on the roof). Tire pressure 335
Wheels and tires Z