2016 MERCEDES-BENZ CLA COUPE brake fluid
[x] Cancel search: brake fluidPage 9 of 345
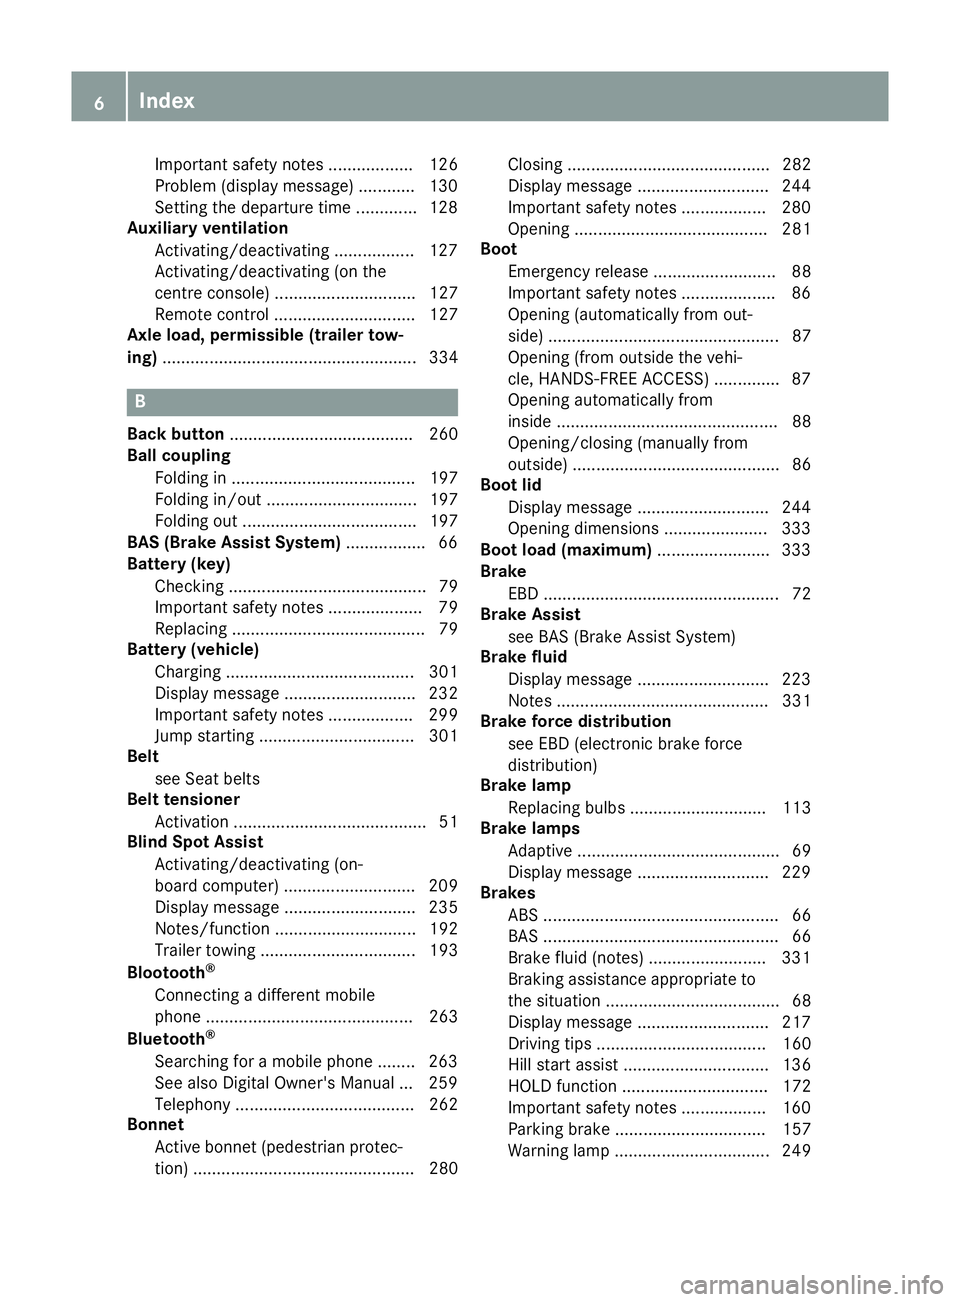
Important safety notes .................. 126
Problem (display message) ............ 130
Setting the departure time .............1
28
Auxiliary ventilation
Activating/deactivating ................. 127
Activating/deactivating (on the
centre console ).............................. 127
Remote control .............................. 127
Axle load, permissible (trailer tow-
ing) ...................................................... 334 B
Back button ....................................... 260
Ball coupling
Folding in ....................................... 197
Folding in/out ................................ 197
Folding out ..................................... 197
BAS (Brake Assist System) ................. 66
Battery (key)
Checking .......................................... 79
Important safety notes .................... 79
Replacing ......................................... 79
Battery (vehicle)
Charging ........................................ 301
Display message ............................ 232
Important safety notes .................. 299
Jump starting ................................. 301
Belt
see Seat belts
Belt tensioner
Activation ......................................... 51
Blind Spot Assist
Activating/deactivating (on-
board computer) ............................ 209
Display message ............................ 235
Notes/function .............................. 192
Trailer towing ................................. 193
Blootooth ®
Connecting a different mobile
phone ............................................ 263
Bluetooth ®
Searching for a mobile phone ........ 263
See also Digital Owner's Manua l... 259
Telephony ...................................... 262
Bonnet
Active bonnet (pedestrian protec-tion) ............................................... 280 Closing ........................................... 282
Display message ............................ 244
Important safety notes .................. 280
Opening ......................................... 281
Boot
Emergency release .......................... 88
Important safety notes .................... 86
Opening (automatically from out-
side) ................................................. 87
Opening (from outside the vehi-
cle, HANDS-FREE ACCESS) .............. 87
Opening automatically from
inside ............................................... 88
Opening/closing (manually from
outside) ............................................ 86
Boot lid
Display message ............................ 244
Opening dimensions ...................... 333
Boot load (maximum) ........................ 333
Brake
EBD .................................................. 72
Brake Assist
see BAS (Brake Assist System)
Brake fluid
Display message ............................ 223
Notes ............................................. 331
Brake force distribution
see EBD (electronic brake force
distribution)
Brake lamp
Replacing bulb s............................. 113
Brake lamps
Adaptive ........................................... 69
Display message ............................ 229
Brakes
ABS .................................................. 66
BAS .................................................. 66
Brake fluid (notes) ......................... 331
Braking assistance appropriate to
the situation ..................................... 68
Display message ............................ 217
Driving tip s.................................... 160
Hill start assist ............................... 136
HOLD function ............................... 172
Important safety notes .................. 160
Parking brake ................................ 157
Warning lamp ................................. 249 6
Index
Page 21 of 345
Display message ............................ 224
Fastening ......................................... 43
Important safety guidelines ............ .41
Introduction .....................................41
Rear seat belt status indicato r .........44
Releasin g......................................... 43
Warning lamp ................................. 248
Warning lamp (function) ................... 44
Seats
Adjusting (electrically) ..................... 99
Adjusting (manually) ........................ 98
Adjusting the 4-way lumbar sup-
port ................................................ 101
Adjusting the head restraint ............ 99
Cleaning the cover ......................... 291
Correct driver's seat position ........... 97
Important safety notes .................... 97
Seat heating problem .................... 102
Storing settings (memory func-
tion) ............................................... 106
Switching seat heating on/of f....... 101
Securing luggage ............................... 272
Selector lever
Cleaning ......................................... 291
Sensors (cleaning instructions) ....... 289
Service
see ASSYST PLUS
Service Centre
see Qualified specialist workshop
Service menu (on-board com-
puter) .................................................. 210
Service message
see ASSYST PLUS
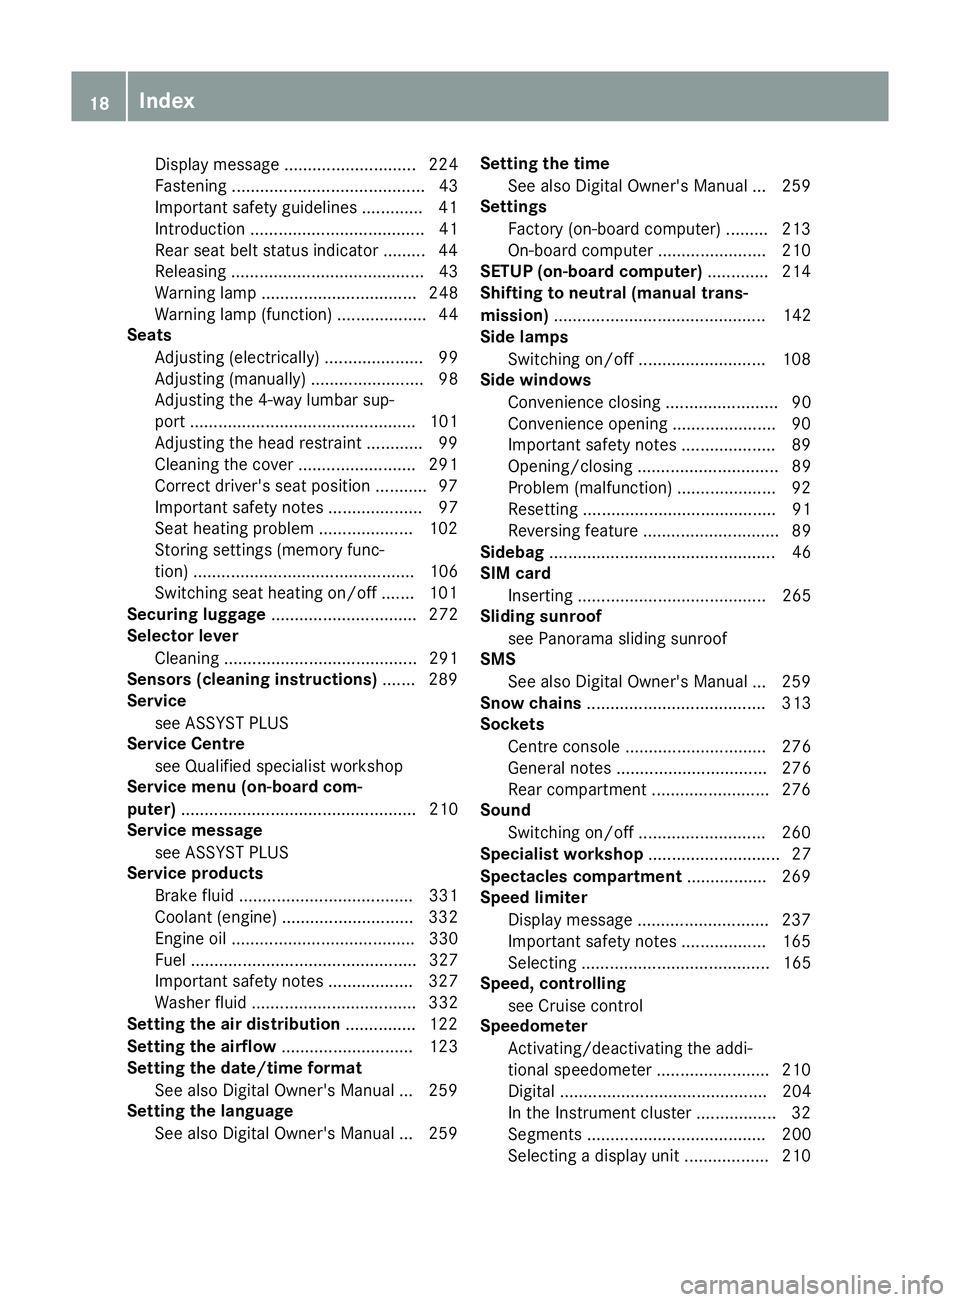
Service products
Brake fluid ..................................... 331
Coolant (engine) ............................ 332
Engine oil ....................................... 330
Fuel ................................................ 327
Important safety notes .................. 327
Washer fluid ................................... 332
Setting the air distribution ............... 122
Setting the airflow ............................ 123
Setting the date/time format
See also Digital Owner's Manua l... 259
Setting the language
See also Digital Owner's Manua l... 259 Setting the time
See also Digital Owner's Manua l... 259
Settings
Factory (on-board computer) ......... 213
On-board computer ....................... 210
SETUP (on-board computer) ............. 214
Shifting to neutral (manual trans-
mission) ............................................. 142
Side lamps
Switching on/of f........................... 108
Side windows
Convenience closing ........................ 90
Convenience opening ...................... 90
Important safety notes .................... 89
Opening/closing .............................. 89
Problem (malfunction) ..................... 92
Resetting ......................................... 91
Reversing feature ............................. 89
Sidebag ................................................ 46
SIM card
Inserting ........................................ 265
Sliding sunroof
see Panorama sliding sunroof
SMS
See also Digital Owner's Manua l... 259
Snow chains ...................................... 313
Sockets
Centre console .............................. 276
General notes ................................ 276
Rear compartment ......................... 276
Sound
Switching on/of f........................... 260
Specialist workshop ............................ 27
Spectacles compartment ................. 269
Speed limiter
Display message ............................ 237
Important safety notes .................. 165
Selecting ........................................ 165
Speed, controlling
see Cruise control
Speedometer
Activating/deactivating the addi-
tional speedometer ........................ 210
Digital ............................................ 204
In the Instrument cluster ................. 32
Segments ...................................... 200
Selecting a display uni t.................. 210 18
Index
Page 25 of 345
Vehicle dimensions
........................... 333
Vehicle emergency locking ................ 85
Vehicle identification number
see VIN
Vehicle identification plate .............. 326
Vehicle tool kit .................................. 294
Ventilation
Setting the vents ........................... 130
Video
Operating the DVD ......................... 206
See also Digital Owner's Manua l... 259
VIN
Seat ............................................... 327
Type plate ...................................... 326 W
Warning and indicator lamps ABS ................................................ 250
Active Brake Assist ........................ 257
Brakes ........................................... 249
Distance warning signal ................. 257
ESP ®
.............................................. 252
ESP ®
OFF ....................................... 253
Fuel tank ........................................ 255
LIM (cruise control) ........................ 163
LIM (Distance Pilot DISTRONIC) .... 168
LIM (variable limiter) ...................... 165
Overview .......................................... 32
PASSENGER AIR BAG ...................... 40
Reserve fue l................................... 255
Seat belt ........................................ 248
Tyre pressure monitor ................... 258
Warning triangle ................................ 293
Washer fluid
Display message ............................ 246
Weather display (COMAND Online)
See also Digital Owner's Manua l... 259
Wheel and tyre combinations
Tyres .............................................. 323
Wheel bolt tightening torque ........... 322
Wheel chock ...................................... 319
Wheels
Changing a whee l.......................... 318
Changing/replacing ....................... 318
Checking ........................................ 310
Cleaning ......................................... 288
Emergency spare whee l................. 323 Fitting a new wheel ........................ 321
Important safety notes .................. 310
Information on driving .................... 310
Removing a whee
l.......................... 321
Storing ........................................... 319
Tightening torque ........................... 322
Wheel size/tyre size ...................... 323
Windowbag
Display message ............................ 225
Operation ......................................... 46
Windows
Cleaning ......................................... 288
see Side windows
Windscreen
Demisting ...................................... 123
Windscreen washer system
Important safety notes .................. 332
Topping up ..................................... 284
Windscreen wipers
Display message ............................ 246
Problem (malfunction) ................... 116
Replacing the wiper blades ............ 115
Switching on/of f........................... 114
Winter driving
General notes ................................ 312
Winter operation
Slippery road surfaces ................... 162
Snow chains .................................. 313
Winter tyres
Limiting the speed (on-board com-
puter) ............................................. 211
M+S tyre s...................................... 312
Wiper blades
Cleaning ......................................... 288
Important safety notes .................. 115
Wooden trim (cleaning instruc-
tions) .................................................. 291
Workshop
see Qualified specialist workshop Z
ZONE function Switching on/of f........................... 123 22
Index
Page 31 of 345
vehicle. This particularly applies to work rele-
vant to safety.
Observe the notes in the Service Booklet.
Always have the following work carried out at a
qualified specialist workshop:
R work relevant to safety
R service and maintenance work
R repair work
R modifications, installations and conversions
R work on electronic components
Mercedes-Benz recommends that you use a
Mercedes-Benz Service Centre. Vehicle registration
Mercedes-Benz may ask its Service Centres to
carry out technical inspections on certain vehi-
cles. The quality or safety of the vehicle is
improved as a result of the inspection.
Mercedes-Benz can only inform you about vehi-
cle checks if it has your registration data.
It is possible that your vehicle has not yet been
registered in your name in the following cases:
R if your vehicle was not purchased at an
authorised specialist dealer
R if your vehicle has not yet been inspected at a
Mercedes-Benz Service Centre
It is advisable to register your vehicle with a
Mercedes-Benz Service Centre.
Inform Mercedes-Benz as soon as possible
about any change in address or vehicle owner-
ship. You can do this at a Mercedes-Benz Ser-
vice Centre, for example. Correct use
If you remove any warning stickers, you or oth-
ers could fail to recognise certain dangers.
Leave warning stickers in position.
Observe the following information when driving
your vehicle:
R the safety notes in this manual
R technical data for the vehicle
R traffic rules and regulations
R laws and safety standards pertaining to motor
vehicles Implied warranty
! Follow the instructions in this manual about
the proper operation of your vehicle as well as about possible vehicle damage. Damage to
your vehicle that arises from culpable contra- ventions against these instructions are not
covered either by Mercedes-Benz implied
warranty or by the New or Used-Vehicle War-
ranty. QR code for rescue card
The QR code is secured in the fuel filler flap and
on the opposite side on the B-pillar. In the event of an accident, rescue services can use the QR
code to quickly find the appropriate rescue card
for your vehicle. The current rescue card con-
tains, in a compact form, the most important
information about your vehicle, e.g. the routing
of the electric cables.
You can find more information under
www.mercedes-benz.de/qr-code. Data stored in the vehicle
Many of the electronic components in your vehi- cle can store data.
These data memories temporarily or perma-
nently store technical information about:
R the vehicle's operating state
R events
R faults
In general, this technical information docu-
ments the state of a component, a module, a
system or the surroundings.
This includes, for example:
R operating conditions of system components,
e.g. fluid levels
R status messages concerning the vehicle and
its individual components, e.g. number of
wheel revolutions/speed, deceleration in
movement, lateral acceleration, accelerator
pedal position
R malfunctions and defects in important system
components, e.g. lights, brakes
R vehicle reactions and operating conditions in
special driving situations, e.g. airbag deploy- 28
Data stored in the vehicleIntroduction
Page 117 of 345
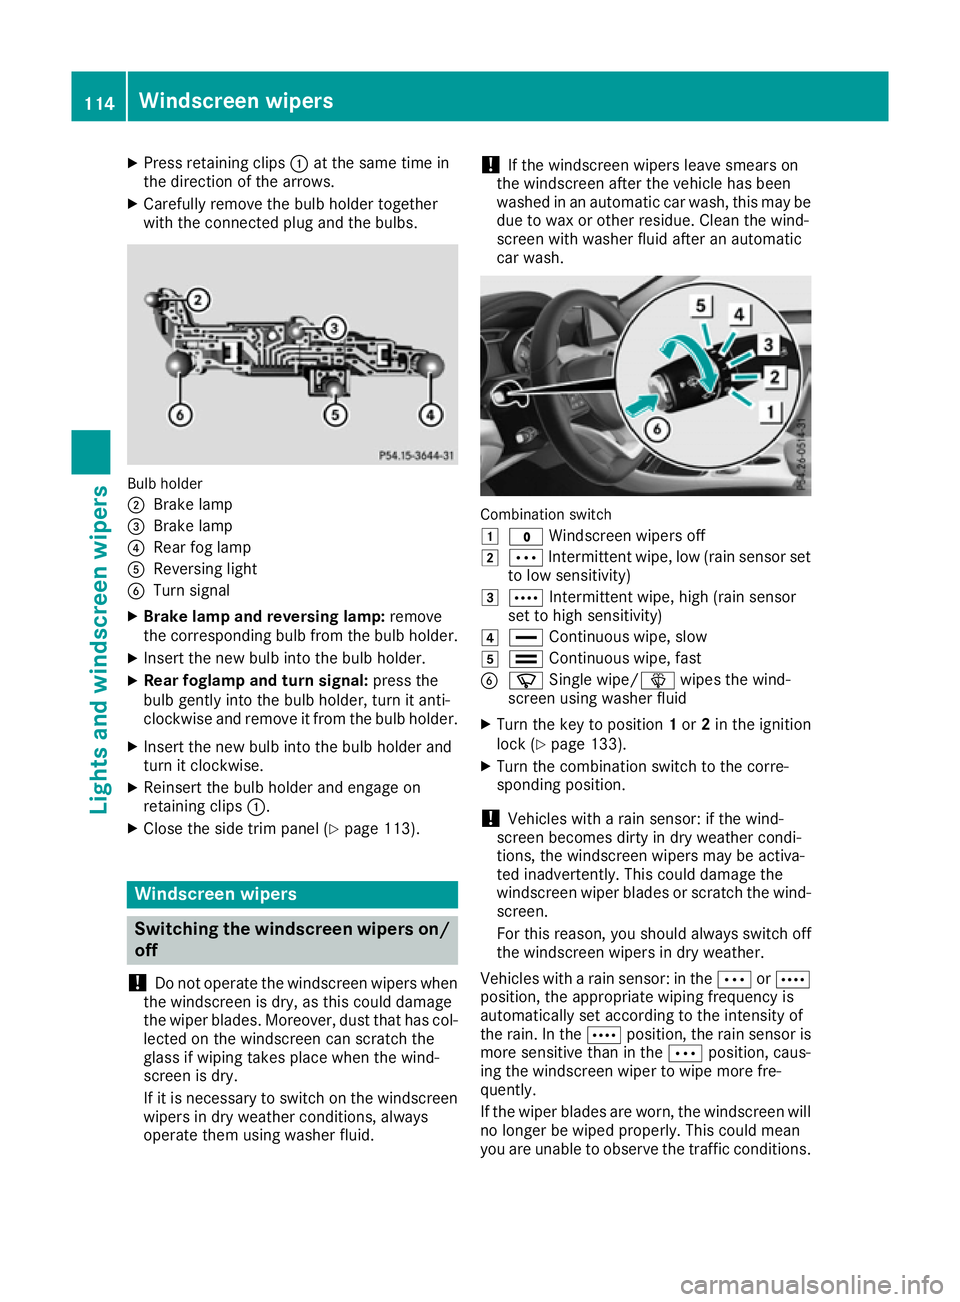
X
Press retaining clips :at the same time in
the direction of the arrows.
X Carefully remove the bulb holder together
with the connected plug and the bulbs. Bulb holder
;
Brake lamp
= Brake lamp
? Rear fog lamp
A Reversing light
B Turn signal
X Brake lamp and reversing lamp: remove
the corresponding bulb from the bulb holder.
X Insert the new bulb into the bulb holder.
X Rear foglamp and turn signal: press the
bulb gently into the bulb holder, turn it anti-
clockwise and remove it from the bulb holder.
X Insert the new bulb into the bulb holder and
turn it clockwise.
X Reinsert the bulb holder and engage on
retaining clips :.
X Close the side trim panel (Y page 113).Windscreen wipers
Switching the windscreen wipers on/
off
! Do not operate the windscreen wipers when
the windscreen is dry, as this could damage
the wiper blades. Moreover, dust that has col-
lected on the windscreen can scratch the
glass if wiping takes place when the wind-
screen is dry.
If it is necessary to switch on the windscreen wipers in dry weather conditions, always
operate them using washer fluid. !
If the windscreen wipers leave smears on
the windscreen after the vehicle has been
washed in an automatic car wash, this may be
due to wax or other residue. Clean the wind-
screen with washer fluid after an automatic
car wash. Combination switch
1
$ Windscreen wipers off
2 Ä Intermittent wipe, low (rain sensor set
to low sensitivity)
3 Å Intermittent wipe, high (rain sensor
set to high sensitivity)
4 ° Continuous wipe, slow
5 ¯ Continuous wipe, fast
B í Single wipe/î wipes the wind-
screen using washer fluid
X Turn the key to position 1or 2in the ignition
lock (Y page 133).
X Turn the combination switch to the corre-
sponding position.
! Vehicles with a rain sensor: if the wind-
screen becomes dirty in dry weather condi-
tions, the windscreen wipers may be activa-
ted inadvertently. This could damage the
windscreen wiper blades or scratch the wind- screen.
For this reason, you should always switch off
the windscreen wipers in dry weather.
Vehicles with a rain sensor: in the ÄorÅ
position, the appropriate wiping frequency is
automatically set according to the intensity of
the rain. In the Åposition, the rain sensor is
more sensitive than in the Äposition, caus-
ing the windscreen wiper to wipe more fre-
quently.
If the wiper blades are worn, the windscreen will
no longer be wiped properly. This could mean
you are unable to observe the traffic conditions. 114
Windscreen wipersLights and windscreen wipers
Page 139 of 345
position
Dor R, the vehicle may accelerate
suddenly. There is a risk of an accident.
When engaging transmission position Dor R,
always keep the brake pedal firmly depressed
and do not depress the accelerator pedal at
the same time.
! Vehicles with manual transmission:
change gear in good time and avoid spinning
the wheels. You could otherwise damage the
vehicle.
Depress the accelerator carefully when pulling
away.
The vehicle automatically locks centrally once
you have pulled away. The locking knobs in the
doors drop down.
You can open the doors from the inside at any
time.
You can also deactivate the automatic door
locking system (Y page 211).
Vehicles with automatic transmission: it is
only possible to shift the transmission from posi-
tion Pto the desired position if you depress the
brake pedal. Only then can the parking lock be
deactivated.
All vehicles (except Mercedes-AMG vehi-
cles): if you do not depress the brake pedal, the
DIRECT SELECT lever can still be moved but the
parking lock remains engaged.
Mercedes-AMG vehicles: if you do not depress
the brake pedal, the selector lever can still be
moved but the parking lock remains engaged.
Vehicles with automatic transmission: at
transmission fluid temperatures below Ò20 †,
you can only shift out of position Pinto another
transmission position when the engine is run-
ning.
i Vehicles with automatic transmission:
upshifts take place at higher engine speeds
after a cold start. This helps the catalytic con- verter to reach its operating temperature
more quickly.
Vehicles with automatic transmission: infor-
mation on automatically releasing the electric
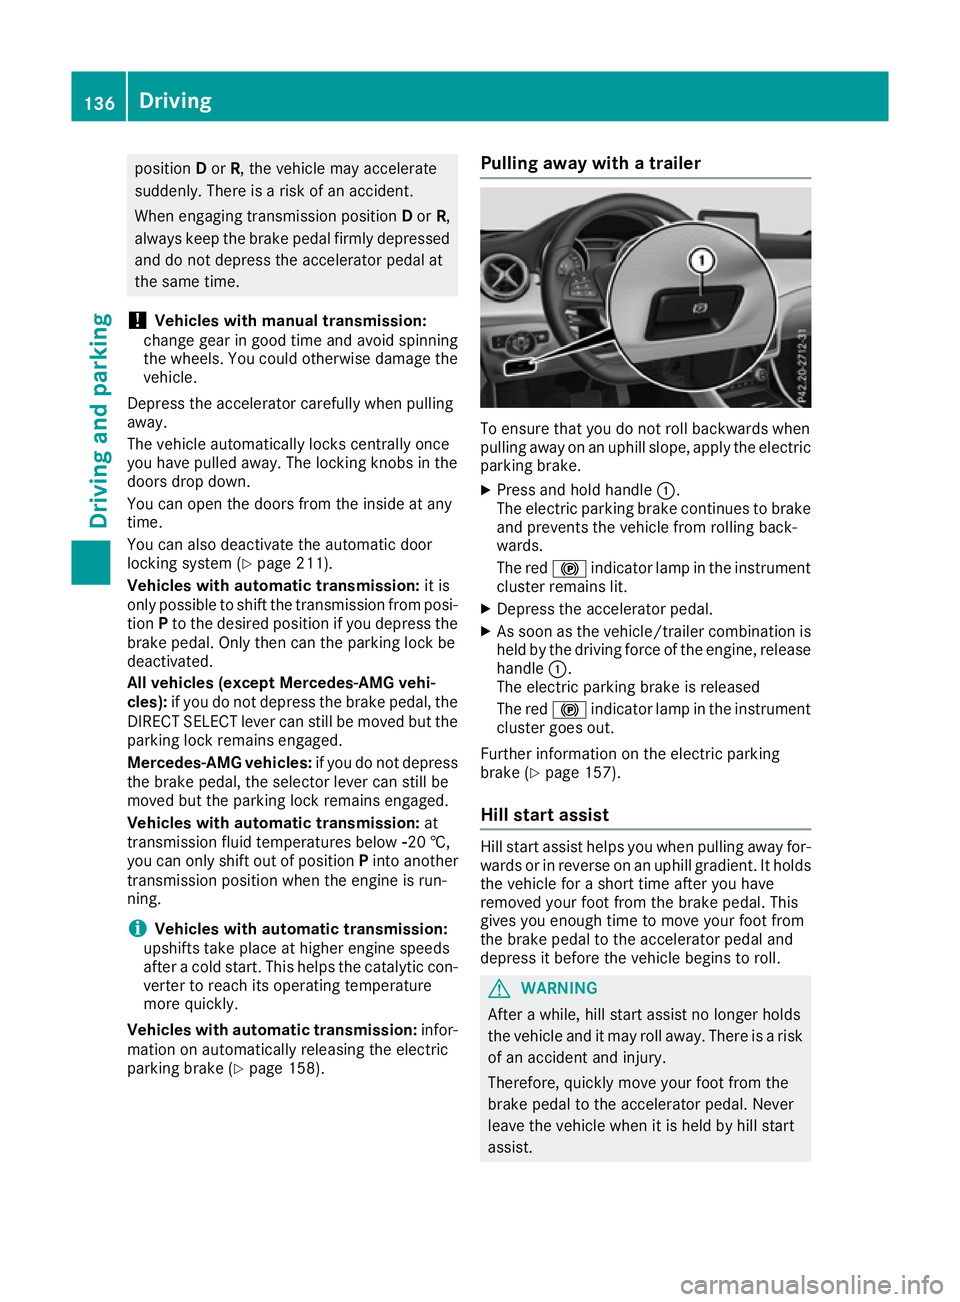
parking brake (Y page 158). Pulling away with a trailer
To ensure that you do not roll backwards when
pulling away on an uphill slope, apply the electric
parking brake.
X Press and hold handle :.
The electric parking brake continues to brake
and prevents the vehicle from rolling back-
wards.
The red !indicator lamp in the instrument
cluster remains lit.
X Depress the accelerator pedal.
X As soon as the vehicle/trailer combination is
held by the driving force of the engine, release
handle :.
The electric parking brake is released
The red !indicator lamp in the instrument
cluster goes out.
Further information on the electric parking
brake (Y page 157).
Hill start assist Hill start assist helps you when pulling away for-
wards or in reverse on an uphill gradient. It holds the vehicle for a short time after you have
removed your foot from the brake pedal. This
gives you enough time to move your foot from
the brake pedal to the accelerator pedal and
depress it before the vehicle begins to roll. G
WARNING
After a while, hill start assist no longer holds
the vehicle and it may roll away. There is a risk of an accident and injury.
Therefore, quickly move your foot from the
brake pedal to the accelerator pedal. Never
leave the vehicle when it is held by hill start
assist. 136
DrivingDriving and parking
Page 147 of 345
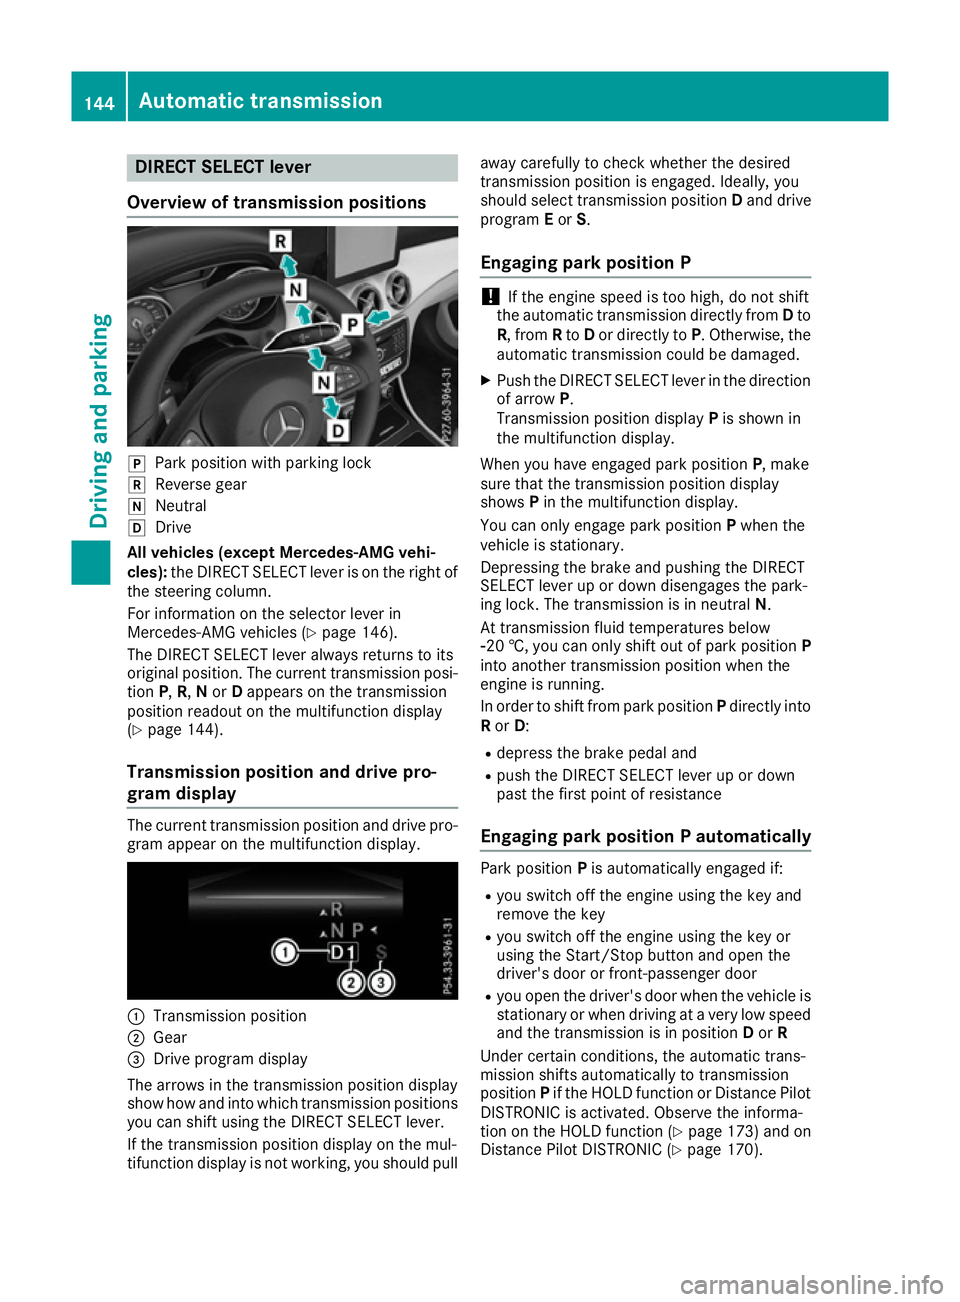
DIRECT SELECT lever
Overview of transmission positions j
Park position with parking lock
k Reverse gear
i Neutral
h Drive
All vehicles (except Mercedes-AMG vehi-
cles): the DIRECT SELECT lever is on the right of
the steering column.
For information on the selector lever in
Mercedes-AMG vehicles (Y page 146).
The DIRECT SELECT lever always returns to its
original position. The current transmission posi-
tion P,R, Nor Dappears on the transmission
position readout on the multifunction display
(Y page 144).
Transmission position and drive pro-
gram display The current transmission position and drive pro-
gram appear on the multifunction display. :
Transmission position
; Gear
= Drive program display
The arrows in the transmission position display
show how and into which transmission positions
you can shift using the DIRECT SELECT lever.
If the transmission position display on the mul-
tifunction display is not working, you should pull away carefully to check whether the desired
transmission position is engaged. Ideally, you
should select transmission position
Dand drive
program Eor S.
Engaging park position P !
If the engine speed is too high, do not shift
the automatic transmission directly from Dto
R, from Rto Dor directly to P. Otherwise, the
automatic transmission could be damaged.
X Push the DIRECT SELECT lever in the direction
of arrow P.
Transmission position display Pis shown in
the multifunction display.
When you have engaged park position P, make
sure that the transmission position display
shows Pin the multifunction display.
You can only engage park position Pwhen the
vehicle is stationary.
Depressing the brake and pushing the DIRECT
SELECT lever up or down disengages the park-
ing lock. The transmission is in neutral N.
At transmission fluid temperatures below
Ò20 †, you can only shift out of park position P
into another transmission position when the
engine is running.
In order to shift from park position Pdirectly into
R or D:
R depress the brake pedal and
R push the DIRECT SELECT lever up or down
past the first point of resistance
Engaging park position P automatically Park position
Pis automatically engaged if:
R you switch off the engine using the key and
remove the key
R you switch off the engine using the key or
using the Start/Stop button and open the
driver's door or front-passenger door
R you open the driver's door when the vehicle is
stationary or when driving at a very low speed and the transmission is in position Dor R
Under certain conditions, the automatic trans-
mission shifts automatically to transmission
position Pif the HOLD function or Distance Pilot
DISTRONIC is activated. Observe the informa-
tion on the HOLD function (Y page 173) and on
Distance Pilot DISTRONIC (Y page 170).144
Automatic transmissionDriving and pa
rking
Page 226 of 345
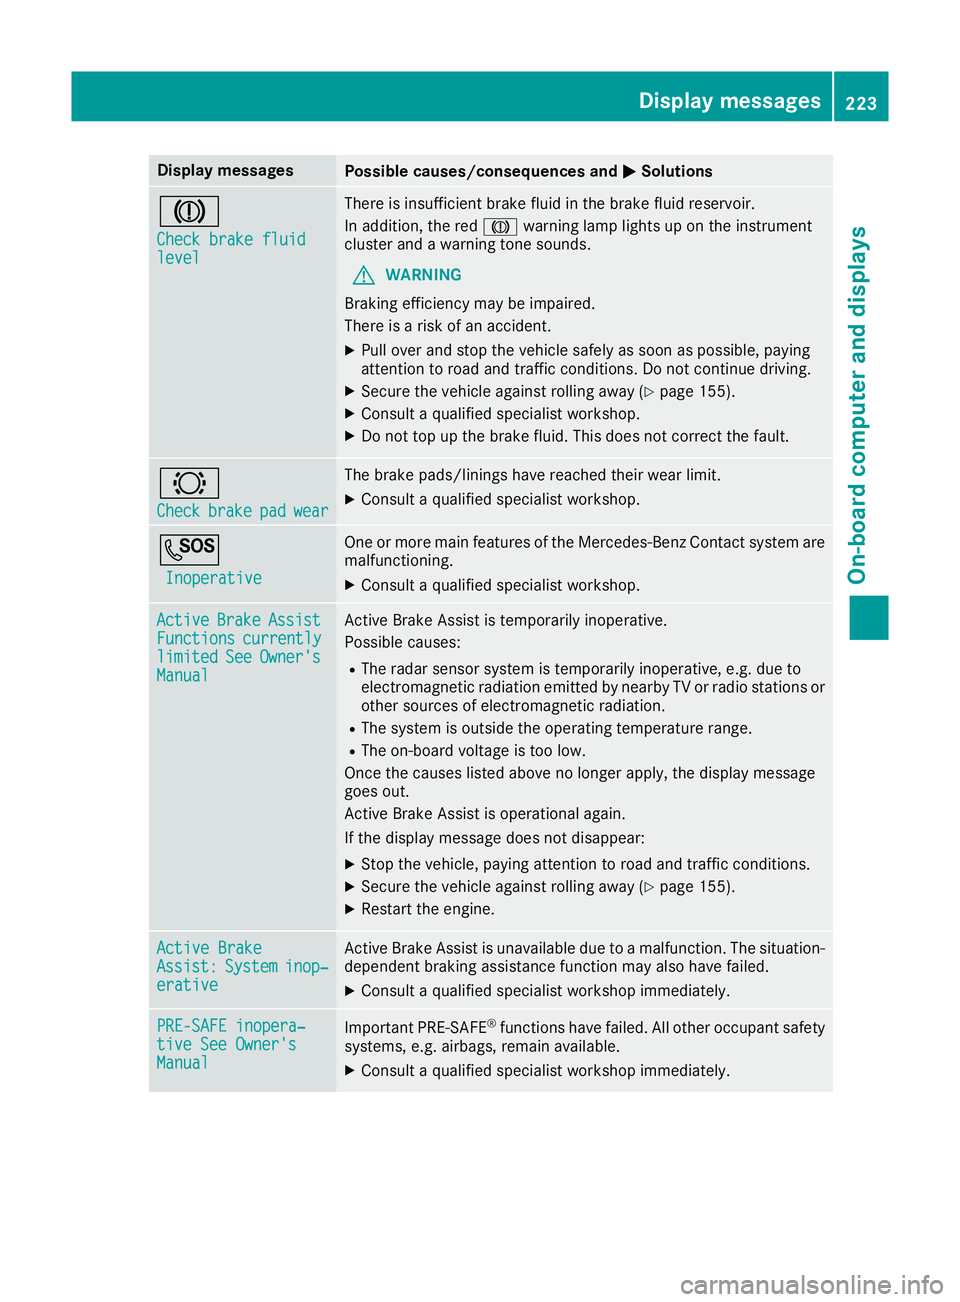
Display messages
Possible causes/consequences and
M
MSolutions J
Check brake fluid Check brake fluid
level level There is insufficient brake fluid in the brake fluid reservoir.
In addition, the red Jwarning lamp lights up on the instrument
cluster and a warning tone sounds.
G WARNING
Braking efficiency may be impaired.
There is a risk of an accident.
X Pull over and stop the vehicle safely as soon as possible, paying
attention to road and traffic conditions. Do not continue driving.
X Secure the vehicle against rolling away (Y page 155).
X Consult a qualified specialist workshop.
X Do not top up the brake fluid. This does not correct the fault. #
Check Check
brake
brakepad
padwear
wear The brake pads/linings have reached their wear limit.
X Consult a qualified specialist workshop. G
Inoperative
Inoperative One or more main features of the Mercedes-Benz Contact system are
malfunctioning.
X Consult a qualified specialist workshop. Active
Active
Brake
BrakeAssist
Assist
Functions
Functions currently
currently
limited
limited See
SeeOwner's
Owner's
Manual
Manual Active Brake Assist is temporarily inoperative.
Possible causes:
R The radar sensor system is temporarily inoperative, e.g. due to
electromagnetic radiation emitted by nearby TV or radio stations or other sources of electromagnetic radiation.
R The system is outside the operating temperature range.
R The on-board voltage is too low.
Once the causes listed above no longer apply, the display message
goes out.
Active Brake Assist is operational again.
If the display message does not disappear:
X Stop the vehicle, paying attention to road and traffic conditions.
X Secure the vehicle against rolling away (Y page 155).
X Restart the engine. Active Brake Active Brake
Assist: Assist:
System
Systeminop‐
inop‐
erative
erative Active Brake Assist is unavailable due to a malfunction. The situation-
dependent braking assistance function may also have failed.
X Consult a qualified specialist workshop immediately. PRE-SAFE inopera‐
PRE-SAFE inopera‐
tive See Owner's tive See Owner's
Manual Manual
Important PRE-SAFE
®
functions have failed. All other occupant safety
systems, e.g. airbags, remain available.
X Consult a qualified specialist workshop immediately. Display
messages
223On-board computer and displays Z