2016 MERCEDES-BENZ CLA-Class tow
[x] Cancel search: towPage 29 of 246

Operating the control for vehicle and
sound settings
XTouch the touch-sensitive surface with two
fingers, spaced slightly apart.
XTurn both fingers clockwise.
The control setting is increased.
or
XTurn both fingers counter-clockwise.
The control setting is decreased.
Moving the map
XUse one finger to press the touch-sensitive
surface until you reach the pressure point.
The crosshair is shown.
XTouch the touch-sensitive surface again
with one finger.
XSwipe your finger in any direction.
The map is moved is the direction of move-
ment.
Zooming in on the map
XTouch the touch-sensitive surface with two fingers, spaced slightly apart.
XGlide your fingers away from each other.
The map scale is magnified.
Zooming out of the map
XTouch the touch-sensitive surface with twofingers, spaced far apart.
XGlide your fingers towards each other.
The map scale is reduced.
Handwriting recognition
Handwriting recognition overview
This function is only available if the touchpad
is equipped with handwriting recognition.
Touchpad27
Overview and operation
Page 72 of 246

Entering an address
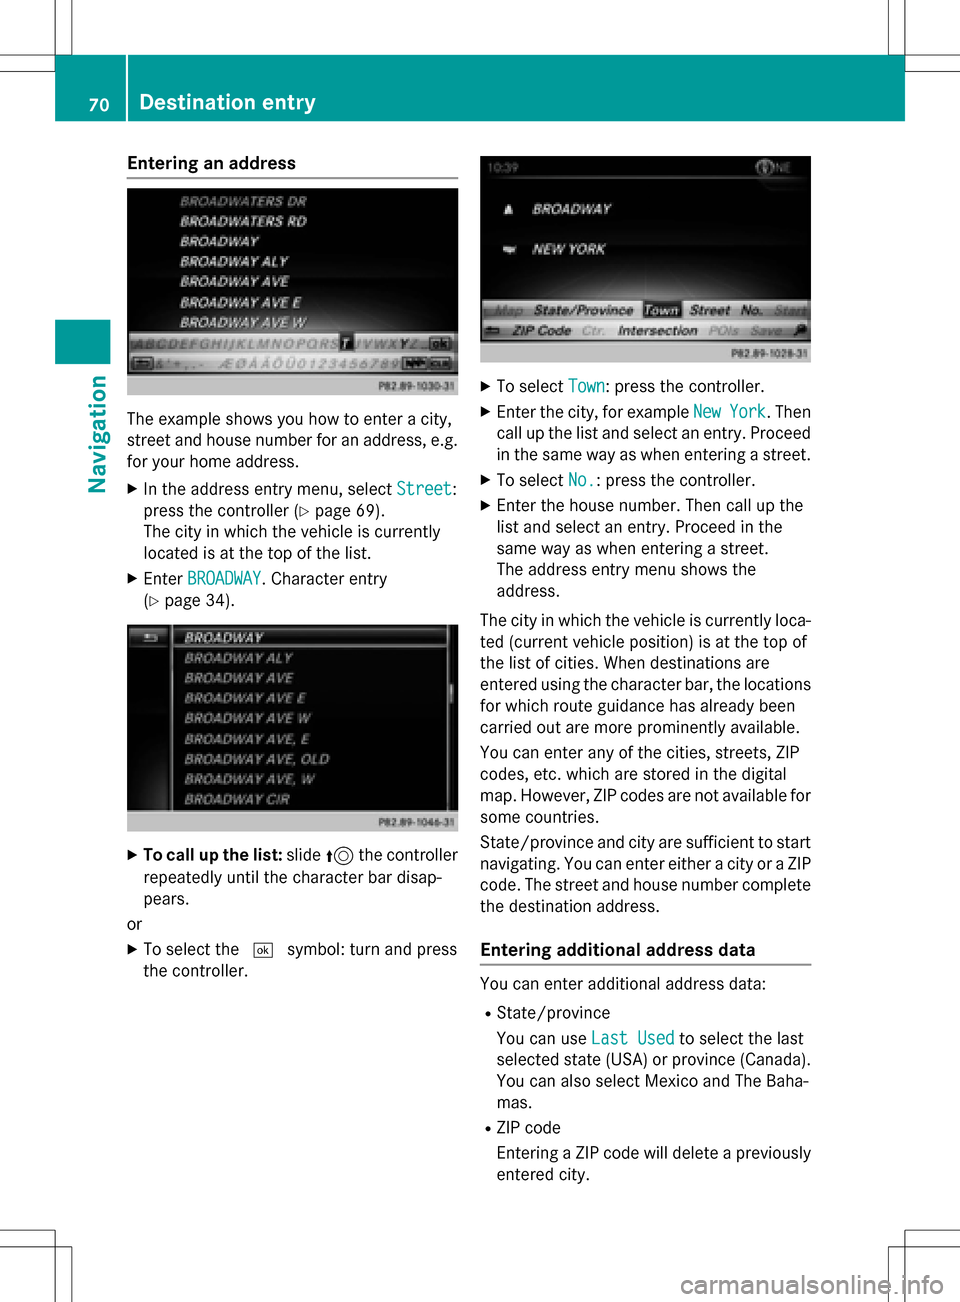
The example shows you how to enter a city,
street and house number for an address, e.g.
for your home address.
XIn the address entry menu, selectStreet:
press the controller (
Ypage 69).
The city in which the vehicle is currently
located is at the top of the list.
XEnter BROADWAY. Character entry
(
Ypage 34).
XTo call up the list: slide5the controller
repeatedly until the character bar disap-
pears.
or
XTo select the ¬symbol: turn and press
the controller.
XTo select Town: press the controller.
XEnter the city, for example NewYork. Then
call up the list and select an entry. Proceed
in the same way as when entering a street.
XTo select No.: press the controller.
XEnter the house number. Then call up the
list and select an entry. Proceed in the
same way as when entering a street.
The address entry menu shows the
address.
The city in which the vehicle is currently loca-
ted (current vehicle position) is at the top of
the list of cities. When destinations are
entered using the character bar, the locations
for which route guidance has already been
carried out are more prominently available.
You can enter any of the cities, streets, ZIP
codes, etc. which are stored in the digital
map. However, ZIP codes are not available for
some countries.
State/province and city are sufficient to start
navigating. You can enter either a city or a ZIP code. The street and house number complete
the destination address.
Entering additional address data
You can enter additional address data:
RState/province
You can use Last Used
to select the last
selected state (USA) or province (Canada). You can also select Mexico and The Baha-
mas.
RZIP code
Entering a ZIP code will delete a previously
entered city.
70Destination entry
Navigation
Page 188 of 246

Connecting USB devices
There are two USB ports in the stowage space
under the armrest.
XConnect the USB device with a suitable
USB port.
If the corresponding media display is visi-
ble, the medium is played and the files are
loaded in the background. Otherwise, the
system does not automatically switch to
USB. If there are no supported audio or
video files, you will see a message to this
effect.
iMP3 players must support Media Transfer
Protocol (MTP).
Playback options
XIn media mode, slide 6the controller.
The media menu bar is shown.
XTo select Options: turn and press the con-
troller.
Playing similar tracks
XTo select PlayMoreLikeThis: turn and
press the controller.
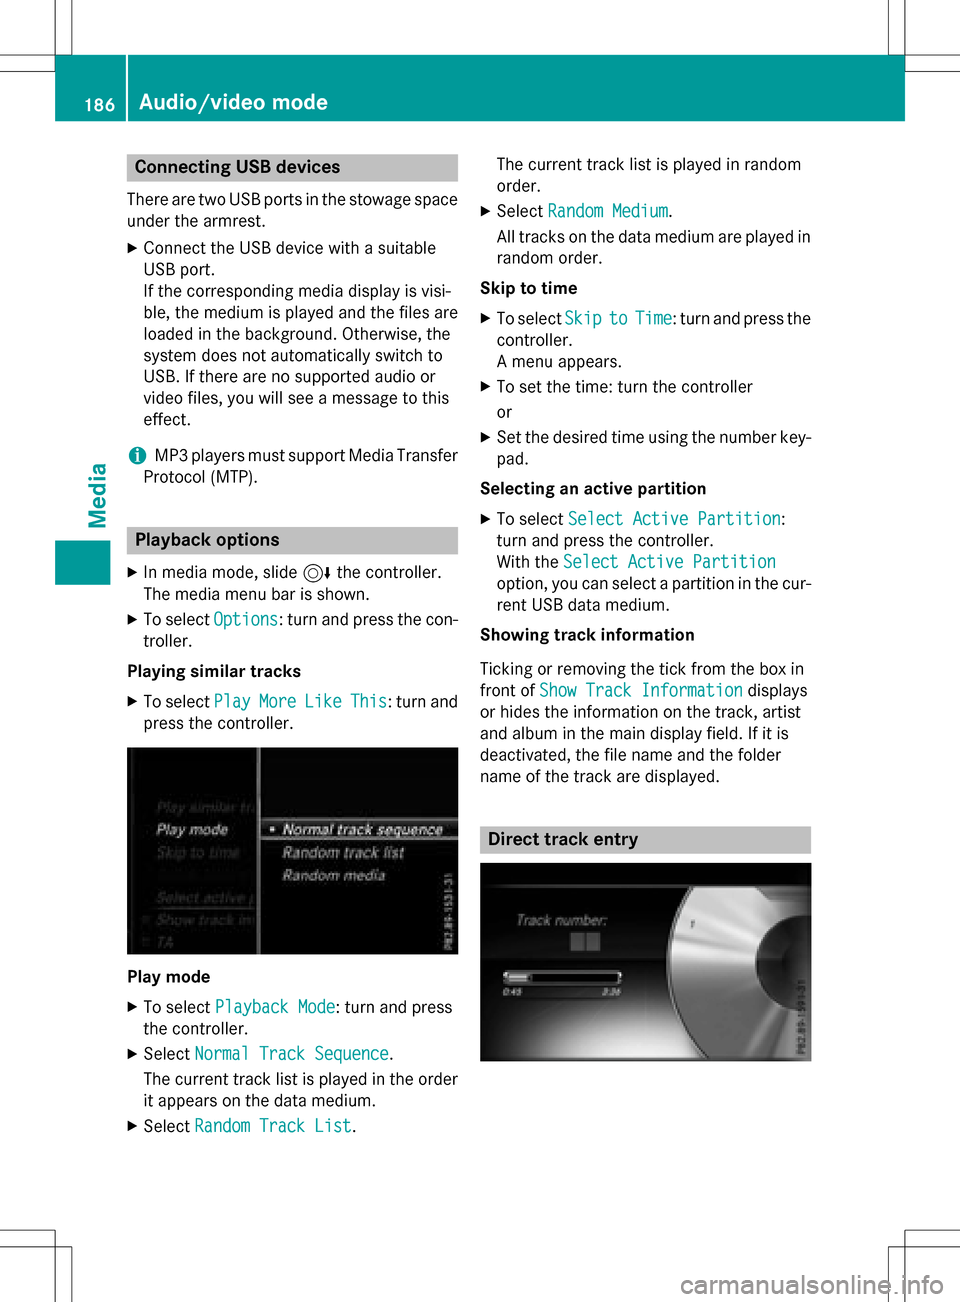
Play mode
XTo select Playback Mode: turn and press
the controller.
XSelect Normal Track Sequence.
The current track list is played in the order
it appears on the data medium.
XSelect Random Track List. The current track list is played in random
order.
XSelect
Random Medium.
All tracks on the data medium are played in
random order.
Skip to time
XTo select SkiptoTime: turn and press the
controller.
A menu appears.
XTo set the time: turn the controller
or
XSet the desired time using the number key- pad.
Selecting an active partition
XTo select Select Active Partition:
turn and press the controller.
With the Select Active Partition
option, you can select a partition in the cur-
rent USB data medium.
Showing track information
Ticking or removing the tick from the box in
front of Show Track Information
displays
or hides the information on the track, artist
and album in the main display field. If it is
deactivated, the file name and the folder
name of the track are displayed.
Direct track entry
186Audio/video mode
Media
Page 199 of 246

Selecting playback options
XTo selectOptions: turn and press the con-
troller.
XSelect Playback Mode.
A # dot indicates the current setting.
XSelect the desired option.
If you select Random
TrackList, you will
see a corresponding message in the display
or selection window.
Increasing the volume on COMAND
XTo select Options: slide6and press the
controller.
XTo select Volume: turn and press the con-
troller.
A menu appears. The #dot indicates the
current setting.
XSelect StandardorBoost.
Information on sound settings
(
Ypage 208).
Operation with the Media Interface
General notes
Media Interface is a universal interface for the
connection of mobile audio and video devi-
ces. Media Interface in COMAND has two
USB connections.
The USB connection sockets are located in
the stowage compartment under the armrest.
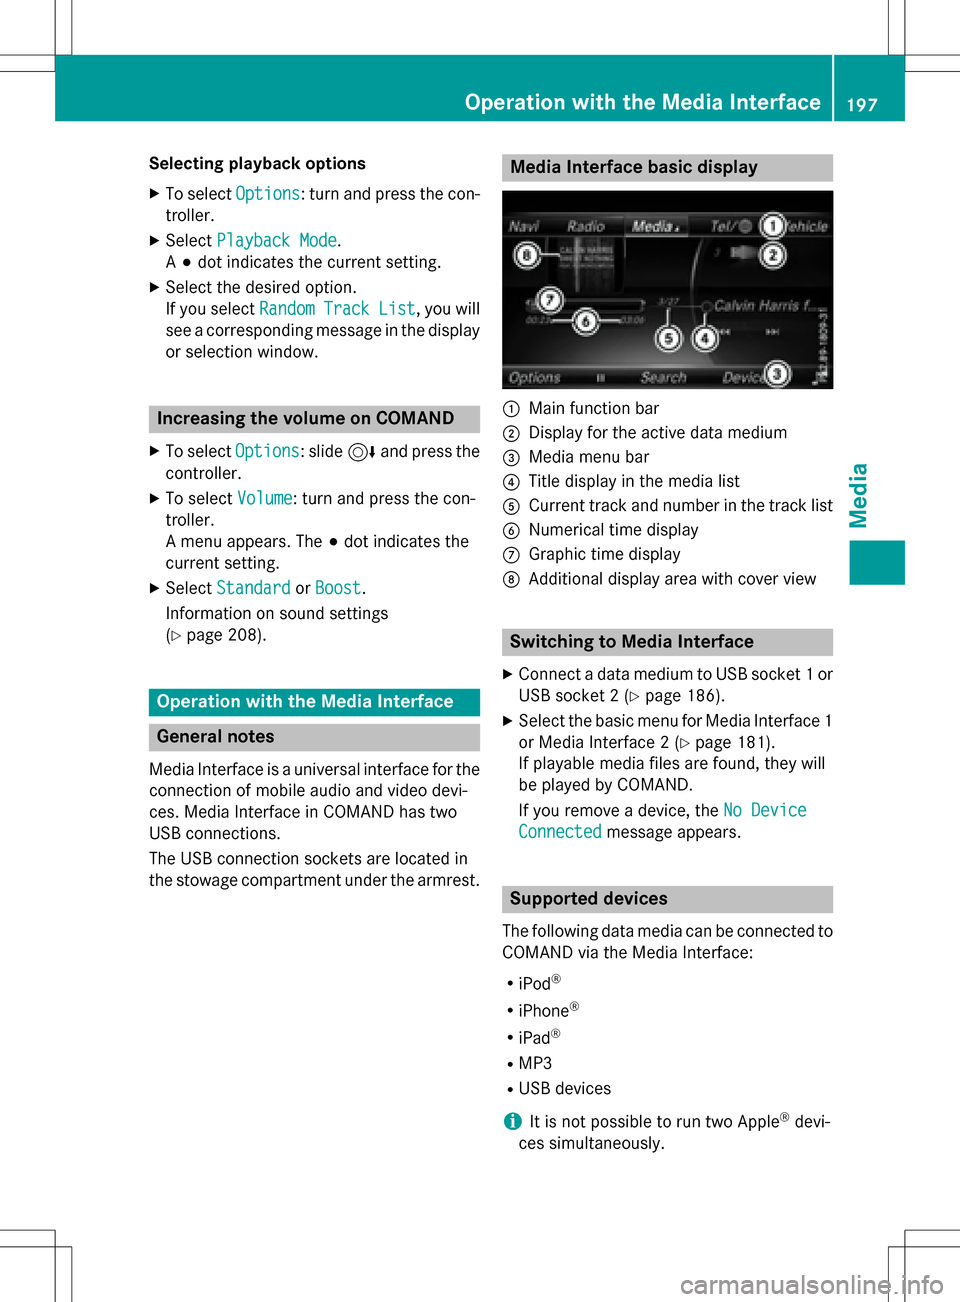
Media Interface basic display
:Main function bar
;Display for the active data medium
=Media menu bar
?Title display in the media list
ACurrent track and number in the track list
BNumerical time display
CGraphic time display
DAdditional display area with cover view
Switching to Media Interface
XConnect a data medium to USB socket 1 or
USB socket 2 (
Ypage 186).
XSelect the basic menu for Media Interface 1
or Media Interface 2 (
Ypage 181).
If playable media files are found, they will
be played by COMAND.
If you remove a device, the No Device
Connectedmessage appears.
Supported devices
The following data media can be connected to
COMAND via the Media Interface:
RiPod®
RiPhone®
RiPad®
RMP3
RUSB devices
iIt is not possible to run two Apple®devi-
ces simultaneously.
Operation with the Media Interface197
Media
Z
Page 228 of 246

Your COMANDequipment
These operatin ginstruction sdescribe all th e
standar dan doptional equipmen tof your
COMAN Dsystem, as available at th etime of
going to print .Country-specifi cdifference s
are possible. Bear in min dthat your vehicle
may no tfeature all function sdescribed here.
Thi salso applies to safety-relevan tsystems
an dfunctions.
Read th einformation on qualified specialis t
workshop sin th evehicle Operator's Manual.
Overview
Important safet ynotes
GWARNING
The CD/DVD drive is aclass 1lase rproduct.
If you ope nth ehousin gof th eCD/DVD drive,
there is aris kof exposure to invisible lase r
radiation .Thi slase rradiation could damage
your retina. There is aris kof injury.
Never ope nth ehousing. Always hav emain -
tenanc ean drepair wor kcarrie dout at aquali -
fie dspecialis tworkshop .
GWARNING
If objects suc has headphones/headset sor
external audio/video sources are no tsecure d
in th epassenger compartment, they can be
flun garound an dhit vehicle occupants .There
is aris kof injury, fo rexample in th eevent of
sudden braking or asudden change in direc -
tion .
Always stow these items or similar objects
carefully so that they canno tbe flun garound ,
fo rexample in alockable vehicle stowag e
compartment.
Equipment
Observ ethat arange of Rear Seat Entertain -
men tSystems are available fo rMercedes -
Benz vehicles .In this Operator's Manual, th e
Rear Seat Entertainmen tSyste mCode 86 4is used fo
rillustration purposes. If you hav e a
differen tRear Seat Entertainmen tSyste min
your vehicle, pleas erefer to th emanufactur-
er' soperatin ginstructions.
Component s
The Rear Seat Entertainmen tSyste m
includes :
Rtwoscreens fo rth erea rbehin dth efront-
seat head restraints
Rtw oremot econtrols
Rasingle drive (rear-compartmen tdrive)
RAU Xjack son bot hrea rscreens (AUX dis -
play) an don th erear-compartmen tdrive
(AUX drive)
Rheadphone sfo reac hrea rscree n
Rtwoset sof cordless headphone s
226Overview
Rear Seat Entertainment