2016 MERCEDES-BENZ B-Class ELECTRIC mirror controls
[x] Cancel search: mirror controlsPage 8 of 342

Installing/removing ....................... 248
Notes/how to use .........................248
Cargo compartment enlargement ... 246
Cargo compartment floor
Height adjustment ......................... 250
Important safety notes .................. 249
Opening/closing ............................ 250
Stowage well (under) ..................... 249
Cargo net
Attaching ....................................... 249
Important safety information ......... 249
Cargo tie down rings ......................... 247
CD player (on-board computer) ........191
Center console
Lower section .................................. 36
Upper section .................................. 35
Central locking
Automatic locking (on-board com-
puter) ............................................. 198
Locking/unlocking (SmartKey) ....... .72
Changing bulbs
Cornering light function ................ .107
High-beam headlamps ................... 106
License plate lighting ..................... 109
Low-beam headlamps .................... 106
Parking lamps ................................ 107
Rear fog lamp ................................ 107
Reversing lamps ............................ 107
Standing lamps (front) ................... 107
Turn signals (front) ......................... 107
Charge level display .......................... 184
Charging
with RANGE PLUS .......................... 195
see Charging the high-voltage battery
Charging cable
Connecting ....................................1 48
Controls ......................................... 147
Important safety notes .................. 146
Removing ....................................... 149
Storing ...........................................1 47
Warming up ................................... 142
Charging the high-voltage battery
(important safety notes) ................... 140
Child
Restraint system .............................. 57
Child seat
Forward-facing restraint system ...... 60 LATCH-type (ISOFIX) child seat
anchors ............................................ 58
On the
front-passenger seat ............ 60
Rearward-facing restraint system .... 60
Top Tether ....................................... 59
Child-proof locks
Important safety notes .................... 61
Rear doors ....................................... 61
Children
Special seat belt retractor ............... 57
Cigarette lighter ................................ 254
Cleaning
Mirror turn signal ........................... 277
Climate control
Automatic climate control (dual-
zone) .............................................. 117
Auxiliary climate control (on-
board computer) ............................ 196
Controlling automatically ............... 120
Convenience opening/closing
(air-recirculation mode) ................. 123
Cooling with air dehumidification .. 118
Defrosting the windows ................. 122
Defrosting the windshield .............. 121
General notes ................................ 116
Immediate pre-entry climate con-
trol ................................................. 125
Indicator lamp ................................ 120
Information about using auto-
matic climate control ..................... 117
Maximum cooling .......................... 122
Overview of systems ...................... 116
Pre-entry climate control at
departure time ............................... 125
Pre-entry climate control at time
of departure (on-board computer) .. 196
Pre-entry climate control via key ... 124
Pre-entry climate control via key
(on-board computer) ...................... 196
Problem with the rear window
defroster ........................................ 123
Problems with cooling with air
dehumidification ............................ 120
Refrigerant ..................................... 337
Refrigerant filling capacity ............. 337
Setting the air distribution ............. 120
Setting the air vents ...................... 126
Setting the airflow ......................... 121
6Index
Page 266 of 342

When using the integrated garage door
opener, always make sure that nobody is
within the range of movement of the garage
door.
Programming
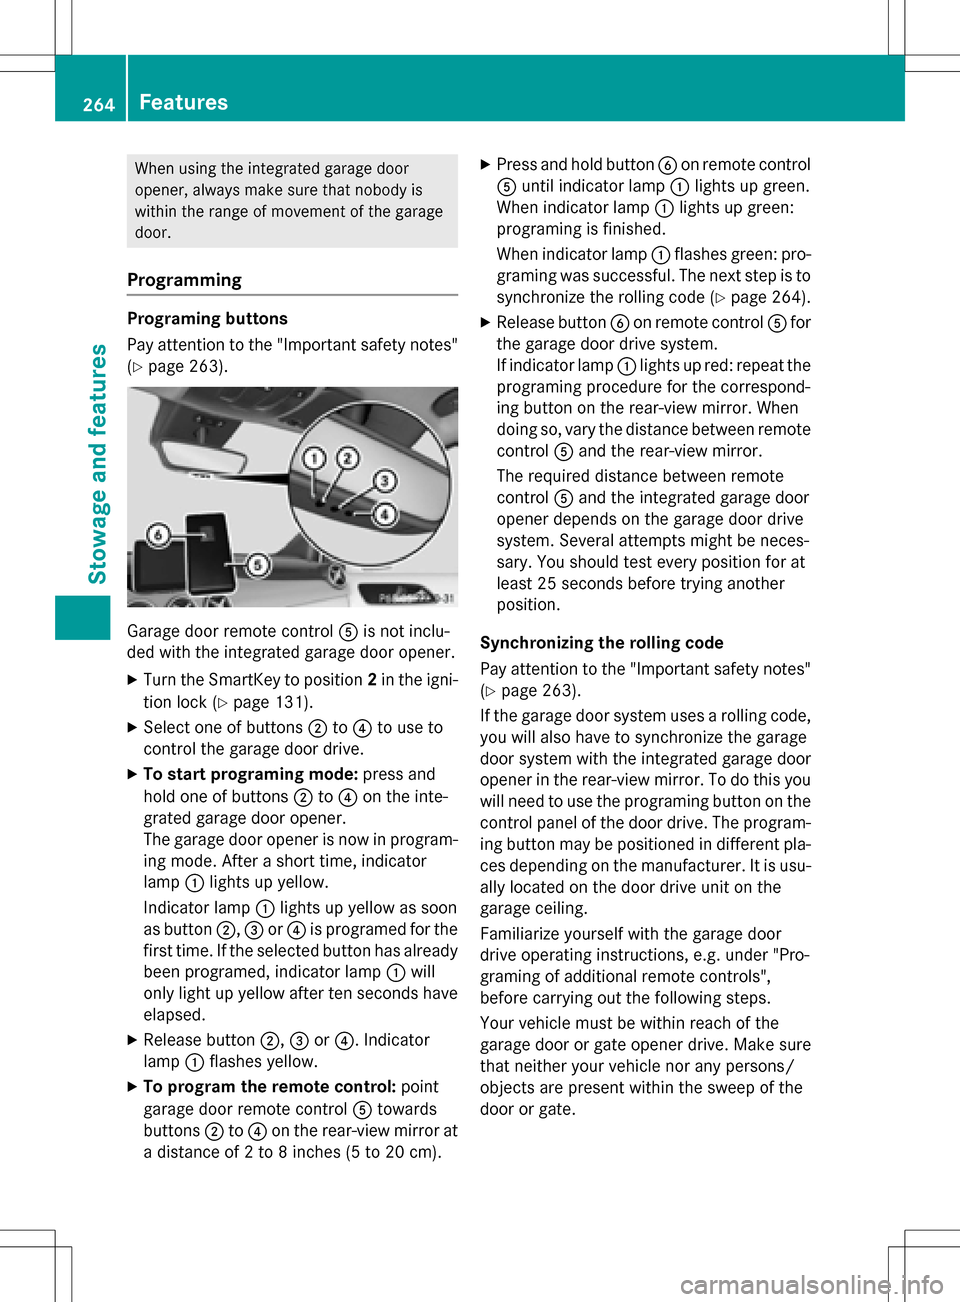
Programing buttons
Pay attention to the "Important safety notes"
(
Ypage 263).
Garage door remote controlAis not inclu-
ded with the integrated garage door opener.
XTurn the SmartKey to position 2in the igni-
tion lock (
Ypage 131).
XSelect one of buttons ;to? to use to
control the garage door drive.
XTo start programing mode: press and
hold one of buttons ;to? on the inte-
grated garage door opener.
The garage door opener is now in program-
ing mode. After a short time, indicator
lamp :lights up yellow.
Indicator lamp :lights up yellow as soon
as button ;,=or? is programed for the
first time. If the selected button has already
been programed, indicator lamp :will
only light up yellow after ten seconds have
elapsed.
XRelease button ;,=or?. Indicator
lamp :flashes yellow.
XTo program the remote control: point
garage door remote control Atowards
buttons ;to? on the rear-view mirror at
a distance of 2 to 8 inches (5 to 20 cm).
XPress and hold button Bon remote control
A until indicator lamp :lights up green.
When indicator lamp :lights up green:
programing is finished.
When indicator lamp :flashes green: pro-
graming was successful. The next step is to
synchronize the rolling code (
Ypage 264).
XRelease button Bon remote control Afor
the garage door drive system.
If indicator lamp :lights up red: repeat the
programing procedure for the correspond-
ing button on the rear-view mirror. When
doing so, vary the distance between remote
control Aand the rear-view mirror.
The required distance between remote
control Aand the integrated garage door
opener depends on the garage door drive
system. Several attempts might be neces-
sary. You should test every position for at
least 25 seconds before trying another
position.
Synchronizing the rolling code
Pay attention to the "Important safety notes"
(
Ypage 263).
If the garage door system uses a rolling code,
you will also have to synchronize the garage
door system with the integrated garage door
opener in the rear-view mirror. To do this you
will need to use the programing button on the
control panel of the door drive. The program- ing button may be positioned in different pla-
ces depending on the manufacturer. It is usu-
ally located on the door drive unit on the
garage ceiling.
Familiarize yourself with the garage door
drive operating instructions, e.g. under "Pro-
graming of additional remote controls",
before carrying out the following steps.
Your vehicle must be within reach of the
garage door or gate opener drive. Make sure
that neither your vehicle nor any persons/
objects are present within the sweep of the
door or gate.
264Features
Stowage and features
Page 268 of 342

Before performing these steps, make sure
that new batteries have been installed in
garage door drive remote controlA.
RNote that some remote controls only trans-
mit for a limited amount of time (the indi-
cator lamp on the remote control goes out).
Press buttonBon remote control Aagain
before transmission ends.
RAlign the antenna cable of the garage door
opener unit. This can improve signal recep-
tion/transmission.
Opening/closing the garage door
After it has been programmed, the integrated
garage door opener assumes the function of
the garage door system's remote control.
Please also read the operating instructions
for the garage door system.
XTurn the SmartKey to position 2in the igni-
tion lock (
Ypage 131).
XPress button ;,=or? that has been
programmed to operate the garage door.
Garage door system with a fixed code: indi-
cator lamp :lights up green.
Garage door system with a rolling code:
indicator lamp :flashes green.
The transmitter will transmit a signal as
long as the button is pressed. The trans-
mission is halted after a maximum of ten
seconds and indicator lamp :lights up
yellow.
XPress button ;,=or? again if neces-
sary.
Clearing the memory
Make sure that you clear the memory of the
integrated garage door opener before selling
the vehicle.
XTurn the SmartKey to position 2in the igni-
tion lock (
Ypage 131).
XPress and hold buttons ;and ?.
The indicator lamp initially lights up yellow
and then green.
XRelease buttons ;and ?.
The memory of the integrated garage door
opener in the rear-view mirror is cleared.
Compass
Calling up the compass
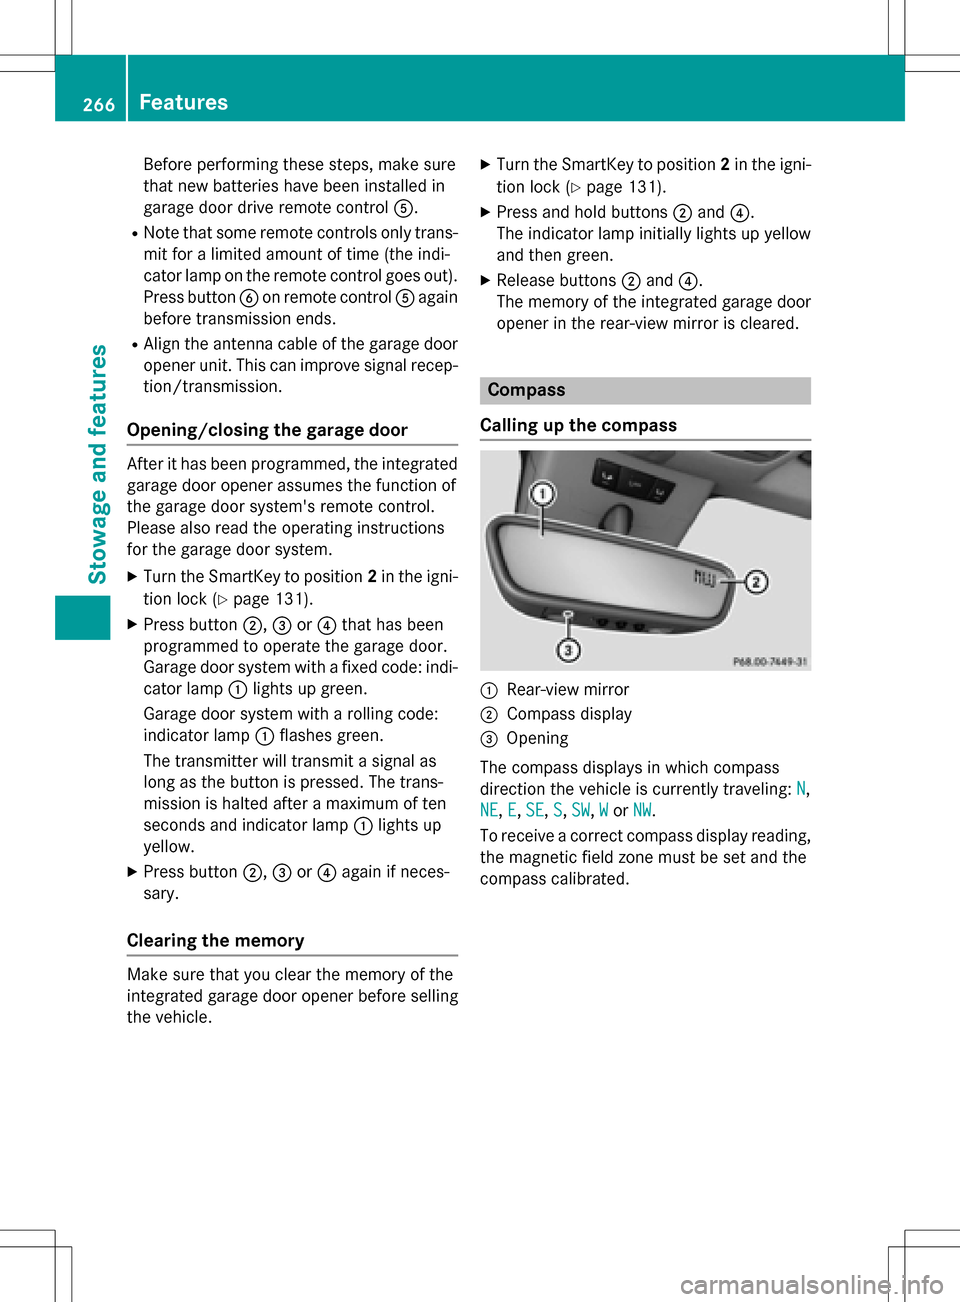
:Rear-view mirror
;Compass display
=Opening
The compass displays in which compass
direction the vehicle is currently traveling: N
,
NE
, E,SE, S,SW,Wor NW.
To receive a correct compass display reading, the magnetic field zone must be set and the
compass calibrated.
266Features
Stowage and features