2016 MERCEDES-BENZ B-Class ELECTRIC lights
[x] Cancel search: lightsPage 181 of 342

Warning display
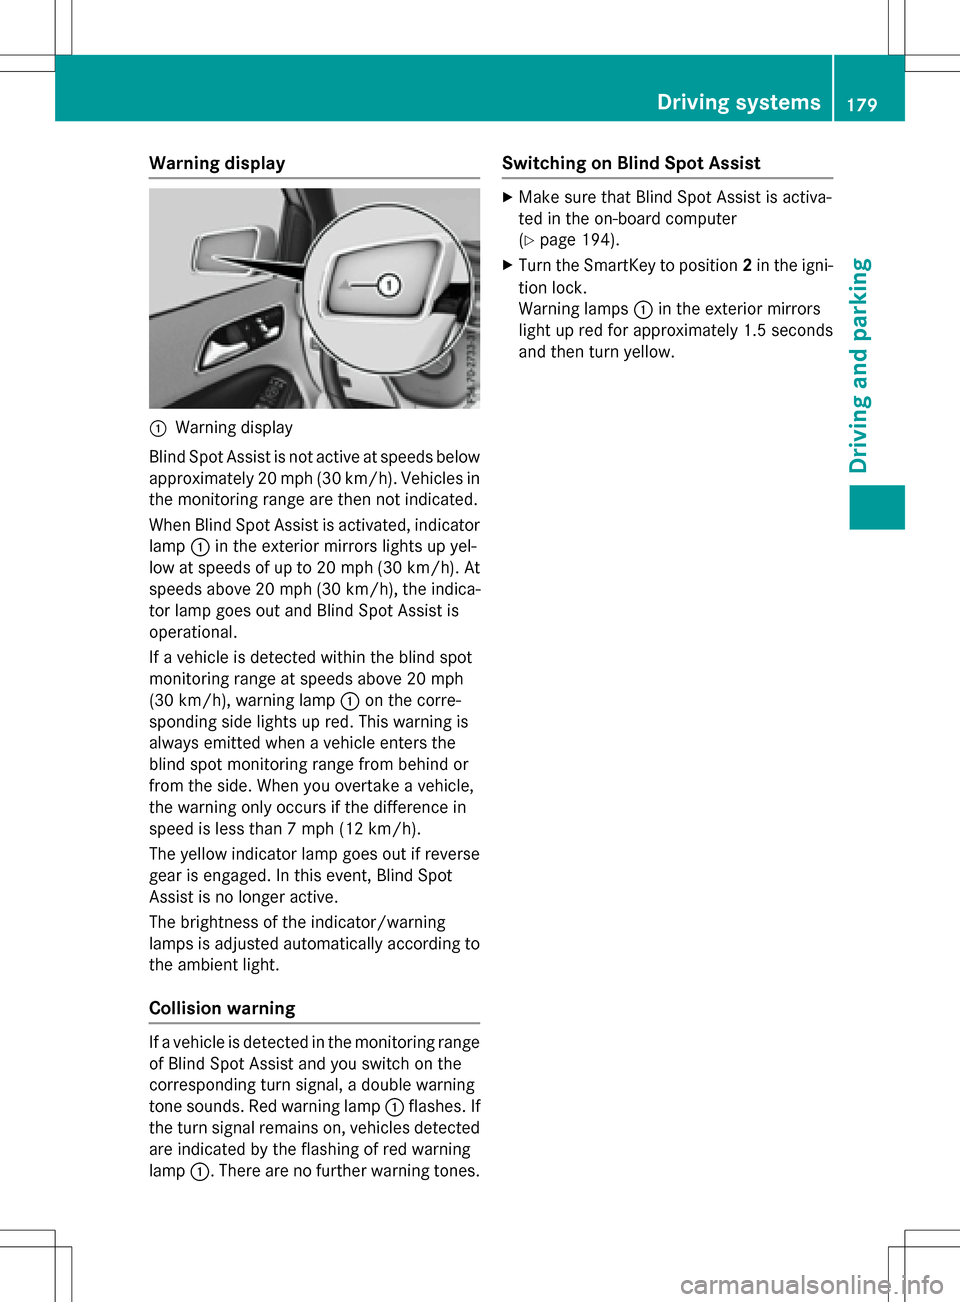
:Warning display
Blind Spot Assist is not active at speeds below
approximately 20 mph (30 km/h). Vehicles in the monitoring range are then not indicated.
When Blind Spot Assist is activated, indicator
lamp :in the exterior mirrors lights up yel-
low at speeds of up to 20 mph (30 km/h). At
speeds above 20 mph (30 km/h), the indica-
tor lamp goes out and Blind Spot Assist is
operational.
If a vehicle is detected within the blind spot
monitoring range at speeds above 20 mph
(30 km/h), warning lamp :on the corre-
sponding side lights up red. This warning is
always emitted when a vehicle enters the
blind spot monitoring range from behind or
from the side. When you overtake a vehicle,
the warning only occurs if the difference in
speed is less than 7 mph (12 km/h).
The yellow indicator lamp goes out if reverse
gear is engaged. In this event, Blind Spot
Assist is no longer active.
The brightness of the indicator/warning
lamps is adjusted automatically according to
the ambient light.
Collision warning
If a vehicle is detected in the monitoring range
of Blind Spot Assist and you switch on the
corresponding turn signal, a double warning
tone sounds. Red warning lamp :flashes. If
the turn signal remains on, vehicles detected
are indicated by the flashing of red warning
lamp :. There are no further warning tones.
Switching on Blind Spot Assist
XMake sure that Blind Spot Assist is activa-
ted in the on-board computer
(
Ypage 194).
XTurn the SmartKey to position 2in the igni-
tion lock.
Warning lamps :in the exterior mirrors
light up red for approximately 1.5 seconds
and then turn yellow.
Driving systems179
Driving and parking
Z
Page 186 of 342

The braking performance of the electric
motor using recuperative braking is, in some
operating modes, either reduced or not effec-
tive:
Rwhen the condition of charge of the high-
voltage battery increases
Rif the high-voltage battery is not yet at a
normal operating temperature
Rwhen driving close to the maximum speed
Rwhen the vehicle is almost stationary
Rin transmission positionN
Rduring and after ESP stability control
If necessary, counteract the reduced regen-
erative braking effect by applying the brake
yourself.
Condition of charge display
Condition of charge display :shows the
condition of charge of the high-voltage bat-
tery.
The charge value is shown as a percentage in
the Energy Flow
menu in the instrument
cluster (
Ypage 187).
iThe Energy Flowmenu can also be dis-
played in the COMAND/Audio display.
The condition of charge of the high-voltage
battery has dropped into the reserve range if
the drive system is running and:
Rthe DriveBatteryReserveLevelmes-
sage appears in the display
Rthe indicator lamp in the instrument cluster lights up Charge the high-voltage battery from a con-
dition of charge of less than 20% at:
Ran electrical outlet
Ra charging station
The braking performance of the electric
motor using recuperative braking is, in some
operating modes, either reduced or not effec-
tive:
Rwhen the condition of charge of the high-
voltage battery increases
Rif the high-voltage battery is not yet at a
normal operating temperature
Rwhen the vehicle is almost stationary
Rin transmission position N
Rduring and after ESP stability control
If you do not make an additional effort to
apply the brake yourself, the braking effect
may not be sufficient. If necessary, counter-
act the reduced regenerative braking effect
by applying the brake yourself.
Operating the on-board computer
Overview
:Multifunction display
;Vehicles with Audio 20: switches on
voice-operated control for navigation (see
manufacturer's operating instructions)
184Displays and operation
On-board computer and displays
Page 196 of 342

XStart the drive system.
XPress the=or; button on the steer-
ing wheel to select the DriveAssist
menu.
XPress9or: to select ESP.
XPressato confirm.
The current selection appears.
XTo activate/deactivate: press thea
button again.
ESP
®is deactivated if the åwarning
lamp in the instrument cluster lights up
continuously when the drive system is run-
ning.
If the ÷ andå warning lamps light up
continuously, ESP
®is not available due to a
malfunction.
Observe the information on warning lamps
(
Ypage 235).
Observe the information on display messages
(
Ypage 201).
Activating/deactivating COLLISION
PREVENTION ASSIST PLUS
XPress the =or; button on the steer-
ing wheel to select the DriveAssist
menu.
XPress the9or: button to select
Collision Prevent. Assist
.
XPress ato confirm.
The current selection appears.
XTo activate/deactivate: press thea
button again.
When COLLISION PREVENTION ASSIST
PLUS is deactivated, the æsymbol
appears in the multifunction display in the
assistance graphic display.
For further information about COLLISION
PREVENTION ASSIST PLUS, see (
Ypage 63).
Activating/deactivating ATTENTION
ASSIST
XPress the =or; button on the steer-
ing wheel to select the DriveAssist
menu.
XPress the9or: button to select
Attention Assist
.
XPress ato confirm.
The current selection appears.
XPress ato confirm.
XPress the :or9 button to set Off,
Standard
or Sensitive.
XPress the abutton to save the setting.
When ATTENTION ASSIST is deactivated,
the é symbol appears in the multifunc-
tion display in the assistance graphics dis-
play.
For further information about ATTENTION
ASSIST, see (
Ypage 176).
Activating/deactivating Blind Spot
Assist
XPress the =or; button on the steer-
ing wheel to select the DriveAssist
menu.
XPress the9or: button to select
Blind Spot Assist
.
XPress ato confirm.
The current selection appears.
XTo activate/deactivate: press thea
button again.
For further information about Blind Spot
Assist, see (
Ypage 177).
Service menu
Depending on the equipment installed in the
vehicle, you have the following options in the
Serv.
menu:
RCalling up display messages in message
memory (
Ypage 200)
RChecking the tire pressure electronically
(
Ypage 309)
RCalling up the service due date
(
Ypage 273)
194Menus and submenus
On-board computer and displays
Page 198 of 342

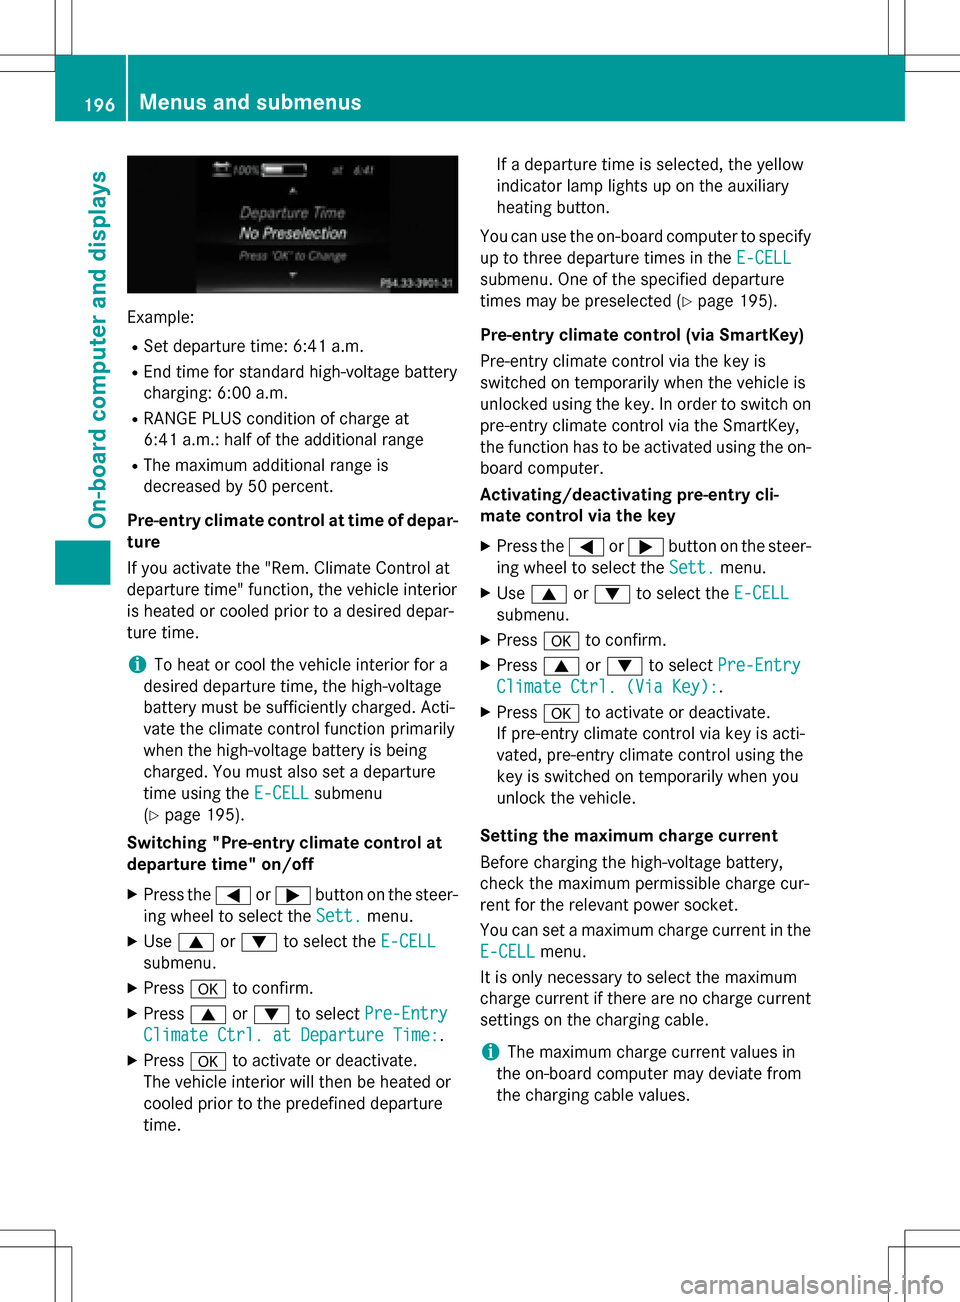
Example:
RSet departure time: 6:41 a.m.
REnd time for standard high-voltage battery
charging: 6:00 a.m.
RRANGE PLUS condition of charge at
6:41 a.m.:half of the additional range
RThe maximum additional range is
decreased by 50 percent.
Pre-entry climate control at time of depar-
ture
If you activate the "Rem. Climate Control at
departure time" function, the vehicle interior
is heated or cooled prior to a desired depar-
ture time.
iTo heat or cool the vehicle interior for a
desired departure time, the high-voltage
battery must be sufficiently charged. Acti-
vate the climate control function primarily
when the high-voltage battery is being
charged. You must also set a departure
time using the E-CELL
submenu
(
Ypage 195).
Switching "Pre-entry climate control at
departure time" on/off
XPress the =or; button on the steer-
ing wheel to select the Sett.
menu.
XUse9 or: to select the E-CELL
submenu.
XPressato confirm.
XPress 9or: to select Pre-Entry
Climate Ctrl. at Departure Time:.
XPressato activate or deactivate.
The vehicle interior will then be heated or
cooled prior to the predefined departure
time. If a departure time is selected, the yellow
indicator lamp lights up on the auxiliary
heating button.
You can use the on-board computer to specify
up to three departure times in the E-CELL
submenu. One of the specified departure
times may be preselected (
Ypage 195).
Pre-entry climate control (via SmartKey)
Pre-entry climate control via the key is
switched on temporarily when the vehicle is
unlocked using the key. In order to switch on
pre-entry climate control via the SmartKey,
the function has to be activated using the on- board computer.
Activating/deactivating pre-entry cli-
mate control via the key
XPress the =or; button on the steer-
ing wheel to select the Sett.
menu.
XUse9 or: to select the E-CELL
submenu.
XPressato confirm.
XPress 9or: to select Pre-Entry
Climate Ctrl. (Via Key):.
XPressato activate or deactivate.
If pre-entry climate control via key is acti-
vated, pre-entry climate control using the
key is switched on temporarily when you
unlock the vehicle.
Setting the maximum charge current
Before charging the high-voltage battery,
check the maximum permissible charge cur-
rent for the relevant power socket.
You can set a maximum charge current in the
E-CELL
menu.
It is only necessary to select the maximum
charge current if there are no charge current
settings on the charging cable.
iThe maximum charge current values in
the on-board computer may deviate from
the charging cable values.
196Menus and submenus
On-board computer and displays
Page 200 of 342

XPress the=or; button on the steer-
ing wheel to select the Sett.
menu.
XPress the:or9 button to select the
Instrument Cluster
submenu.
XPress ato confirm.
XPress the :or9 button to select the
Permanent Display:
function.
The current setting Outside
Temperature
orSpeedometer [km/h]/Speedometer
[mph]appears.
XPress the abutton to save the setting.
Lights
Switching the daytime running lamps on/
off
XPress the =or; button on the steer-
ing wheel to select the Sett.
menu.
XPress the:or9 button to select the
Light
submenu.
XPress ato confirm.
XPress the :or9 button to select the
Daytime Running Lights
function.
If the Daytime Running Lights
function
has been switched on, the multifunction
display shows the cone of light and the
W symbol in orange.
XPress the abutton to save the setting.
Further information on daytime running
lamps (
Ypage 100).
Vehicle
Activating/deactivating the automatic
door locking mechanism
XPress the =or; button on the steer-
ing wheel to select the Sett.
menu.
XPress the:or9 button to select the
Vehicle
submenu.
XPress ato confirm.
XPress the :or9 button to select the
Automatic Door Lock
function.
If the Automatic Door Lock
function is
switched on, the multifunction display
shows the doors in orange.
XPress the abutton to save the setting.
If you activate the Automatic door locks
function, the vehicle is centrally locked above
a speed of around 9 mph (15 km/h).
For further information on the automatic lock-
ing feature, see (
Ypage 80).
Activating/deactivating the acoustic
locking verification signal
If you switch on the Acoustic
Lockfunction,
an acoustic signal sounds when you lock the
vehicle.
XPress the =or; button on the steer-
ing wheel to select the Sett.
menu.
XPress the:or9 button to select the
Vehicle
submenu.
XPress ato confirm.
XPress the :or9 button to select the
Acoustic Lock
function.
If the Acoustic
Lockfunction is activated,
the multifunction display shows the &
symbol in orange.
XPress the abutton to save the setting.
Restoring the factory settings
XPress the =or; button on the steer-
ing wheel to select the Sett.
menu.
XPress the:or9 button to select the
Factory Setting
submenu.
XPress ato confirm.
The Reset All Settings?
function
appears.
XPress the :or9 button to select No
orYes.
XPress the abutton to confirm the selec-
tion.
If you have selected Yes
, the multifunction
display shows a confirmation message.
For safety reasons, not all functions are reset.
198Menus and submenus
On-board computer and displays
Page 201 of 342

For safety reasons, theDaytime Running
Lightsfunction in theLightsubmenu is only
reset if the vehicle is stationary.
Menus and submenus199
On-board computer and displays
Z
Page 207 of 342

Display messagesPossible causes/consequences andMSolutions
T!
÷
Inoperative See
Operator's Manual
EBD (electronic brake force distribution), ABS, BAS, ESP®,th e
HOLD function , RBS and hill start assist are not available due to a
malfunction.
COLLISION PREVENTION ASSIST PLUS may also have failed.
A warning tone sounds.
The ÷, å,!andé (USA only) or J(Canada only)
warning lamps in the instrument cluster may also light up.
GWARNING
The braking performance of the electric motor using recuperative
braking may be either reduced or not effective. If you do not make
an additional effort to apply the brake yourself, the braking effect
may no t be sufficient. If necessary, counteract the reduced regen-
erative braking effect by applying the brake yourself.
The brake system continues to function normally, but without the
functions listed above. The front and rear wheels could therefore
lock if you brake hard, for example.
The steerability and braking characteristics may be severely affec-
ted. The braking distance in an emergency braking situation can
increase.
If ES P
®is not operational, ESP®is unable to stabilize the vehicle.
There is an increased risk of skidding and an accident.
XDrive on carefully.
XVisit a qualified specialist workshop immediately.
F(USA
only)
!(Canada
only)
Turn On the Igni‐
tion to Release
the Parking Brake
The red F(USA only) or !(Canada only) indicator lamp
lights up.
You attempted to release the electric parking brake while the igni-
tion was switched off.
XSmartKey: turnthe SmartKey to position 1in the ignition lock.
XKEYLESS-GO: switch on the ignition.
F(USA
only)
!(Canada
only)
Please Release
Parking Brake
The red F(USA only) or !(Canada only) indicator lamp
flashes and a warning tone sounds. A condition for automatic
release of the electric parking brake is not fulfilled (
Ypage 155).
You are driving with the electric parking brake applied.
XRelease the electric parking brake manually.
The red F(USA only) or !(Canada only) indicator lamp
flashes and a warning tone sounds.
You are using the electric parking brake foremergenc y braking
(
Ypage 155).
Display messages20 5
On-board computer and displays
Z
Page 208 of 342

Display messagesPossible causes/consequences andMSolutions
F(USA
only)
!(Canada
only)
Parking Brake See
Operator's Manual
The yellow !warning lamp lights up.
The electric parking brake is malfunctioning.
To apply:
XSwitc hth e ignition off.
XPress the electric parking brake handle for at least ten seconds.
XShift th e transmission to position P.
XConsult a qualified specialist workshop.
The yellow!warning lamp and the red F(USA only)
or ! (Canada only) indicator lamp light up.
The electric parking brake is malfunctioning.
To release:
XSwitc h offthe ignition and turn it back on.
XRelease the electric parking brake manually.
or
XRelease the electric parking brake automatically (Ypage 155).
If th e electric parking brake still cannot be released:
XDo no t drive on.
XConsult a qualified specialist workshop.
The red F(USA only) or !(Canada only) indicator lamp
flashes and the yellow !warning lamp lights up.
The electric parking brake is malfunctioning.
To release:
XSwitc h offthe ignition and turn it back on.
XRelease the electric parking brake manually.
To apply:
XSwitc h offthe ignition and turn it back on.
XApply the electric parking brake manually.
If th e red F (USA only) or !(Canada only) indicator lamp
continues to flash:
XDo no t drive on.
XSecureth e vehicle against rolling away (Ypage 324).
XShift th e transmission to position P.
XTurnthefron t wheels towards the curb.
XConsult a qualified specialist workshop.
206Display messages
On-board computer and displays