2016 MERCEDES-BENZ B-Class ESP
[x] Cancel search: ESPPage 183 of 246

XTo display the main function bar: slide5
the controller.
XTo select Media: turn and press the con-
troller.
The last media source you have set is dis-
played.
XTo select Mediain media mode: slide 5
and press the controller.
The menu appears with the available media
sources.
XTo select the media source: turn the con-
troller and press to confirm.
If the media source contains music or video
files, these will be played. The correspond-
ing basic menu will be shown.
Using the number keypad
XTo select a media source: press the corre-
sponding number key.
If the media source contains music or video
files, these will be played. The correspond-
ing basic menu will be shown.
XTo enter the track number: press the g
button.
A menu appears.
XTo enter and confirm the number of the
track using the number keypad: press the
controller.
Use the sbutton to show the track infor-
mation for the track that is currently play-
ing.
The track is played.
Using the device list
XIn Media mode, slide 6the controller.
The media menu bar appears.
XTo select Devices: turn and press the con-
troller.
The available media sources will be shown.
The #dot indicates the current setting.
XSelect the media source.
If the media source contains music or video
files, these will be played. The correspond-
ing basic menu will be shown.
Audio/video mode
Important safety notes
GWARNING
The CD/DVD drive is a class 1 laser product.
If you open the housing of the CD/DVD drive,
there is a risk of exposure to invisible laser
radiation. This laser radiation could damage
your retina. There is a risk of injury.
Never open the housing. Always have main-
tenance and repair work carried out at a quali- fied specialist workshop.
GWARNING
Handling discs while driving may distract you from traffic conditions. You could also lose
control of the vehicle. There is a risk of an
accident.
Handle discs only when the vehicle is station-
ary.
Notes on audio/video mode
Permissible data carriers
RCD audio, CD-R and CD-RW
RDVD video, DVD-R and DVD-RW (audio for-
mats PCM DTS®and Dolby®Digital)
RSD memory card
RUSB storage device
RApple®devices
Audio/video mode181
Media
Z
Page 185 of 246

COMAND does not support WMA files of the
followin g types:
RDRM (Digit al Rights Management) encryp-
ted files
Rvar iable bit rate
RWMA Pro
R5.1 surround sound
iOnlyuse tracks with a bit rate of at least
128 kb it/sand a sampling rate of at least
44.1 kH z.Lower rates can cause a notice-
able deterioration in quality. This is espe-
cially the case if you have activated a sur-
round sound function.
Selecting an active partition (USB mass storage devices only)
You can select this function for USB storage
devices when the storage device is parti-
tioned. Up to 9 partitions (primary or logical,
FAT, FAT32, exFAT and NTFS) are supported.
Selecting an active partition
XTo select Optionsin the media menu bar:
turn and press the controller.
XSelect Select Active Partition.
Notes on copyright
Audio/video files that you create or repro-
duce yourself for playback are generally sub-
ject to copyright protection.
In many countries, reproductions, even for
private use, are not permitted without the
prior consent of the copyright holder.
Make sure that you know about the applicable
copyright regulations and that you comply
with these.
Notes on CDs/DVDs
!COMAND is designed to play discs that
comply with the EN 60908 standard. There-
fore, you can only use discs with a maxi-
mum thickness of 1.3 mm.
If you insert thicker discs, e.g. those that
contain data on both sides (DVD on one side and audio data on the other), they can-
not be ejected and can damage the device.
Only use round discs with a diameter of
12 cm. Do not use discs with a diameter of
8 cm, even with an adapter.
Discs with copy protection are not compati-
ble with the audio CD standard and therefore
may not be able to be played by COMAND.
Playback problems may occur when playing
copied discs.
There may be playback problems if you play
CDs that you have copied yourself with a stor- age capacity of more than 700 MB.
Menu overview
CD mode basic display
:
Main function bar
;Display for the active data medium
=Media menu bar
?Title display in the media list
ACurrent track and number in the track list
BNumerical time display
CGraphic time display
DAlbum cover (if available)
Audio/video mode183
Media
Z
Page 186 of 246

Inserting and removing a disc from
the single CD/DVD drive
XTo insert:press theþbutton on the
single drive.
If there isadisc already inserted, itwill be
ejecte d.
XInsert a discinto the disc slot with the prin-
ted side facing upwards.
The drive closes and the disc isplayed.
If the CD/DVD is operated in Media mode,
the corresponding basic menu willbe
shown. Ifthe CD/DVD isstarted using
another application (e.g. navigation), the
disp laywill not change.
iThe drive may not beable to play discs
wit h co pyprotection.
XTo remove: press theþbutton.
The drive ejects the disc.
XRemove the ejected disc from the slot.
Ifyou donot take the disc out of the slot, it
is drawn inagain automatical lyafter a short
while .
Inserting discs into the DVD changer
The DVD changer has a magazine with six
trays.
XTo insert the CD/DVD into the maga-
zine tray: press theVbutton.
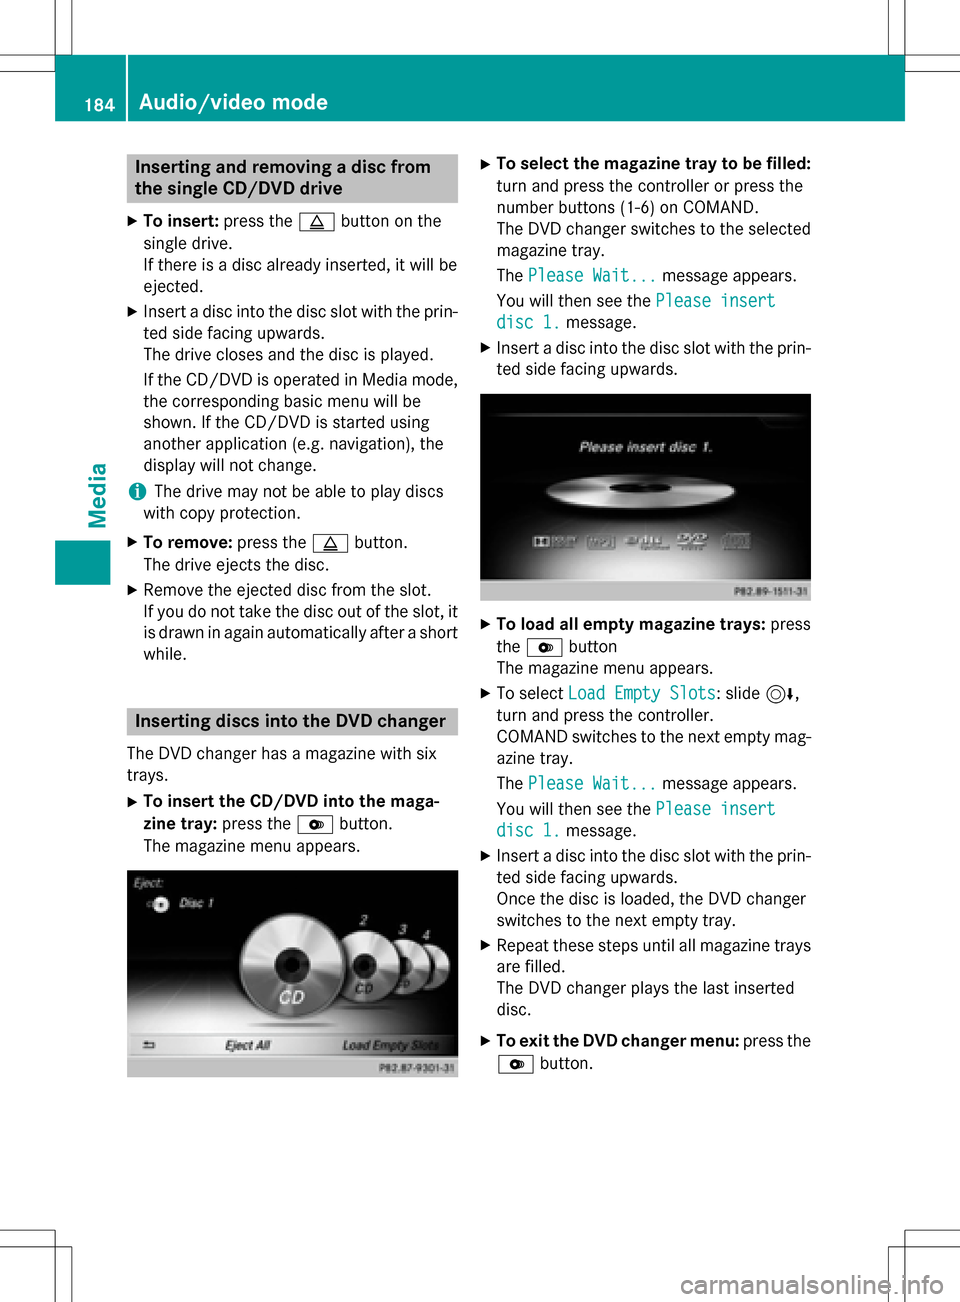
The magazine menu appears.
XTo select thema gazine tray tobe filled:
turn and press the controller or press the
number buttons (1-6) on COMAND.
The DVD changer switches to the selected
magazine tray.
The Please Wait...
message appears.
You willthen see the Please insert
disc 1.message.
XInsert a discinto the discslot with the prin-
ted side facing upwards.
XTo load all emp ty magazine trays: press
the V button
The magazine menu appears.
XTo select Load Empty Slots: slide6,
turn and press the controller.
COMAND switches to the next empty mag-
azine tray.
The Please Wait...
message appears.
You willthen see the Please insert
disc 1.message.
XInsert a discinto the discslot with the prin-
ted side facing upwards.
Once the disc isloaded, the DVD changer
swit ches to the next empty tray.
XRepeat these steps unt ilall magazine trays
are filled.
The DVD changer plays the last inserted
disc .
XTo exit the DVD changer menu: press the
V button.
184Audio/video mode
Media
Page 188 of 246

Connecting USB devices
There are two USB ports in the stowage space
under the armrest.
XConnect the USB device with a suitable
USB port.
If the corresponding media display is visi-
ble, the medium is played and the files are
loaded in the background. Otherwise, the
system does not automatically switch to
USB. If there are no supported audio or
video files, you will see a message to this
effect.
iMP3 players must support Media Transfer
Protocol (MTP).
Playback options
XIn media mode, slide 6the controller.
The media menu bar is shown.
XTo select Options: turn and press the con-
troller.
Playing similar tracks
XTo select PlayMoreLikeThis: turn and
press the controller.
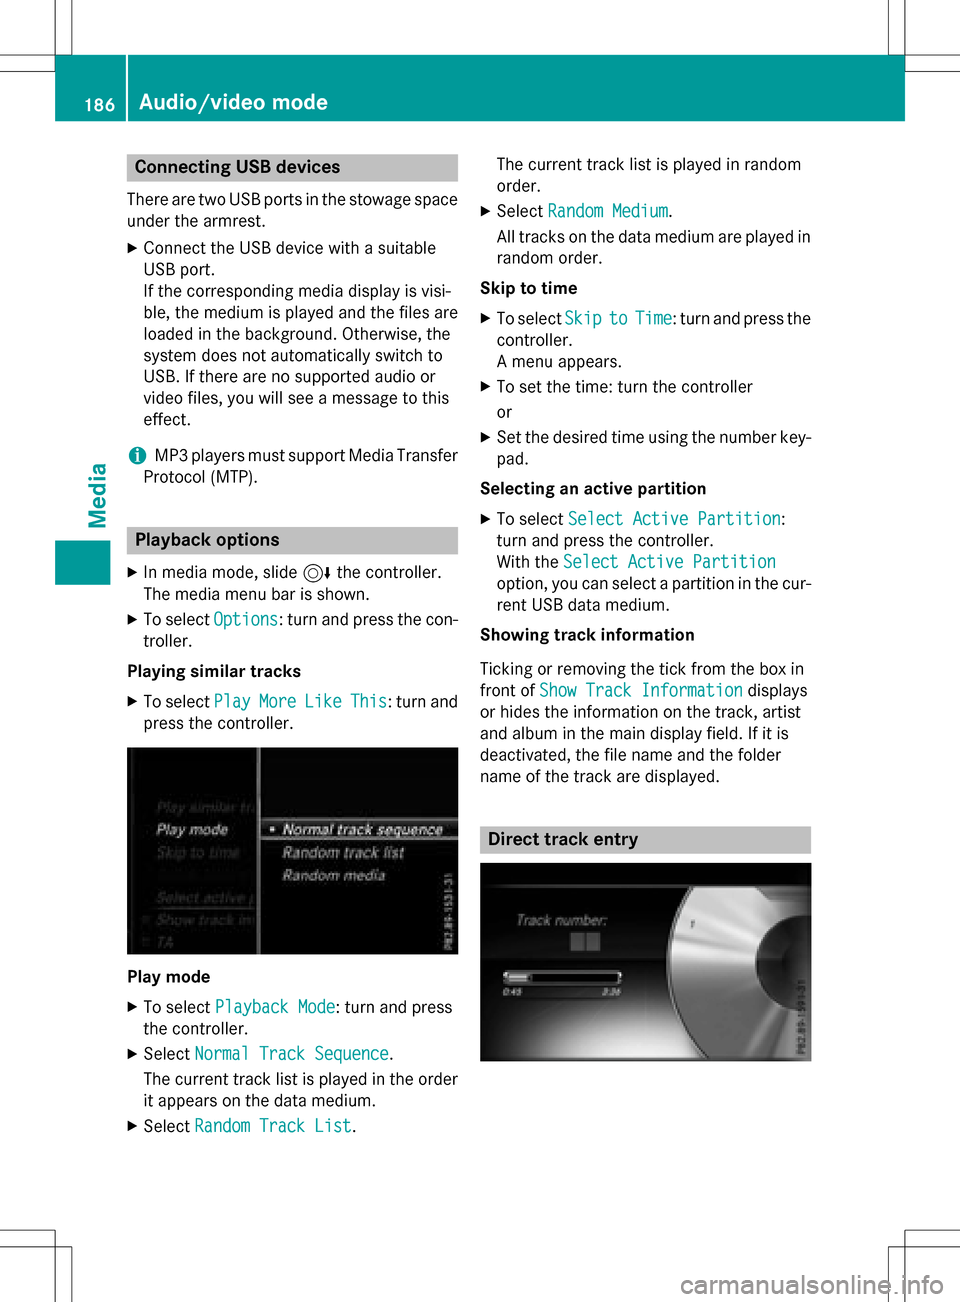
Play mode
XTo select Playback Mode: turn and press
the controller.
XSelect Normal Track Sequence.
The current track list is played in the order
it appears on the data medium.
XSelect Random Track List. The current track list is played in random
order.
XSelect
Random Medium.
All tracks on the data medium are played in
random order.
Skip to time
XTo select SkiptoTime: turn and press the
controller.
A menu appears.
XTo set the time: turn the controller
or
XSet the desired time using the number key- pad.
Selecting an active partition
XTo select Select Active Partition:
turn and press the controller.
With the Select Active Partition
option, you can select a partition in the cur-
rent USB data medium.
Showing track information
Ticking or removing the tick from the box in
front of Show Track Information
displays
or hides the information on the track, artist
and album in the main display field. If it is
deactivated, the file name and the folder
name of the track are displayed.
Direct track entry
186Audio/video mode
Media
Page 191 of 246

XIn media mode, slide6the controller.
The media menu bar appears.
XTo select Options: turn and press the con-
troller.
XTo select Delete Stored Audio CDs:
press the controller.
A selection list for the stored audio CDs is
displayed.
XTo select the desired audio CD: turn and
press the controller.
The audio CD is deleted.
Media search
General notes
COMAND plays back files from the following
data media:
RDisc (CD/DVD)
RMemory card
RUSB storage device
RApple®devices (folder, year and photos are
not available)
The categories are shown according to the
data available, whereby a database is created
for iPod
®and for all the other media sources
(CD, USB, SD card) respectively. During the
search the relevant database is accessed
depending on the active media source.
Starting the media search
XIn Media mode, slide 6the controller.
The media menu bar appears.
XTo select Search: turn and press the con-
troller.
The category list appears.
Category list
XIn Media mode, slide 6the controller.
The media menu bar is shown.
XTo select Search: turn and press the con-
troller.
The category list is shown.
Depending on the connected media sources
and files, the following categories are listed:
RCurrent Tracklist
RFolder
RSelect By Cover
RKeyword Search
RPlaylists
RArtists
RAlbums
RTracks
RGenres
RYear
RComposers
RStored Audio CDs
RVideos
RPhotos
iThe categories are available as soon as
the entire media content has been read and
analyzed.
If the same device is reconnected with
unchanged media content, these catego-
ries are available more quickly.
When connecting Apple
®devices, the cat-
egories “Folder”, “Year” and “Photos” are
not available.
Media search189
Media
Z
Page 197 of 246

De-authorizing (deregistering)aBlue-
toot h®audi odevice
XTo selec t aBluetoot h®audio devic efrom
th eBluetoot h®devicelist :turn th econtrol-
ler .
XTo selec tth esymbol to th eright of th e
Bluetoot h®audio device: slid e9 and
press th econtroller .
XTo selectDeauthorize:press th econtrol-
ler .
A prompt appears askin gwhether you
really wish to deauthoriz ethis device.
XTo selec tYesor No:turn and press th econ-
troller.
If you selec tYes
,th edevic ewill be delete d
from th eBluetoot h®devicelist .
If you selec tNo
th eprocess is canceled.
iBefore re-authorizin gth eBluetoot h®
audio device, you should also delete th e
devic enam eMB Bluetooth
from your
Bluetoot h®audio device's Bluetoot h®list
(se eth eBluetoot h®audio device's operat -
in g instructions).
Switchin gto Bluetoot h®audiomode
Basic display
:Audio transmissio nstatus (dependin gon
th eBluetoot h®audio device, also titl e
nam eand artist )
;Data medium position in th emedia list
=Sound setting s
?Devicelist
ATo stop Ëor start Ìplayback
BNameof th econnecte dBluetoot h®audio
devic e(example)
COption smen u
Some mobile phone sonly suppor ttw oBlue-
toot h
®profiles at th esam etime (e.g. Hands-
Free Profile fo rBluetoot h®telephon yand
Bluetoot h®audio profil efo raudio streaming).
If you activat eBluetoot h®audio mode and
there is already an active Internet connection ,
this can caus eth econnection to be termina-
ted.
Switchin gto Bluetoot h®audio
XPress th eÕ button.
XTo selec tBluetooth Audioin th emenu:
turn and press th econtroller .
COMAN Dactivates th eBluetoot h
®audio
device. The basi cdisplay then appears .
Playback starts.
iIf th eBluetoot h®audio devic econnecte d
supports metadat aand correspondin gdat a
is available ,then th eartist ,track and album
nam ecan be displayed .
Starting/stopping playback
XTo selectStar tplayback Ì:turn and
press th econtroller .
Playback starts. Ëis selected.
XTo stop playback: selec tË.
A message appears .Ì is selected.
XTo continu eplayback: selec tÌ.
A message appears .Ë is selected.
Starting playback if th eBluetoot h®
audiodevice ha sbeen stopped
Durin gth esearch fo rmobile phone s ,the
connection wit hth eBluetoot h®audio devic e
is terminated (
Ypage 115). In th eBluetoot h®
audio basi cdisplay (Ypage 195) you will see
Bluetooth®audio mode195
Media
Z
Page 198 of 246

theNoBluetoothAudioDeviceConnec‐
tedmessage and the Connect Last Used
Playermenu item cannot be selected.
When the search is finished, the Bluetooth
®
audio device can be reconnected.
XTo select Start playback Ì: slide6
and press the controller.
Playback resumes from the beginning.
XTo select Connect Last Used Player:
press the controller.
Depending on the Bluetooth
®audio device
used, playback starts immediately or you
must start playback manually.
In this case, you will see the Bluetooth
Audio Device Pausedmessage.
iIf there is an Internet connection and the
mobile phone that is connected only sup-
ports two Bluetooth
®profiles at the same
time, the Internet connection is interrup-
ted.
iThe connection to the Bluetooth®audio
device can also be interrupted if:
Rthe connected mobile phone only sup-
ports 2 Bluetooth®profiles at the same
time.
Ryou connect to the Internet using
COMAND (
Ypage 154).
Selecting a track
The function is not supported by all Blue-
tooth®audio devices.
Some mobile phones impair function with
regard to the following criteria:
Rthe number of tracks that can be selected
Rthe time period until the next or previous
track is played
XSwitch the multifunction steering wheel to
the media menu (see the vehicle Operator's
Manual).
XTo skip forwards or backwards to a
track: press the 9or: button on
the multifunction steering wheel.
XRapid scroll: press and hold the 9
or : button on the multifunction steer-
ing wheel until the desired track is reached.
If you press and hold the 9or:
buttons, the rapid scrolling speed increa-
ses after a short time.
Further ways to select tracks (
Ypage 187).
iIn rapid scroll, track names are not
shown, but instead only Track 1, Track 2
etc. The playback times for the tracks
played are not displayed. This is available
as an optional function starting with AVRCP
Version 1.3. There is also no music search
option available with Bluetooth
®Audio.
Selecting playback options
If the Bluetooth®audio device supports the
corresponding function, the following options
are available:
RNormal Track Sequence: the tracks are
played in the normal order (e.g. track 1, 2, 3
etc.).
Audio data playback is determined by the
order in which the tracks are written to the
data medium. Alphabetical order is the
most common. Once all the tracks in a
folder have been played, the tracks in the
next folder are played.
RRandomTrackList: the current track list
is played in random order (e.g. 3, 8, 5 etc.).
RRandom Medium: all tracks on the data
medium are played in random order (e.g.
track 3, 8, 5 etc.).
Playback options are optional functions
and are not, or only partially, supported by
Bluetooth
®audio devices.
196Bluetooth®audio mode
Media
Page 199 of 246

Selecting playback options
XTo selectOptions: turn and press the con-
troller.
XSelect Playback Mode.
A # dot indicates the current setting.
XSelect the desired option.
If you select Random
TrackList, you will
see a corresponding message in the display
or selection window.
Increasing the volume on COMAND
XTo select Options: slide6and press the
controller.
XTo select Volume: turn and press the con-
troller.
A menu appears. The #dot indicates the
current setting.
XSelect StandardorBoost.
Information on sound settings
(
Ypage 208).
Operation with the Media Interface
General notes
Media Interface is a universal interface for the
connection of mobile audio and video devi-
ces. Media Interface in COMAND has two
USB connections.
The USB connection sockets are located in
the stowage compartment under the armrest.
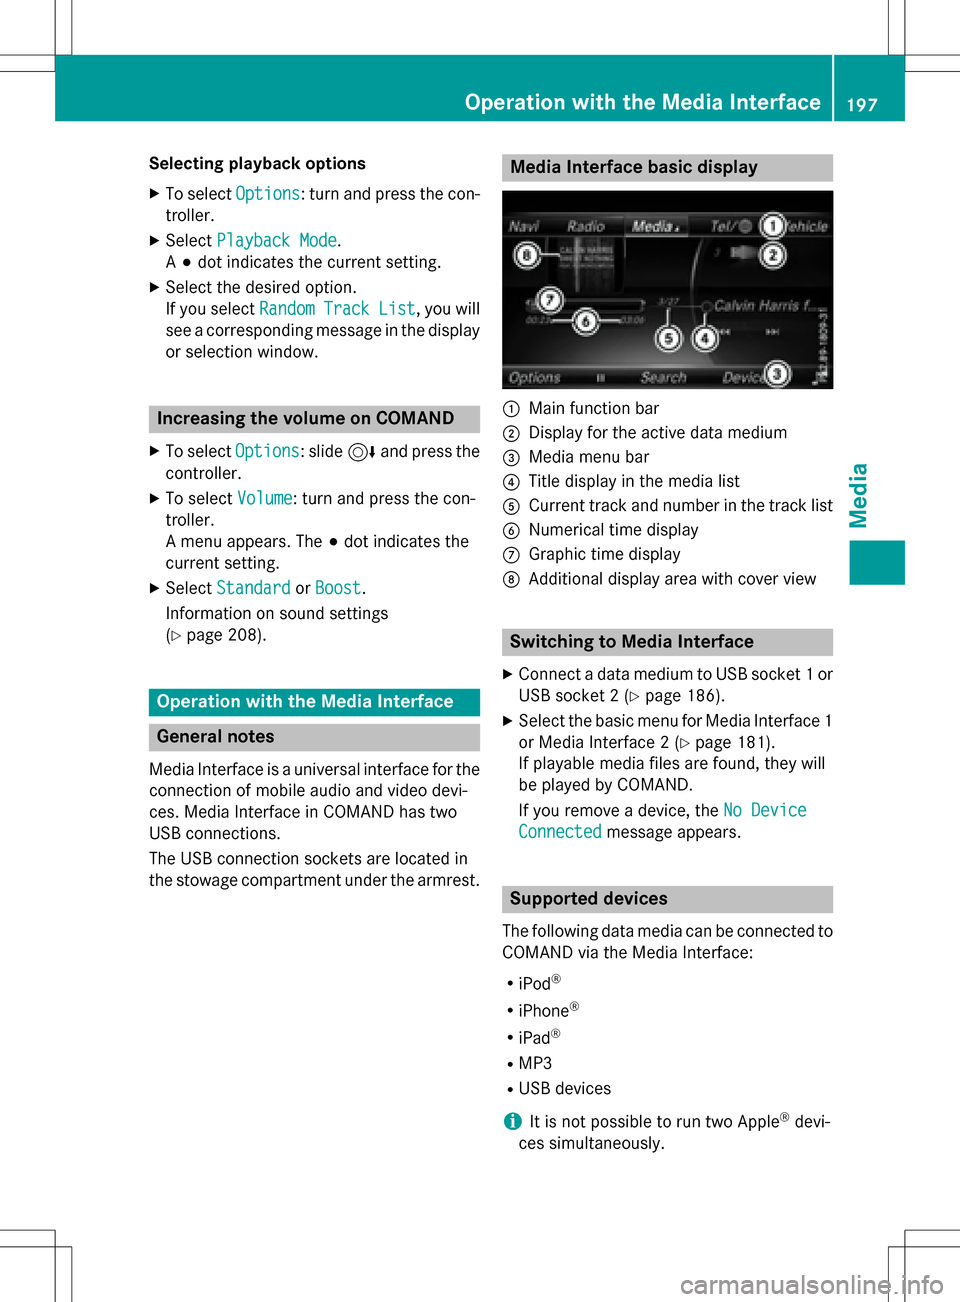
Media Interface basic display
:Main function bar
;Display for the active data medium
=Media menu bar
?Title display in the media list
ACurrent track and number in the track list
BNumerical time display
CGraphic time display
DAdditional display area with cover view
Switching to Media Interface
XConnect a data medium to USB socket 1 or
USB socket 2 (
Ypage 186).
XSelect the basic menu for Media Interface 1
or Media Interface 2 (
Ypage 181).
If playable media files are found, they will
be played by COMAND.
If you remove a device, the No Device
Connectedmessage appears.
Supported devices
The following data media can be connected to
COMAND via the Media Interface:
RiPod®
RiPhone®
RiPad®
RMP3
RUSB devices
iIt is not possible to run two Apple®devi-
ces simultaneously.
Operation with the Media Interface197
Media
Z