2016 MERCEDES-BENZ AMG GT S oil dipstick
[x] Cancel search: oil dipstickPage 10 of 290

DVD videoOperatin g(on-boar dcomputer) .... .158
see also Digital Operator's Man-
ual ..................................................2 00
DYNAMIC SELECT controller ............ 108
E
E-SELECT lever................................... 109
EASY-ENTRY feature
Function/notes ................................ 80
EASY-EXIT feature
Function/notes ................................ 80
EBD (electronic brake force distri-
bution)
Display message ............................ 169
Function/notes ................................ 57
ECO start/stop function
Automatic engine switch-off .......... 105
Deactivating/activating ................. 106
General information ....................... 105
Important safety notes .................. 105
Introduction ................................... 105
Electronic Stability Program
see ESP
®(Electronic Stability Program)
Emergency
Automatic measures after an acci-
dent ................................................. 49
Emergency release
Driver's door ....................................6 8
Vehicle .............................................6 8
Emergency Tensioning Devices
Activation ........................................ .46
Emergency unlocking
Tailgate ............................................ 71
Emissions control
Service and warranty information .... 22
Engine
Check Engine warning lamp ........... 195
Display message ............................ 178
ECO start/stop function ................ 105
Engine number ............................... 281
Irregular running ............................ 107
Jump-starting ................................. 248
Starting problems .......................... 107
Starting the engine with the
SmartKey ....................................... 104 Starting with the Start/Stop but-
ton ................................................. 104
Switching off .................................. 120
Tow-starting (vehicle) ..................... 252
Engine electronics
Notes ............................................. 279
Problem (malfunction) ................... 107
Engine oil
Adding ........................................... 230
Additives ........................................ 284
Checking the oil level ..................... 228
Checking the oil level using the
dipstick .......................................... 228
Checking the oil level using the
on-board computer ........................ 230
Display message ............................ 179
Fill
ing capacity ............................... 284
Notes about oil grades ................... 283
Notes on oil level/consumption .... 228
Temperature (on-board com-
puter) ............................................. 162
Entering an address
see also Digital Operator's Man-
ual .................................................. 200
ESP
®(Electronic Stability Pro-
gram)
AMG menu (on-board computer) ... 163
Characteristics ................................. 56
Deactivating/activating ................... 56
Display message ............................ 167
Function/notes ................................ 55
General notes .................................. 55
Important safety information ........... 56
Warning lamp ................................. 192
ETS/4ETS (Electronic Traction Sys-
tem) ...................................................... 55
Exhaust check ................................... 123
Exhaust pipe (cleaning instruc-
tions) .................................................. 238
Exterior lighting
Cleaning ......................................... 237
see Lights
Exterior mirrors
Adjusting ......................................... 82
Dipping (automatic) ......................... 83
Folding in/out (automatically) ......... 82
Folding in/out (electrically) ............. 82
8Index
Page 230 of 290

XMake sure that the windshield wipers are
turned off.
XPull release lever:on the hood.
The hood is released.
XReach into the gap, pull hood catch handle ;
up and lift the hood.
If you lift the hood by approximately 15 in
(40 cm), the hood is opened and held open
automatically by the gas-filled strut.
Closing the hood
XLower the hood and let it fall from a height of
approximately 8 in (20 cm).
XCheck that the hood has engaged properly.
If the hood can be raised slightly, it is not
properly engaged. Open it again and close it
with a little more force.
Engine oil
Notes on the oil level
Depending on your driving style, the vehicle
consumes up to 0.9 US qt (0.8 liters) of oil per
600 miles (1,000 km). The oil consumption may be higher than this when the vehicle is new or if
you frequently drive at high engine speeds.
Depending on the engine, the oil dipstick may be
in a different location.
It is only possible to correctly measure the oil
level when:
Rthe engine is at normal operating temperature
Rthe vehicle is parked on a level surface
Rthe engine is left running in neutral for at least
30 seconds before switching off
This applies when checking the oil level using
the oil dipstick or on-board computer.
Checking the oil level using the oil dip-
stick
GWARNING
Certain components in the engine compart-
ment, such as the engine, radiator and parts
of the exhaust system, can become very hot.
Working in the engine compartment poses a
risk of injury.
Where possible, let the engine cool down and touch only the components described in the
following.
It is only possible to correctly measure the oil
level with the oil dipstick when the engine is at
normal operating temperature and in a period of
2 to minutes after the engine has been switched
off.
XPull oil dipstick :out of the dipstick guide
tube.
XWipe off oil dipstick :.
228Engine compartment
Maintenance and care
Page 231 of 290

XSlowly slide oil dipstick:into the guide tube
to the stop, and take it out again.
If the level is between MIN mark =and MAX
mark ;, the oil level is correct.
XIf the oil level has dropped to MIN mark =or
below, add 1.1 US qt (1.0 liter) engine oil.
Engine compartment229
Maintenance and care
Z
Page 232 of 290

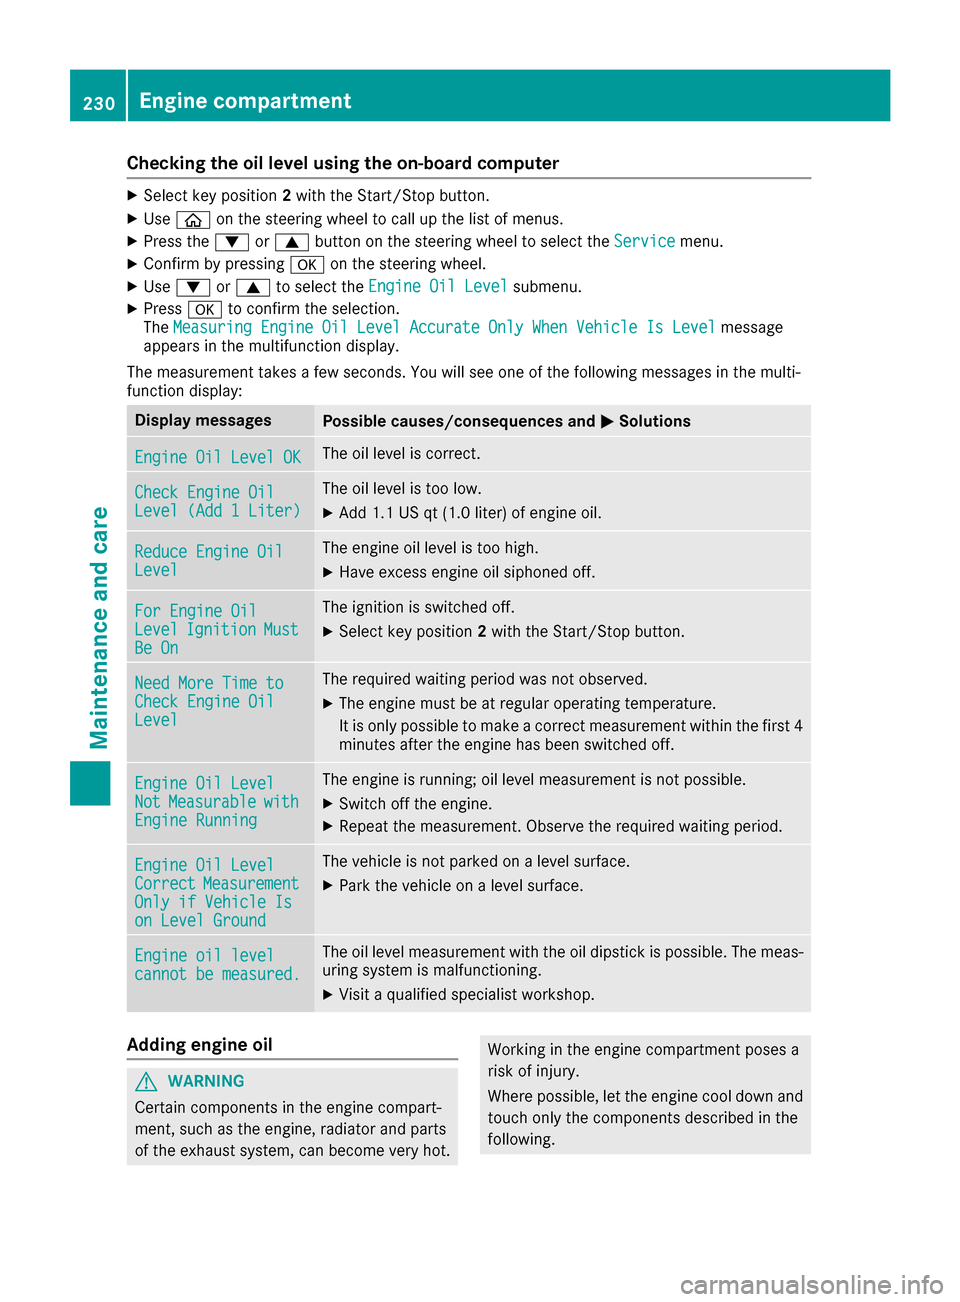
Checking the oil level using the on-board computer
XSelect key position2with the Start/Stop button.
XUse ò on the steering wheel to call up the list of menus.
XPress the :or9 button on the steering wheel to select the Servicemenu.
XConfirm by pressingaon the steering wheel.
XUse: or9 to select the Engine Oil Levelsubmenu.
XPressato confirm the selection.
The Measuring Engine Oil Level Accurate Only When Vehicle Is Levelmessage
appears in the multifunction display.
The measurement takes a few seconds. You will see one of the following messages in the multi-
function display:
Display messagesPossible causes/consequences and MSolutions
Engine Oil Level OKThe oil level is correct.
Check Engine OilLevel (Add 1 Liter)
The oil level is too low.
XAdd 1.1 US qt (1.0 liter) of engine oil.
Reduce Engine OilLevel
The engine oil level is too high.
XHave excess engine oil siphoned off.
For Engine OilLevelIgnitionMustBe On
The ignition is switched off.
XSelect key position2with the Start/Stop button.
Need More Time toCheck Engine OilLevel
The required waiting period was not observed.
XThe engine must be at regular operating temperature.
It is only possible to make a correct measurement within the first 4
minutes after the engine has been switched off.
Engine Oil LevelNotMeasurablewithEngine Running
The engine is running; oil level measurement is not possible.
XSwitch off the engine.
XRepeat the measurement. Observe the required waiting period.
Engine Oil LevelCorrectMeasurementOnly if Vehicle Ison Level Ground
The vehicle is not parked on a level surface.
XPark the vehicle on a level surface.
Engine oil levelcannot be measured.
The oil level measurement with the oil dipstick is possible. The meas-
uring system is malfunctioning.
XVisit a qualified specialist workshop.
Adding engine oil
GWARNING
Certain components in the engine compart-
ment, such as the engine, radiator and parts
of the exhaust system, can become very hot.
Working in the engine compartment poses a
risk of injury.
Where possible, let the engine cool down and touch only the components described in the
following.
230Engine compartment
Maintenance and care
Page 233 of 290

GWARNING
If engine oil comes into contact with hot com- ponents in the engine compartment, it may
ignite. There is a risk of fire and injury.
Make sure that engine oil is not spilled next to
the filler neck. Let the engine cool down and
thoroughly clean the engine oil off the com-
ponents before starting the engine.
HEnvironmental note
When adding oil, take care not to spill any. If
oil enters the soil or waterways, it is harmful to
the environment.
!Only use engine oils and oil filters that have
been approved for vehicles with a service sys-
tem. You can obtain a list of the engine oils
and oil filters tested and approved in accord- ance with the Mercedes-Benz Specifications
for Service Products at any Mercedes-Benz
Service center.
Damage to the engine or exhaust system is
caused by the following:
Rusing engine oils and oil filters that have notbeen specifically approved for the service
system
Rreplacing engine oil and oil filters after the
interval for replacement specified by the
service system has been exceeded
Rusing engine oil additives.
!Do not add too much oil. If the oil level is
above the "max" mark on the dipstick, too
much oil has been added. This can lead to
damage to the engine or the catalytic con-
verter. Have excess oil siphoned off.
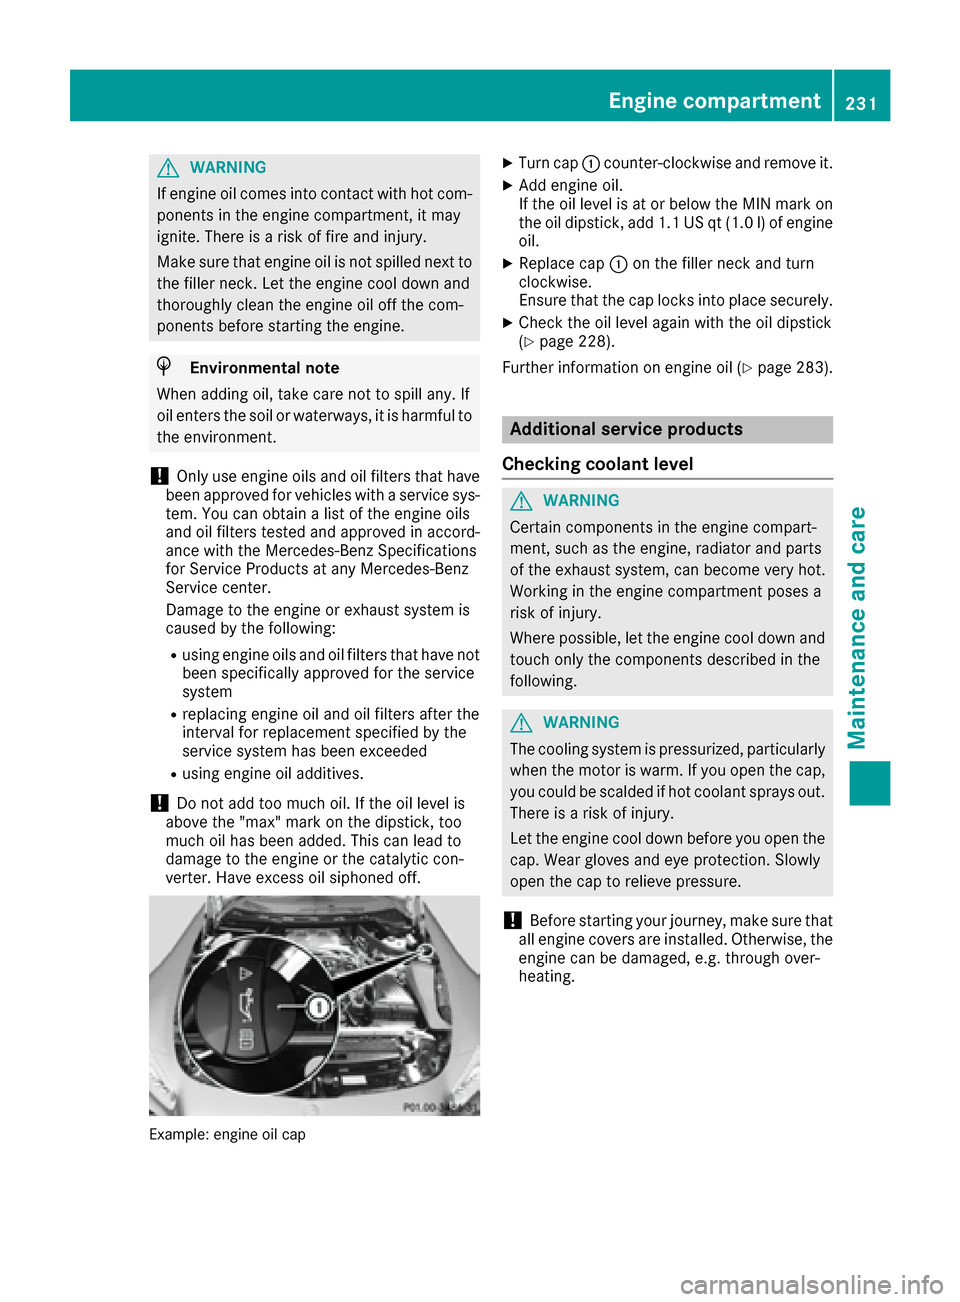
Example: engine oil cap
XTurn cap :counter-clockwise and remove it.
XAdd engine oil.
If the oil level is at or below the MIN mark on
the oil dipstick, add 1.1 US qt (1.0 l) of engine
oil.
XReplace cap :on the filler neck and turn
clockwise.
Ensure that the cap locks into place securely.
XCheck the oil level again with the oil dipstick
(Ypage 228).
Further information on engine oil (
Ypage 283).
Additional service products
Checking coolant level
GWARNING
Certain components in the engine compart-
ment, such as the engine, radiator and parts
of the exhaust system, can become very hot.
Working in the engine compartment poses a
risk of injury.
Where possible, let the engine cool down and touch only the components described in the
following.
GWARNING
The cooling system is pressurized, particularly
when the motor is warm. If you open the cap,
you could be scalded if hot coolant sprays out.
There is a risk of injury.
Let the engine cool down before you open the
cap. Wear gloves and eye protection. Slowly
open the cap to relieve pressure.
!Before starting your journey, make sure that
all engine covers are installed. Otherwise, the
engine can be damaged, e.g. through over-
heating.
Engine compartment231
Maintenance and care
Z