2016 MERCEDES-BENZ AMG GT S light
[x] Cancel search: lightPage 143 of 290

mine which warning display is active when the
engine is running.
Transmission posi-
tionWarning display
DFront area activated
R,Nor the vehicle is
rolling backwardsRear and front areas
activated
PNo areas activated
One or more segments light up as the vehicle
approaches an obstacle, depending on the vehi-
cle's distance from the obstacle.
From the:
Rsixth segment onwards, you will hear an inter-
mittent warning tone for approximately two
seconds.
Rseventh segment onwards, you will hear a
warning tone for approximately two seconds.
This indicates that you have now reached the minimum distance.
Deactivating/activating PARKTRONIC
:Indicator lamp
;Deactivates/activates PARKTRONIC
If indicator lamp :lights up, PARKTRONIC is
deactivated.
iPARKTRONIC is automatically activated
when you set the Start/Stop button to key
position 2.
Driving systems141
Driving and parking
Z
Page 144 of 290
Problems with PARKTRONIC
ProblemPossible causes/consequences andMSolutions
Only the red segments in
the PARKTRONIC warn-
ing displays are lit. You
also hear a warning tone
for approximately two
seconds.
PARKTRONIC is then
deactivated and the indi-
cator lamp on the
PARKTRONIC button
lights up.PARKTRONIC has malfunctioned and has switched off.
XIf problems persist, have PARKTRONIC checked at a qualified spe-
cialist workshop.
Only the red segments in
the PARKTRONIC warn-
ing displays are lit.
PARKTRONIC is then
deactivated.The PARKTRONIC sensors are dirty or there is interference.
XClean the PARKTRONIC sensors (Ypage 237).
XSwitch the ignition back on.
The problem may be caused by an external source of radio or ultra-
sound waves.
XSee if PARKTRONIC functions in a different location.
Rear view camera
General notes
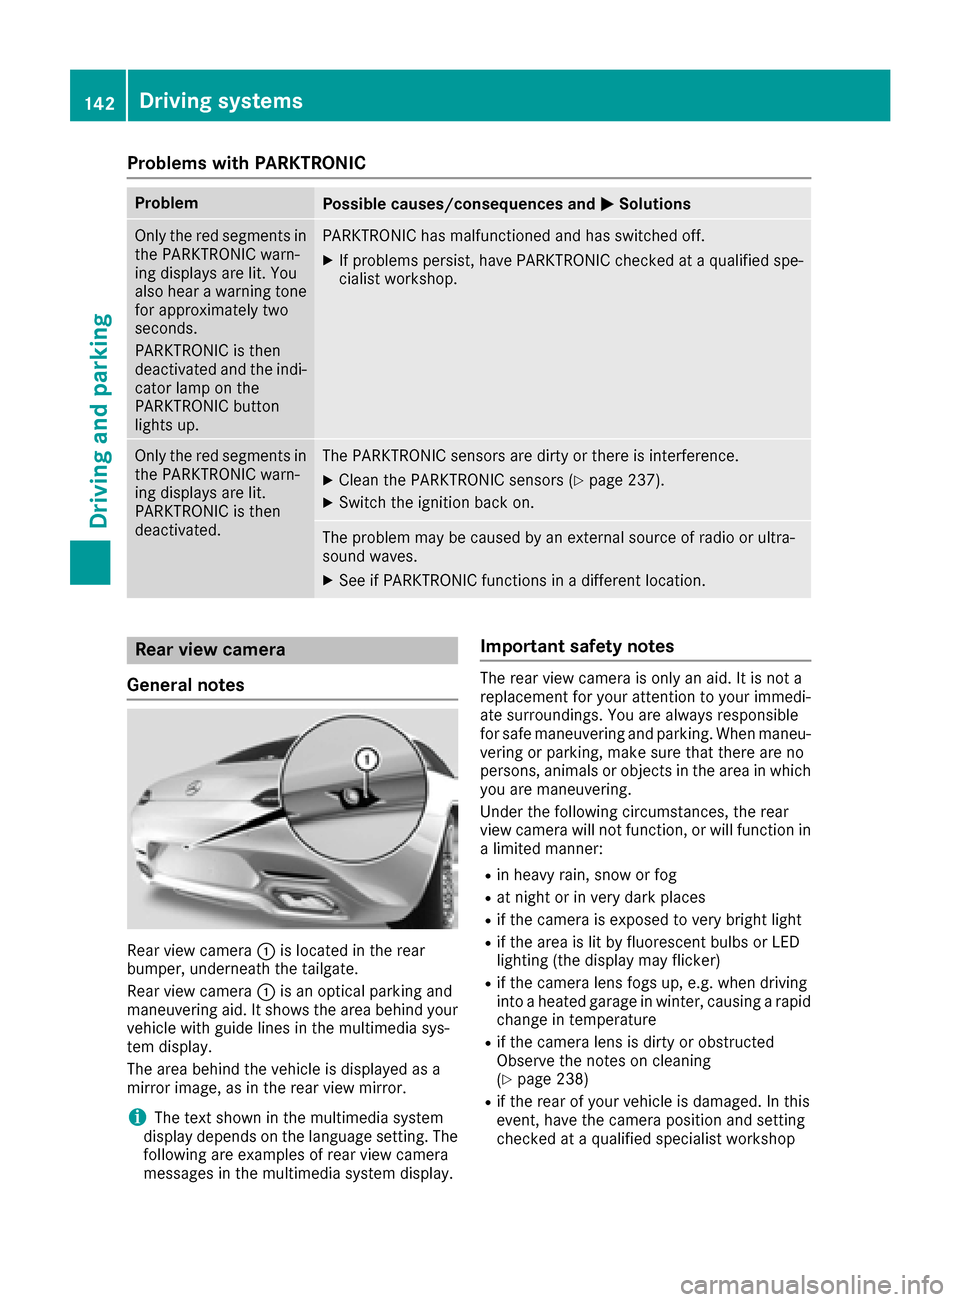
Rear view camera :is located in the rear
bumper, underneath the tailgate.
Rear view camera :is an optical parking and
maneuvering aid. It shows the area behind your
vehicle with guide lines in the multimedia sys-
tem display.
The area behind the vehicle is displayed as a
mirror image, as in the rear view mirror.
iThe text shown in the multimedia system
display depends on the language setting. The
following are examples of rear view camera
messages in the multimedia system display.
Important safety notes
The rear view camera is only an aid. It is not a
replacement for your attention to your immedi-
ate surroundings. You are always responsible
for safe maneuvering and parking. When maneu-
vering or parking, make sure that there are no
persons, animals or objects in the area in which you are maneuvering.
Under the following circumstances, the rear
view camera will not function, or will function in
a limited manner:
Rin heavy rain, snow or fog
Rat night or in very dark places
Rif the camera is exposed to very bright light
Rif the area is lit by fluorescent bulbs or LED
lighting (the display may flicker)
Rif the camera lens fogs up, e.g. when driving
into a heated garage in winter, causing a rapid
change in temperature
Rif the camera lens is dirty or obstructed
Observe the notes on cleaning
(
Ypage 238)
Rif the rear of your vehicle is damaged. In this
event, have the camera position and setting
checked at a qualified specialist workshop
142Driving systems
Driving and parking
Page 146 of 290
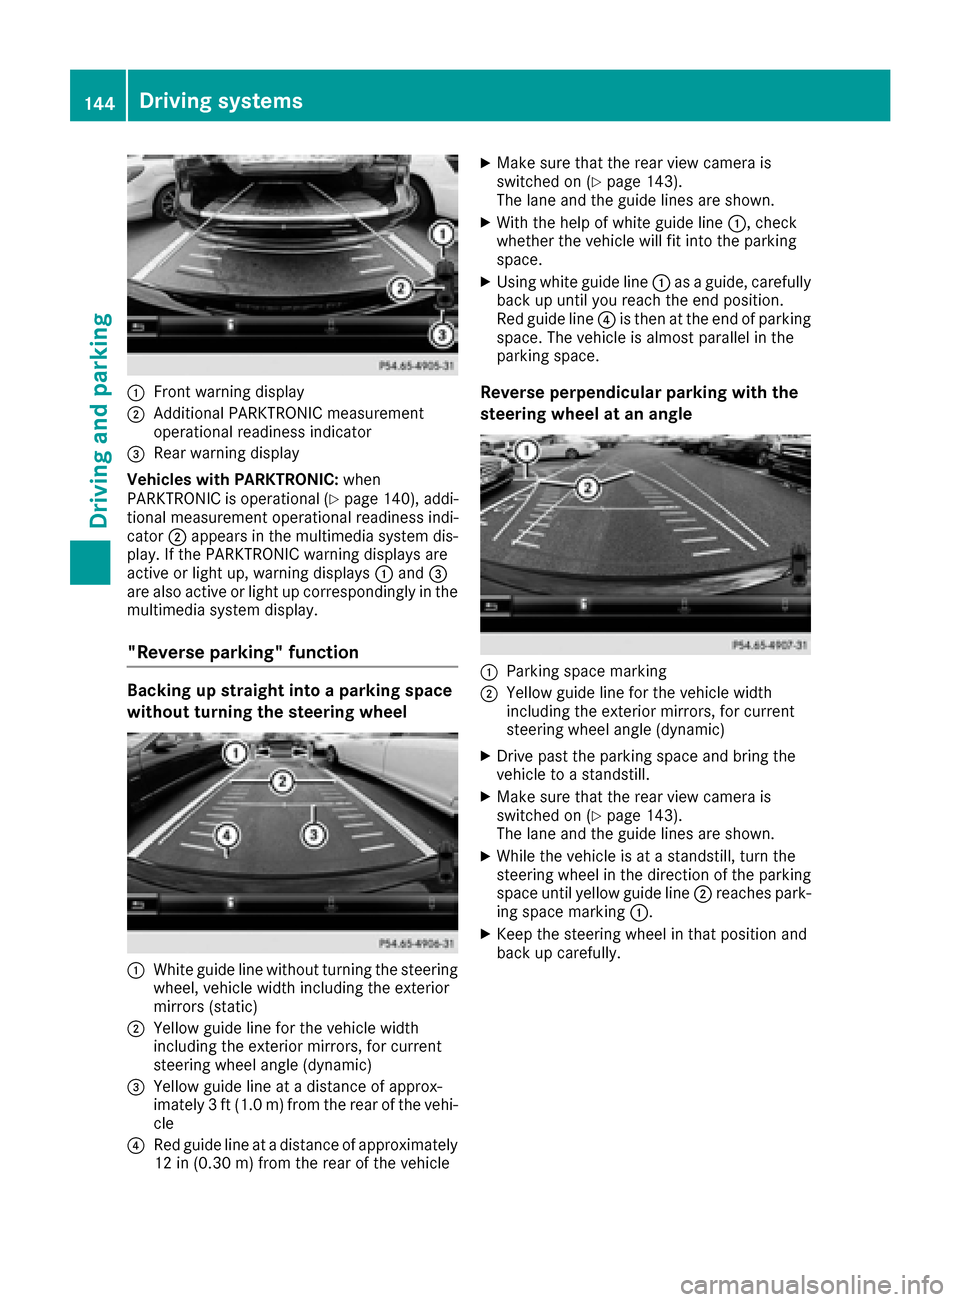
:Front warning display
;Additional PARKTRONIC measurement
operational readiness indicator
=Rear warning display
Vehicles with PARKTRONIC: when
PARKTRONIC is operational (
Ypage 140), addi-
tional measurement operational readiness indi-
cator ;appears in the multimedia system dis-
play. If the PARKTRONIC warning displays are
active or light up, warning displays :and =
are also active or light up correspondingly in the multimedia system display.
"Reverse parking" function
Backing up straight into a parking space
without turning the steering wheel
:White guide line without turning the steering
wheel, vehicle width including the exterior
mirrors (static)
;Yellow guide line for the vehicle width
including the exterior mirrors, for current
steering wheel angle (dynamic)
=Yellow guide line at a distance of approx-
imately 3 ft (1.0 m) from the rear of the vehi-
cle
?Red guide line at a distance of approximately
12 in (0.30 m) fromthe rear of the vehicle
XMake sure that the rear view camera is
switched on (Ypage 143).
The lane and the guide lines are shown.
XWith the help of white guide line :, check
whether the vehicle will fit into the parking
space.
XUsing white guide line :as a guide, carefully
back up until you reach the end position.
Red guide line ?is then at the end of parking
space. The vehicle is almost parallel in the
parking space.
Reverse perpendicular parking with the
steering wheel at an angle
:Parking space marking
;Yellow guide line for the vehicle width
including the exterior mirrors, for current
steering wheel angle (dynamic)
XDrive past the parking space and bring the
vehicle to a standstill.
XMake sure that the rear view camera is
switched on (Ypage 143).
The lane and the guide lines are shown.
XWhile the vehicle is at a standstill, turn the
steering wheel in the direction of the parking
space until yellow guide line ;reaches park-
ing space marking :.
XKeep the steering wheel in that position and
back up carefully.
144Driving systems
Driving an d parking
Page 147 of 290

:Yellow guide line for the vehicle width
including the exterior mirrors, for current
steering wheel angle (dynamic)
XStop the vehicle when it is almost exactly in
front of the parking space.
The white lane should be as close to parallel
with the parking space marking as possible.
:White guide line at current steering wheel
angle
;Parking space marking
XTurn the steering wheel to the center position
while the vehicle is stationary.
:Red guide line at a distance of approximately
12 in (0.30 m) from the rear of the vehicle
;White guide line without turning the steering
wheel
=End of parking space
XBack up carefully until you have reached the
final position.
Red guide line:is then at the end of parking
space =. The vehicle is almost parallel in the
parking space.
Wide-angle function
:Symbol for the wide-angle view function
;PARKTRONIC warning displays
You can also use the rear view camera to select
a wide-angle view.
When PARKTRONIC is operational (
Ypage 140),
a symbol for your own vehicle appears in the
display of the multimedia system. If the
PARKTRONIC warning displays are active, warn-
ing displays ;light up in the multimedia system
display in yellow or red respectively.
Driving systems145
Driving and parking
Z
Page 150 of 290

Rthere are narrow vehicles, e.g. motorcycles or
bicycles
Rthe road has very wide lanes
Rthe road has narrow lanes
Ryou are not driving in the middle of the lane
Rthere are barriers or similar lane borders
Vehicles in the monitoring range are then not
indicated.
Example: Sedan
Blind Spot Assist monitors the area up to 10 ft
(3 m) behind your vehicle and directly next to
your vehicle, as shown in the diagram.
If the lanes are narrow, vehicles driving in the
lane beyond the lane next to your vehicle may be
indicated, especially if the vehicles are not driv-
ing in the middle of their lane. This may be the
case if there are vehicles driving at the inner
edge of their lanes.
Due to the nature of the system:
Rwarnings may be issued in error when driving
close to crash barriers or similar solid lane
borders.
Rthe warning is canceled when driving for an
extended period next to long vehicles, such as
trucks.
Warning display
:Warning display
Blind Spot Assist is not active at speeds below
approximately 20 mph (30 km/h). Vehicles in
the monitoring range are then not indicated.
When Blind Spot Assist is activated, indicator
lamp :in the exterior mirrors lights up yellow
at speeds of up to 20 mph (30 km/h). At speeds
above 20 mph (30 km/h), the indicator lamp
goes out and Blind Spot Assist is operational.
If a vehicle is detected within the blind spot
monitoring range at speeds above 20 mph
(30 km/h), warning lamp :on the correspond-
ing side lights up red. This warning is always
emitted when a vehicle enters the blind spot
monitoring range from behind or from the side.
When you overtake a vehicle, the warning only
occurs if the difference in speed is less than
7 mph (12 km/h).
If you select the reverse gear, Blind Spot Assist
is not operational.
The brightness of the warning lamps is auto-
matically adapted to the brightness of the sur-
roundings.
Collision warning
If a vehicle is detected in the monitoring range of
Blind Spot Assist and you switch on the corre-
sponding turn signal, a double warning tone
sounds. Red warning lamp :flashes. If the turn
s
ignal remains on, detected vehicles are indica-
ted by the flashing of red warning lamp :.
There are no further warning tones.
148Driving system s
Driving an d parking
Page 151 of 290

Switching on Blind Spot Assist
XMake sure that Blind Spot Assist
(Ypage 160) is activated in the on-board
computer.
XSelect key position 2with the Start/Stop but-
ton.
Warning lamps :in the exterior mirrors light
up red for approximately 1.5 seconds and
then turn yellow.
Lane Keeping Assist
General notes
Lane Keeping Assist monitors the area in front of
your vehicle by means of multifunction cam-
era :which is attached behind the top of the
windshield. Active Lane Keeping Assist detects
lane markings on the road and can warn you
before you leave your lane unintentionally.
This function is available in the range between
40 mph and 120 mph (60 km/h and 200 km/h).
A warning may be given if a front wheel passes
over a lane marking. It will warn you by means of
intermittent vibration in the steering wheel for
up to 1.5 seconds.
Important safety notes
GWARNING
Lane Keeping Assist may not always clearly
recognize lane markings.
In this case, Lane Keeping Assist may:
Rgive an unnecessary warning
Rnot give a warning
There is a risk of an accident.
Always pay particular attention to the traffic
situation and stay in lane, in particular if
warned by Lane Keeping Assist.
GWARNING
The Lane Keeping Assist warning does not
return the vehicle to the original lane. There is
a risk of an accident.
You should always steer, brake or accelerate
yourself, in particular if warned by Lane Keep-
ing Assist.
If you fail to adapt your driving style, Lane Keep-
ing Assist can neither reduce the risk of an acci-
dent nor override the laws of physics. Lane
Keeping Assist cannot take into account the
road, traffic and weather conditions. Lane Keep- ing Assist is merely an aid. You are responsible
for the distance to the vehicle in front, for vehi-
cle speed, for braking in good time and for stay-
ing in your lane.
The Lane Keeping Assist does not keep the vehi-
cle in the lane.
The system may be impaired or may not function
if:
Rthere is poor visibility, e.g. due to insufficient
illumination of the road, or due to snow, rain,
fog or spray
Rthere is glare, e.g. from oncoming traffic, the
sun or reflections (e.g. when the road surface
is wet)
Rthe windshield is dirty, fogged up, damaged or
covered, for instance by a sticker, in the vicin-
ity of the camera
Rthere are no, several or unclear lane markings
for a lane, e.g. in areas with road construction
work
Rthe lane markings are worn away, dark or cov-
ered up, e.g. by dirt or snow
Rthe distance to the vehicle in front is too small and the lane markings thus cannot be detec-
ted
Rthe lane markings change quickly, e.g. lanes
branch off, cross one another or merge
Rthe road is narrow and winding
Rthere are strong shadows cast on the road
Switching on Lane Keeping Assist
XActivate Lane Keeping Assist using the on-
board computer; to do so, select Standardor
Adaptive(Ypage 161).
If you drive at speeds above 40 mph
(60 km/h) and lane markings are detected,
the lines in the assistance graphics display
Driving systems149
Driving and parking
Z
Page 162 of 290

RDISTRONIC PLUS (Ypage 128)
RDistance warning function of COLLISION
PREVENTION ASSIST PLUS (Ypage 53)
RBlind Spot Assist (Ypage 147)
RATTENTION ASSIST (Ypage 146)
RLane Keeping Assist (Ypage 149)
XPress:to display the ATTENTION ASSIST
assessment.
Service menu
Depending on the equipment installed in the
vehicle, you have the following options in the
Service
menu:
RCalling up display messages in message
memory (Ypage 166)
RChecking the tire pressure electronically
(Ypage 261)
RCalling up the service due date
(Ypage 233)
RChecking the engine oil level using the on-
board computer (Ypage 230)
Settings menu
Introduction
Depending on the equipment installed in the
vehicle, you have the following options in the
Settings
menu:
RChanging assistance settings (Ypage 160)
RChanging the light settings (Ypage 161)
RChanging the instrument cluster settings
(Ypage 161)
RRestoring the factory settings (Ypage 162)
Assistance submenu
Activating/deactivating COLLISION PRE-
VENTION ASSIST PLUS
XPress òon the steering wheel to open the
menu list.
XPress :or9 on the steering wheel to
select the Settingsmenu.
XConfirm by pressing aon the steering
wheel.
XPress :or9 to select the DriveAs‐sistsubmenu.
XPressato confirm.
XPress 9or: to select CollisionPrevention.
XPressato confirm.
The current selection appears.
XTo activate/deactivate: press theabut-
ton again.
When COLLISION PREVENTION ASSIST PLUS
is deactivated, the æsymbol appears in
the multifunction display in the Assistance
Graphicmenu.
For further information about COLLISION PRE-
VENTION ASSIST PLUS, see (
Ypage 53).
Activating/deactivating Blind Spot Assist
XPress òon the steering wheel to open the
menu list.
XPress :or9 on the steering wheel to
select the Settingsmenu.
XConfirm by pressing aon the steering
wheel.
XPress :or9 to select the DriveAs‐sistsubmenu.
XPressato confirm.
XPress :or9 to select Blind SpotAssist.
XPressato confirm.
The current selection appears.
XTo activate/deactivate: press theabut-
ton again.
When Blind Spot Assist is activated, gray
radar waves propagating backwards appear
next to the vehicle in the Assistance
Graphicmenu in the multifunction display.
For further information about Blind Spot Assist,
see (
Ypage 147).
Setting ATTENTION ASSIST
XPress òon the steering wheel to open the
menu list.
XPress :or9 on the steering wheel to
select the Settingsmenu.
XConfirm by pressing aon the steering
wheel.
XPress :or9 to select the DriveAs‐sistsubmenu.
XPressato confirm.
XPress :or9 to select ATTENTIONASSIST.
XPressato confirm.
160Menus and submenus
On-board computer and displays
Page 163 of 290

XPress:or9 to select Off,Standardor Sensitive.
XPress ato confirm the selection.
When ATTENTION ASSIST is deactivated, the
é symbol appears in the Assistance
Graphicmenu in the multifunction display.
For further information about ATTENTION
ASSIST, see (
Ypage 146).
Setting Lane Keeping Assist
XPress the òbutton on the steering wheel
to open the menu list.
XPress the :or9 button on the steering
wheel to select the Settingsmenu.
XConfirm by pressing aon the steering
wheel.
XPress :or9 to select the DriveAs‐sistsubmenu.
XPressato confirm.
XPress :or9 to select LaneKeepingAssist.
XPressato confirm.
Press :or9 to select Off,Standardor Adaptive.
XTo change the setting: pressaagain.
For further information about Lane Keeping
Assist, see (
Ypage 149).
Light submenu
Switching the daytime running lamps on/
off
This function is not available in Canada.
XPress òon the steering wheel to open the
menu list.
XPress :or9 on the steering wheel to
select the Settingsmenu.
XConfirm by pressing aon the steering
wheel.
XPress :or9 to select the Lightssubmenu.
XPressato confirm.
XUsing :or9, select the DaytimeRunning Lightsfunction.
If the DaytimeRunningLightsfunction has
been switched on, the cone of light and the
W symbol in the multifunction display are
shown in white.
XPress the abutton to save the setting. Further information about
Daytime Running
Lights(Ypage 86).
Instrument cluster submenu
Setting the brightness of the display/
switch
You can use theBrightnessfunction to set the
brightness of the multifunction display and the
switches in the vehicle in increments.
XPress the òbutton on the steering wheel
to open the menu list.
XPress :or9 on the steering wheel to
select the Settingsmenu.
XConfirm by pressing aon the steering
wheel.
XPress :or9 to select the Instru‐ment Clustersubmenu.
XPressato confirm.
XUsing :or9, select the Brightnessfunction.
XPressato confirm.
You can see the selected setting Levelwith a
value between 0 and 10. Level 0 corresponds
to a dim light and level 10 corresponds to a
bright light.
XPress the :or9 button to change the
brightness. The brightness is set simultane-
ously with the selection.
XPress the aor% button to save the
setting.
Selecting the distance unit
The Display Unit Speed-/Odometer:func-
tion allows you to choose whether certain dis-
plays appear in kilometers or miles in the mul-
tifunction display.
XUse ò on the steering wheel to call up the
list of menus.
XPress the :or9 button on the steering
wheel to select the Settingsmenu.
XConfirm by pressing aon the steering
wheel.
XPress the :or9 button to select the
Instrument Clustersubmenu.
XPress ato confirm.
XPress the :or9 button to select the
Display Unit Speed-/Odometerfunction.
You will see the selected setting: kmorMiles.
XPress the abutton to save the setting.
Menus and submenus161
On-board computer and displays
Z