2016 MERCEDES-BENZ AMG GT ROADSTER door lock
[x] Cancel search: door lockPage 142 of 289
i
After a short period, the vehicle is secured
by the electric parking brake, thus relieving
the service brake.
The electric parking brake secures the vehicle
automatically if the HOLD function is activated,
the vehicle is stationary and:
R the driver's seat belt is not fastened and the
driver's door is open
R the engine is switched off, unless it is auto-
matically switched off by the ECO start/stop
function
R a system fault occurs
R the power supply is insufficient
If the electric parking brake is not operational, a
horn will sound at regular intervals. The HOLD
function must then be deactivated.
If a malfunction occurs, the transmission may
also be shifted to position Pautomatically.
The Brake immediately Brake immediately message may also
appear in the multifunction display.
X Immediately depress the brake pedal firmly
until the warning message on the multifunc-
tion display goes out.
The HOLD function is deactivated. A horn will
sound at regular intervals if you turn off the
engine, take off your seat belt or open the driv-
er's door when the HOLD function is activated.
The horn alerts you to the fact that the HOLD
function is still activated. If you attempt to lock the vehicle, the tone becomes louder. The vehi-cle cannot be locked until you have deactivated
the HOLD function.
i Once you have switched off the engine, you
cannot restart it until you have deactivated
the HOLD function. RACE START
Important safety notes i
RACE START must not be used on normal
roads. RACE START must only be activated
and used on dedicated road circuits, outside
of public road use.
RACE START enables optimum acceleration
from a standing start. For this, a suitably high-
grip road surface is required, along with the
tyres and vehicle being in good condition. G
WARNING
If you use RACE START, individual tyres may
get into a spin and the vehicle could skid.
Depending on the selected ESP ®
mode, there
is an increased risk of skidding and having an accident. Make sure that no persons, animals
or obstacles are within range of the vehicle.
i Observe the safety notes on driving safety
systems (Y page 54).
Be sure to read the safety notes and informa-
tion on ESP ®
(Y page 57).
Activation conditions You can activate RACE START if:
R the doors are closed
R the engine is running and the engine and
transmission are at operating temperature.
This is the case when the oil temperature
gauge in the multifunction display is shown in white (Y page 167).
R ESP ®
is functioning correctly (Y page 58)
R the steering wheel is in the straight-ahead
position
R the vehicle is stationary and the brake pedal is
depressed sufficiently (left foot)
R the transmission is in position D
R drive program S,S+ orRACE is selected
(Y page 108)
Activating RACE START i
When manual mode (Y
page 115) is active,
the transmission automatically shifts up to
RACE START in the drive program. This func-
tion supports maximum acceleration with
RACE START. After going through an acceler- ating process once from a stationary position,
this function is automatically deactivated.
X Depress the brake pedal with your left foot
and keep it depressed.
X Pull and hold both steering wheel gearshift
paddles.
X The RACE START Confirm: Paddle UP RACE START Confirm: Paddle UP
Cancel: Paddle DOWN Cancel: Paddle DOWN message appears in
the multifunction display.
X Release both steering wheel gearshift pad-
dles. Driving systems
139Driving and parking Z
Page 196 of 289
Display messages
Possible causes/consequences and
M
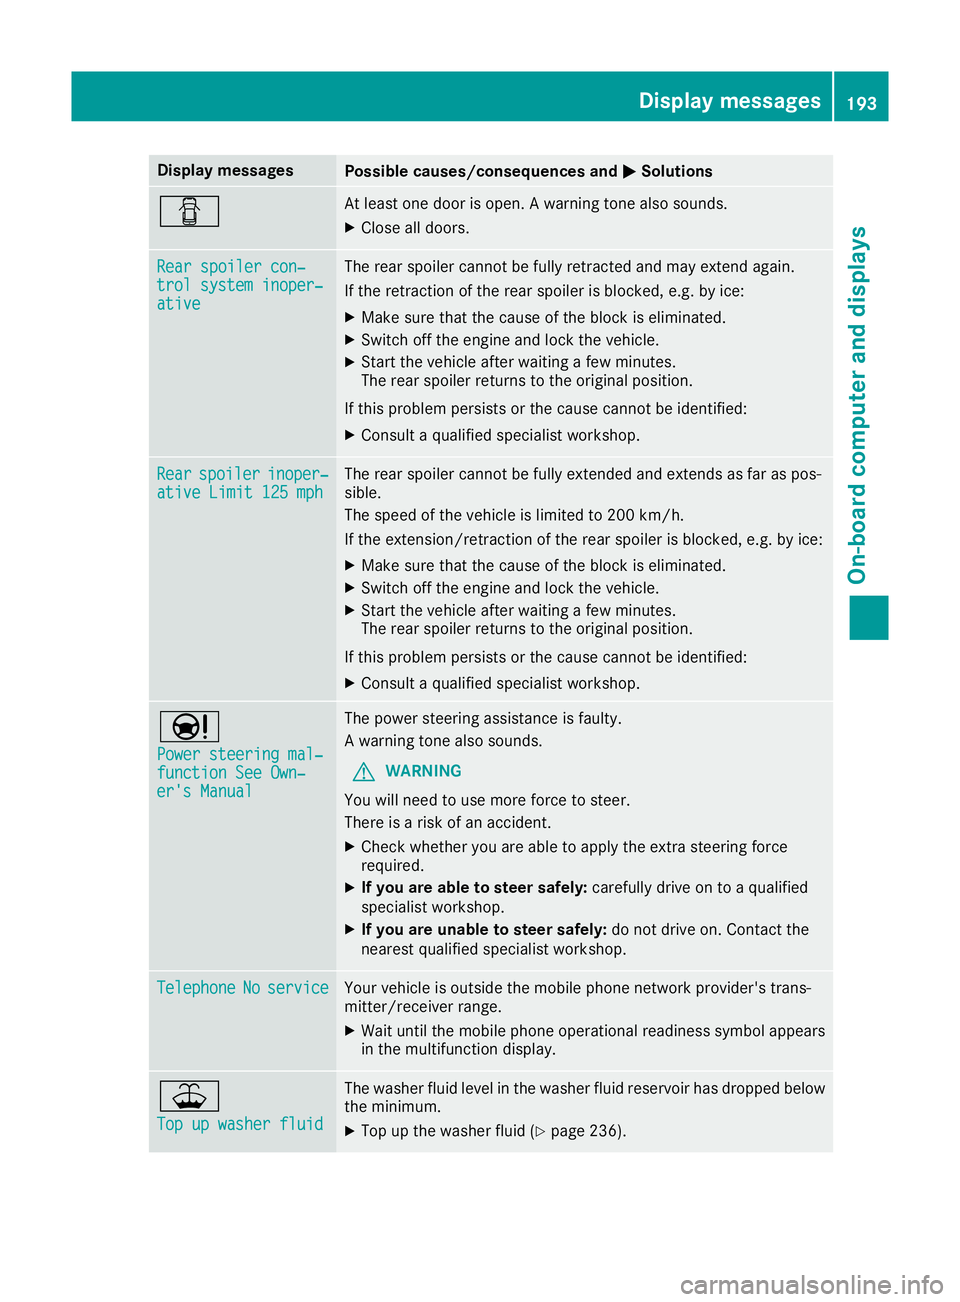
MSolutions C At least one door is open. A warning tone also sounds.
X Close all doors. Rear spoiler con‐
Rear spoiler con‐
trol system inoper‐ trol system inoper‐
ative ative The rear spoiler cannot be fully retracted and may extend again.
If the retraction of the rear spoiler is blocked, e.g. by ice:
X Make sure that the cause of the block is eliminated.
X Switch off the engine and lock the vehicle.
X Start the vehicle after waiting a few minutes.
The rear spoiler returns to the original position.
If this problem persists or the cause cannot be identified:
X Consult a qualified specialist workshop. Rear Rear
spoiler
spoiler inoper‐
inoper‐
ative Limit 125 mph
ative Limit 125 mph The rear spoiler cannot be fully extended and extends as far as pos-
sible.
The speed of the vehicle is limited to 200 km/h.
If the extension/retraction of the rear spoiler is blocked, e.g. by ice:
X Make sure that the cause of the block is eliminated.
X Switch off the engine and lock the vehicle.
X Start the vehicle after waiting a few minutes.
The rear spoiler returns to the original position.
If this problem persists or the cause cannot be identified: X Consult a qualified specialist workshop. Ð
Power steering mal‐ Power steering mal‐
function See Own‐ function See Own‐
er's Manual er's Manual The power steering assistance is faulty.
A warning tone also sounds.
G WARNING
You will need to use more force to steer.
There is a risk of an accident.
X Check whether you are able to apply the extra steering force
required.
X If you are able to steer safely: carefully drive on to a qualified
specialist workshop.
X If you are unable to steer safely: do not drive on. Contact the
nearest qualified specialist workshop. Telephone Telephone
No
Noservice
service Your vehicle is outside the mobile phone network provider's trans-
mitter/receiver range.
X Wait until the mobile phone operational readiness symbol appears
in the multifunction display. ¥
Top up washer fluid Top up washer fluid The washer fluid level in the washer fluid reservoir has dropped below
the minimum.
X Top up the washer fluid (Y page 236). Display
messages
193On-board computer and displays Z
Page 221 of 289
Glove compartment
X
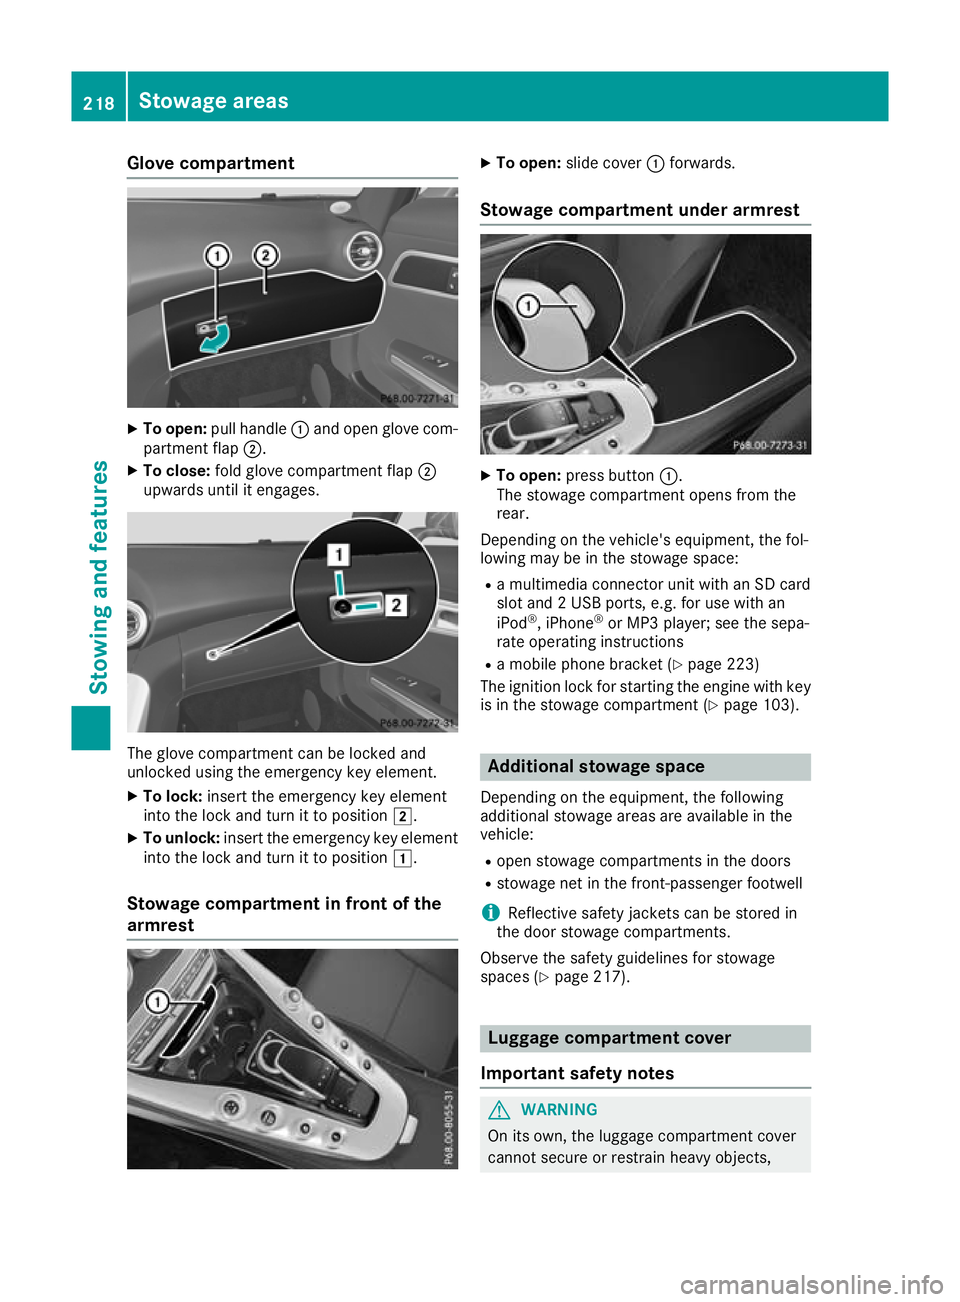
To open: pull handle :and open glove com-
partment flap ;.
X To close: fold glove compartment flap ;
upwards until it engages. The glove compartment can be locked and
unlocked using the emergency key element.
X To lock: insert the emergency key element
into the lock and turn it to position 2.
X To unlock: insert the emergency key element
into the lock and turn it to position 1.
Stowage compartment in front of the
armrest X
To open: slide cover :forwards.
Stowage compartment under armrest X
To open: press button :.
The stowage compartment opens from the
rear.
Depending on the vehicle's equipment, the fol-
lowing may be in the stowage space:
R a multimedia connector unit with an SD card
slot and 2 USB ports, e.g. for use with an
iPod ®
, iPhone ®
or MP3 player; see the sepa-
rate operating instructions
R a mobile phone bracket (Y page 223)
The ignition lock for starting the engine with key
is in the stowage compartment (Y page 103). Additional stowage space
Depending on the equipment, the following
additional stowage areas are available in the
vehicle:
R open stowage compartments in the doors
R stowage net in the front-passenger footwell
i Reflective safety jackets can be stored in
the door stowage compartments.
Observe the safety guidelines for stowage
spaces (Y page 217). Luggage compartment cover
Important safety notes G
WARNING
On its own, the luggage compartment cover
cannot secure or restrain heavy objects, 218
Stowage areasStowing and features
Page 228 of 289
When leaving the vehicle, always take the key
with you and lock the vehicle. Never leave
children unattended in the vehicle.
! Do not enter an automatic car wash with the
rear aerofoil extended. Otherwise, the rear
aerofoil may be damaged.
Only extend the rear aerofoil in order to wash
it by hand. Retract it again when you have fin- ished cleaning it.
You can extend and retract the rear spoiler man-
ually for cleaning.
X Close the tailgate.
X Select key position 2with the Start/Stop but-
ton (Y page 103). X
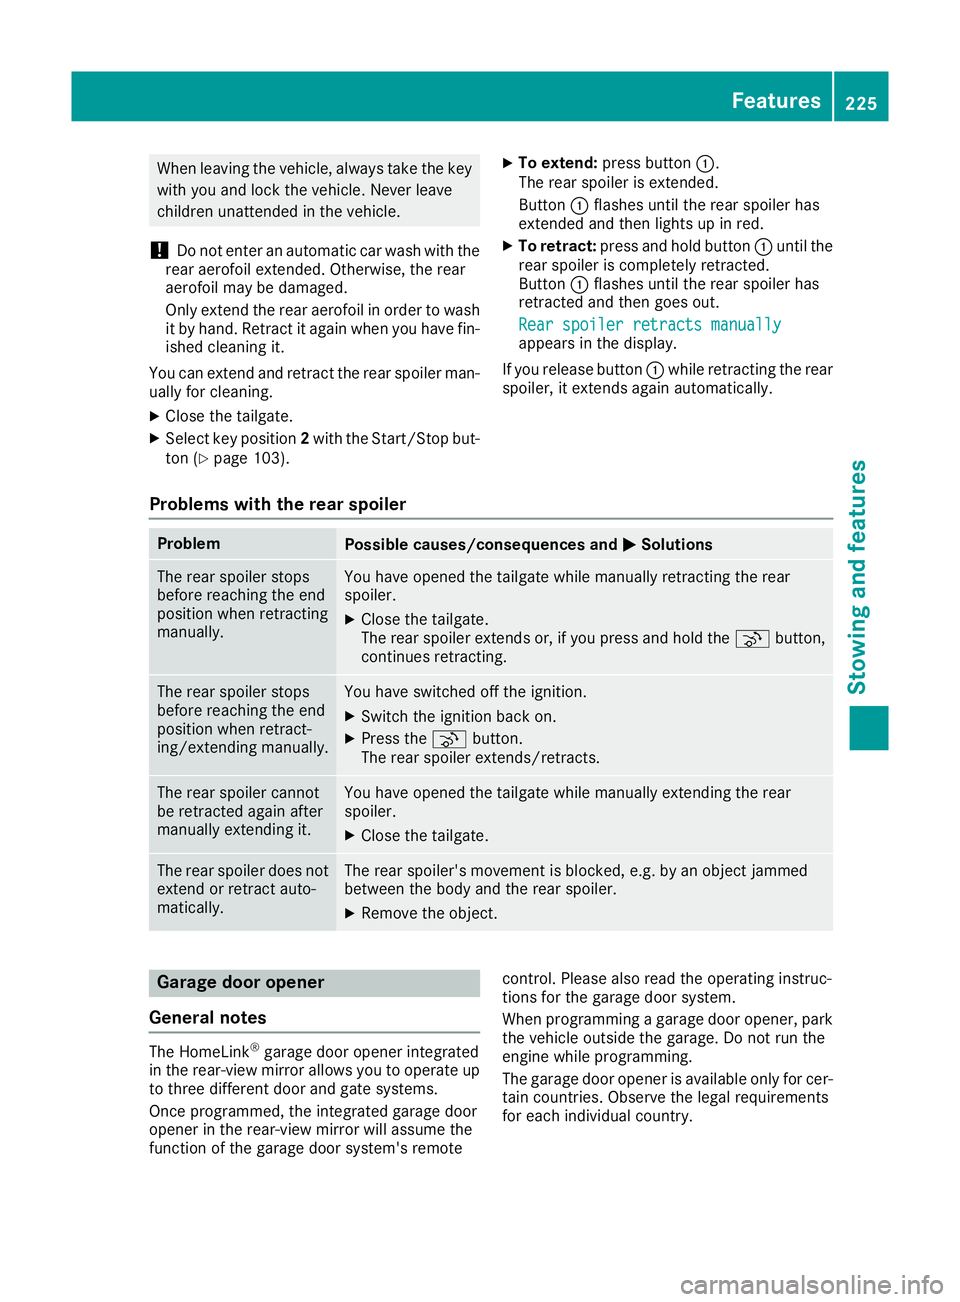
To extend: press button :.
The rear spoiler is extended.
Button :flashes until the rear spoiler has
extended and then lights up in red.
X To retract: press and hold button :until the
rear spoiler is completely retracted.
Button :flashes until the rear spoiler has
retracted and then goes out.
Rear spoiler retracts manually Rear spoiler retracts manually
appears in the display.
If you release button :while retracting the rear
spoiler, it extends again automatically.
Problems with the rear spoiler Problem
Possible causes/consequences and
M MSolutions The rear spoiler stops
before reaching the end
position when retracting
manually. You have opened the tailgate while manually retracting the rear
spoiler.
X Close the tailgate.
The rear spoiler extends or, if you press and hold the ¬button,
continues retracting. The rear spoiler stops
before reaching the end
position when retract-
ing/extending manually. You have switched off the ignition.
X Switch the ignition back on.
X Press the ¬button.
The rear spoiler extends/retracts. The rear spoiler cannot
be retracted again after
manually extending it. You have opened the tailgate while manually extending the rear
spoiler.
X Close the tailgate. The rear spoiler does not
extend or retract auto-
matically. The rear spoiler's movement is blocked, e.g. by an object jammed
between the body and the rear spoiler.
X Remove the object. Garage door opener
General notes The HomeLink
®
garage door opener integrated
in the rear-view mirror allows you to operate up
to three different door and gate systems.
Once programmed, the integrated garage door
opener in the rear-view mirror will assume the
function of the garage door system's remote control. Please also read the operating instruc-
tions for the garage door system.
When programming a garage door opener, park
the vehicle outside the garage. Do not run the
engine while programming.
The garage door opener is available only for cer- tain countries. Observe the legal requirements
for each individual country. Features
225Stowing and features Z
Page 242 of 289
matically to parking position
Pand locks the
wheels if the driver's or front-passenger door
is opened and the engine is switched off. This
may damage the vehicle, the transmission or the car wash.
You can wash the vehicle in an automatic car
wash from the very start.
Wash off excess dirt before cleaning the vehicle
in an automatic car wash.
After using an automatic car wash, wipe wax off the windscreen and the wiper blades. This will
prevent smears and reduce wiping noises
caused by residue on the windscreen.
Washing by hand In some countries, washing by hand is only
allowed at specially equipped washing bays.
Observe the legal requirements for each indi-
vidual country.
X Do not use hot water and do not wash the
vehicle in direct sunlight.
X Use a soft sponge to clean.
X Use a mild cleaning agent, such as a car
shampoo approved by Mercedes-Benz.
X Thoroughly hose down the vehicle with a gen-
tle jet of water.
X Do not point the water jet directly towards the
air inlet.
X Use plenty of water and rinse out the sponge
frequently.
X Rinse the vehicle with clean water and dry
thoroughly with a chamois.
X Do not let the cleaning agent dry on the paint-
work.
When using the vehicle in winter, remove all
traces of road salt deposits carefully and as
soon as possible.
High-pressure cleaner G
WARNING
The water jet of circular-jet nozzles (dirt grind- ers) can cause damage not visible from the
outside to tyres or chassis components. Com-
ponents damaged in this way can unexpect-
edly fail. There is a risk of an accident.
Do not use high-pressure cleaners with circu-
lar-jet nozzles to clean the vehicle. Have dam- aged tyres or chassis components replaced
immediately.
! Always maintain a distance of at least 30 cm
between the vehicle and the high-pressure
cleaner nozzle. Information about the correct
distance is available from the equipment
manufacturer.
Move the high-pressure cleaner nozzle
around when cleaning your vehicle.
Do not aim directly at any of the following:
R tyres
R door gaps, roof gaps, joints etc.
R electrical components
R battery
R plug connectors
R lamps
R seals
R trim elements
R ventilation slots
Damage to seals or electrical components
can lead to leaks or failures.
! Vehicles with decorative film: parts of your
vehicle are covered with a decorative film.
Maintain a distance of at least 70 cm between the parts of the vehicle covered with the film
and the nozzle of the high pressure cleaner.
Information about the correct distance is
available from the equipment manufacturer.
Move the high-pressure cleaner nozzle
around whilst cleaning.
! If the key is within the rear detection range
of KEYLESS-GO, the following situations, for
example, could lead to the unintentional
opening of the tailgate:
R using a car wash
R using a high-pressure cleaner
Make sure that the key is at least 3 m away
from the vehicle.
Cleaning the paintwork !
Do not affix:
R stickers
R films
R magnetic plates or similar items
to painted surfaces. You could otherwise
damage the paintwork. Care
239Maintenance and care Z
Page 250 of 289
Flat tyre
Preparing the vehicle
Your vehicle may be equipped with: R a TIREFIT kit (Y page 246)
R an emergency spare wheel (certain countries
only) (Y page 273)
Information on changing and fitting a wheel
(Y page 267).
X Stop the vehicle as far away as possible from
traffic on solid, non-slippery and level ground.
X Switch on the hazard warning lamps.
X Safeguard the vehicle against rolling away
(Y page 119).
X If possible, bring the front wheels into the
straight-ahead position.
X Switch off the engine.
X Pump the tyre to the specified tyre pres-
sure: open the driver's door.
The on-board electronics now have status 0.
This is the same as the key having been
removed.
or X Remove the key from the ignition lock.
X Make sure that the passengers are not endan-
gered as they do so. Make sure that no one is
near the danger area while a wheel is being
changed. Anyone who is not directly assisting in the wheel change should, for example,
stand behind the barrier.
X Get out of the vehicle. Pay attention to traffic
conditions when doing so.
X Close the driver's door.
X Place the warning triangle at a suitable dis-
tance (Y page 245). Observe legal require-
ments. TIREFIT kit
Important safety notes TIREFIT is a tyre sealant.
You can use TIREFIT to seal punctures of up to
4 mm, particularly those in the tyre tread. You
can use TIREFIT at outside temperatures down
to Ò20 †. G
WARNING
In the following situations, the tyre sealant is
unable to provide sufficient breakdown assis- tance, as it is unable to seal the tyre properly:
R there are cuts or punctures in the tyre
larger than those mentioned above.
R the wheel rim is damaged.
R you have driven at very low tyre pressures
or on a flat tyre.
There is a risk of an accident.
Do not drive any further. Contact a qualified
specialist workshop. G
WARNING
The tyre sealant is harmful and causes irrita-
tion. It must not come into contact with your
skin, eyes or clothing or be swallowed. Do not inhale TIREFIT fumes. Keep tyre sealant away
from children. There is a risk of injury.
If you come into contact with the tyre sealant,
observe the following:
R Rinse off the tyre sealant from your skin
immediately with water.
R If the tyre sealant comes into contact with
your eyes, immediately rinse them thor-
oughly with clean water.
R If tyre sealant is swallowed, immediately
rinse your mouth out thoroughly and drink
plenty of water. Do not induce vomiting,
and seek medical attention immediately.
R Immediately change out of clothing which
has come into contact with tyre sealant.
R If an allergic reaction occurs, seek medical
attention immediately.
! Do not operate the tyre inflation compres-
sor for longer than ten minutes at a time with- out a break. It may otherwise overheat.
The tyre inflation compressor can be oper-
ated again once it has cooled down.
Comply with the manufacturer's safety instruc-
tions on the tyre inflation compressor label and
on the tyre sealant bottle. Flat tyre
247Breakdown assistance Z
Page 260 of 289
the middle, e.g. with a white cloth
(30 x 30 cm). This makes other road users
aware that a vehicle is being towed.
R only secure the tow rope to the towing eye.
R observe the brake lamps of the towing vehi-
cle while driving. Always maintain a dis-
tance so that the tow rope does not sag.
R do not use steel cables or chains to tow
your vehicle. You could otherwise damage
the vehicle.
! Do not use the towing eyes for recovery pur-
poses as this could damage the vehicle. If in
doubt, recover the vehicle with a crane.
! When towing, pull away slowly and
smoothly. If the tractive power is too high, the
vehicles could be damaged.
! Shift the automatic transmission to
Nand
do not open the driver's or front passenger's
door during towing. The automatic transmis-
sion may otherwise shift to position P, which
could damage both vehicles.
! You may tow the vehicle for a maximum of
50km. A towing speed of 50 km/h must not
be exceeded.
For towing distances over 50 km, the entire
vehicle must be lifted up and transported.
! Observe the transmission fluid temperature
(AMG menu) in the on-board computer when
towing. The transmission fluid temperature
must not exceed 120 †. If this occurs, you
must stop towing immediately.
! Tow-starting the vehicle is not permitted.
The transmission may otherwise be damaged.
Also observe the following notes: R Observe the legal requirements in each indi-
vidual country when towing.
R If the engine does not start, try jump-starting
it (Y page 253). Tow-starting the vehicle is not
permitted.
R If it is not possible to jump-start the vehicle,
have it transported to the nearest qualified
specialist workshop, e.g. a Mercedes-Benz
Service Centre.
If the vehicle can no longer be driven because of an accident or breakdown, you have the follow-
ing options:
R transporting the vehicle As a rule, you should have the vehicle trans-
ported.
R towing the vehicle with a tow rope or tow bar
Only tow the vehicle in exceptional cases. The
engine must be running if you tow the vehicle with a tow rope or tow bar.
If the vehicle has suffered transmission damage, have it transported on a transporter or trailer.
Observe the display messages in the instrument
cluster.
The battery must be connected and charged.
Otherwise, you:
R will not be able to switch on the ignition with
the Start/Stop button
R cannot start the engine
R cannot release the electric parking brake
R cannot shift the automatic transmission to
position N
Deactivate the automatic locking feature before
towing the vehicle (Y page 70). You could oth-
erwise be locked out when pushing or towing
the vehicle.
Deactivate tow-away protection before the vehi-
cle is towed away (Y page 61). Fitting/removing the towing eye
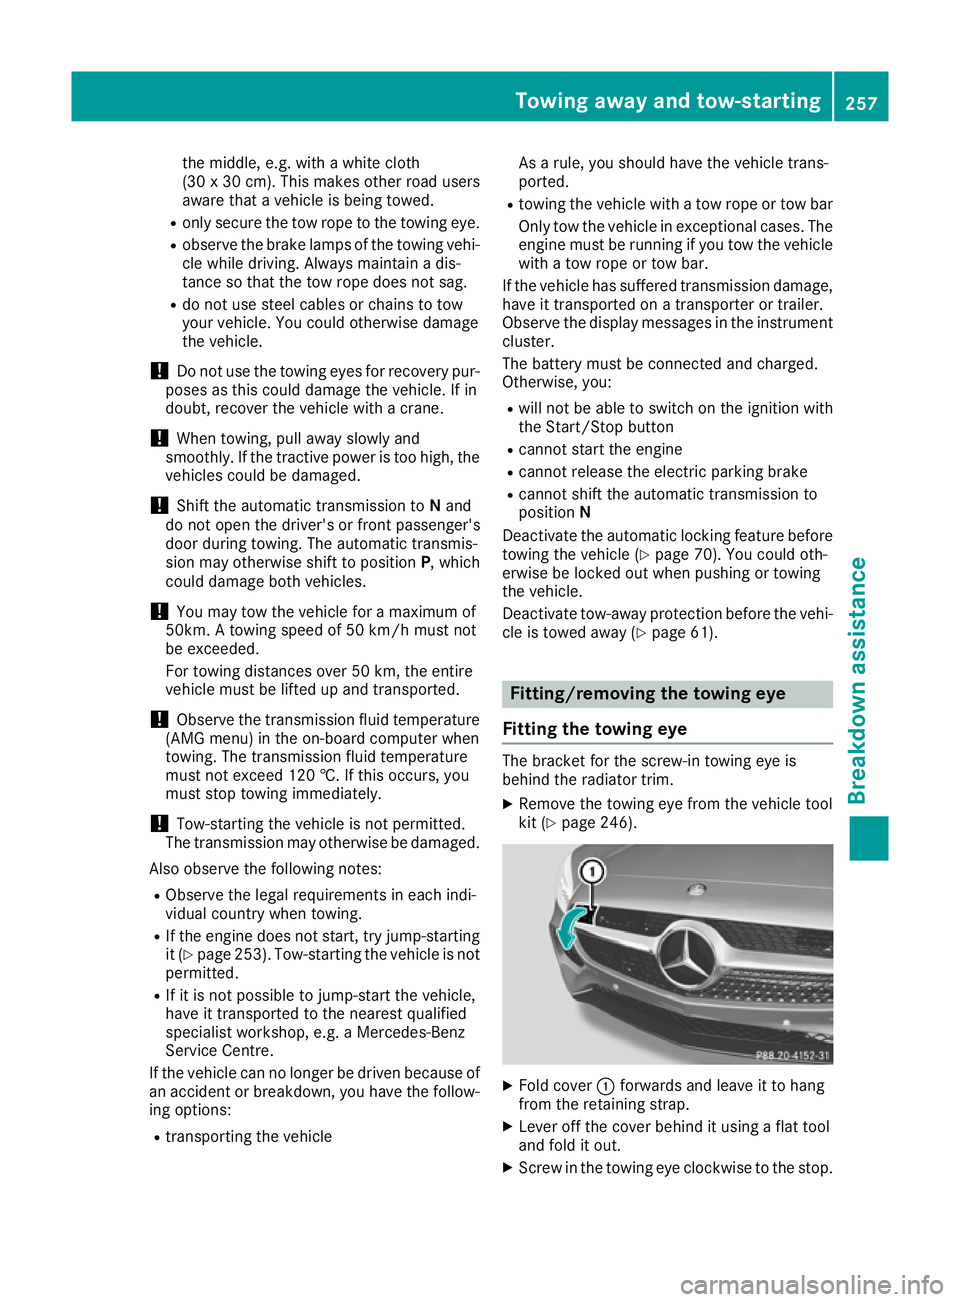
Fitting the towing eye The bracket for the screw-in towing eye is
behind the radiator trim.
X Remove the towing eye from the vehicle tool
kit (Y page 246). X
Fold cover :forwards and leave it to hang
from the retaining strap.
X Lever off the cover behind it using a flat tool
and fold it out.
X Screw in the towing eye clockwise to the stop. Towing away and tow-starting
257Breakdown assistance Z
Page 261 of 289
Removing the towing eye
X
Loosen the towing eye and unscrew it.
X Fold down the inner cover until it engages.
X Attach cover at the bottom and press it in at
the top until it engages.
X Put the towing eye back into the vehicle tool
kit. Towing the vehicle with all wheels on
the ground
It is important that you observe the safety
instructions when towing away your vehicle
(Y page 256).
The automatic transmission automatically shifts to position Pwhen you open the driver's or front-
passenger door or when you remove the key
from the ignition lock. In order to ensure that the automatic transmission stays in position N
when towing away the vehicle, you must
observe the following points:
X Insert the key into the ignition lock. You must
use the key instead of the Start/Stop button
(Y page 103).
X Start the engine and leave it running during
the entire towing procedure.
X Depress the brake pedal and keep it
depressed.
X Move the transmission to position Nwith the
E-SELECT lever.
X Check the transmission position using the
indicator in the multifunction display
(Y page 111).
X Release the brake pedal.
X Release the electric parking brake.
X Switch on the hazard warning lamps
(Y page 90).
In order to signal a change of direction when
towing the vehicle with the hazard warning
lamps switched on, use the combination switch as usual. In this case, only the turn signals for
the desired direction flash. When you reset the
combination switch, the hazard warning lamps
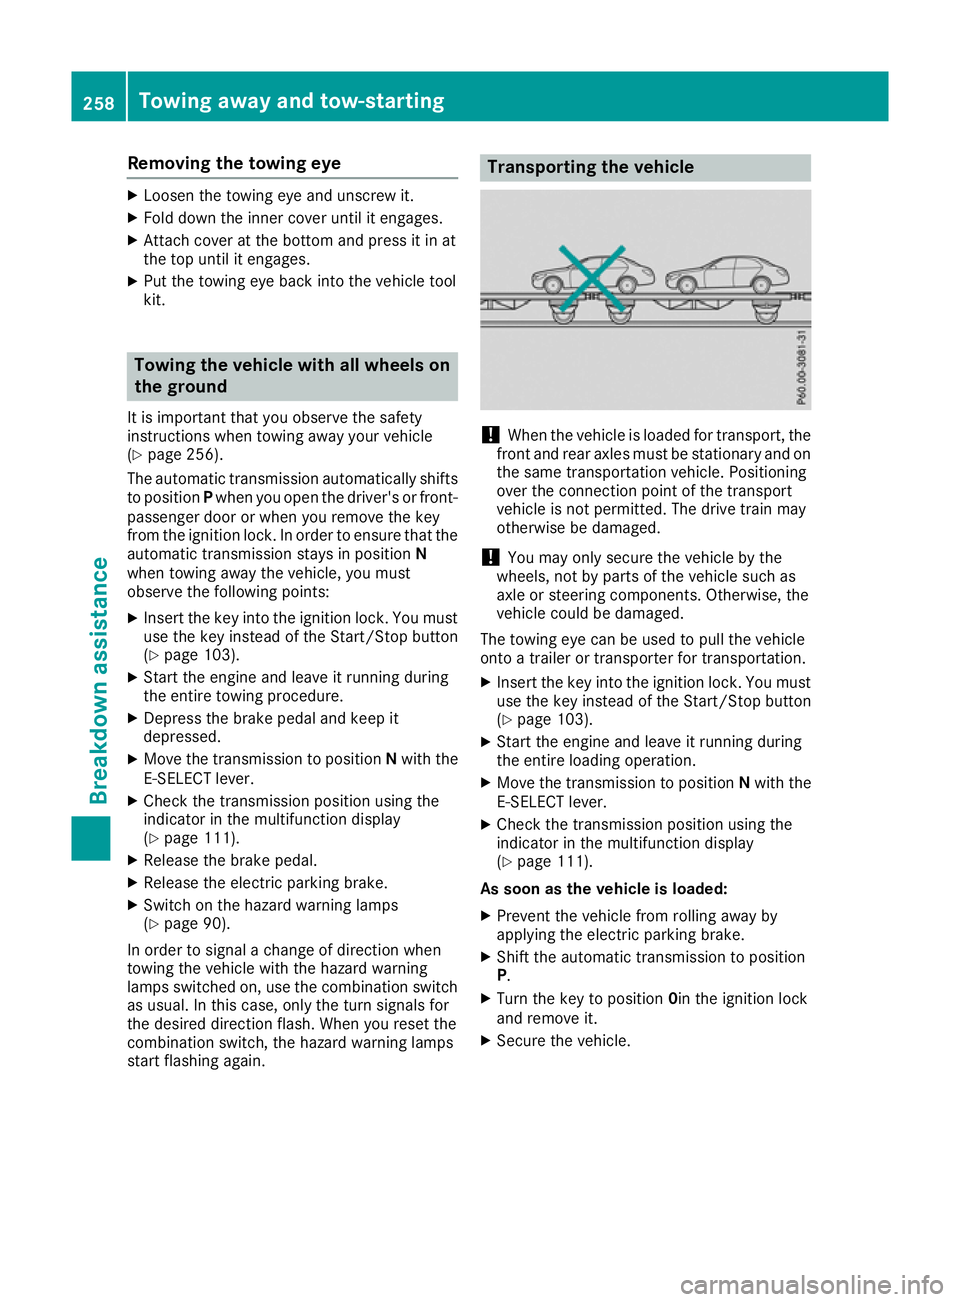
start flashing again. Transporting the vehicle
!
When the vehicle is loaded for transport, the
front and rear axles must be stationary and on the same transportation vehicle. Positioning
over the connection point of the transport
vehicle is not permitted. The drive train may
otherwise be damaged.
! You may only secure the vehicle by the
wheels, not by parts of the vehicle such as
axle or steering components. Otherwise, the
vehicle could be damaged.
The towing eye can be used to pull the vehicle
onto a trailer or transporter for transportation.
X Insert the key into the ignition lock. You must
use the key instead of the Start/Stop button
(Y page 103).
X Start the engine and leave it running during
the entire loading operation.
X Move the transmission to position Nwith the
E-SELECT lever.
X Check the transmission position using the
indicator in the multifunction display
(Y page 111).
As soon as the vehicle is loaded:
X Prevent the vehicle from rolling away by
applying the electric parking brake.
X Shift the automatic transmission to position
P.
X Turn the key to position 0in the ignition lock
and remove it.
X Secure the vehicle. 258
Towing away and tow-startingBreakdown assistance