2016 LINCOLN MKZ ECO mode
[x] Cancel search: ECO modePage 77 of 544

Note:Personal entry codes 4 and 5 will not
recall memory positions.
Erasing a Personal Code
1. Enter the factory-set 5-digit code.
2. Press and release 1·2 on the keypad within five seconds.
3. Press and hold 1·2 for two seconds. You must do this within five seconds of
completing Step 2.
All personal codes are now erased and only
the factory-set 5–digit code will work.
Anti-Scan Feature
The keypad will go into an anti-scan mode
if you enter the wrong code seven times (35
consecutive button presses). This mode
disables the keypad for one minute and the
keypad lamp will flash.
The anti-scan feature will turn off after:
• one minute of keypad inactivity
• pressing the unlock button on the remote control • switching the ignition on
• unlocking your vehicle using intelligent
access.
Unlocking and Locking the Doors
To Unlock the Driver Door
Enter the factory-set 5-digit code or your
personal code. You must press each number
within five seconds of each other. The
interior lamps will illuminate.
Note: All doors will unlock if you enable the
all-door unlocking mode. See Locking and
Unlocking (page 67).
To Unlock All Doors
Enter the factory-set code or your personal
code, then press 3·4 within five seconds.
To Lock All Doors
Press and hold 7·8 and 9·0 at the same time
(with the driver door closed). You do not
need to enter the keypad code first. To Release the Trunk
Enter the factory-set code or your personal
code, then press 5·6 within five seconds.
Displaying the Factory Set Code
Note:
You will need to have two
programmed intelligent access keys for this
procedure.
To display the factory-set code in the
information display:
E155835
1. Remove the rubber covering (A) in the cupholder. Place the first programmed
key in the backup slot (B) at the bottom
of the cupholder.
74
Locks
Page 91 of 544

E142451
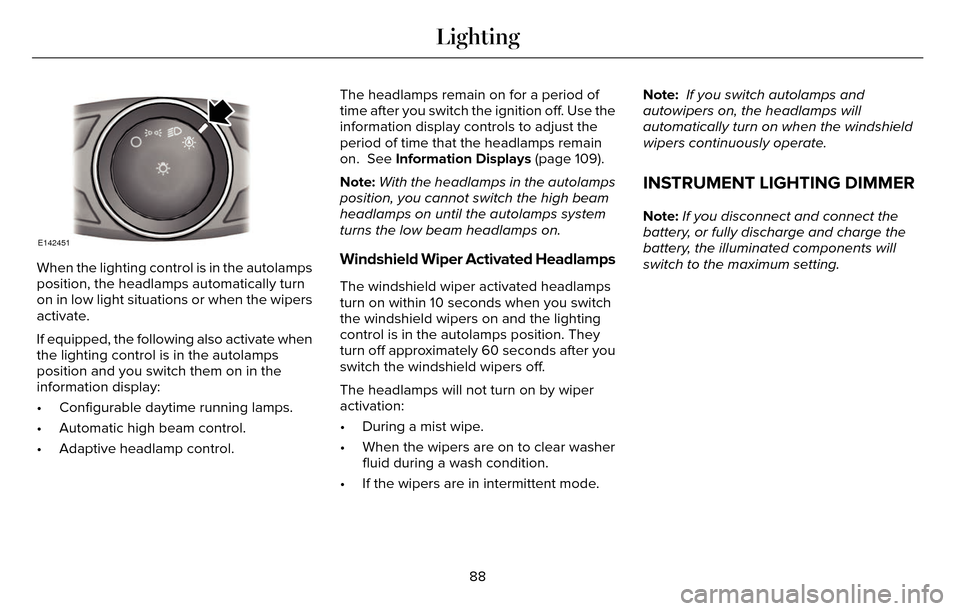
When the lighting control is in the autolamps
position, the headlamps automatically turn
on in low light situations or when the wipers
activate.
If equipped, the following also activate when
the lighting control is in the autolamps
position and you switch them on in the
information display:
• Configurable daytime running lamps.
• Automatic high beam control.
• Adaptive headlamp control.The headlamps remain on for a period of
time after you switch the ignition off. Use the
information display controls to adjust the
period of time that the headlamps remain
on. See Information Displays (page 109).
Note:
With the headlamps in the autolamps
position, you cannot switch the high beam
headlamps on until the autolamps system
turns the low beam headlamps on.Windshield Wiper Activated Headlamps
The windshield wiper activated headlamps
turn on within 10 seconds when you switch
the windshield wipers on and the lighting
control is in the autolamps position. They
turn off approximately 60 seconds after you
switch the windshield wipers off.
The headlamps will not turn on by wiper
activation:
• During a mist wipe.
• When the wipers are on to clear washer fluid during a wash condition.
• If the wipers are in intermittent mode. Note:
If you switch autolamps and
autowipers on, the headlamps will
automatically turn on when the windshield
wipers continuously operate.
INSTRUMENT LIGHTING DIMMER
Note: If you disconnect and connect the
battery, or fully discharge and charge the
battery, the illuminated components will
switch to the maximum setting.
88
Lighting
Page 107 of 544

Engine Coolant Temperature Gauge
Indicates engine coolant temperature. At
normal operating temperature, the level
indicator will be in the normal range. If the
engine coolant temperature exceeds the
normal range, stop the vehicle as soon as
safely possible, switch off the engine and let
the engine cool.
WARNING
Never remove the coolant reservoir
cap while the engine is running or hot.
WARNING LAMPS AND
INDICATORS
The following warning lamps and indicators
will alert you to a vehicle condition that may
become serious. Some lamps will illuminate
when you start your vehicle to make sure
they work. If any lamps remain on after
starting your vehicle, refer to the respective
system warning lamp for further information.Note:
Some warning indicators appear in
the information display and function the
same as a warning lamp, but do not display
when you start your vehicle.
Adaptive Cruise Control (If Equipped)
E144524
The speed control system indicator
light changes color to indicate
what mode the system is in: See
Using Adaptive Cruise Control (page 207).
On (white light): Illuminates when the
adaptive cruise control system is turned on.
Turns off when the speed control system is
turned off.
Engaged (green light): Illuminates when the
adaptive cruise control system is engaged.
Turns off when the speed control system is
disengaged.
Anti-Lock Braking System
If it illuminates when you are
driving, this indicates a
malfunction. You will continue to
have the normal braking system (without
ABS) unless the brake system warning lamp
is also illuminated. Have the system checked
by your authorized dealer.
Battery
If it illuminates while driving, it
indicates a malfunction. Switch off
all unnecessary electrical
equipment and have the system checked by
your authorized dealer immediately.
Blind Spot Monitor (If Equipped)
E151262
It will illuminate when you switch
this feature off or in conjunction
with a message. See Blind Spot
Information System (page 220). See
Information Messages (page 115).
104
Instrument Cluster
Page 110 of 544

Service Engine Soon
If the service engine soon indicator
light stays illuminated after the
engine is started, it indicates that
the On Board Diagnostics system (OBD) has
detected a malfunction of the vehicle
emissions control system. Refer to On board
diagnostics (OBD) in the Fuel and Refueling
chapter for more information about having
your vehicle serviced. See Emission Control
System (page 172).
If the light is blinking, engine misfire is
occurring which could damage your catalytic
converter. Drive in a moderate fashion (avoid
heavy acceleration and deceleration) and
have your vehicle serviced immediately.
WARNING
Under engine misfire conditions,
excessive exhaust temperatures could
damage the catalytic converter, the fuel
system, interior floor coverings or other
vehicle components, possibly causing a fire.
Have an authorized dealer service your
vehicle immediately.
The service engine soon indicator light
illuminates when the ignition is first turned
on prior to engine start to check the bulb and
to indicate whether the vehicle is ready for
Inspection/Maintenance (I/M) testing.
Normally, the service engine soon light will
stay on until the engine is cranked, then turn
itself off if no malfunctions are present.
However, if after 15 seconds the service
engine soon light blinks eight times, it means
that the vehicle is not ready for I/M testing.
See Emission Control System (page 172).
Stability Control
E138639
It will flash when the system is
active. If it remains illuminated or
does not illuminate when you
switch the ignition on, this indicates a
malfunction. During a malfunction the system
will switch off. Have the system checked by
your authorized dealer immediately. See
Using Stability Control (page 195).
Stability Control Off
It will illuminate when you switch
the system off. It will go out when
you switch the system back on or
when you switch the ignition off. See Using
Stability Control (page 195).
Trunk Ajar
E159323
Displays when the ignition is on
and the trunk is not completely
closed.
AUDIBLE WARNINGS AND
INDICATORS
Key in Ignition Warning Chime
Sounds when you open the driver's door and
you have left the key in the ignition.
107
Instrument Cluster
Page 135 of 544

Transmission
Action
Message
See your authorized dealer.
Transmission Malfunction Service Now
The transmission is overheating and needs to cool. Stop in a safe place as soon as it’s possible.
Transmission Overheating Stop Safely
The transmission has overheated and needs to cool. Stop in a safe place as soon as it’s possible.
Transmission Overtemperature Stop Safely
See your authorized dealer.
Transmission Service Required
Transmission is getting hot. Stop to let it cool.
Transmission Too Hot Press Brake
Displays when the transmission has overheated and has limited functional\
ity. See Automatic
Transmission (page 175).
Transmission Limited Function See Manual
Transmission is too cold. Wait for it to warm up before you drive.
Transmission Warming Up Please Wait
A reminder to shift into park. In addition, this message is typical afte\
r reconnecting or rechargingthe battery until you cycle the ignition to the on mode. See Changing the 12V Battery (page
297).
Transmission Not in Park
Displays when the transmission has adjusted the shift strategy.
Transmission Adjusted
Displays when the transmission is adjusting the shift strategy.
Transmission Adapt Mode
Displays when the transmission shift lever is locked and unable to selec\
t gears.
Transmission Indicate Mode Lockup On
Displays when the transmission shift lever is unlocked and free to selec\
t gears.
Transmission Indicate Mode Lockup Off
Displays when an invalid gear has been selected.
Invalid Gear Selection
132
Information Displays
Page 139 of 544

Driver temperature control: Adjusts the temperature setting using the control on the driver side. This control also adjusts the
passenger side temperature when you switch off dual zone mode.
A
Fan speed control: Adjusts the volume of air circulated in the vehicle.
B
Passenger temperature control: Adjusts the temperature on the passenger side.
C
Power: Press the button to switch the system on and off. When the system is off, it prevents outside air from entering the vehicle.
D
Recirculated air: Press the button to switch between outside air and recirculated air. When you select recirculated air, the air
currently in the passenger compartment recirculates. This may reduce the\
time needed to cool the interior (when used with A/C)
and may reduce unwanted odors from entering your vehicle.
E
Note: Recirculated air may turn off automatically (or be prevented from turnin\
g on) in all airflow modes except MAX A/C to reduce
risk of fogging. Recirculated air may also turn on and off automatically in Panel or Panel and Floor airflow modes during hot weather
in order to improve cooling efficiency.
A/C: Press the button to turn air conditioning compressor on or off. Use air conditioning with recirculated air to improve cooling
performance and efficiency.
F
MAX A/C: Press the button to maximize cooling. Recirculated air flows through the instrument panel vents, air conditioni\
ng
automatically turns on, and the fan automatically adjusts to the highest\
speed.
G
AUTO: Press the button to turn on automatic operation. Select the desired tem\
perature using the temperature control. The system
adjusts fan speed, air distribution, air conditioning operation, and sel\
ects outside air or recirculated air to heat or cool the vehicle
in order to maintain the desired temperature. You can also use the AUTO button to turn off dual zone operation by pressing and
holding the button for more than two seconds.
H
Heated rear window: Press the button to switch the heated rear window on and off. See Heated Windows and Mirrors (page 138).
I
Defrost: Select to distribute air through the windshield air vents. Air distribu\
tion to the instrument panel and footwell vents turns
off. You can also use this setting to defrost and clear the windshield of a th\
in covering of ice.
J
136
Climate Control
Page 147 of 544

Power Lumbar
E165608
Multi-Contour Front Seats With Active
Motion (If Equipped)
Note:The massage system will turn off after
20 minutes.
Note: The engine must be running or the
vehicle must be in accessory mode to
activate the seats.
Note: Allow a few seconds for any selection
to activate. The seatback and cushion
massage cannot function at the same time.
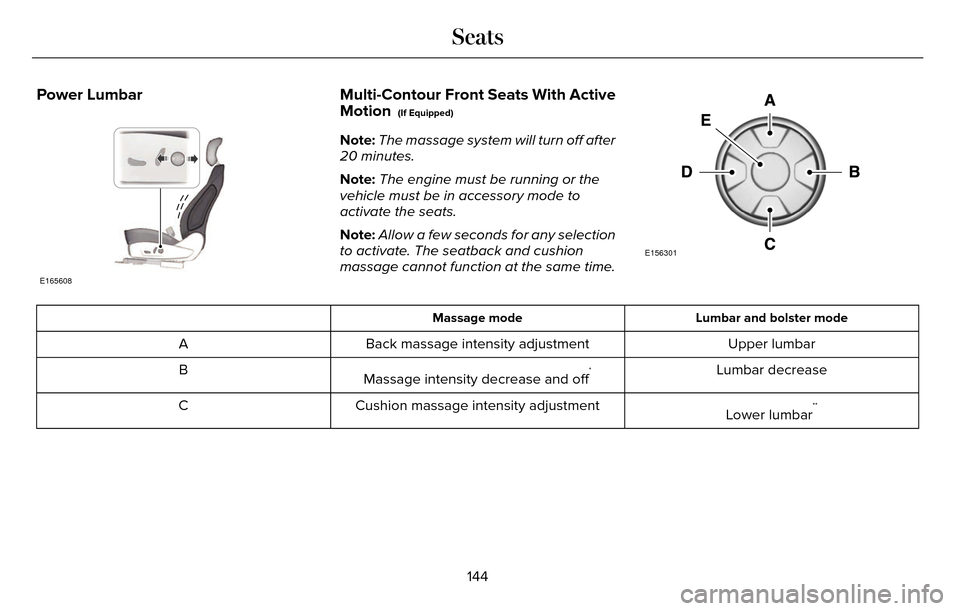
E156301
Lumbar and bolster mode
Massage mode
Upper lumbar
Back massage intensity adjustment
A
Lumbar decrease
Massage intensity decrease and off
*B
Lower lumbar
**Cushion massage intensity adjustment
C
144
Seats
Page 148 of 544

Lumbar and bolster mode
Massage mode
Lumbar increase
Massage intensity increase
D
-
On and off
E
*The massage feature will default to an alternating massage mode with bac\
k massage intensity adjustment. The lumbar and bolster feature
will default to the middle lumbar mode.
**Press C a second time to adjust the back bolster. Press C a third time to adjust the cushion bolster.
You can also adjust this feature through the touchscreen.
E142607
Press the Menu Settings icon, then
Vehicle. Choose Multi-Contour
Seats.
When switched on, the system displays
directions for you to adjust the lumbar
settings in your seat or to set the massage
function.
To access and make adjustments to the
lumbar setting:
1. Choose the desired seat to adjust.
2. Press the + or - to adjust the lumbar intensity. To access and make adjustments to the
massage setting:
1. Press the Menu Settings icon, then
Vehicle. Choose Multi-Contour Seats.
2. Choose the desired seat to adjust.
3. Press OFF, LO or HI.MEMORY FUNCTION
WARNINGS
Before activating the seat memory,
make sure that the area immediately
surrounding the seat is clear of obstructions
and that all occupants are clear of moving
parts.
Do not use the memory function when
your vehicle is moving.
145
Seats