Page 70 of 501
Safety features of your vehicle
54
3
Do not put anything in front of the
passenger air bag indicator.
Main components of the occu-
pant detection system
A detection device located within the front passenger seat cushion.
An electronic system which deter- mines whether the passenger air
bag systems should be activated
or deactivated.
A indicator light located on the instrument panel which illuminates
the words PASSENGER AIR BAG
“OFF” indicating the front passen-
ger air bag system is deactivated.
The instrument panel air bag warn- ing light is interconnected with the
occupant detection system. If the front passenger seat is occu-
pied by a person that the system
determines to be of appropriate size,
and he/she sits properly (sitting
upright with the seatback in an
upright position, centered on the
seat cushion with their seat belt on,
legs comfortably extended and their
feet on the floor), the PASSENGER
AIR BAG “OFF” indicator will turn off
and the front passenger's air bag will
be able to inflate, if necessary, in
frontal crashes.
You will find the PASSENGER AIR
BAG “OFF” indicator on the center
facia panel. This system detects the
conditions 1~4 in the following table
and activates or deactivates the front
passenger air bag based on these
conditions.
Always be sure that you and all vehi-
cle occupants are seated and
restrained properly (sitting upright
with the seat in an upright position,
centered on the seat cushion, with
the person’s legs comfortably
extended, feet on the floor, and wear-
ing the safety belt properly) for the
most effective protection by the air
bag and the safety belt.
The ODS (Occupant Detection
System) may not function properly if
the passenger takes actions which
can defeat the detection system.
These include:
(1) Failing to sit in an upright position.
(2) Leaning against the door or center console.
(3) Sitting towards the sides or the front of the seat.
(4) Putting legs on the dashboard or resting them on other locations
which reduce the passenger
weight on the front seat.
(5) Improperly wearing the safety belt.
(6) Reclining the seat back.
Page 129 of 501
Features of your vehicle
42
4
D130300AUN
Tilt steering/
Telescope steering
(if equipped)
Tilt steering allows you to adjust the
steering wheel before you drive.
You can also raise the steering wheel
to give your legs more room when
you exit and enter the vehicle (if
equipped).
The steering wheel should be posi-
tioned so that it is comfortable for
you to drive, while permitting you to
see the instrument panel warning
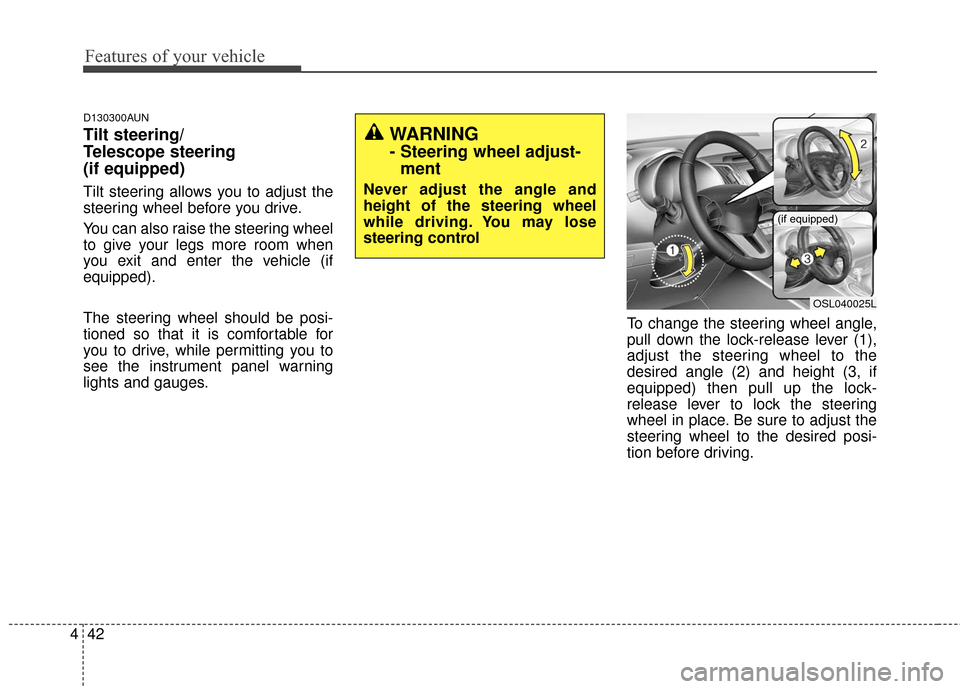
lights and gauges. To change the steering wheel angle,
pull down the lock-release lever (1),
adjust the steering wheel to the
desired angle (2) and height (3, if
equipped) then pull up the lock-
release lever to lock the steering
wheel in place. Be sure to adjust the
steering wheel to the desired posi-
tion before driving.
OSL040025L
(if equipped)
WARNING
- Steering wheel adjust-
ment
Never adjust the angle and
height of the steering wheel
while driving. You may lose
steering control
Page 145 of 501
Features of your vehicle
58
4
D150100AAM-EU
Instrument panel illumination
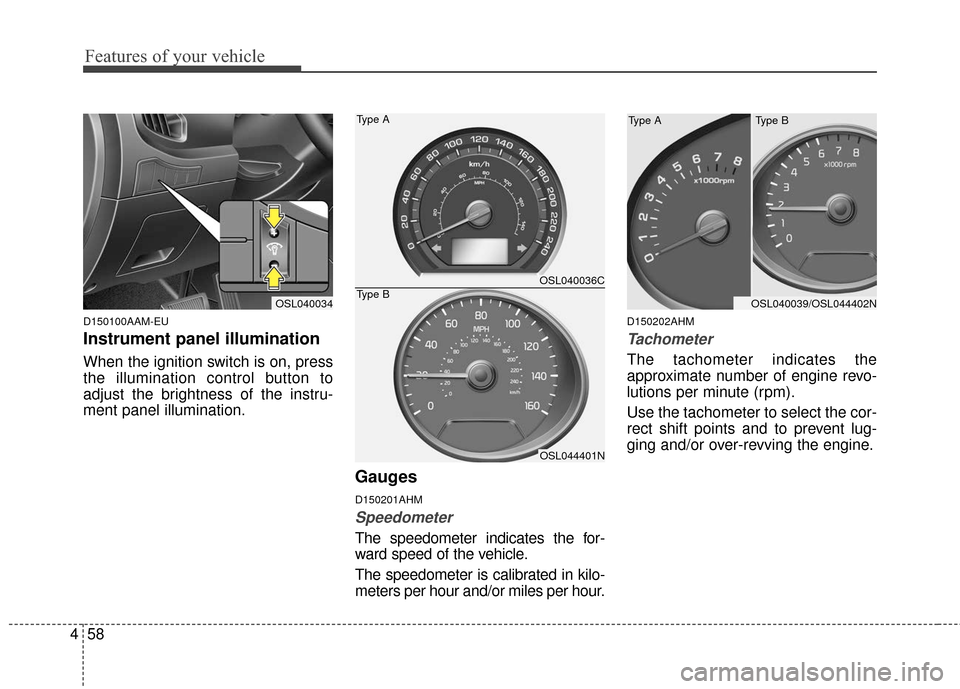
When the ignition switch is on, press
the illumination control button to
adjust the brightness of the instru-
ment panel illumination.
Gauges
D150201AHM
Speedometer
The speedometer indicates the for-
ward speed of the vehicle.
The speedometer is calibrated in kilo-
meters per hour and/or miles per hour.
D150202AHM
Tachometer
The tachometer indicates the
approximate number of engine revo-
lutions per minute (rpm).
Use the tachometer to select the cor-
rect shift points and to prevent lug-
ging and/or over-revving the engine.
OSL040034OSL040039/OSL044402N
OSL040036C
OSL044401N
Type A
Type B
Type B
Type A
Page 154 of 501
467
Features of your vehicle
D150304AHM-EU-U1
Seat belt warning
As a reminder to the driver, the seat
belt warning light will blink for
approximately 6 seconds each time
you turn the ignition switch ON,
regardless of belt fastening.
If the driver's seat belt is not fastened
when the ignition switch is turned on,
the seat belt warning light and the
seat belt warning chime will operate
for approximately 6 seconds. But if it
is fastened within the 6 seconds, the
warning light will blink until the 6 sec-
onds are up The warning chime will
turn off immediately.If the driver's seat belt is disconnect-
ed after the ignition switch is turned
to the ON position, the seat belt
warning light will blink for approxi-
mately 6 seconds. But if it is fastened
within the 6 seconds the warning
light will turn off immediately. If the
driver's seat belt is not fastened
when the vehicle speed exceeds 10
km/h (6 mph), the seat belt warning
light and chime will operate approxi-
mately 11 times with a pattern of 6
seconds on and 24 seconds off until
the belt is fastened or the vehicle
speed decreases below 5 km/h (3
mph).
For front passenger’s seat belt warn-
ing light on the center facia, refer to
‘seat belt’ in section 3.
D150305AHM
Turn signal indicator
The blinking green arrows on the
instrument panel show the direction
indicated by the turn signals. If the
arrow comes on but does not blink,
blinks more rapidly than normal, or
does not illuminate at all, it indicates
a malfunction in the turn signal sys-
tem. You should consult your dealer
for repairs.
Page 173 of 501
Features of your vehicle
86
4
❈ The actual feature may differ from the
illustration.
D190400AUN-C1
Lighting control
The light switch has a Headlight and
a Parking light position.
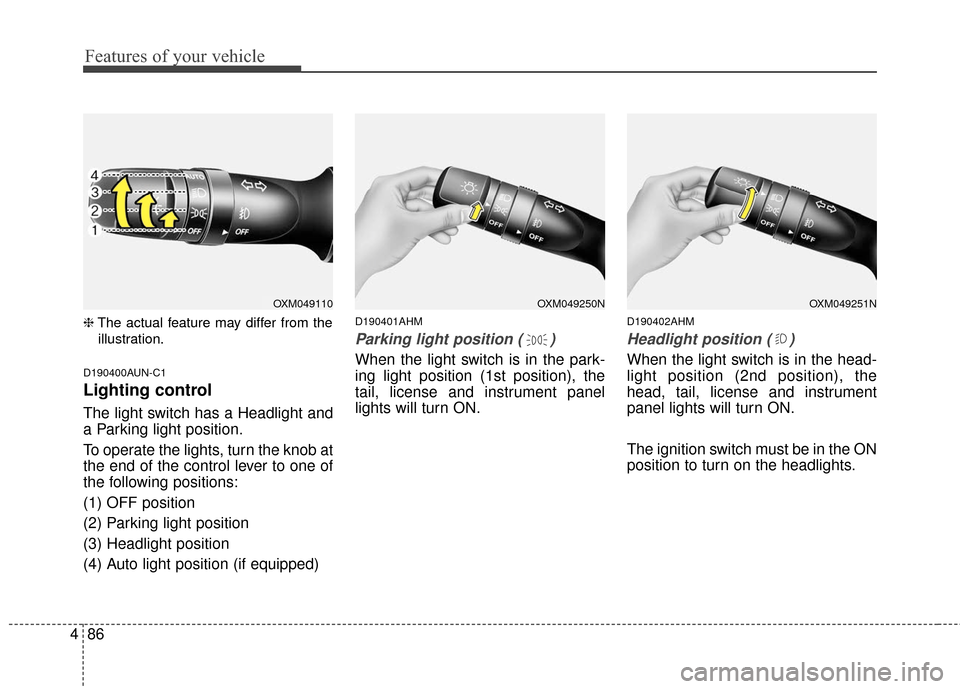
To operate the lights, turn the knob at
the end of the control lever to one of
the following positions:
(1) OFF position
(2) Parking light position
(3) Headlight position
(4) Auto light position (if equipped)
D190401AHM
Parking light position ( )
When the light switch is in the park-
ing light position (1st position), the
tail, license and instrument panel
lights will turn ON.
D190402AHM
Headlight position ( )
When the light switch is in the head-
light position (2nd position), the
head, tail, license and instrument
panel lights will turn ON.
The ignition switch must be in the ON
position to turn on the headlights.
OXM049251NOXM049250NOXM049110
Page 174 of 501
487
Features of your vehicle
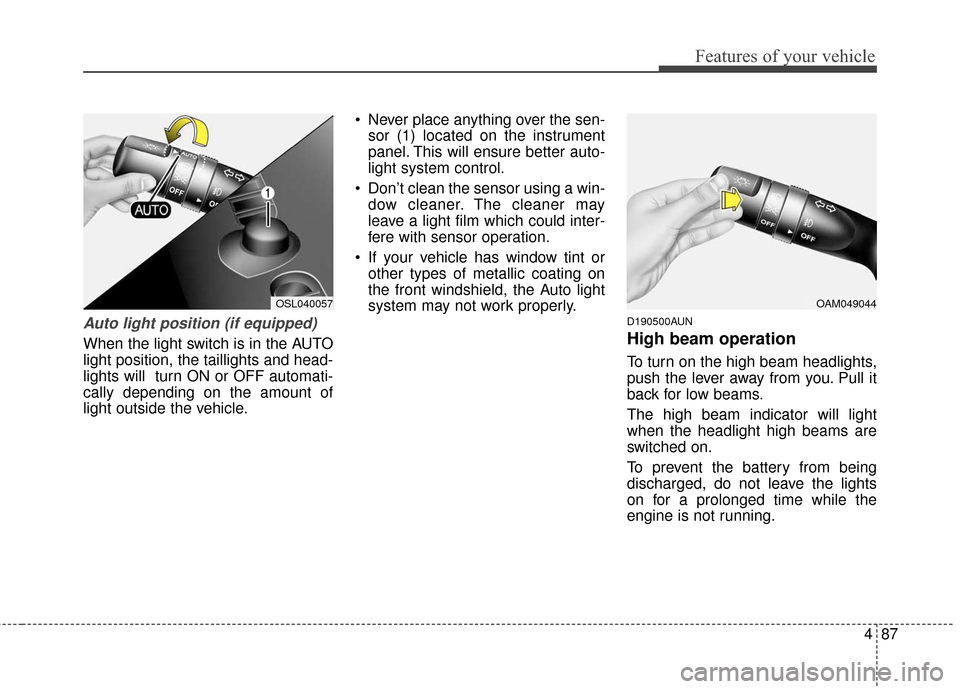
Auto light position (if equipped)
When the light switch is in the AUTO
light position, the taillights and head-
lights will turn ON or OFF automati-
cally depending on the amount of
light outside the vehicle. Never place anything over the sen-
sor (1) located on the instrument
panel. This will ensure better auto-
light system control.
Don’t clean the sensor using a win- dow cleaner. The cleaner may
leave a light film which could inter-
fere with sensor operation.
If your vehicle has window tint or other types of metallic coating on
the front windshield, the Auto light
system may not work properly.
D190500AUN
High beam operation
To turn on the high beam headlights,
push the lever away from you. Pull it
back for low beams.
The high beam indicator will light
when the headlight high beams are
switched on.
To prevent the battery from being
discharged, do not leave the lights
on for a prolonged time while the
engine is not running.
OAM049044OSL040057
Page 175 of 501
Features of your vehicle
88
4
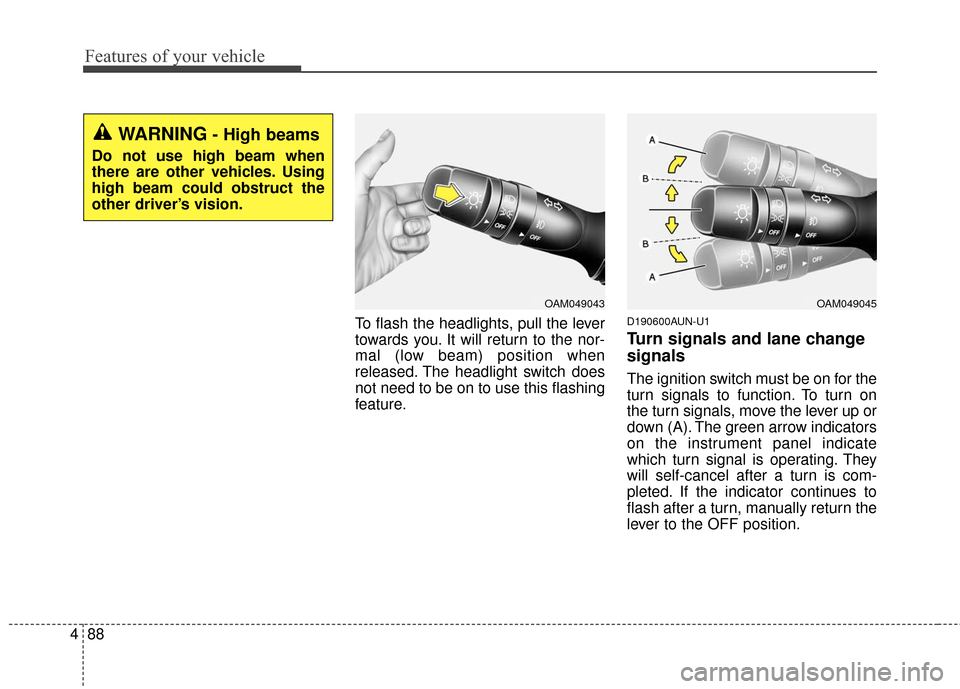
To flash the headlights, pull the lever
towards you. It will return to the nor-
mal (low beam) position when
released. The headlight switch does
not need to be on to use this flashing
feature.D190600AUN-U1
Turn signals and lane change
signals
The ignition switch must be on for the
turn signals to function. To turn on
the turn signals, move the lever up or
down (A). The green arrow indicators
on the instrument panel indicate
which turn signal is operating. They
will self-cancel after a turn is com-
pleted. If the indicator continues to
flash after a turn, manually return the
lever to the OFF position.
OAM049045OAM049043
WARNING- High beams
Do not use high beam when
there are other vehicles. Using
high beam could obstruct the
other driver’s vision.
Page 184 of 501
497
Features of your vehicle
DEFROSTER
220000AUN
If you want to defrost and defog the
front windshield, refer to “Windshield
defrosting and defogging” in this sec-
tion.Rear window defroster
The defroster heats the window to
remove frost, fog and thin ice from
the rear window, while the engine is
running.
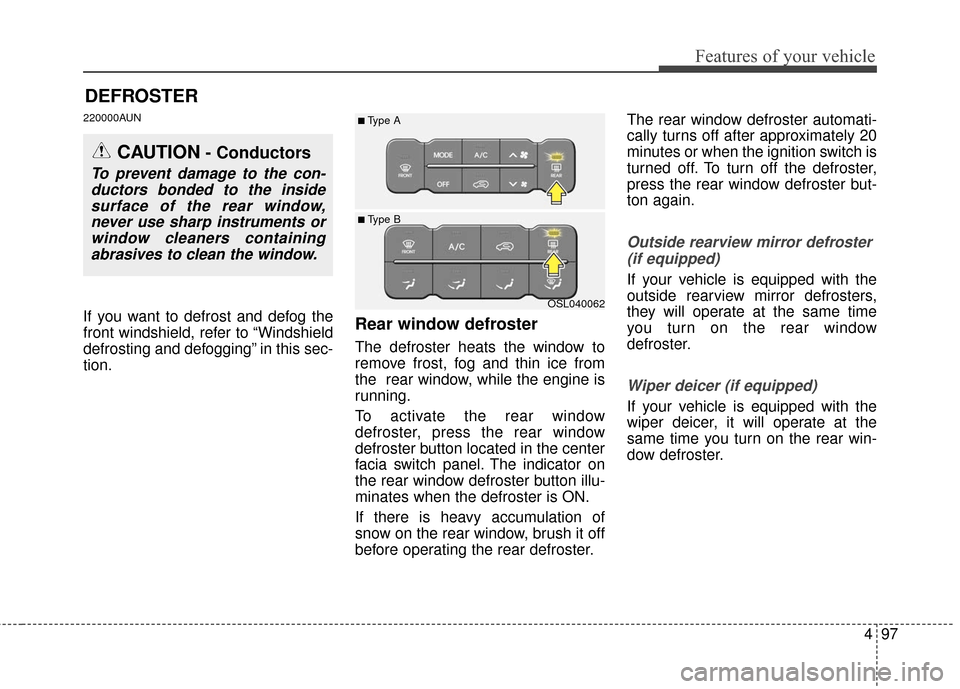
To activate the rear window
defroster, press the rear window
defroster button located in the center
facia switch panel. The indicator on
the rear window defroster button illu-
minates when the defroster is ON.
If there is heavy accumulation of
snow on the rear window, brush it off
before operating the rear defroster.The rear window defroster automati-
cally turns off after approximately 20
minutes or when the ignition switch is
turned off. To turn off the defroster,
press the rear window defroster but-
ton again.
Outside rearview mirror defroster
(if equipped)
If your vehicle is equipped with the
outside rearview mirror defrosters,
they will operate at the same time
you turn on the rear window
defroster.
Wiper deicer (if equipped)
If your vehicle is equipped with the
wiper deicer, it will operate at the
same time you turn on the rear win-
dow defroster.
CAUTION- Conductors
To prevent damage to the con-ductors bonded to the insidesurface of the rear window,never use sharp instruments orwindow cleaners containingabrasives to clean the window.
OSL040062
■ Type B
■Type A