Page 353 of 524
What to do in an emergency
26
ROAD WARNING
Hazard warning flasher
The hazard warning flasher serves
as a warning to other drivers to exer-
cise extreme caution when
approaching, overtaking, or passing
your vehicle.
It should be used whenever emer-
gency repairs are being made or
when the vehicle is stopped near the
edge of a roadway.Depress the flasher switch with the
ignition switch in any position. The
flasher switch is located in the center
console switch panel. All turn signal
lights will flash simultaneously.
• The hazard warning flasher oper-
ates whether your vehicle is run-
ning or not.
The turn signals do not work when the hazard flasher is on.
Care must be taken when using the hazard warning flasher while
the vehicle is being towed.
OPSE064018L
Page 380 of 524

Maintenance
67
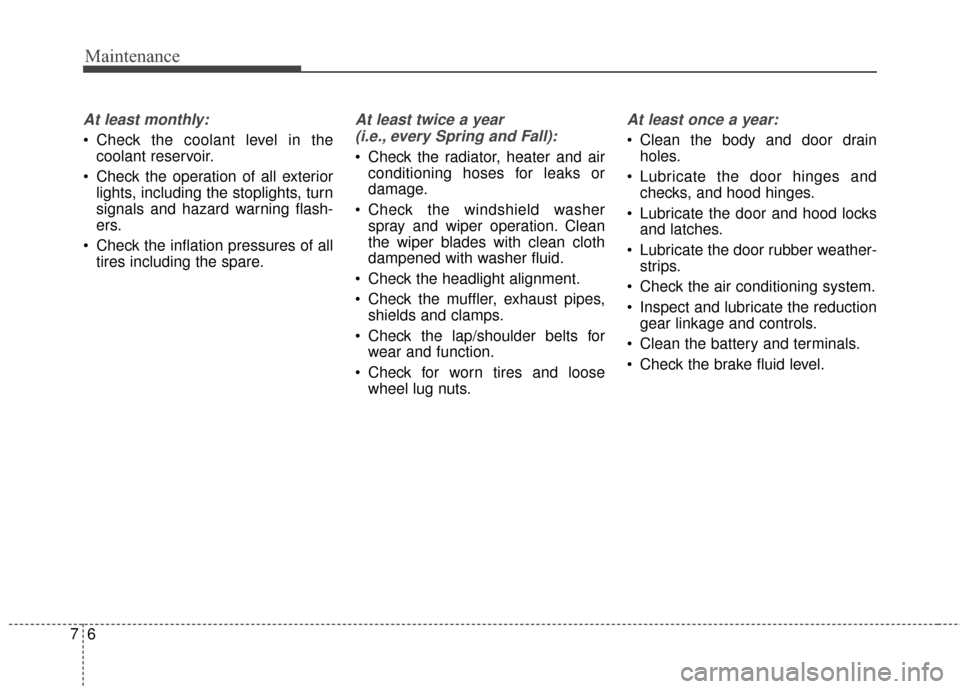
At least monthly:
Check the coolant level in thecoolant reservoir.
Check the operation of all exterior lights, including the stoplights, turn
signals and hazard warning flash-
ers.
Check the inflation pressures of all tires including the spare.
At least twice a year
(i.e., every Spring and Fall):
Check the radiator, heater and air conditioning hoses for leaks or
damage.
Check the windshield washer spray and wiper operation. Clean
the wiper blades with clean cloth
dampened with washer fluid.
Check the headlight alignment.
Check the muffler, exhaust pipes, shields and clamps.
Check the lap/shoulder belts for wear and function.
Check for worn tires and loose wheel lug nuts.
At least once a year:
Clean the body and door drainholes.
Lubricate the door hinges and checks, and hood hinges.
Lubricate the door and hood locks and latches.
Lubricate the door rubber weather- strips.
Check the air conditioning system.
Inspect and lubricate the reduction gear linkage and controls.
Clean the battery and terminals.
Check the brake fluid level.
Page 427 of 524

753
Maintenance
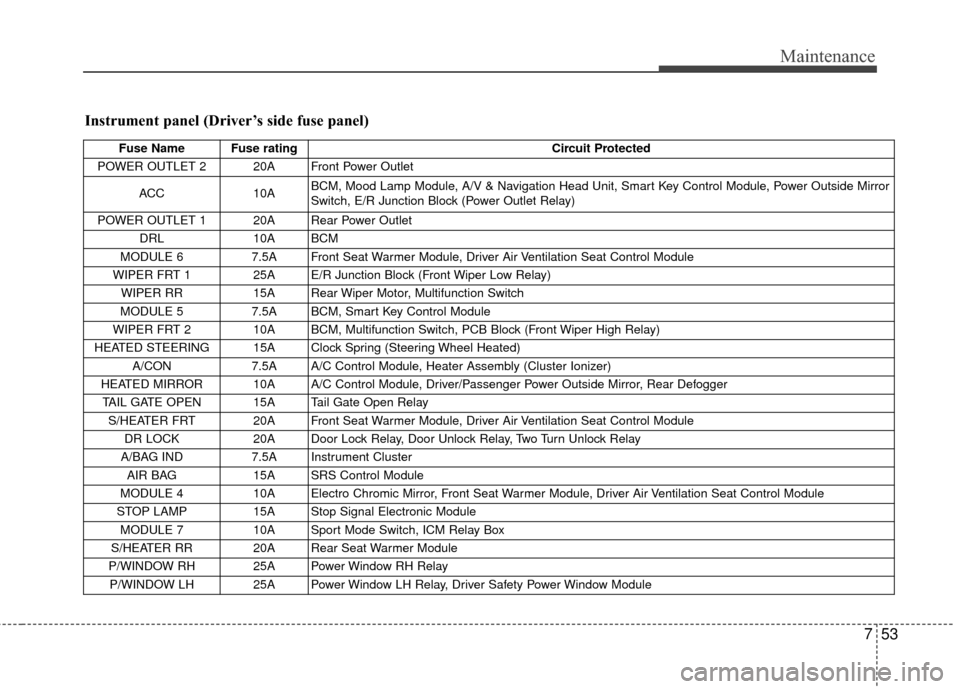
Instrument panel (Driver’s side fuse panel)
Fuse Name Fuse ratingCircuit Protected
POWER OUTLET 2 20A Front Power Outlet
ACC 10A BCM, Mood Lamp Module, A/V & Navigation Head Unit, Smart Key Control Module, Power Outside Mirror
Switch, E/R Junction Block (Power Outlet Relay)
POWER OUTLET 1 20A Rear Power Outlet DRL 10A BCM
MODULE 6 7.5A Front Seat Warmer Module, Driver Air Ventilation Seat Control Module
WIPER FRT 1 25A E/R Junction Block (Front Wiper Low Relay) WIPER RR 15A Rear Wiper Motor, Multifunction Switch
MODULE 5 7.5A BCM, Smart Key Control Module
WIPER FRT 2 10A BCM, Multifunction Switch, PCB Block (Front Wiper High Relay)
HEATED STEERING 15A Clock Spring (Steering Wheel Heated) A/CON 7.5A A/C Control Module, Heater Assembly (Cluster Ionizer)
HEATED MIRROR 10A A/C Control Module, Driver/Passenger Power Outside Mirror, Rear Defogger TAIL GATE OPEN 15A Tail Gate Open Relay S/HEATER FRT 20A Front Seat Warmer Module, Driver Air Ventilation Seat Control Module DR LOCK 20A Door Lock Relay, Door Unlock Relay, Two Turn Unlock Relay
A/BAG IND 7.5A Instrument Cluster
AIR BAG 15A SRS Control Module
MODULE 4 10A Electro Chromic Mirror, Front Seat Warmer Module, Driver Air Ventilation Seat Control Module
STOP LAMP 15A Stop Signal Electronic Module
MODULE 7 10A Sport Mode Switch, ICM Relay Box
S/HEATER RR 20A Rear Seat Warmer Module
P/WINDOW RH 25A Power Window RH Relay P/WINDOW LH 25A Power Window LH Relay, Driver Safety Power Window Module
Page 433 of 524

759
Maintenance
LIGHT BULBS
Use only the bulbs of the specifiedwattage.
If you don’t have necessary tools, the correct bulbs and the expertise,
consult an authorized Kia dealer. In
many cases, it is difficult to replace
vehicle light bulbs because other
parts of the vehicle must be
removed before you can get to the
bulb. This is especially true if you
have to remove the headlight
assembly to get to the bulb(s).
Removing/installing the headlight
assembly can result in damage to
the vehicle.
Do not install additional bulb or LED. If you install that, the lamp
may not be operated properly and
fuse box or electric wiring system
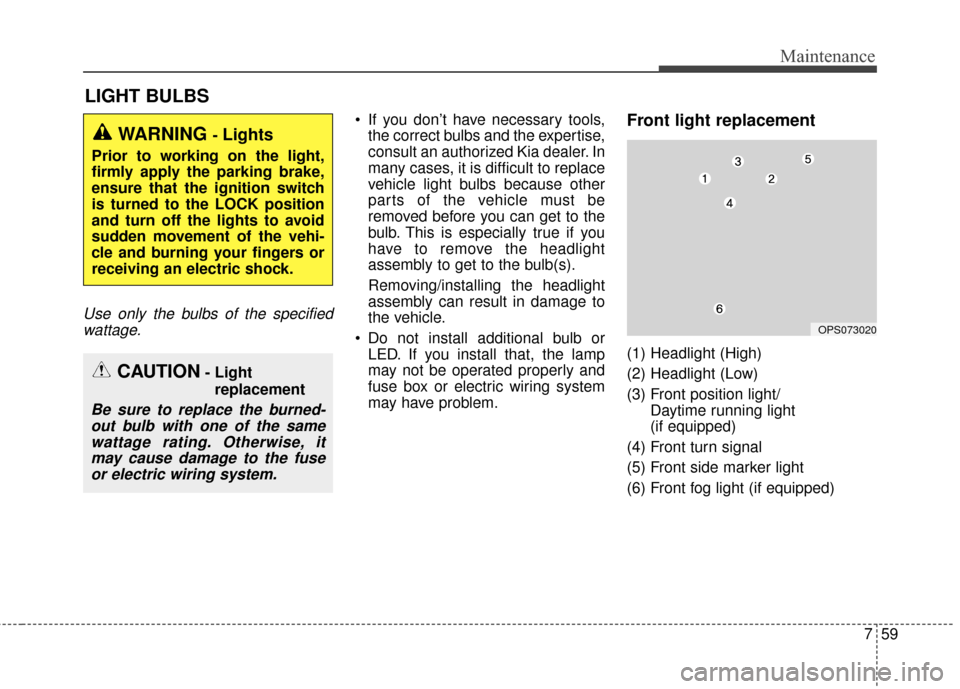
may have problem.Front light replacement
(1) Headlight (High)
(2) Headlight (Low)
(3) Front position light/ Daytime running light
(if equipped)
(4) Front turn signal
(5) Front side marker light
(6) Front fog light (if equipped)
WARNING - Lights
Prior to working on the light,
firmly apply the parking brake,
ensure that the ignition switch
is turned to the LOCK position
and turn off the lights to avoid
sudden movement of the vehi-
cle and burning your fingers or
receiving an electric shock.
CAUTION- Light replacement
Be sure to replace the burned-out bulb with one of the samewattage rating. Otherwise, itmay cause damage to the fuseor electric wiring system.
OPS073020
Page 436 of 524
Maintenance
62
7
Headlight bulb (High, Low)
Follow the steps 1 to 6 from the pre-
vious page.
7. Remove the headlight bulb cover
by turning it counterclockwise.
8. Disconnect the headlight bulb socket-connector.
9. Unsnap the headlight bulb retain- ing wire by depressing the end
and pushing it upward.
10. Remove the bulb from the head- light assembly. 11. Install a new headlight bulb and
snap the headlight bulb retaining
wire into position by aligning the
wire with the groove on the bulb.
12. Connect the headlight bulb sock- et connector.
13. Install the headlight bulb cover by turning it clockwise.
14. Connect the power connector to the back of the headlight assem-
bly.
15. Reinstall the headlight assembly to the body of the vehicle.
Front turn signal / position light /
DRL
LED type
If the light bulb is not operating, have
the vehicle checked by an authorized
Kia dealer.
OPSE074031L
High Low
OPSE074017
Position
light/DRL
Turn signal light
Page 438 of 524
Maintenance
64
7
Side repeater light bulb
replacement (if equipped)
If the light bulb is not operating, have
the vehicle checked by an authorized
Kia dealer.
Rear combination light bulb
replacement
(1) Tail and stop light/
Side marker light (LED)
(2) Tail and side marker light(LED)
(3) Rear turn signal light
(4) Back-up light 1. Open the tailgate.
2. Loosen the light assembly retain-
ing screws with a philips head
screwdriver.
3. Remove the rear combination light assembly from the body of the
vehicle.
OPS073035OPSE074020
OPS073031
Page 439 of 524

765
Maintenance
Turn signal light
4. Remove the socket from theassembly by turning the socket
counterclockwise until the tabs on
the socket align with the slots on
the assembly.
5. Remove the bulb from the socket by pressing it in and rotating it
counterclockwise until the tabs on
the bulb align with the slots in the
socket. 6. Insert a new bulb by inserting it
into the socket and rotating it until
it locks into place.
7. Install the socket in the assembly by aligning the tabs on the socket
with the slots in the assembly and
turning the socket clockwise.
8. Reinstall the light assembly to the body of the vehicle.
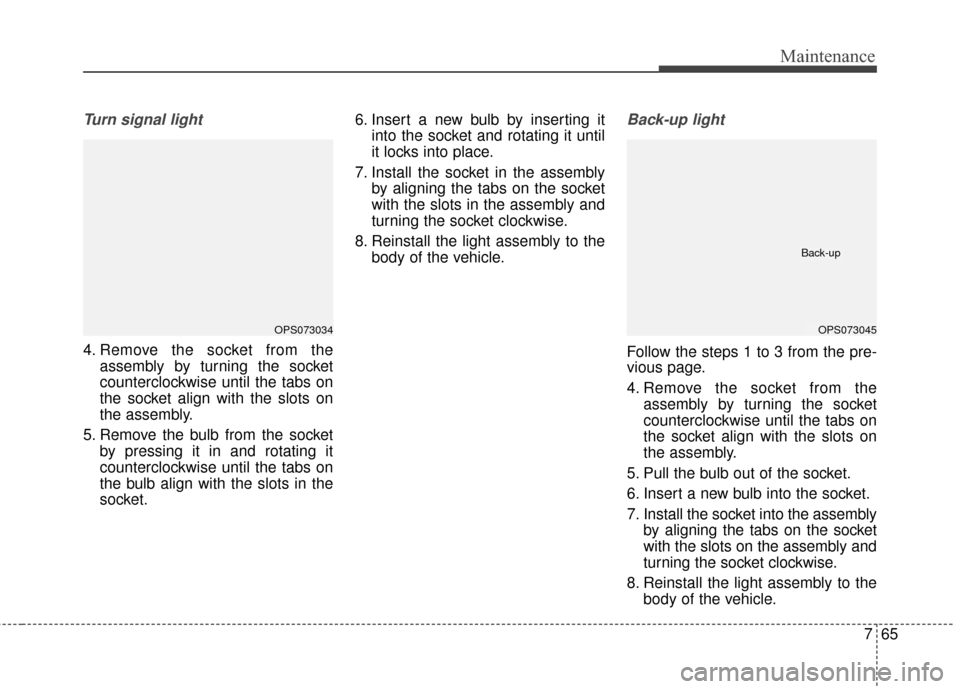
Back-up light
Follow the steps 1 to 3 from the pre-
vious page.
4. Remove the socket from theassembly by turning the socket
counterclockwise until the tabs on
the socket align with the slots on
the assembly.
5. Pull the bulb out of the socket.
6. Insert a new bulb into the socket.
7. Install the socket into the assembly by aligning the tabs on the socket
with the slots on the assembly and
turning the socket clockwise.
8. Reinstall the light assembly to the body of the vehicle.
OPS073034OPS073045
Back-up
Page 453 of 524
Specifications & Consumer information
48
BULB WATTAGE
Light BulbWattageBulb type
Front Headlamps (High)
55H7LL
Headlamps (Low) 55H7LL
Front turn signal lamps LEDLED
Front position lamps LEDLED
Front fog lamps* 559006
Front day time running lamps*LEDLED
Front side marker 5W5W
Side Repeater lamps (Outside Mirror)* LED LED
Rear Rear tail,stop lamps and side marker LED LED
Rear tail lamps and side marker LED LED
Rear turn signal lamps 27 PY27W
Back-up lamps 16 W16W
High mounted stop lamps LED LED
License plate lamps 5 W5W
Interior Map lamps 8 (LED*) FESTOON (LED*)
Room lamps 8 (LED*) FESTOON (LED*)
Personal lamps* LED* LED*
Vanity mirror lamps 5 FESTOON
Glove box lamps 5 FESTOON
Luggage lamp 8 (LED*) FESTOON (LED*)
*: If equipped