Page 79 of 524

49
Features of your vehicle
To deactivate the immobilizersystem:
Turn the POWER button to the ON
position by pressing the button while
carrying the smart key.
To activate the immobilizer system:
Turn the POWER button to the OFF
position. The immobilizer system
activates automatically. Without a
valid smart key for your vehicle, the
vehicle will not start.
In order to prevent theft of your vehi-
cle, do not leave spare keys anywhere
in your vehicle. Your Immobilizer pass-
word is a customer unique password
and should be kept confidential. Do
not leave this number anywhere in
your vehicle.
✽ ✽ NOTICE
When starting the vehicle, do not use
the key with other immobilizer keys
around. Otherwise the vehicle may
not start or may stop soon after it
starts. Keep each key separate in
order to avoid a starting malfunction.
Do not put metal accessories near
the smart key.
The vehicle may not start because
the metal accessories may interrupt
the transponder signal from transmit-
ting normally.
✽ ✽NOTICE
If you need additional keys or lose
your keys, contact an authorized
Kia dealer.
This device complies with
Industry Canada licence-exempt
RSS standard(s).
Operation is subject to the following
two conditions:
(1) This device may not cause inter-
ference, and
(2) This device must accept any interference, including interfer-
ence that may cause undesired
operation of the device.
✽ ✽NOTICE
Changes or modifications not
expressly approved by the party
responsible for compliance could void
the user’s authority to operate the
equipment. If the keyless entry sys-
tem is inoperative due to changes or
modifications not expressly approved
by the party responsible for compli-
ance, it will not be covered by your
manufacturer’s vehicle warranty.
CAUTION- Immobilizer
damage
Do not expose your immobilizersystem to moisture, static elec-tricity and rough handling. Thismay damage your immobilizer.
CAUTION- Immobilizer
alterations
Do not change, alter or adjustthe immobilizer system becauseit could cause the immobilizersystem to malfunction.
Page 86 of 524
Features of your vehicle
16
4
Emergency tailgate safety
release
Your vehicle is equipped with an
emergency tailgate safety release
lever located on the bottom of the
tailgate. When someone is inadver-
tently locked in the cargo area, the
tailgate can be opened by pushing
the release lever and pushing open
the tailgate.
WARNING
• No one should be allowed to
occupy the cargo area of the
vehicle at any time. The cargo
area is a very dangerous loca-
tion in the event of a crash.
Use the release lever for emergencies only. Use with
extreme caution, especially
while the vehicle is in motion.
OPSE044019
Page 88 of 524

Features of your vehicle
18
4
Power windows
The POWER button must be in the
ON position for power windows to
operate.
Each door has a power window
switch that controls the door's win-
dow. The driver has a power window
lock button which can block the oper-
ation of the rear passenger windows.
The power windows can be operated
for approximately 30 seconds after
the vehicle turned off or turned to the
ACC position. However, if the front
doors are opened, the power win-
dows cannot be operated even with-
in the 30 second period.
✽ ✽
NOTICE
While driving with the rear windows
down or with the sunroof (if
equipped) in an open (or partially
open) position, your vehicle may
demonstrate a wind buffeting or
pulsation noise. This noise is a nor-
mal occurrence and can be reduced
or eliminated by taking the follow-
ing actions. If the noise occurs with
one or both of the rear windows
down, partially lower both front
windows approximately one inch. If
you experience the noise with the
sunroof open, slightly reduce the
size of the sunroof opening.
Window opening and closing
The driver’s door has a master power
window switch that controls all the
windows in the vehicle.
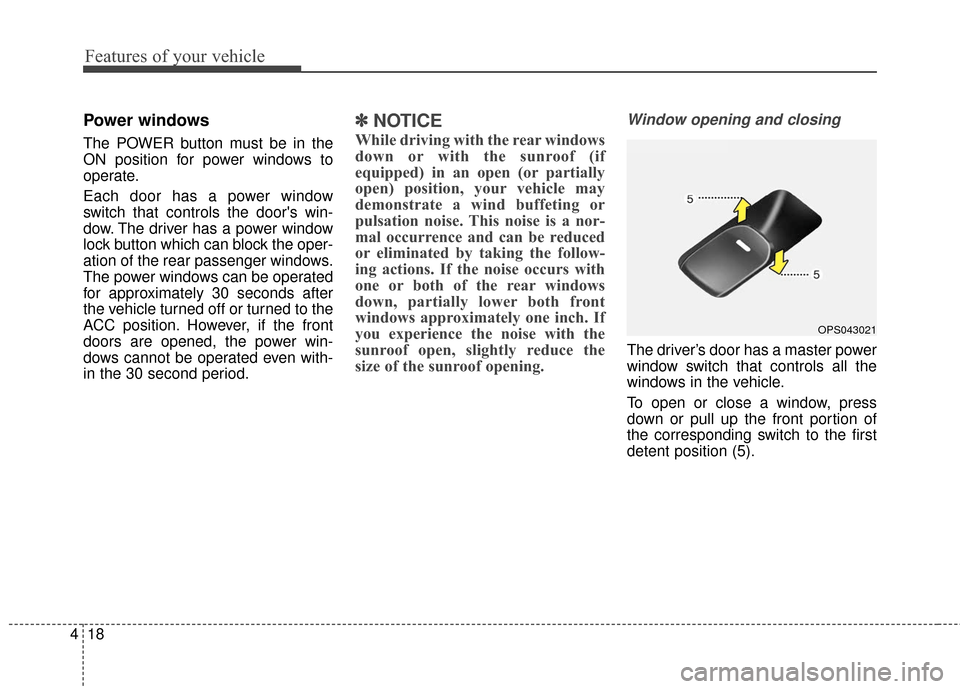
To open or close a window, press
down or pull up the front portion of
the corresponding switch to the first
detent position (5).
OPS043021
Page 107 of 524

437
Features of your vehicle
If the mirror is jammed with ice, do
not adjust the mirror by force. Use an
approved spray de-icer (not radiator
antifreeze) to release the frozen
mechanism or move the vehicle to a
warm place and allow the ice to melt.
Remote control
Electric type
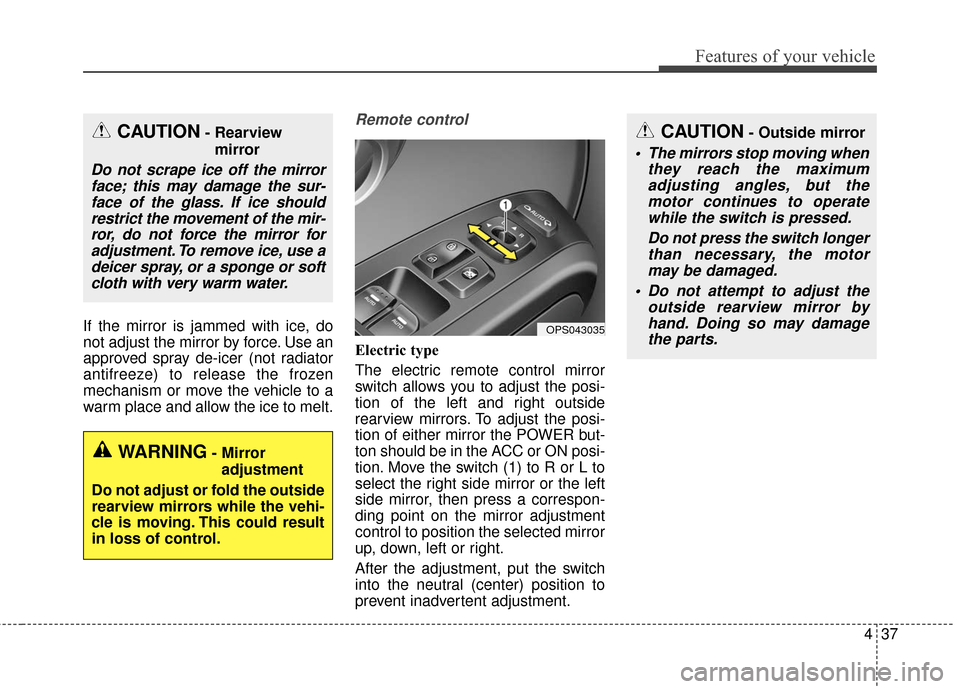
The electric remote control mirror
switch allows you to adjust the posi-
tion of the left and right outside
rearview mirrors. To adjust the posi-
tion of either mirror the POWER but-
ton should be in the ACC or ON posi-
tion. Move the switch (1) to R or L to
select the right side mirror or the left
side mirror, then press a correspon-
ding point on the mirror adjustment
control to position the selected mirror
up, down, left or right.
After the adjustment, put the switch
into the neutral (center) position to
prevent inadvertent adjustment.
CAUTION- Rearviewmirror
Do not scrape ice off the mirrorface; this may damage the sur-face of the glass. If ice shouldrestrict the movement of the mir-ror, do not force the mirror foradjustment. To remove ice, use adeicer spray, or a sponge or softcloth with very warm water.
WARNING- Mirror
adjustment
Do not adjust or fold the outside
rearview mirrors while the vehi-
cle is moving. This could result
in loss of control.
OPS043035
CAUTION- Outside mirror
The mirrors stop moving when they reach the maximumadjusting angles, but themotor continues to operatewhile the switch is pressed.
Do not press the switch longerthan necessary, the motormay be damaged.
Do not attempt to adjust the outside rearview mirror byhand. Doing so may damagethe parts.
Page 150 of 524

Features of your vehicle
80
4
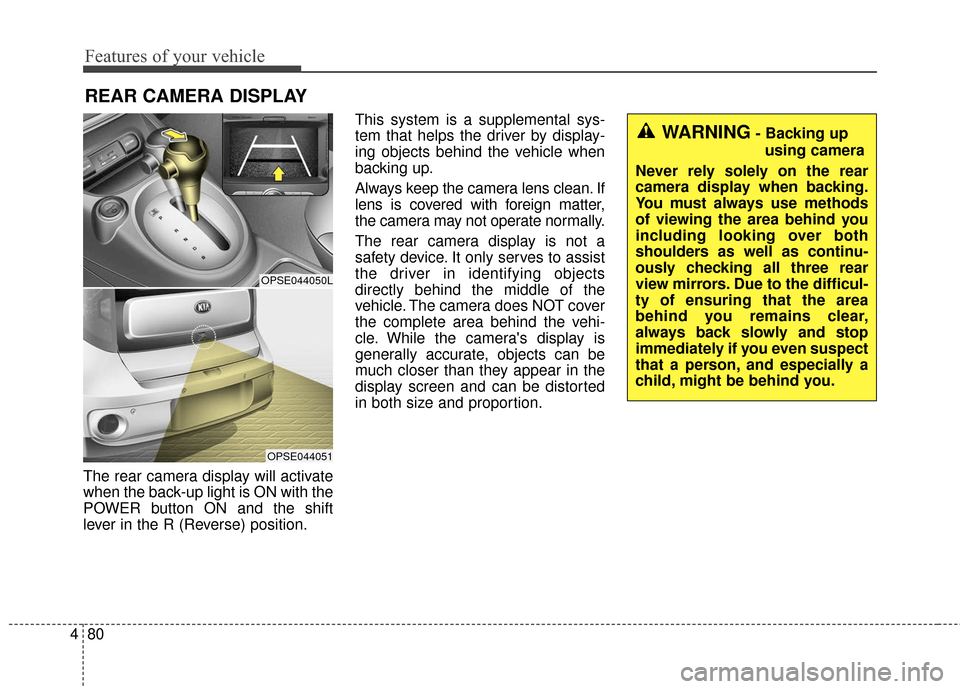
The rear camera display will activate
when the back-up light is ON with the
POWER button ON and the shift
lever in the R (Reverse) position. This system is a supplemental sys-
tem that helps the driver by display-
ing objects behind the vehicle when
backing up.
Always keep the camera lens clean. If
lens is covered with foreign matter,
the camera may not operate normally.
The rear camera display is not a
safety device. It only serves to assist
the driver in identifying objects
directly behind the middle of the
vehicle. The camera does NOT cover
the complete area behind the vehi-
cle. While the camera's display is
generally accurate, objects can be
much closer than they appear in the
display screen and can be distorted
in both size and proportion.
REAR CAMERA DISPLAY
OPSE044050L
OPSE044051
WARNING- Backing up
using camera
Never rely solely on the rear
camera display when backing.
You must always use methods
of viewing the area behind you
including looking over both
shoulders as well as continu-
ously checking all three rear
view mirrors. Due to the difficul-
ty of ensuring that the area
behind you remains clear,
always back slowly and stop
immediately if you even suspect
that a person, and especially a
child, might be behind you.
Page 151 of 524

481
Features of your vehicle
Headlamp escort (if equipped)
If you turn the POWER button to the
ACC or OFF position with the head-
lights ON, the headlights remain on
for about 5 minutes. However, if the
driver’s door is opened and closed,
the headlights are turned off after 15
seconds.
The headlights can be turned off by
pressing the lock button on the smart
key twice or turning the light switch to
the OFF or Auto position. However, if
you turn the light switch to the Auto
position when it is dark outside, the
headlights will not be turned off
immediately.
Battery saver function
The purpose of this feature is toprevent the battery from being dis-
charged. The system automatically
turns off the parking lights when
the driver turns the vehicle off and
opens the driver-side door (in that
order).
With this feature, the parking lights will turn off automatically if the driv-
er parks on the side of the road at
night.
If necessary, to keep the lights on
when the vehicle is turned off, per-
form the following:
1) Open the driver-side door.
2) Turn the parking lights OFF and ON again using the light switch
on the steering column.
Daytime running light
Daytime Running Lights (DRL) may
help make it easier for others to see
the front of your vehicle during the
day. DRL can be helpful in many dif-
ferent driving conditions, and it is
especially helpful after dawn and
before sunset.
The DRL system turns OFF when:
1. The front fog light or headlight (lowbeam) switch is ON.
2. The POWER button is OFF.
3. The parking brake is applied.
LIGHTING
Page 175 of 524

4105
Features of your vehicle
Reserved Climate Control Button(if equipped)
If you press the reserved climate
control button ( ), the indicator
lamp inside the button blinks three
times and the settings for reserved
climate control is displayed on AVN.
For details on how to set reserved
climate control, refer to the AVN
manual that is provided separately.
When reserved climate control is set
and the charging cable is connected,
the climate control begins operating
30 minutes before the set time
(departure time). The indicator lamp lighting conditions
1.Blinking three times:
When you press the reserved cli-
mate control button and enter the
corresponding settings screen on
AVN
2.Remaining turned on: When reserved climate control is set
3.Blinking continuously: When the climate control is operat-
ing (operates only when the charg-
ing cable is connected)
Blower OFF
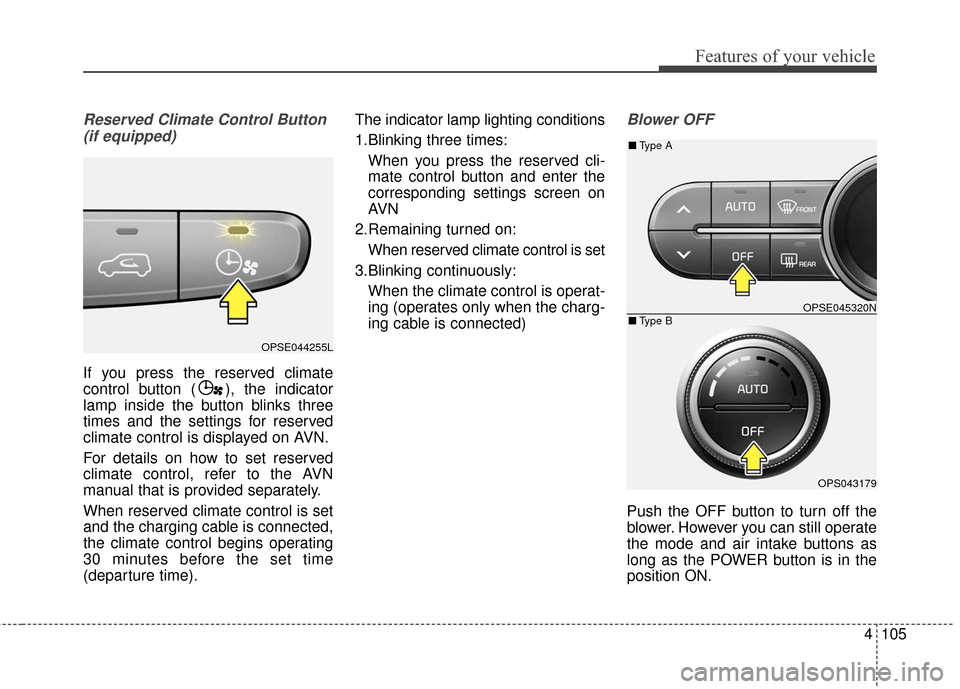
Push the OFF button to turn off the
blower. However you can still operate
the mode and air intake buttons as
long as the POWER button is in the
position ON.
OPSE044255L
OPSE045320N
OPS043179
■ Type B
■Type A
Page 181 of 524
4111
Features of your vehicle
3. Press the defrost button ( ).
4. The air-conditioning and heaterwill be turned on according to the
detected ambient temperature,
outside (fresh) air position and
higher fan speed will be selected
automatically.
If the air-conditioning and heater,
outside (fresh) air position and high-
er fan speed are not selected auto-
matically, adjust the corresponding
button or knob manually.
If the position is selected, with a
low fan speed, a higher fan speed
may be automatically selected.To defrost outside windshield
1. Set fan speed to the highest posi- tion.
2. Set temperature to the Maximum (32°C(90°F)). 3. Press the defrost button ( ).
4. The air-conditioning and heater
will be turned on according to the
detected ambient temperature and
outside (fresh) air position will be
selected automatically.
If the position is selected, with a
low fan speed, a higher fan speed
may be automatically selected.
OPSE045322N
OPSE044186
■ Type B
■Type A