Page 123 of 565
439
Features of your vehicle
(1) Driver’s door power windowswitch
(2) Front passenger’s door power window switch
(3) Rear door (left) power window switch
(4) Rear door (right) power window switch
(5) Window opening and closing
(6) Automatic power window up/down* (Driver's and
Passenger's window)
(7) Power window and rear sunroof* lock switch
* if equipped
In cold and wet climates, power win-
dows may not work properly due to
freezing conditions.
WINDOWS
OUMA044020
UM CAN (ENG) 4.qxp 12/1/2014 12:51 PM Page 39
Page 124 of 565

Features of your vehicle
40
4
Power windows
The ignition switch must be in the ON
position for power windows to operate.
Each door has a power window
switch that controls the door's win-
dow. The driver has a power window
lock button which can block the oper-
ation of passenger windows. The
power windows can be operated for
approximately 30 seconds after the
ignition key is removed or turned to
the ACC or LOCK (or OFF) position.
However, if the front doors are
opened, the power windows cannot
be operated even within the 30 sec-
ond period.
✽ ✽
NOTICE
While driving with the rear windows
down or with the sunroof (if
equipped) in an open (or partially
open) position, your vehicle may
demonstrate a wind buffeting or
pulsation noise. This noise is a nor-
mal occurrence and can be reduced
or eliminated by taking the follow-
ing actions. If the noise occurs with
one or both of the rear windows
down, partially lower both front
windows approximately one inch. If
you experience the noise with the
sunroof open, slightly reduce the
size of the sunroof opening.
Window opening and closing
The driver’s door has a master power
window switch that controls all the
windows in the vehicle.
To open or close a window, press
down or pull up the front portion of
the corresponding switch to the first
detent position (5).
OYP044035K
UM CAN (ENG) 4.qxp 12/1/2014 12:51 PM Page 40
Page 126 of 565
Features of your vehicle
42
4
And if the power window switch is
pulled up continuously again within 5
seconds after the window is lowered
by the automatic window reversal
feature, the automatic window rever-
sal will not operate.
The automatic reverse feature for the
driver’s window is only active when
the “auto up” feature is used by fully
pulling up the switch. The automatic
reverse feature will not operate if the
window is raised using the halfway
position on the power window switch.
Always check for obstructions before
raising any window to avoid injuries
or vehicle damage. If an object less
than 4 mm (0.16 in.) in diameter is
caught between the window glass
and the upper window channel, the
automatic reverse window may not
detect the resistance and will not
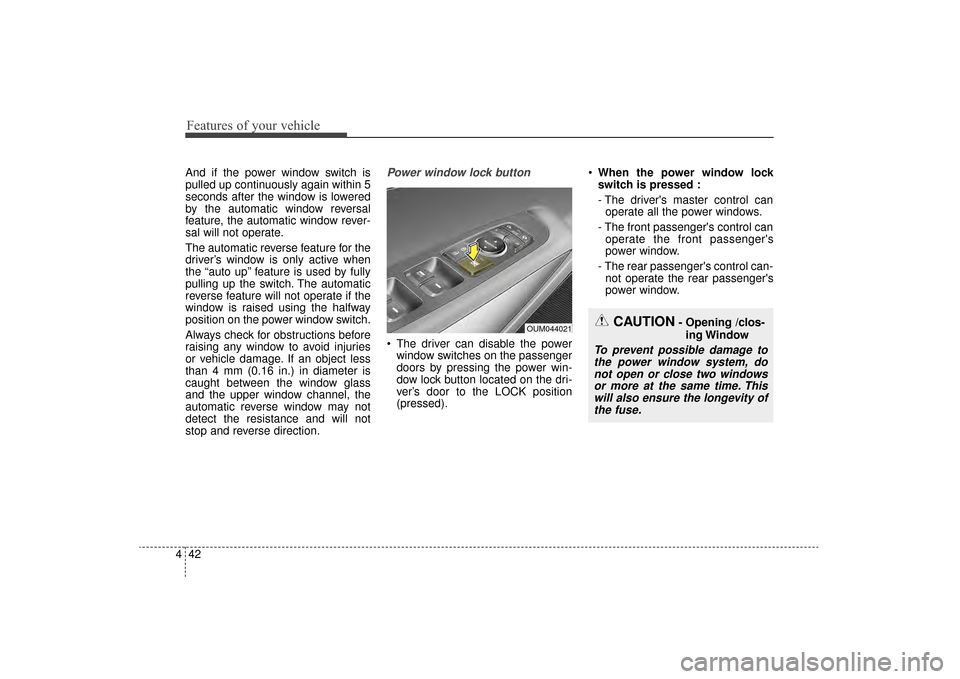
stop and reverse direction.Power window lock button
The driver can disable the power
window switches on the passenger
doors by pressing the power win-
dow lock button located on the dri-
ver’s door to the LOCK position
(pressed).
When the power window lock
switch is pressed :
- The driver's master control can
operate all the power windows.
- The front passenger's control can operate the front passenger's
power window.
- The rear passenger's control can- not operate the rear passenger's
power window.
OUM044021CAUTION- Opening /clos-
ing Window
To prevent possible damage tothe power window system, donot open or close two windowsor more at the same time. Thiswill also ensure the longevity ofthe fuse.
UM CAN (ENG) 4.qxp 12/1/2014 12:51 PM Page 42
Page 128 of 565
Features of your vehicle
44
4
Opening the hood
1. Pull the release lever to unlatch
the hood. The hood should pop
open slightly. Open the hood after turning off the
engine on a flat surface, shifting the
shift lever to the P (Park) position
and setting the parking brake.
2. Go to the front of the vehicle, raisethe hood slightly, pull the second-
ary latch (1) inside of the hood
center and lift the hood (2).
3. Raise the hood. It will completely rise by itself after it has been
raised about halfway.
HOOD
OUM044022
OUM044023
UM CAN (ENG) 4.qxp 12/1/2014 12:51 PM Page 44
Page 129 of 565
445
Features of your vehicle
Closing the hood
1. Before closing the hood, check thefollowing:
partment must be correctly
installed.
bustible material must be
removed from the engine com-
partment.
2. Lower the hood halfway and push down to securely lock in place.WARNING - Unsecuredengine hood
Always double check to be sure
that the hood is firmly latched
before driving away. If it is not
latched, the hood could fly open
while the vehicle is being driv-
en, causing a total loss of visi-
bility, which might result in an
accident.
WARNING - Fire risk
Do not leave gloves, rags or any
other combustible material in the
engine compartment. Doing so
may cause a heat-induced fire.
WARNING - Hood obstruction
Before closing the hood, ensure
that all obstructions are removed
from the hood opening. Closing
the hood with an obstruction
present in the hood opening may
result in property damage or
severe personal injury.
UM CAN (ENG) 4.qxp 12/1/2014 12:51 PM Page 45
Page 130 of 565

Features of your vehicle
46
4
Opening the fuel filler lid
The fuel filler lid must be opened
from inside the vehicle by pressing
the fuel filler lid opener button.
If the fuel filler lid does not open
because ice has formed around it,
tap lightly or push on the lid to break
the ice and release the lid. Do not pry
on the lid. If necessary, spray around
the lid with an approved de-icer fluid
(do not use radiator anti-freeze) or
move the vehicle to a warm place
and allow the ice to melt. 1. Stop the engine.
2. To open the fuel filler lid, push the
fuel filler lid opener button.
3. Pull open the fuel filler lid (1).
4. To remove the cap, turn the fuel filler cap (2) counterclockwise.
5. Refuel as needed.
Closing the fuel filler lid
1. To install the cap, turn it clockwise until it “clicks” once. This indicates
that the cap is securely tightened.
2. Close the fuel filler lid and push it in lightly making sure that it is
securely closed.
✽ ✽NOTICE
There may be an intermittent noise
near the refueling hole while the
engine is idling if the fuel cap is not
closed securely. This occurs normal-
ly with the OBD system.
✽ ✽NOTICE
When refueling on unlevel ground,
the fuel gauge may not point to the F
position.
It is not a malfunction. If you move
your vehicle to a level ground, the fuel
gauge will move to the full position.
FUEL FILLER LID
OUM044025
OUMA044024
UM CAN (ENG) 4.qxp 12/1/2014 12:52 PM Page 46
Page 131 of 565

447
Features of your vehicle
Always check that the fuel cap is
installed securely to prevent fuel
spillage in the event of an accident.
✽ ✽NOTICE
Tighten the cap until it clicks once,
otherwise the fuel cap open warning
indicator light will illuminate
WARNING- Fire/explo-
sion risk
Read and follow all warnings
posted at the gas station facili-
ty. Failure to follow all warnings
may result in severe personal
injury, severe burns or death
due to fire or explosion.WARNING- Static electricity
Before touching the fuel noz- zle, you should eliminate
potentially dangerous static
electricity discharge by touch-
ing another metal part of the
vehicle, a safe distance away
from the fuel filler neck, noz-
zle, or other gas source.
Do not get back into a vehicle once you have begun refueling
since you can generate static
electricity by touching, rubbing
or sliding against any item or
fabric (polyester, satin, nylon,
etc.) capable of producing stat-
ic electricity. Static electricity
discharge can ignite fuel
vapors resulting in rapid burn-
ing. If you must reenter the
vehicle, you should once again
eliminate potentially danger-
ous static electricity discharge
by touching a metal part of the
vehicle, away from the fuel filler
neck, nozzle or other gasoline
source.WARNING- Refueling
Always remove the fuel cap
carefully and slowly. If the cap
is venting fuel or if you hear a
hissing sound, wait until the
condition stops before com-
pletely removing the cap. If
pressurized fuel sprays out, it
can cover your clothes or skin
and subject you to the risk of
fire and burns.
UM CAN (ENG) 4.qxp 12/1/2014 12:52 PM Page 47
Page 133 of 565
449
Features of your vehicle
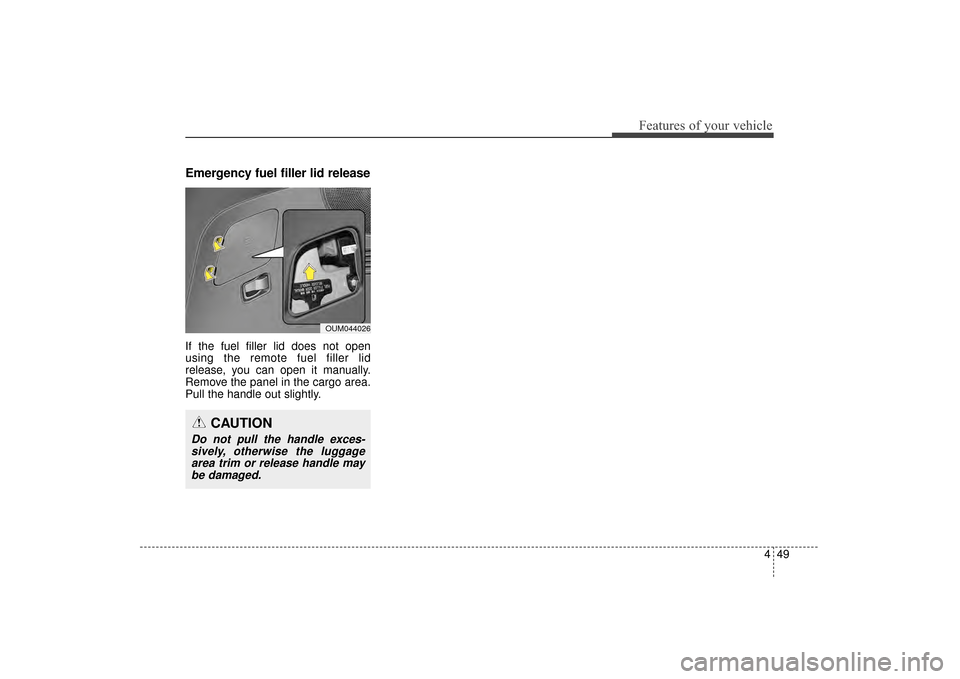
Emergency fuel filler lid release
If the fuel filler lid does not open
using the remote fuel filler lid
release, you can open it manually.
Remove the panel in the cargo area.
Pull the handle out slightly.
CAUTION
Do not pull the handle exces-sively, otherwise the luggagearea trim or release handle maybe damaged.
OUM044026
UM CAN (ENG) 4.qxp 12/1/2014 12:52 PM Page 49