2016 KIA Sedona key
[x] Cancel search: keyPage 421 of 644

59
Driving your vehicle
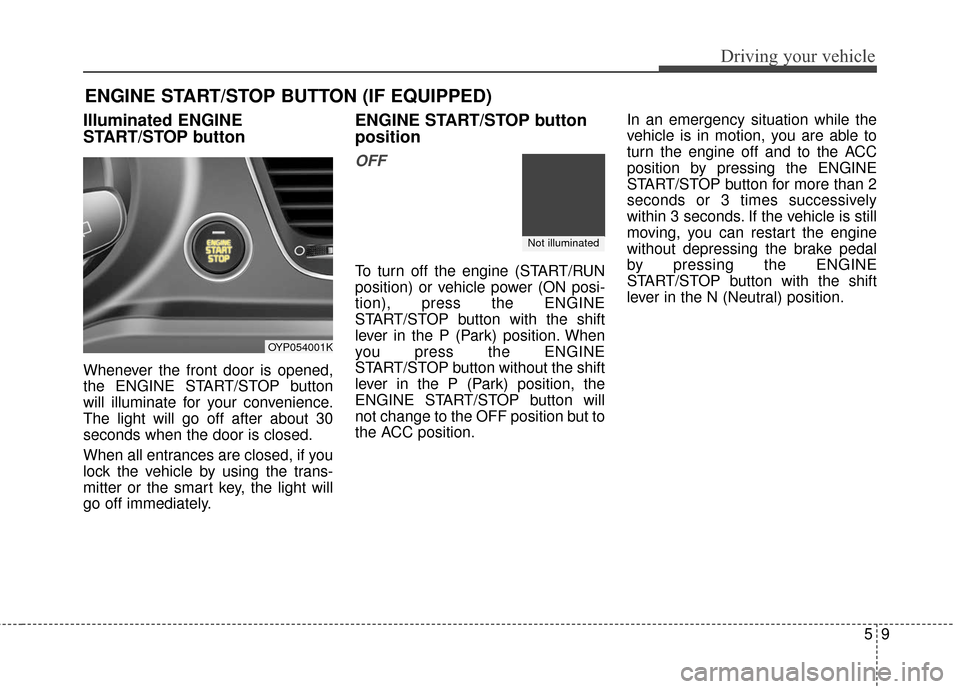
Illuminated ENGINE
START/STOP button
Whenever the front door is opened,
the ENGINE START/STOP button
will illuminate for your convenience.
The light will go off after about 30
seconds when the door is closed.
When all entrances are closed, if you
lock the vehicle by using the trans-
mitter or the smart key, the light will
go off immediately.
ENGINE START/STOP button
position
OFF
To turn off the engine (START/RUN
position) or vehicle power (ON posi-
tion), press the ENGINE
START/STOP button with the shift
lever in the P (Park) position. When
you press the ENGINE
START/STOP button without the shift
lever in the P (Park) position, the
ENGINE START/STOP button will
not change to the OFF position but to
the ACC position.In an emergency situation while the
vehicle is in motion, you are able to
turn the engine off and to the ACC
position by pressing the ENGINE
START/STOP button for more than 2
seconds or 3 times successively
within 3 seconds. If the vehicle is still
moving, you can restart the engine
without depressing the brake pedal
by pressing the ENGINE
START/STOP button with the shift
lever in the N (Neutral) position.
ENGINE START/STOP BUTTON (IF EQUIPPED)
OYP054001K
Not illuminated
Page 423 of 644

511
Driving your vehicle
✽
✽
NOTICE
If you leave the ENGINE START/
STOP button in the ACC or ON
position for a long time, the battery
will discharge.
Starting the engine with a
smart key
1.Carry the smart key or leave it
inside the vehicle.
2.Make sure the parking brake is firmly applied
3.Place the transaxle shift lever in P (Park). Depress the brake pedal
fully.
You can also start the engine whenthe shift lever is in the N (Neutral)position.
4.Press the ENGINE START/STOP button while depressing the brake
pedal.
It should be started withoutdepressing the accelerator.
5.Do not wait for the engine to warm up while the vehicle remains sta-
tionary.
Start driving at moderate engine
speeds. (Steep accelerating and
decelerating should be avoided.) Even if the smart key is in the vehi-
cle, if it is far away from you, the
engine may not start.
When the ENGINE START/STOP button is in the ACC position or
above, if any door is opened, the
system checks for the smart key. If
the smart key is not in the vehicle,
a message "key not in the vehicle"
will appear on the LCD display. And
if all doors are closed, the chime
will sound for 5 seconds. The indi-
cator or warning will turn off while
the vehicle is moving. Always have
the smart key with you.
WARNING- Starting
vehicle
Never press the ENGINE
START/STOP button while the
vehicle is in motion except in an
emergency. This would result in
loss of directional control and
braking function, which could
cause an accident.
Page 424 of 644

Driving your vehicle
12
5
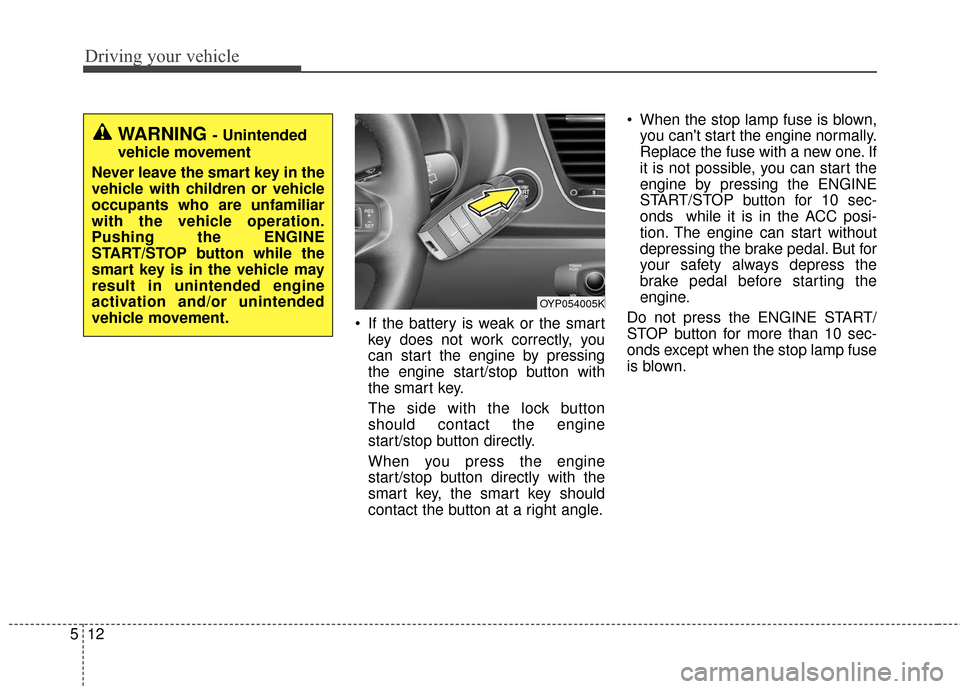
If the battery is weak or the smart
key does not work correctly, you
can start the engine by pressing
the engine start/stop button with
the smart key.
The side with the lock button
should contact the engine
start/stop button directly.
When you press the engine
start/stop button directly with the
smart key, the smart key should
contact the button at a right angle. When the stop lamp fuse is blown,
you can't start the engine normally.
Replace the fuse with a new one. If
it is not possible, you can start the
engine by pressing the ENGINE
START/STOP button for 10 sec-
onds while it is in the ACC posi-
tion. The engine can start without
depressing the brake pedal. But for
your safety always depress the
brake pedal before starting the
engine.
Do not press the ENGINE START/
STOP button for more than 10 sec-
onds except when the stop lamp fuse
is blown.
WARNING - Unintended
vehicle movement
Never leave the smart key in the
vehicle with children or vehicle
occupants who are unfamiliar
with the vehicle operation.
Pushing the ENGINE
START/STOP button while the
smart key is in the vehicle may
result in unintended engine
activation and/or unintended
vehicle movement.
OYP054005K
Page 430 of 644

Driving your vehicle
18
5
Ignition key interlock system
The ignition key cannot be removed
unless the shift lever is in the P
(Park) position. Even if the ignition
switch is in the LOCK position, the
key also cannot be removed.
If your vehicle is equipped with
ENGINE START/STOP button, the
button will not change to the OFF
position unless the shift lever is in the
P (Park) position.
Good driving practices
Never move the gear shift lever
from P (Park) to any other position
with the accelerator pedal
depressed.
Never move the gear shift lever into P (Park) when the vehicle is in
motion.
Slow down before shifting to a lower gear. Otherwise, the lower
gear may not be engaged.
Always use the parking brake. Do not depend on placing the
transaxle in P (Park) to keep the
vehicle from moving.
Optimum vehicle performance and economy is obtained by smoothly
depressing and releasing the
accelerator pedal.
Moving up a steep grade from a
standing start
To move up a steep grade from a
standing start, depress the brake
pedal, shift the shift lever to D
(Drive). Select the appropriate gear
depending on load weight and steep-
ness of the grade, and release the
parking brake. Depress the accelera-
tor gradually while releasing the
service brakes.
When accelerating from a stop on
a steep hill, the vehicle may have a
tendency to roll backwards.
Shifting the shift lever into 2
(Second Gear) will help prevent
the vehicle from rolling back-
wards.
Page 491 of 644

579
Driving your vehicle
Use high quality ethylene gly-
col coolant
Your vehicle is delivered with high qual-
ity ethylene glycol coolant in the cool-
ing system. It is the only type of coolant
that should be used because it helps
prevent corrosion in the cooling sys-
tem, lubricates the water pump and
prevents freezing. Be sure to replace
or replenish your coolant in accor-
dance with the maintenance schedule
in section 7. Before winter, have your
coolant tested to assure that its freez-
ing point is sufficient for the tempera-
tures anticipated during the winter.
Check battery and cables
Winter puts additional burdens on
the battery system. Visually inspect
the battery and cables as described
in section 7. The level of charge in
your battery can be checked by an
authorized Kia dealer or a service
station.
Change to "winter weight" oil
if necessary
In some climates it is recommended
that a lower viscosity "winter weight"
oil be used during cold weather. See
section 8 for recommendations. If
you aren't sure what weight oil you
should use, consult an authorized
Kia dealer.
Check spark plugs and igni-
tion system
Inspect your spark plugs as
described in section 7 and replace
them if necessary. Also check all
ignition wiring and components to be
sure they are not cracked, worn or
damaged in any way.
To keep locks from freezing
To keep the locks from freezing,
squirt an approved de-icer fluid or
glycerine into the key opening. If a
lock is covered with ice, squirt it with
an approved de-icing fluid to remove
the ice. If the lock is frozen internally,
you may be able to thaw it out by
using a heated key. Handle the heat-
ed key with care to avoid injury.
Use approved window washer
anti-freeze in system
To keep the water in the window
washer system from freezing, add an
approved window washer anti-freeze
solution in accordance with instruc-
tions on the container. Window wash-
er anti-freeze is available from an
authorized Kia dealer and most auto
parts outlets. Do not use engine
coolant or other types of anti-freeze
as these may damage the paint finish.
Page 594 of 644

Maintenance
66
7
If you do not have a spare, use a
fuse of the same rating from a circuityou may not need for operating thevehicle, such as the power outletfuse.
If the headlights or other electrical
components do not work and the
fuses are OK, check the fuse panel
in the engine compartment. If a fuse
is blown, it must be replaced.
Fuse switch
Always, put the fuse switch at the ON
position.
If you move the switch to the OFF
position, some items such as audio
and digital clock must be reset and
transmitter (or smart key) may not
work properly. When the switch is
Off, the caution will be displayed on
the instrument cluster.
Always place the fuse switch in the
ON position while driving the vehicle.
Engine compartment fuse
replacement
1. Turn the ignition switch and all other switches off.
2. Remove the fuse panel cover by pressing the tab and pulling the
cover up.
When the blade type fuse is dis- connected, remove it by using the
clip designed for changing fuses
located in the engine room fuse
box. Upon removal, securely
insert reserve fuse of equal quan-
tity.
OYP074011K
OYP074012N
Page 597 of 644

769
Maintenance
Inner fuse panel
Fuse Name Fuse ratingCircuit Protected
ECU 10A PCM, Injector Drive Box, Smart Key Control Module/Immobilizer Module
MODULE4 7.5AHead Lamp Leveling Device Actuator LH/RH, Multipurpose Check Connector, Bezel Switch, MTS
Module, Electro Chromic, A/V & Navigation Head Unit, A/C Control Module, Heater Control Module,
Passenger Ventilation Seat Control Module, Driver IMS Control Module, Rear Seat Heater Control
Module, Auto Head Leveling Device Module, ATM Shift Lever ILL.
MODULE3 10A LDWS Module, Stop Lamp, Front Parking Assist Sensor LH/RH, Front Parking Assist Sensor LH/RH
(CENTER), Rear Parking Assist Buzzer, Rear Parking Assist Sensor LH/RH, Rear Parking Assist
Sensor LH/RH (CENTER), Blind Spot Detection Radar LH/RH
MODULE5 7.5A Rear Seat Heater Control Module, AC Inverter Unit, Heater Control Module, Passenger Ventilation Seat
Control Module, Portable Lamp, Around View Unit
MODULE6 7.5A BCM, Smart Key Control Module
WIPER RR 15A Rear Wiper Motor, Wiper RR Relay
CLUSTER 7.5A Instrument Cluster
A/CON1 7.5A A/C Control Module, Ionizer, Rear A/C Control Switch, PCB Block (Blower Relay, Blower RR Relay)
MEMORY2 10A Data Link Connector, Instrument Cluster, Digital Clock, A/C Control Module, BCM, Power Sliding Door
Module, Driver Door Module, Passenger Safety Power Window Switch, Driver IMS Control Module
SMART KEY3 10A Start/Stop Button Switch, Immobilizer Module
POWER OUTLET2 20A Console Power Outlet A/BAG IND 7.5A Instrument Cluster, Digital Clock, A/C Control Module(Auto)
WASHER 15A Multifunction Switch, BCM
HEATED STEERING 15A Clock Spring (Steering Wheel Switch) MEMORY1 10A Clock Spring (Steering Wheel Switch)
SMART KEY1 25A Smart Key Control Module
POWER OUTLET3 20A Rear Power Outlet MODULE2 7.5A BCM, Driver Door Module, Passenger Door Module
Page 598 of 644

Maintenance
70
7
Fuse Name Fuse rating Circuit Protected
MULTIMEDIA 15A USB Charger #1/#2, MTS Module, Audio, A/V & Navigation Head Unit S/ROOF FRT 20A Front Sunroof Motor AMP 25A AMP IG1 20A PCB BLOCK (Fuse - ABS3, TCU, MDPS, CRUISE)
SMART KEY2 7.5A Smart Key Control Module
INTERIOR LAMP 10A Portable Lamp, Overhead Console Lamp, Cargo Lamp, Front Vinity Lamp Switch LH/RH, Glove Box
Lamp, Key Warning Switch
START 7.5A With IMMO./Smart Key : Transmission Range Switch, W/O IMMO. : PCB Block (B/Alarm Relay)
S/ROOF RR 25A Rear Sunroof Motor
DOOR LOCK 20A Tail Gate Relay, Door Lock/Unlock Relay, Sliding Door Lock/Unlock Relay
FOG LAMP REAR 10A -
MODULE1 10A Audio, A/V & Navigation Head Unit, Around View Unit, BCM, Overhead Console Lamp, MTS Module,
Digital Clock, USB Charger #1/#2
AIR BAG 15A SRS Control Module, Passenger Occupant Detection Sensor
A/CON2 7.5A A/C Control Module, Blower Resistor (Manual)
HEATED MIRROR 10A Passenger Power Outside Mirror, A/C Control Module BRAKE SWITCH 7.5A Smart Key Control Module, Stop Lamp Switch
P/WINDOW LH 25ADriver Safety Window Module, Driver Door Module, Rear Power Window Switch LH, Rear Safety Power
Window Switch LH, Rear Safety Power Window Module LH
MODULE7 7.5A Key Inter Lock Solenoid, Fuel Lid Switch, ATM Lever Switch, Rear A/C Control Switch, Electro Chromic
Mirror
POWER OUTLET1 20A Front Power Outlet P/SEAT (DRV) 30A Driver Manual Switch, Driver Lumbar Support Switch, Driver IMS Control Module
P/WINDOW RH 25APassenger Safety Window Module, Passenger Power Window Motor, Passenger Door Module, Rear
Power Window Switch RH, Rear Safety Power Window Switch RH, Rear Safety Power Window Module
RH
S/HEATER FRT 20A Heater Control Module, Passenger Ventilation Seat Control Module