Page 124 of 449
453
Features of your vehicle
Language
Choose a language you prefer within the
LCD display.
Maintenance system
(only for Type B cluster,
if equipped)
The Maintenance system informs the
driver when to replace engine oil and
rotate tires.
Maintenance
1. When the vehicle is at a standstill,pressing the TRIP button for more than
2 seconds with the ENGINE START/
STOP button in the ON position or
engine running, the LCD display on the
cluster will change to the "User
Setting" mode.
You can move to the items by pressing
the TRIP button and select the item by
pressing the RESET button.
2. In the "User Setting" mode select "Maintenance".
OUB041067OUB042068OUB041069
Page 125 of 449
Features of your vehicle
54
4
Maintenance schedule
1. Select the desired engine oil (tire rota-
tion) maintenance schedule.
2. If finished, you can come out of the Maintenance mode by pressing the
TRIP button for more than 2 seconds.
Engine Oil(Tire Rotation) ServiceRequired
1. If service is required, the message will be displayed. 2. If you would like to reset or inactivate
the maintenance system press the
RESET button for more than 1 second.
The display will change to "Engine Oil
Service Message" mode.
You can move to items by pressing the
TRIP button and select the desired
item by pressing the RESET button.
OUB042070OUB042071OUB041072
Page 170 of 449
499
Features of your vehicle
Temperature conversion
You can switch the temperature mode
between Centigrade and Fahrenheit as
follows:
While pressing the OFF button, press the
AUTO button for 4 seconds or more.
The display will change from Centigrade
to Fahrenheit, or from Fahrenheit to
Centigrade.
If the battery has been discharged or dis-
connected, the temperature mode dis-
play will reset to Centigrade.
Air intake control
This is used to select the outside (fresh)
air position or recirculated air position.
To change the air intake control position,
press the control button.Recirculated air position
With the recirculated airposition selected, air from
the passenger compart-
ment will be drawn through
the heating system and
heated or cooled according
to the function selected.
Outside (fresh) air position With the outside (fresh) airposition selected, air
enters the vehicle from out-
side and is heated or
cooled according to the
function selected.
OUB045127
Page 178 of 449

4107
Features of your vehicle
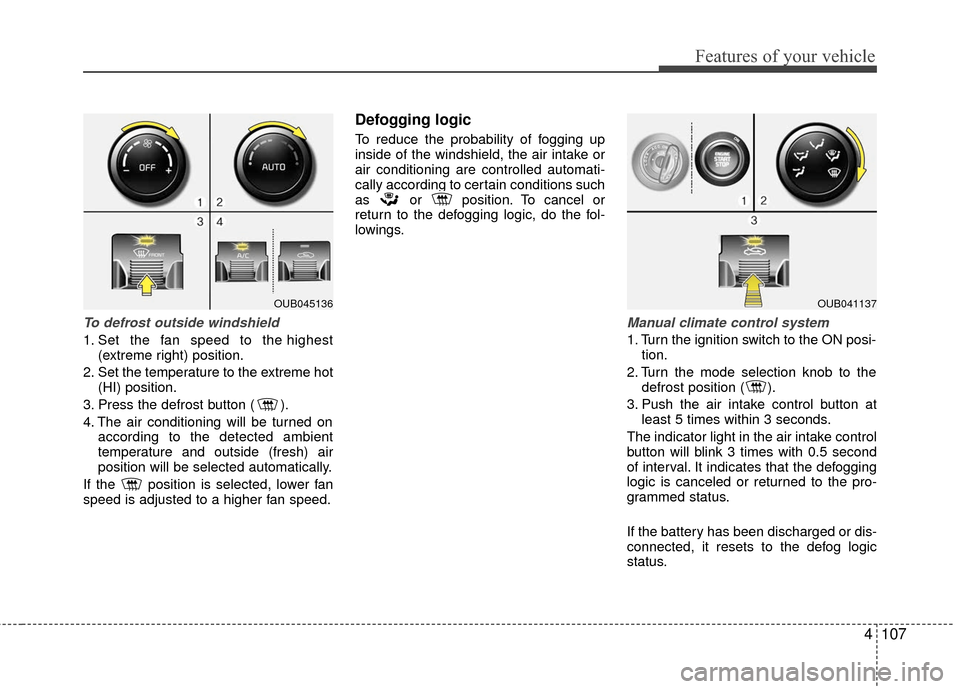
To defrost outside windshield
1. Set the fan speed to the highest(extreme right) position.
2. Set the temperature to the extreme hot (HI) position.
3. Press the defrost button ( ).
4. The air conditioning will be turned on according to the detected ambient
temperature and outside (fresh) air
position will be selected automatically.
If the position is selected, lower fan
speed is adjusted to a higher fan speed.
Defogging logic
To reduce the probability of fogging up
inside of the windshield, the air intake or
air conditioning are controlled automati-
cally according to certain conditions such
as or position. To cancel or
return to the defogging logic, do the fol-
lowings.
Manual climate control system
1. Turn the ignition switch to the ON posi- tion.
2. Turn the mode selection knob to the defrost position ( ).
3. Push the air intake control button at least 5 times within 3 seconds.
The indicator light in the air intake control
button will blink 3 times with 0.5 second
of interval. It indicates that the defogging
logic is canceled or returned to the pro-
grammed status.
If the battery has been discharged or dis-
connected, it resets to the defog logic
status.
OUB045136OUB041137
Page 179 of 449
Features of your vehicle
108
4
Automatic climate control system
(if equipped)
1. Turn the ignition switch to the ON posi- tion.
2. Select the defrost position pressing defrost button ( ).
3. While holding the air conditioning but- ton (A/C) pressed, press the air intake
control button at least 5 times within 3
seconds. The A/C display blinks 3 times. It indi-
cates that the defogging logic is canceled
or returned to the programmed status.
If the battery has been discharged or dis-
connected, it is reset to the defog logic
status.
Auto defogging system
(Only for automatic climate controlsystem, if equipped)
Auto defogging reduces the possibility of
fogging up the inside of the windshield by
automatically sensing the moisture of
inside the windshield.
The auto defogging system operates
when the AUTO mode is on.
OUB045138OVF041170
Page 180 of 449

4109
Features of your vehicle
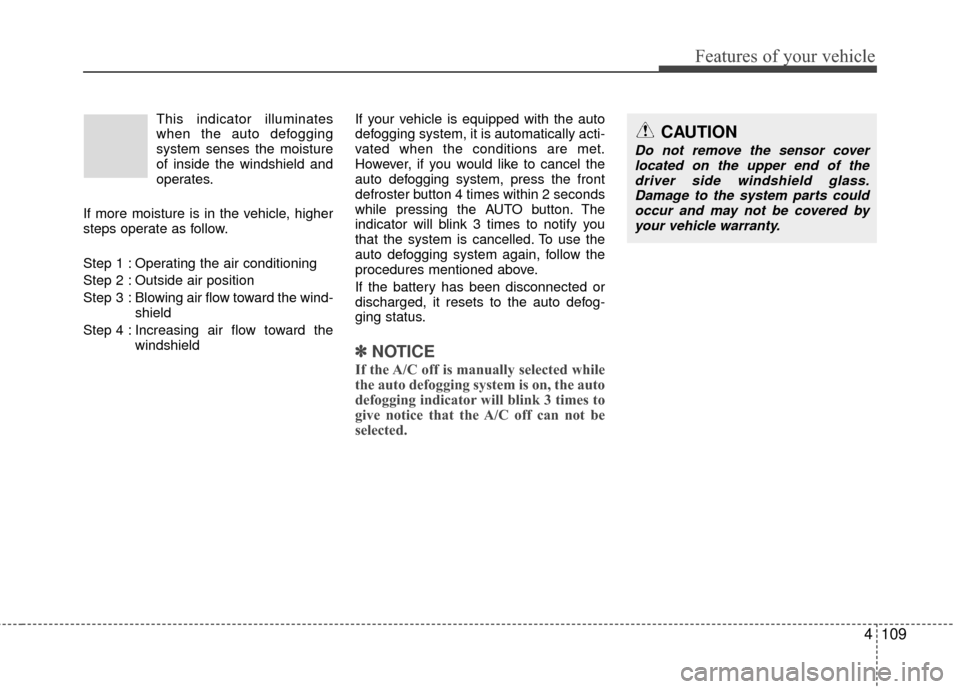
This indicator illuminates
when the auto defogging
system senses the moisture
of inside the windshield and
operates.
If more moisture is in the vehicle, higher
steps operate as follow.
Step 1 : Operating the air conditioning
Step 2 : Outside air position
Step 3 : Blowing air flow toward the wind- shield
Step 4 : Increasing air flow toward the windshield If your vehicle is equipped with the auto
defogging system, it is automatically acti-
vated when the conditions are met.
However, if you would like to cancel the
auto defogging system, press the front
defroster button 4 times within 2 seconds
while pressing the AUTO button. The
indicator will blink 3 times to notify you
that the system is cancelled. To use the
auto defogging system again, follow the
procedures mentioned above.
If the battery has been disconnected or
discharged, it resets to the auto defog-
ging status.
✽ ✽
NOTICE
If the A/C off is manually selected while
the auto defogging system is on, the auto
defogging indicator will blink 3 times to
give notice that the A/C off can not be
selected.
CAUTION
Do not remove the sensor cover
located on the upper end of thedriver side windshield glass. Damage to the system parts couldoccur and may not be covered byyour vehicle warranty.
Page 189 of 449
Features of your vehicle
118
4
Digital clock and calendar
(if equipped)
Whenever the battery terminals or relat-
ed fuses are disconnected, you must
reset the clock and the calendar.
When the ignition switch is in the ACC or
ON position, the clock buttons operate as
follows:
Setup the clock and calender
With audio off
1. Press the [SETUP/CLOCK] button (1)
until the clock of the display blinks.
2. Set the clock by turning the knob (2) and press it.
With audio on
1. Press the [SETUP/CLOCK] button (1) until the clock adjust mode displayed.
2. Set the clock by turning the knob(2) and press it.
OUB045161N
WARNING- Clock SettingDistraction
Do not adjust the clock while driv-
ing. Such adjustments may distract
you for too long from the roadway
and lead to a collision.
Page 193 of 449

Features of your vehicle
122
4 Steering wheel audio control
(if equipped)
The steering wheel audio control button
is installed to improve convenience.
Do not operate the audio remote control
buttons simultaneously.
VOLUME (+/-) (1)
Push the lever up to increase volume.
Push the lever down to decrease vol-
ume.
MODE (3)
Press the button to select Radio or CD
(compact disc).
MUTE (4)
Press the MUTE button to cancel thesound.
Press the MUTE button again to acti- vate the sound.
SEEK/PRESET ( / ) (2)
The SEEK/PRESET button has different
functions base on the system mode. For
the following functions the button should
be pressed for 0.8 second or more.
RADIO mode
It will function as the AUTO SEEK select
button.
CDP/USB/iPod
®mode
It will function as the FF/REW button.
iPod
®is a registered trademark of Apple
Inc. If the SEEK button is pressed for less
than 0.8 second, it will work as follows in
each mode.
RADIO mode
It will function as the PRESET STATION
select buttons.
CDP/USB/iPod
®mode
It will function as the TRACK UP/DOWN
button.
Detailed information for audio control
buttons is described in the following
pages in this section.
Bluetooth®Wireless Technology
(if equipped)
You can use a compatible phone via
using the
Bluetooth®Wireless
Technology
. Detailed information for the
Bluetooth® Wireless Technology is
described in the Audio system section.
OUB041163