Page 8 of 488

15
Introduction
Do not use methanol
Fuels containing methanol (wood alco-
hol) should not be used in your vehicle.
This type of fuel can reduce vehicle per-
formance and damage components ofthe fuel system, engine control systemand emission control system.
Fuel Additives
Kia recommends that you use unleaded
gasoline which has an octane rating of
RON(Research Octane Number) 95 /
AKI(Anti Knock Index) 91 or higher (for
Europe) or Octane Rating of RON(Reasearch Octane Number) 91 /
AKI(Anti-Knock Index)87 or higher
(except Europe).
For customers who do not use good
quality gasolines including fuel additives
regularly, and have problems starting or
the engine does not run smoothly, one
bottle of additives added to the fuel tank
at every 15,000km (For Europe)/
5,000km (Except Europe). Additives are
available from your authorized Kia dealer
along with information on how to use
them. Do not mix other additives.
Operation in foreign countries
If you are going to drive your vehicle in
another country, be sure to:
Observe all regulations regarding reg-istration and insurance.
Determine that acceptable fuel is avail- able. No special break-in period is needed. By
following a few simple precautions for the
first 1,000 km (600 miles) you may add to
the performance, economy and life of
your vehicle.
Do not race the engine.
While driving, keep your engine speed
(rpm, or revolutions per minute)
between 2,000 rpm and 4,000 rpm.
Do not maintain a single speed for long
periods of time, either fast or slow.
Varying engine speed is needed to
properly break-in the engine.
Avoid hard stops, except in emergencies,
to allow the brakes to seat properly.
Don't tow a trailer during the first 2,000 km (1,200 miles) of operation.
VEHICLE BREAK-IN PROCESS
Page 19 of 488
37
Safety features of your vehicle
Removal and installation
To remove the headrest:
1. Recline the seatback (2) with therecline lever (1).
2. Raise headrest as far as it can go.
3. Press the headrest release button (3) while pulling the headrest up (4). To reinstall the headrest :
1. Put the headrest poles (2) into the holes
while pressing the release button (1).
2. Recline the seatback (4) with the recline lever (3).
3. Adjust the headrest to the appropriate height.CAUTION
If you recline the seatback towards
the front with the headrest and seat cushion raised, the headrest maycome in contact with the sunvisoror other parts of the vehicle.
OYFH034205OTA034053
WARNING
NEVER allow anyone to ride in a
seat with the headrest removed.WARNING
Always make sure the headrest
locks into position after reinstalling
and adjusting it properly.
OTA034054
Page 35 of 488
323
Safety features of your vehicle
When using the rear center seat belt, the
buckle with the “CENTER” mark must beused.To release the seat belt:
When you want to release the seat belt,
press the button (1) in the locking buckle.Stowing the rear seat belt
The rear seat belt buckles can be stowed
in the pocket between the rear seatback
and cushion when not in use.
The center seat belt can be stowed with
the plate and webbing rolled in the pock-
et between the rear seatback and cush-
ion. (2-point static type belt, if equipped)
OTA032025B210A02NF-2
WARNING
The center lap belt latching mecha-
nism is different from those for the
rear seat shoulder belts. When fas-tening the rear seat shoulder belts
or the center lap belt, make sure
they are inserted into the correct
buckles to obtain maximum protec-
tion from the seat belt system and
assure proper operation.
OTA030027
Page 45 of 488

333
Safety features of your vehicle
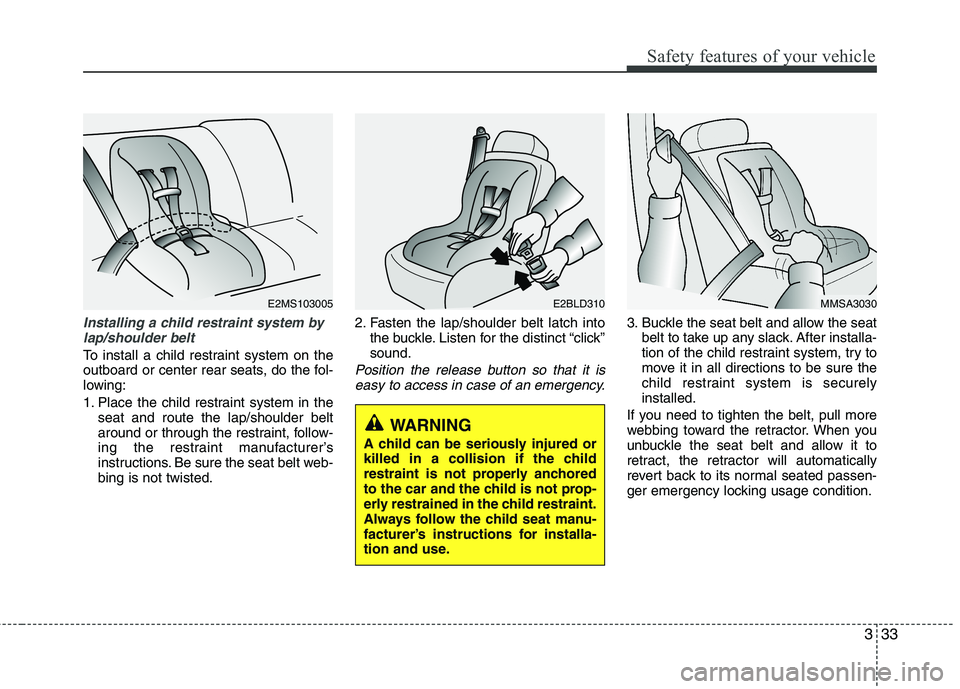
Installing a child restraint system bylap/shoulder belt
To install a child restraint system on the
outboard or center rear seats, do the fol-
lowing:
1. Place the child restraint system in the seat and route the lap/shoulder belt
around or through the restraint, follow-
ing the restraint manufacturer’s
instructions. Be sure the seat belt web-bing is not twisted. 2. Fasten the lap/shoulder belt latch into
the buckle. Listen for the distinct “click”sound.Position the release button so that it is
easy to access in case of an emergency.
3. Buckle the seat belt and allow the seat belt to take up any slack. After installa-
tion of the child restraint system, try to
move it in all directions to be sure the
child restraint system is securelyinstalled.
If you need to tighten the belt, pull more
webbing toward the retractor. When you
unbuckle the seat belt and allow it to
retract, the retractor will automatically
revert back to its normal seated passen-
ger emergency locking usage condition.
E2BLD310
WARNING
A child can be seriously injured or
killed in a collision if the child
restraint is not properly anchored
to the car and the child is not prop-
erly restrained in the child restraint.
Always follow the child seat manu-
facturer’s instructions for installa-
tion and use.
MMSA3030E2MS103005
Page 86 of 488

411
Features of your vehicle
Smart key precautions
✽✽NOTICE
If, for some reason, you happen to lose your smart key, you will not be able to
start the engine. Tow the vehicle, if
necessary, we recommend that you
contact an authorized Kia dealer.
A maximum of 2 smart keys can be
registered to a single vehicle. If you
lose a smart key, we recommend that
you contact an authorized Kia dealer.
The smart key will not work if any of
the following occurs:
- The smart key is close to a radiotransmitter such as a radio station or
an airport which can interfere with
normal operation of the smart key.
- The smart key is near a mobile two-
way radio system or a cellular phone.
- Another vehicle’s smart key is being
operated close to your vehicle.
When the smart key does not work
properly, open and close the door with
the mechanical key. If you have a
problem with the smart key, we rec-
ommend that you contact an author-
ized Kia dealer.
(Continued)(Continued)
If the transmitter (or smart key) is in
close proximity to your cell phone or
smart phone, the signal from the
transmitter (or smart key) could be
blocked by normal operation of your
cell phone or smart phone. This is
especially important when the phone
is active such as making call, receiving
calls, text messaging, and/or send-
ing/receiving emails. Avoid placing
the transmitter (or smart key) and
your cell phone or smart phone in the
same pants or jacket pocket and
maintain adequate distance between
the two devices. CAUTION
Keep the smart key away from
water or any liquid. If the keyless
entry system is inoperative due to exposure to water or liquids, it willnot be covered by your manufactur- er’s vehicle warranty.
CAUTION
Keep the smart key away from elec- tromagnetic materials that blockselectromagnetic waves to the key
surface.
Page 90 of 488

415
Features of your vehicle
Operating door locks from out-
side the vehicle
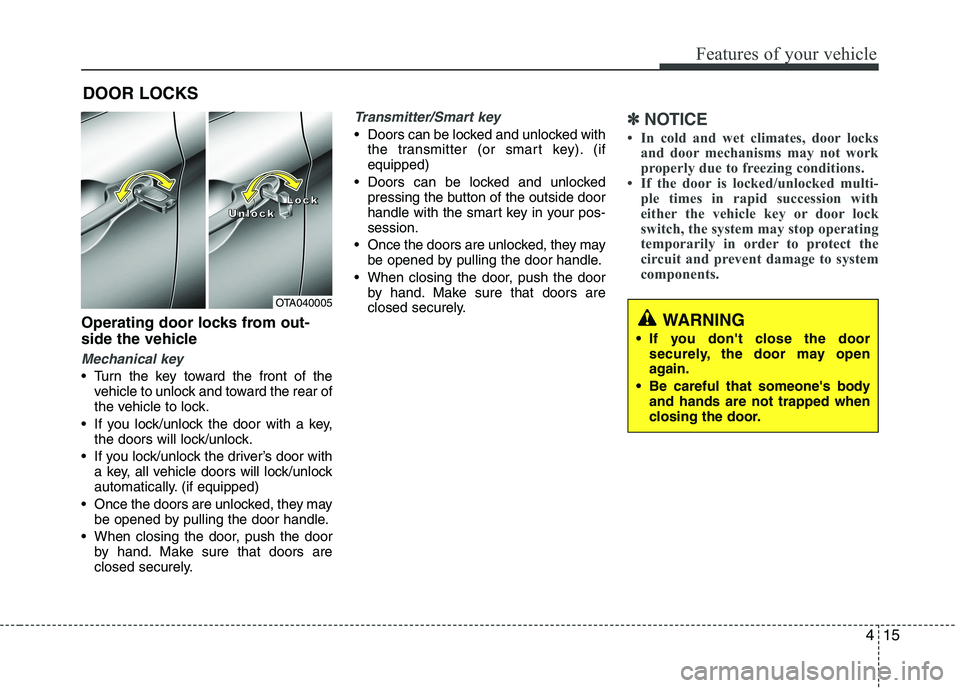
Mechanical key
Turn the key toward the front of thevehicle to unlock and toward the rear of
the vehicle to lock.
If you lock/unlock the door with a key, the doors will lock/unlock.
If you lock/unlock the driver’s door with a key, all vehicle doors will lock/unlock
automatically. (if equipped)
Once the doors are unlocked, they may be opened by pulling the door handle.
When closing the door, push the door by hand. Make sure that doors are
closed securely.
Transmitter/Smart key
Doors can be locked and unlocked withthe transmitter (or smart key). (if equipped)
Doors can be locked and unlocked pressing the button of the outside door
handle with the smart key in your pos-session.
Once the doors are unlocked, they may be opened by pulling the door handle.
When closing the door, push the door by hand. Make sure that doors are
closed securely.✽✽ NOTICE
In cold and wet climates, door locks and door mechanisms may not work
properly due to freezing conditions.
If the door is locked/unlocked multi-
ple times in rapid succession with
either the vehicle key or door lock
switch, the system may stop operating
temporarily in order to protect the
circuit and prevent damage to system
components.
DOOR LOCKS
OTA040005
LLLLoooocccckkkkUUUUnnnnlllloooocccckkkk
WARNING
If you don't close the door securely, the door may open
again.
Be careful that someone's body and hands are not trapped when
closing the door.
Page 113 of 488

Features of your vehicle
38
4
MIRRORS
Inside rearview mirror
Adjust the rearview mirror to center on
the view through the rear window. Make
this adjustment before you start driving.
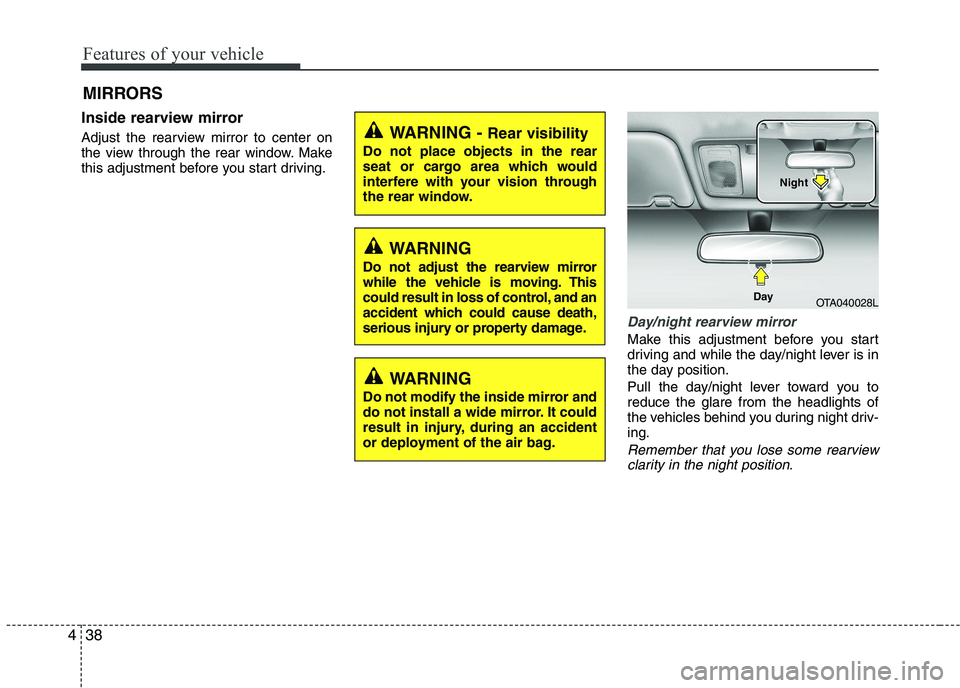
Day/night rearview mirror
Make this adjustment before you start
driving and while the day/night lever is in
the day position.
Pull the day/night lever toward you to reduce the glare from the headlights of
the vehicles behind you during night driv-ing.
Remember that you lose some rearview clarity in the night position.
WARNING - Rear visibility
Do not place objects in the rear
seat or cargo area which would
interfere with your vision through
the rear window.
WARNING
Do not adjust the rearview mirror
while the vehicle is moving. This
could result in loss of control, and an
accident which could cause death,
serious injury or property damage.
WARNING
Do not modify the inside mirror and
do not install a wide mirror. It could
result in injury, during an accident
or deployment of the air bag.
OTA040028L
Day Night
Page 116 of 488
441
Features of your vehicle
Folding the outside rearview mirror
Electric Type (if equipped)
To fold the outside rearview mirror,
depress the button.
To unfold it, depress the button again.Manual type
To fold outside rearview mirror, grasp the
housing of mirror and then fold it toward
the rear of the vehicle.
CAUTION
In case it is an electric type outside
rearview mirror, don’t fold it byhand. It could cause motor failure.
CAUTION
The electric type outside rearviewmirror operates even though the
ignition switch is in the OFF posi-tion. However, to prevent unneces-sary battery discharge, do not adjust the mirrors longer than necessary
while the engine is not running.
OTA040031OTA040032