Page 110 of 501

439
Features of your vehicle
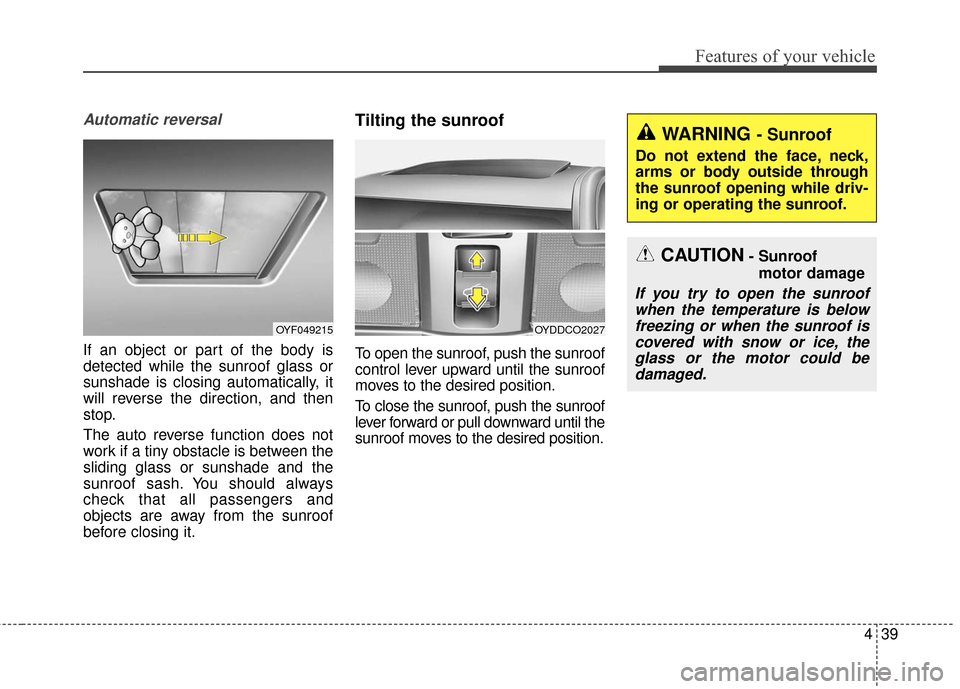
Automatic reversal
If an object or part of the body is
detected while the sunroof glass or
sunshade is closing automatically, it
will reverse the direction, and then
stop.
The auto reverse function does not
work if a tiny obstacle is between the
sliding glass or sunshade and the
sunroof sash. You should always
check that all passengers and
objects are away from the sunroof
before closing it.
Tilting the sunroof
To open the sunroof, push the sunroof
control lever upward until the sunroof
moves to the desired position.
To close the sunroof, push the sunroof
lever forward or pull downward until the
sunroof moves to the desired position.
OYF049215OYDDCO2027
CAUTION- Sunroof motor damage
If you try to open the sunroofwhen the temperature is belowfreezing or when the sunroof iscovered with snow or ice, theglass or the motor could bedamaged.
WARNING - Sunroof
Do not extend the face, neck,
arms or body outside through
the sunroof opening while driv-
ing or operating the sunroof.
Page 113 of 501

Features of your vehicle
42
4
Tilt and telescoping steering
Tilt steering allows you to adjust the
steering wheel before you drive. You
can also raise it to give your legs
more room when you exit and enter
the vehicle.
The steering wheel should be posi-
tioned so that it is comfortable for
you to drive, while permitting you to
see the instrument panel warning
lights and gauges.
To change the steering wheel angle,
pull down the lock release lever (1),
adjust the steering wheel to the
desired angle (2) and height (3), then
pull up the lock-release lever to lock
the steering wheel in place. Be sure
to adjust the steering wheel to the
desired position before driving.
Horn
To sound the horn, press the horn
symbol on your steering wheel.
Check the horn regularly to be sure it
operates properly.
To sound the horn, press the area
indicated by the horn symbol on your
steering wheel (see illustration). The
horn will operate only when this area
is pressed.WARNING - Steering
wheel
adjustment
Never adjust the angle and
height of the steering wheel
while driving. You may lose
steering control
OYDDCO3028
OYDDCO2030
Page 114 of 501

443
Features of your vehicle
Heated steering wheel
(if equipped)
With the ignition switch in the ON
position, pressing the heated steer-
ing wheel button warms the steering
wheel. The indicator on the button
will illuminate and notify you on the
LCD display.
To turn the heated steering wheel off,
press the button once again. The
indicator on the button will turn off
and notify you on the LCD display.
If you turn on the ignition again after
turning off your engine in half an
hour (after operating heater button),
the heating system will be main-
tained in its 'on' condition.
✽ ✽NOTICE
The heated steering wheel will turn
off automatically approximately 30
minutes after the heated steering
wheel is turned on.
CAUTION
Do not install any grip to oper-
ate the steering wheel. Thiscauses damage to the heatedsteering wheel system.
When cleaning the heated steering wheel, do not use anorganic solvent such as paintthinner, benzene, alcohol andgasoline. Doing so may dam-age the surface of the steeringwheel.
If the surface of the steering wheel is damaged by a sharpobject, damage to the heatedsteering wheel componentscould occur.
OYDDCO2029
WARNING
If the steering wheel becomes
too warm, turn the system off.
The heated steering wheel may
cause burns even at low tem-
peratures, especially if used for
long periods of time.
Page 117 of 501

Features of your vehicle
46
4
Inside rearview mirror
Adjust the rearview mirror so that the
center view through the rear window
is seen. Make this adjustment before
you start driving.
Do not place objects in the rear seat
which would interfere with your vision
through the rear window.
Day/night rearview mirror
(if equipped)
Make this adjustment before you
start driving and while the day/night
lever is in the day position.
Pull the day/night lever toward you to
reduce the glare from the headlights
of the vehicles behind you during
night driving.
Remember that you lose somerearview clarity in the night position. Electric chromic mirror with
homelink
®system (if equipped)
To operate the electric rearview mir-
ror
Press the I button (1) to turn the
automatic- dimming function on. The
mirror indicator light will illuminate.
Press the O button (2) to turn the
automatic- dimming function off. The
mirror indicator light will turn off.
* HomeLink
®is a registered trade-
mark of Johnson Controls, Inc.
MIRRORS
WARNING - Mirror
adjustment
Do not adjust the rearview mirror
while the vehicle is moving. This
could result in loss of control.
OYDDCO2031
Day NightOHD046025N
Page 123 of 501

Features of your vehicle
52
4
Remote control
Electric type
The electric remote control mirror
switch allows you to adjust the posi-
tion of the left and right outside
rearview mirrors. To adjust the posi-
tion of either mirror the ignition switch
should be in the ACC or ON position.
Move the lever (1) to R or L to select
the right side mirror or the left side
mirror, then press a corresponding
point on the mirror adjustment con-
trol to position the selected mirror up,
down, left or right.
After the adjustment, put the lever
into neutral (center) position to pre-
vent inadvertent adjustment.
CAUTION - Outside mirror
The mirrors stop moving when
they reach the maximumadjusting angles, but themotor continues to operatewhile the switch is pressed.Do not press the switch longerthan necessary, the motormay be damaged.
Do not attempt to adjust the outside rearview mirror byhand. Doing so may damagethe parts.
OYDDCO2039
CAUTION - Rearview
mirror
Do not scrape ice off the mirrorface; this may damage the sur-face of the glass. If ice shouldrestrict movement of the mirror,do not force the mirror foradjustment. To remove ice, usea deicer spray, or a sponge orsoft cloth with very warm water.
WARNING - Mirror
adjustment
Do not adjust or fold the outside
rearview mirrors while the vehi-
cle is moving. This could result
in loss of control.
Page 126 of 501
455
Features of your vehicle
INSTRUMENT CLUSTER
1. Tachometer
2. Speedometer
3. Engine coolant temperature gauge
4. Fuel gauge
5. Turn signal indicators
6. Warning and indicator lights
7. LCD display
OYDNDI3001C/OYDNDI2002C
■
■Type A / Type B
❈The actual cluster in the vehicle may differ
from the illustration.
For more details refer to the "Gauges" in
the next pages.
■
■ Type C
Page 130 of 501

459
Features of your vehicle
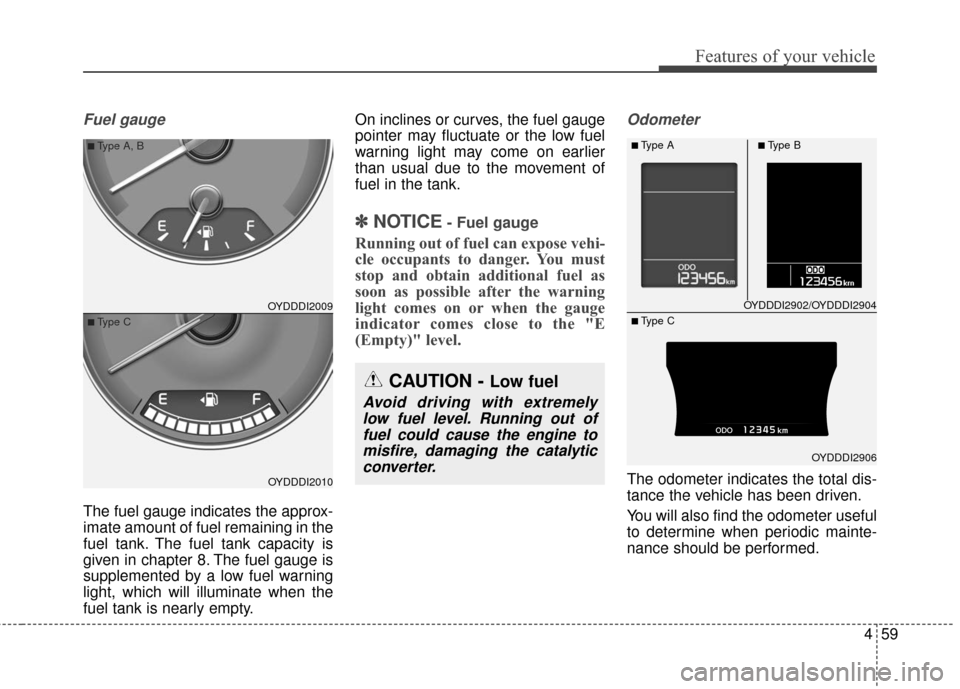
Fuel gauge
The fuel gauge indicates the approx-
imate amount of fuel remaining in the
fuel tank. The fuel tank capacity is
given in chapter 8. The fuel gauge is
supplemented by a low fuel warning
light, which will illuminate when the
fuel tank is nearly empty.On inclines or curves, the fuel gauge
pointer may fluctuate or the low fuel
warning light may come on earlier
than usual due to the movement of
fuel in the tank.
✽ ✽
NOTICE- Fuel gauge
Running out of fuel can expose vehi-
cle occupants to danger. You must
stop and obtain additional fuel as
soon as possible after the warning
light comes on or when the gauge
indicator comes close to the "E
(Empty)" level.
Odometer
The odometer indicates the total dis-
tance the vehicle has been driven.
You will also find the odometer useful
to determine when periodic mainte-
nance should be performed.
OYDDDI2009
OYDDDI2010
■Type A, B
■Type C
CAUTION - Low fuel
Avoid driving with extremely
low fuel level. Running out offuel could cause the engine tomisfire, damaging the catalyticconverter.
OYDDDI2902/OYDDDI2904
OYDDDI2906
■Type A■Type B
■ Type C
Page 135 of 501

Features of your vehicle
64
4
Two Press Unlock (if equipped)
Off:
The two press unlock function will
be deactivated. Therefore, all doors
will unlock if the door is unlocked.
On: The driver’s door will unlock if the
door is unlocked. When the door is
unlocked again within 4 seconds,
all doors will unlock.
Horn Feedback (if equipped)
Off: The Horn feedback operation will
be deactivated.
On: After locking the door by pressing
the lock button on the transmitter, if
you press the lock button again
within 4 seconds, the warning
sound will operate once to indicate
that all doors are locked.Lamp
Head Lamp Delay (if equipped)
If this item is checked, the headlamp
delay and headlamp welcome func-
tion will be activated.
Welcome Light (if equipped)
If this item is checked, the welcome
light function of the puddle lamp will
be activated.
One Touch Turn Lamp (if equipped)
If this item is checked, the lane
change signals will blink 3, 5 or 7
times when the turn signal lever is
moved slightly.
Settings
Welcome Sound
If this item is checked, the welcome
sound function will be activated.
Shift Indicator (if equipped)
If this item is checked, the shift indi-
cator function will be activated.
For more details, refer to "Instrument
Cluster" in this chapter.
Seat Easy Access (if equipped)
If this item is checked, the driver’s
seat will automatically move forward
or rearward for the driver to enter or
exit the vehicle comfortably.