2016 HYUNDAI VELOSTER TURBO check engine light
[x] Cancel search: check engine lightPage 9 of 406

13
Introduction
Your new vehicle is designed to obtain
maximum performance with UNLEADED
FUEL, as well as minimize exhaust emis-
sions and spark plug fouling.
Your new vehicle is designed to use only
unleaded fuel having a pump octane
number ((R+M)/2) of 87 (Research
Octane Number 91) or higher. (Do not
use methanol blended fuels.)Gasoline containing alcohol and
methanol
Gasohol, a mixture of gasoline and
ethanol (also known as grain alcohol),
and gasoline or gasohol containing
methanol (also known as wood alcohol)
are being marketed along with or instead
of leaded or unleaded gasoline.
Do not use gasohol containing more than
10% ethanol, and do not use gasoline or
gasohol containing any methanol. Either
of these fuels may cause drivability prob-
lems and damage to the fuel system,
engine control system and emission con-
trol system.
Discontinue using gasohol of any kind if
drivability problems occur.
Vehicle damage or drivability problems
may not be covered by the manufactur-
er’s warranty if they result from the use
of:
1. Gasohol containing more than 10%
ethanol.
2. Gasoline or gasohol containing
methanol.
3. Leaded fuel or leaded gasohol."E85" fuel is an alternative fuel com-
prised of 85 percent ethanol and 15 per-
cent gasoline, and is manufactured
exclusively for use in Flexible Fuel
Vehicles. “E85” is not compatible with
your vehicle. Use of “E85” may result in
poor engine performance and damage to
your vehicle's engine and fuel system.
HYUNDAI recommends that customers
do not use fuel with an ethanol content
exceeding 10 percent.
FUEL REQUIREMENTS
CAUTION
Never add any fuel system cleaning
agents to the fuel tank other than
what has been specified. (Consult
an authorized HYUNDAI dealer for
details.)
WARNING
• Do not "top off" after the nozzle
automatically shuts off when
refueling.
• Tighten the cap until it clicks one
time, otherwise the fuel cap open
warning light will illuminate.
• Always check that the fuel cap is
installed securely to prevent fuel
spillage in the event of an acci-
dent.
CAUTION
Never use gasohol which contains
methanol. Discontinue use of any
gasohol product which impairs dri-
vability.
CAUTION
Your New Vehicle Limited Warranty
does not cover damage to the fuel
system or any performance prob-
lems caused by the use of “E85” fuel.
Page 83 of 406

Features of your vehicle
6 4
Smart key function
1. Door lock
2. Door unlock
3. Tailgate unlock
4. Panic
With a smart key, you can lock or unlock
a door (and tailgate) and even start the
engine without inserting the key.
Refer to the following for more details.
Locking
Using the door handle button
1. Close all doors, engine hood and tail-
gate.
2. Press the button of the outside door
handle.
3. The hazard warning lights will blink
and the chime will sound once.
4. Make sure that doors are locked by
checking the door lock button inside
the vehicle or pulling the outside door
handle.
✽NOTICE
• The button will only operate when the
smart key is within 0.7~1m (28~40in.)
from the outside door handle.
• Even though you press the outside
door handle button, the doors will not
lock and the chime will sound for 3
seconds if any of following occur:
- The smart key is in the vehicle.
- The engine start/stop button is in
ACC or ON position.
- Any door except the tailgate is open.
SMART KEY (IF EQUIPPED)
OYF049213
WARNING- Smart key
Leaving children unattended in a
vehicle with the smart key is dan-
gerous. Children copy adults and
they could press the engine
start/stop button. It would enable
children to operate power windows
or other controls, or even make the
vehicle move, which could result in
serious bodily injury or even death.
Never leave the keys in your vehicle
with unsupervised children.
OFS040008
Page 84 of 406

47
Features of your vehicle
Using the button on the smart key
1 Close all doors, engine hood and tail-
gate.
2. Press the lock button(1).
3. The hazard warning lights will blink
and the chime will sound once.
4. Make sure that doors are locked by
checking the door lock button inside or
pulling the outside door handle.Unlocking
Using the door handle
1. Press the button of the driver's outside
door handle.
2. The driver’s door will unlock. The haz-
ard warning lights will blink and the
chime will sound two times.
3. Press the button once more within 4
seconds.
4. All doors will unlock and the hazard
warning lights will blink and the chime
will sound two times.
❈If you press the button of the front pas-
senger’s outside door handle while
carrying the smart key, all doors will
unlock. (if equipped)
✽NOTICE
• The button will only operate when the
smart key is within 0.7~1m (28~40in.)
from the outside door handle.
• When the smart key is recognized in
the area of 0.7~1m (28~40in.) from the
front outside door handle, other peo-
ple can also open the doors.
• After unlocking the driver’s door or
all doors, the door(s) will lock auto-
matically unless the door is opened.
Using the button on the smart key
1. Press the unlock button (2) of the
smart key.
2. The driver’s door will unlock. The haz-
ard warning lights will blink and the
chime will sound two times.
3. Press the unlock button (2) once more
within 4 seconds.
4. All doors will unlock. The hazard warn-
ing lights will blink and the chime will
sound two times.
✽NOTICE
After pressing the button, the doors will
lock automatically unless any door is
opened.
Page 108 of 406

431
Features of your vehicle
Opening the hood
1. Pull the release lever to unlatch the
hood. The hood should pop open
slightly.2. Go to the front of the vehicle, raise the
hood slightly, pull the secondary latch
(1) inside of the hood center and lift the
hood (2).
3. Raise the hood. It will raise completely
by itself after it has been raised
halfway.
Closing the hood
1. Before closing the hood, check the fol-
lowing:
• All filler caps in engine compartment
must be correctly installed.
• Gloves, rags or any other com-
bustible material must be removed
from the engine compartment.
2. Lower the hood halfway and push it
down. Make sure the hood is locked
securely.
HOOD
WARNING
Open the hood after turning off the
engine on a flat surface, shifting
the shift lever to the P (Park) posi-
tion for automatic transaxle/
Ecoshift dual clutch transmission
and to the 1st (First) gear or R
(Reverse) for manual transaxle, and
setting the parking brake.
OFS040021OFS045022L
Page 110 of 406

433
Features of your vehicle
Opening the fuel filler lid
The fuel filler lid must be opened from
inside the vehicle by pulling the fuel filler
lid opener switch.
✽NOTICE
If the fuel filler lid will not open because
ice has formed around it, tap lightly or
push on the lid to break the ice and
release the lid. Do not pry on the lid. If
necessary, spray around the lid with an
approved de-icer fluid (do not use radi-
ator anti-freeze) or move the vehicle to a
warm place and allow the ice to melt.
1. Stop the engine.
2. To open the fuel filler lid, pull the fuel
filler lid opener switch.
3. Pull the fuel filler lid (1) out to fully
open.
4. To remove the cap, turn the fuel tank
cap (2) counterclockwise.
5. Refuel as needed.
Closing the fuel filler lid
1. To install the cap, turn it clockwise until
it clicks one time. This indicates that
the cap is securely tightened.
2. Close the fuel filler lid and push it in
lightly making sure that it is securely
closed.
FUEL FILLER LID
OFS043224N
WARNING- Refueling
• If pressurized fuel sprays out, it
can cover your clothes or skin
and thus subject you to the risk
of fire and burns. Always remove
the fuel cap carefully and slowly.
If the cap is venting fuel or if you
hear a hissing sound, wait until
the condition stops before com-
pletely removing the cap.
• Do not "top off" after the nozzle
automatically shuts off when
refueling.
• Tighten the cap until it clicks one
time, otherwise the fuel cap open
warning light will illuminate.
• Always check that the fuel cap is
installed securely to prevent fuel
spillage in the event of an acci-
dent.
OFS040024
Page 111 of 406

Features of your vehicle
34 4
(Continued)
Use only approved portable plas-
tic fuel containers designed to
carry and store gasoline.
• Do not use cellular phones while
refueling. Electric current and/or
electronic interference from cel-
lular phones can potentially
ignite fuel vapors causing a fire.
• When refueling, always shut the
engine off. Sparks produced by
electrical components related to
the engine can ignite fuel vapors
causing a fire. Once refueling is
complete, check to make sure the
filler cap and filler door are
securely closed, before starting
the engine.
• DO NOT use matches or a lighter
and DO NOT SMOKE or leave a lit
cigarette in your vehicle while at
a gas station especially during
refueling. Automotive fuel is
highly flammable and can, when
ignited, result in fire.
(Continued)(Continued)
• Do not get back into a vehicle
once you have begun refueling
since you can generate static
electricity by touching, rubbing
or sliding against any item or fab-
ric (polyester, satin, nylon, etc.)
capable of producing static elec-
tricity. Static electricity discharge
can ignite fuel vapors resulting in
rapid burning. If you must re-
enter the vehicle, you should
once again eliminate potentially
dangerous static electricity dis-
charge by touching a metal part
of the vehicle, away from the fuel
filler neck, nozzle or other gaso-
line source.
• When using an approved
portable fuel container, be sure to
place the container on the
ground prior to refueling. Static
electricity discharge from the
container can ignite fuel vapors
causing a fire. Once refueling has
begun, contact with the vehicle
should be maintained until the
filling is complete.
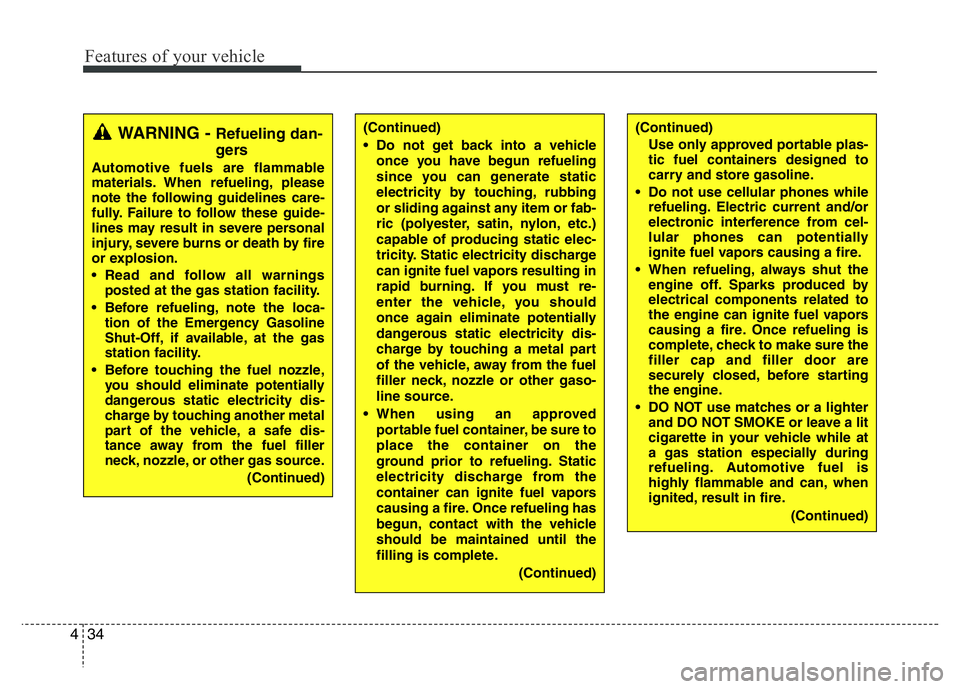
(Continued)WARNING - Refueling dan-
gers
Automotive fuels are flammable
materials. When refueling, please
note the following guidelines care-
fully. Failure to follow these guide-
lines may result in severe personal
injury, severe burns or death by fire
or explosion.
• Read and follow all warnings
posted at the gas station facility.
• Before refueling, note the loca-
tion of the Emergency Gasoline
Shut-Off, if available, at the gas
station facility.
• Before touching the fuel nozzle,
you should eliminate potentially
dangerous static electricity dis-
charge by touching another metal
part of the vehicle, a safe dis-
tance away from the fuel filler
neck, nozzle, or other gas source.
(Continued)
Page 117 of 406

Features of your vehicle
40 4
Electric power steering (EPS)
The power steering uses a motor to
assist you in steering the vehicle. If the
engine is off or if the power steering sys-
tem becomes inoperative, the vehicle
may still be steered, but it will require
increased steering effort.
The motor driven power steering is con-
trolled by a power steering control unit
which senses the steering wheel torque
and vehicle speed to command the
motor.
The steering effort increases as the vehi-
cle’s speed increases and the effort
decreases as the vehicle’s speed
decreases for optimum steering control.
Should you notice any change in the
effort required to steer during normal
vehicle operation, have the power steer-
ing checked by an authorized HYUNDAI
dealer.
✽NOTICE
The following symptoms may occur dur-
ing normal vehicle operation:
• The EPS warning light does not illu-
minate when turning the ignition to
the ON position.
• The steering gets effort increases after
turning the ignition switch on. This
happens as the system performs the
EPS system diagnostics. When the
diagnostics is completed, the steering
wheel will return to its normal condi-
tion.
• A click noise may be heard from the
EPS relay after the ignition switch is
turned to the ON or LOCK (OFF)
position.
• A motor noise may be heard when the
vehicle is at a stop or at a low driving
speed.
• If the Electric Power Steering System
does not operate normally, the warning
light will illuminate on the instrument
cluster. The steering wheel may
become difficult to control or operate
abnormally. Take your vehicle to an
authorized HYUNDAI dealer and have
the vehicle checked as soon as possible.
(Continued)
STEERING WHEEL
CAUTION
• If the Electric Power Steering
System does not operate normal-
ly, the warning light will illuminate
on the instrument cluster. The
steering wheel may become diffi-
cult to control or operate abnor-
mally. Take your vehicle to an
authorized HYUNDAI dealer and
have the vehicle checked as soon
as possible.
• When you operate the steering
wheel in low temperatures, an
abnormal noise could occur. If
temperature rises, the noise will
disappear. This is a normal condi-
tion.
• When the vehicle is stationary, if
you turn the steering wheel all the
way to the left or right repeatedly,
the steering wheel assist may
temporarily be reduced, not a
system malfunction. As time
passes. The steering wheel return
to normal operation.
Page 136 of 406

459
Features of your vehicle
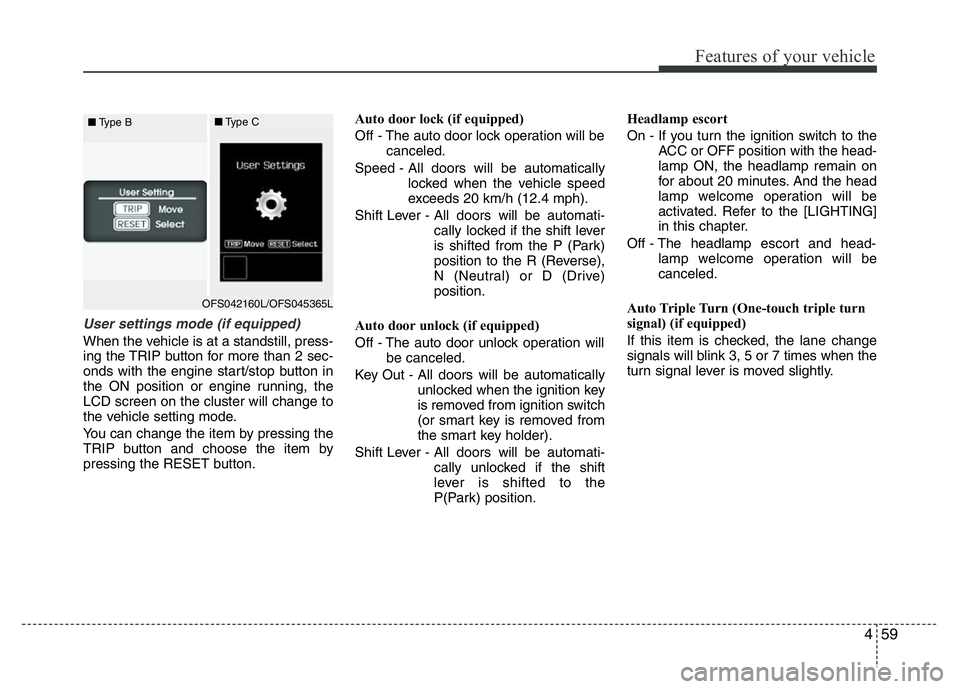
User settings mode (if equipped)
When the vehicle is at a standstill, press-
ing the TRIP button for more than 2 sec-
onds with the engine start/stop button in
the ON position or engine running, the
LCD screen on the cluster will change to
the vehicle setting mode.
You can change the item by pressing the
TRIP button and choose the item by
pressing the RESET button.Auto door lock (if equipped)
Off - The auto door lock operation will be
canceled.
Speed - All doors will be automatically
locked when the vehicle speed
exceeds 20 km/h (12.4 mph).
Shift Lever - All doors will be automati-
cally locked if the shift lever
is shifted from the P (Park)
position to the R (Reverse),
N (Neutral) or D (Drive)
position.
Auto door unlock (if equipped)
Off - The auto door unlock operation will
be canceled.
Key Out - All doors will be automatically
unlocked when the ignition key
is removed from ignition switch
(or smart key is removed from
the smart key holder).
Shift Lever - All doors will be automati-
cally unlocked if the shift
lever is shifted to the
P(Park) position.Headlamp escort
On - If you turn the ignition switch to the
ACC or OFF position with the head-
lamp ON, the headlamp remain on
for about 20 minutes. And the head
lamp welcome operation will be
activated. Refer to the [LIGHTING]
in this chapter.
Off - The headlamp escort and head-
lamp welcome operation will be
canceled.
Auto Triple Turn (One-touch triple turn
signal) (if equipped)
If this item is checked, the lane change
signals will blink 3, 5 or 7 times when the
turn signal lever is moved slightly.
OFS042160L/OFS045365L ■Type B■Type C