Page 83 of 603

2-56
Safety system of your vehicle
Occupant Classification
System (OCS)
Your vehicle is equipped with an
Occupant Classification System
(OCS) in the front passenger's seat.The OCS is designed to detect the
presence of a properly-seated front
passenger and determine if the pas-
senger's front air bag should be
enabled (may inflate) or not. The dri-
ver's front air bag is not affected or
controlled by the OCS.
Main components of the
Occupant Classification System
A detection device located within
the front passenger seat cushion.
Electronic system to determine whether the passenger air bag
systems should be activated or
deactivated.
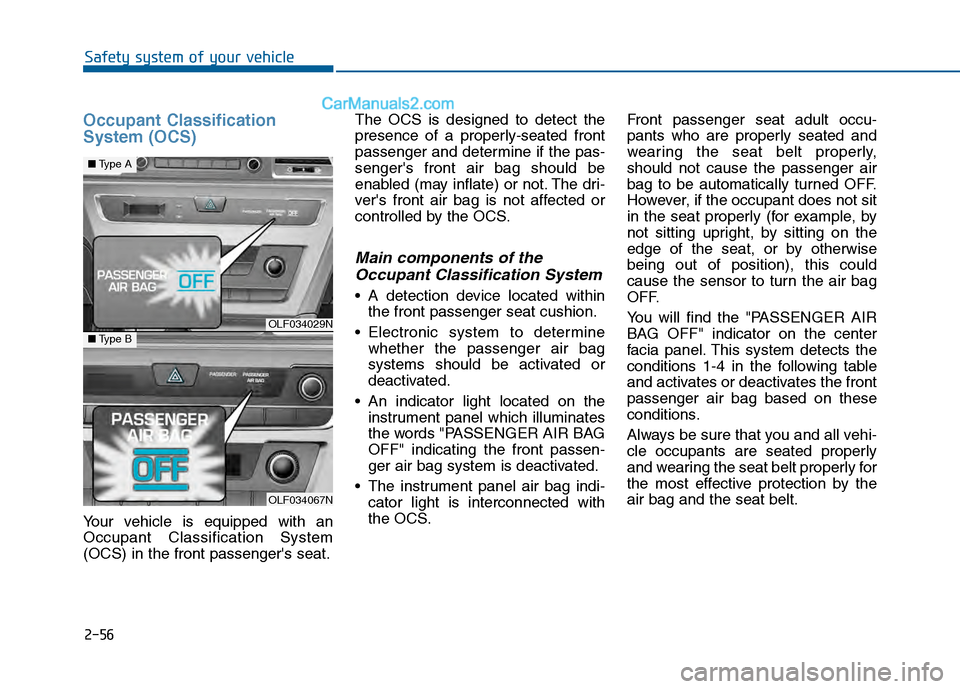
An indicator light located on the instrument panel which illuminates
the words "PASSENGER AIR BAG
OFF" indicating the front passen-
ger air bag system is deactivated.
The instrument panel air bag indi- cator light is interconnected with
the OCS. Front passenger seat adult occu-
pants who are properly seated and
wearing the seat belt properly,
should not cause the passenger air
bag to be automatically turned OFF.
However, if the occupant does not sit
in the seat properly (for example, by
not sitting upright, by sitting on the
edge of the seat, or by otherwise
being out of position), this could
cause the sensor to turn the air bag
OFF.
You will find the "PASSENGER AIR
BAG OFF" indicator on the center
facia panel. This system detects the
conditions 1-4 in the following table
and activates or deactivates the front
passenger air bag based on these
conditions.
Always be sure that you and all vehi-
cle occupants are seated properly
and wearing the seat belt properly for
the most effective protection by the
air bag and the seat belt.
OLF034029N
OLF034067N
■
Type A
■Type B
Page 93 of 603

2-66
Safety system of your vehicle
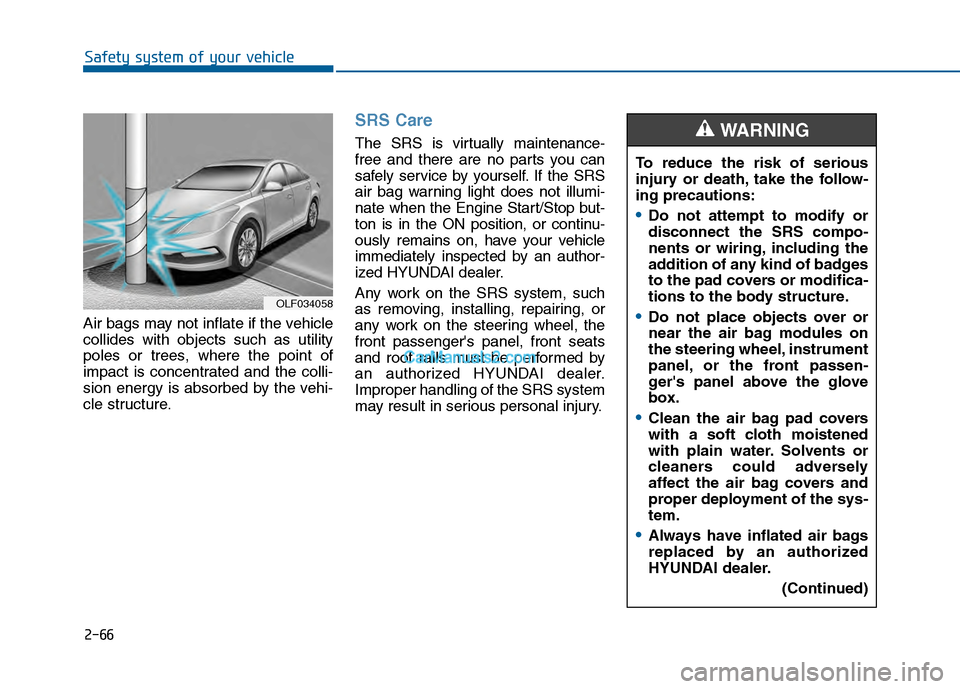
Air bags may not inflate if the vehicle
collides with objects such as utility
poles or trees, where the point of
impact is concentrated and the colli-
sion energy is absorbed by the vehi-
cle structure.
SRS Care
The SRS is virtually maintenance-
free and there are no parts you can
safely service by yourself. If the SRS
air bag warning light does not illumi-
nate when the Engine Start/Stop but-
ton is in the ON position, or continu-
ously remains on, have your vehicle
immediately inspected by an author-
ized HYUNDAI dealer.
Any work on the SRS system, such
as removing, installing, repairing, or
any work on the steering wheel, the
front passenger's panel, front seats
and roof rails must be performed by
an authorized HYUNDAI dealer.
Improper handling of the SRS system
may result in serious personal injury. To reduce the risk of serious
injury or death, take the follow-
ing precautions:
Do not attempt to modify or
disconnect the SRS compo-
nents or wiring, including the
addition of any kind of badges
to the pad covers or modifica-
tions to the body structure.
Do not place objects over or
near the air bag modules on
the steering wheel, instrument
panel, or the front passen-
ger's panel above the glove
box.
Clean the air bag pad covers
with a soft cloth moistened
with plain water. Solvents or
cleaners could adversely
affect the air bag covers and
proper deployment of the sys-
tem.
Always have inflated air bags
replaced by an authorized
HYUNDAI dealer.
(Continued)
WARNING
OLF034058
Page 115 of 603

3-20
Convenient features of your vehicle
The Driver Position Memory System
is provided to store and recall the fol-
lowing memory settings with a sim-
ple button operation.
- Driver's seat position
- Outside rearview mirror position
- Instrument panel illumination intensity
If the battery is disconnected, the
position memory will be lost and the
driving positions must be stored in
the system again.
If the Driver Position Memory
System does not operate normally,
have the system checked by an
authorized HYUNDAI dealer.
Storing Positions into Memory
1. Check that the shift lever is in P (Park) while the ignition switch is
in the ON position.
2. Adjust the driver's seat position, outside rearview mirror position
and instrument panel illumination
intensity to positions comfortable
for the driver.
3. Press the SET button. The system will beep once and notify you
"Press button to save settings"on
the LCD display.
4. Press one of the memory buttons (1 or 2) within 5 seconds. The sys-
tem will beep twice when the mem-
ory has been successfully stored.
5.
"Driver 1 (or 2) settings saved" will
appear on the LCD display.
D D R
RI
IV
V E
ER
R
P
P O
O S
SI
IT
T I
IO
O N
N
M
M E
EM
M O
OR
RY
Y
S
S Y
Y S
ST
T E
EM
M
(
( I
IF
F
E
E Q
Q U
UI
IP
P P
PE
ED
D )
)
OLF044013
Never attempt to operate the driv-
er position memory system while
the vehicle is moving.
This could result in loss of con-
trol, and an accident causing
death, serious injury, or property
damage.
WARNING
OLF044403N/OLF044404N
Page 116 of 603

3-21
Convenient features of your vehicle
3
Recalling positions from memory
1. Check that the shift lever is in P(Park) while the ignition switch is
in the ON position.
2. Press the desired memory button (1 or 2). The system will beep once,
and then the driver's seat position,
outside rearview mirror position
and instrument panel illumination
intensity will automatically adjust to
the stored positions.
3.
"Driver 1(or 2) settings is applied" will
appear on the LCD display. While recalling the "1" memory
position, pressing the SET or 1
button temporarily stops the
adjustment of the recalled memo-
ry position. Pressing the 2 button
recalls the "2" memory position.
While recalling the "2" memory position, pressing the SET or 2
button temporarily stops the
adjustment of the recalled memo-
ry position. Pressing the 1 button
recalls the "1" memory position.
While recalling the stored posi- tions, pressing one of the con-
trol buttons for the driver's seat,
outside rearview mirror or
instrument panel illumination
will cause the movement of that
component to stop and move in
the direction that the control
button is pressed.
Easy Access Function
When exiting the vehicle the driver’s
seat will move rearward when the
engine is turned off and the shift lever
in P (Park).
When entering the vehicle the dri-
ver’s seat will move forward when the
ignition switch is placed to the ACC
position.
You can activate or deactivate the
Easy Access Function from the User
Settings Mode on the LCD display.
For more information, refer to the
"LCD Display" section in this
chapter.
NOTICE
OLF044401N/OLF044402N
Page 118 of 603

3-23
Convenient features of your vehicle
3
Tilt Steering / Telescope Steering
Adjust the steering wheel so it points
toward your chest, not toward your
face. Make sure you can see the
instrument panel warning lights and
gauges. After adjusting, push the
steering wheel both up and down to
be certain it is locked in position.
Always adjust the position of the
steering wheel before driving.To change the steering wheel angle
and height:
1. Pull down the lock-release lever (1).
2. Adjust the steering wheel to thedesired angle (2) and height (3).
3. Pull up the lock-release lever to lock the steering wheel in place.
Information
After adjustment, sometimes the lock
release lever may not lock the steering
wheel. It is not a malfunction. This
occurs when two gears engage. In this
case, adjust the steering wheel again
and then lock the steering wheel.
Heated Steering Wheel
(if equipped)
When the ignition switch is in the ON
position or when the engine is running,
press the heated steering wheel but-
ton to warm the steering wheel. The
indicator on the button will illuminate.
i
OLF044015
OLF044016
OLF044017
■Type A
■Type BNEVER adjust the steering
wheel while driving. This may
cause loss of vehicle control
resulting in an accident.
WARNING
Page 160 of 603
3-65
Convenient features of your vehicle
3
Instrument Cluster Control
Adjusting instrument clusterillumination
When the vehicle's parking lights or
headlights are on, press the illumina-
tion control button to adjust the
brightness of the instrument panel
illumination. When pressing the illumination con-
trol button, the interior switch illumi-
nation intensity is also adjusted. The
selected brightness of illumination
can be saved in the Driver Position
Memory System (if equipped).
For more information, refer to
“Driver position Memory System”
in this chapter.
The brightness of the instrumentpanel illumination is displayed.
If the brightness reaches the maxi- mum or minimum level, an alarm
will sound.
OLF044102
OLF044142L
OLF044143L
■ Type A, C
■ Type B, D
Page 201 of 603
3-106
Convenient features of your vehicle
Do not cover or spill anything on the sensor (1) located in front of
the rearview mirror.
Do not clean the sensor using a window cleaner, the cleanser may
leave a light film which could
interfere with sensor operation.
If your vehicle has window tint or other types of metallic coat-
ing on the front windshield, the
AUTO light system may not work
properly.
Parking lamp position ( )
The parking lamp, license plate lamp
and instrument panel lamp are turned
ON.
Headlamp position ( )
The headlamp, parking lamp, license
plate lamp and instrument panel lamp
are turned ON.
Information
The ignition switch must be in the ON
position to turn on the headlamp.
i
NOTICE
OLF044086NOLF044087N
Page 219 of 603

3-124
Convenient features of your vehicle
D
DE
EF
FR
R O
O S
ST
T E
ER
R
To prevent damage to the conduc-
tors bonded to the inside surface
of the rear window, never use
sharp instruments or window
cleaners containing abrasives to
clean the window.
If you want to defrost and defog
the front windshield, refer to the
"Windshield Defrosting and
Defogging" section in this chapter.
Rear Window Defroster
The defroster heats the window to
remove frost, fog and thin ice from
the interior and exterior of the rear
window, while engine is running. To activate the rear window
defroster, press the rear window
defroster button located in the center
facia switch panel. The indicator on
the rear window defroster button illu-
minates when the defroster is ON.
To turn off the defroster, press the rear window defroster button again.
Information
• If there is heavy accumulation ofsnow on the rear window, brush it off
before operating the rear defroster.
• The rear window defroster automat- ically turns off after approximately
20 minutes or when the ignition
switch is in the LOCK/OFF position.
Outside rearview mirror defroster
If your vehicle is equipped with the
outside rearview mirror defrosters,
they will operate at the same time you
turn on the rear window defroster.
i
NOTICE
OLF044204
OLF044205
■ Manual climate control system
■Automatic climate control system