Page 549 of 708

6-11
What to do in an emergency
6
If any of the below happens, have
the system checked by an author-
ized HYUNDAI dealer.
1. The Low Tire Pressure Telltale/TPMS Malfunction Indicator
does not illuminate for 3 sec-
onds when the ignition switch
is placed to the ON position or
engine is running.
2. The TPMS Malfunction Indicator remains illuminated after blink-
ing for approximately 1 minute.
3. The Low Tire Pressure Position Telltale remains illuminated.
Low tire pressure
telltale
Low tire pressure
position and tire
pressure telltale
When the tire pressure monitoring
system warning indicators are illumi-
nated and warning message dis-
played on the cluster LCD display,
one or more of your tires is signifi-
cantly under-inflated. The Low Tire
Pressure Position Telltale will indi-
cate which tire is significantly under-
inflated by illuminating the corre-
sponding position light.
If either telltale illuminates, immedi-
ately reduce your speed, avoid hard
cornering and anticipate increased
stopping distances. You should stop
and check your tires as soon as pos-
sible. Inflate the tires to the proper
pressure as indicated on the vehi-
cle’s placard or tire inflation pressure
label located on the driver’s side cen-
ter pillar outer panel. If you cannot reach a service station
or if the tire cannot hold the newly
added air, replace the low pressure
tire with the spare tire.
The Low Tire Pressure Telltale will
remain on and the TPMS Malfunction
Indicator may blink for one minute
and then remain illuminated (when
the vehicle is driven approximately
20 minutes at speed above 15.5 mph
(25 km/h)) until you have the low
pressure tire repaired and replaced
on the vehicle.
Information
The spare tire is not equipped with a
tire pressure sensor.
i
NOTICE
OLF064028N
Page 557 of 708

6-19
What to do in an emergency
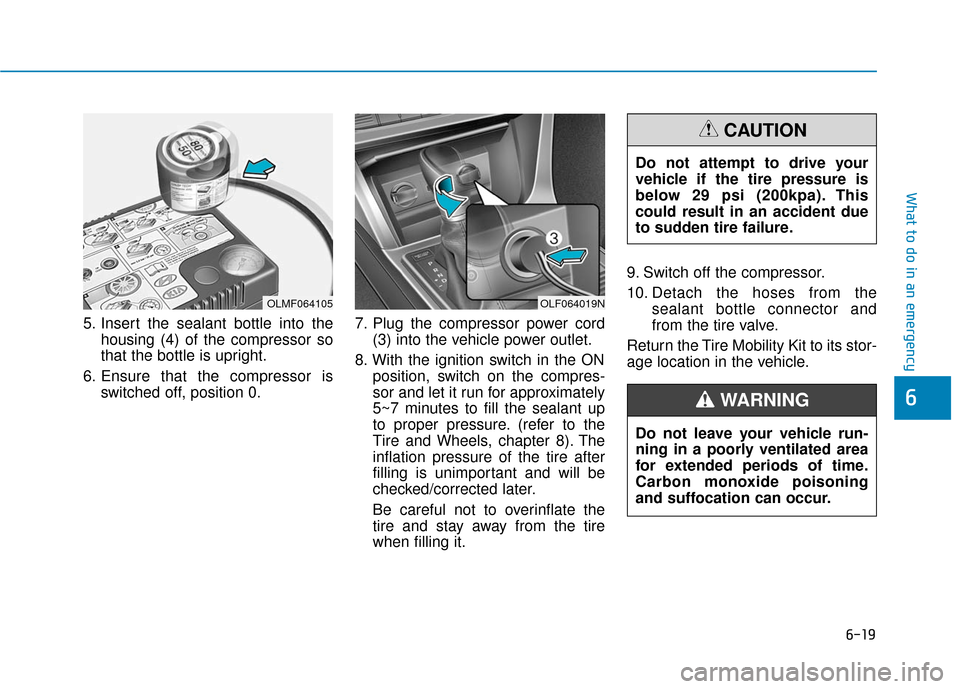
5. Insert the sealant bottle into thehousing (4) of the compressor so
that the bottle is upright.
6. Ensure that the compressor is switched off, position 0. 7. Plug the compressor power cord
(3) into the vehicle power outlet.
8. With the ignition switch in the ON position, switch on the compres-
sor and let it run for approximately
5~7 minutes to fill the sealant up
to proper pressure. (refer to the
Tire and Wheels, chapter 8). The
inflation pressure of the tire after
filling is unimportant and will be
checked/corrected later.
Be careful not to overinflate the
tire and stay away from the tire
when filling it. 9. Switch off the compressor.
10. Detach the hoses from the
sealant bottle connector and
from the tire valve.
Return the Tire Mobility Kit to its stor-
age location in the vehicle.
6
OLMF064105OLF064019N
Do not attempt to drive your
vehicle if the tire pressure is
below 29 psi (200kpa). This
could result in an accident due
to sudden tire failure.
CAUTION
Do not leave your vehicle run-
ning in a poorly ventilated area
for extended periods of time.
Carbon monoxide poisoning
and suffocation can occur.
WARNING
Page 558 of 708

6-20
Distributing the sealant
11. Immediately drive approximately4~6miles (7~10km or about 10
minutes) to evenly distribute the
sealant in the tire.
Do not exceed a speed of 50 mph
(80 km/h). If possible, do not fall
below a speed of 12 mph (20 km/h).
While driving, if you experience any
unusual vibration, ride disturbance or
noise, reduce your speed and drive
with caution until you can safely pull
off of the side of the road. Checking the tire inflation pres-
sure
1. After driving approximately
4~6miles (7~10km or about
10 minutes), stop at a safe loca-
tion.
2. Connect hose (9) of the compres- sor directly to the tire valve.
3. Plug the compressor power cord into the vehicle power outlet. 4. Adjust the tire inflation pressure to
the recommended tire inflation.
With the ignition switched on, pro- ceed as follows.
- To increase the inflation pres- sure:
Switch on the compressor, posi-
tion to [I]. To check the current
inflation pressure setting, briefly
switch off the compressor.
- To reduce the inflation pres- sure:
Loosen the screw cap (8) on the
compressor hose.
Information
The pressure gauge may show higher
than actual reading when the com-
pressor is running. To get an accurate
tire pressure, the compressor needs to
be turned off.
i
What to do in an emergency
OLF064020
Never use a puncture-repairing
agent not approved by HYUNDAI
dealer to repair and/or inflate a
low pressure tire. Tire sealant
not approved by HYUNDAI deal-
er may damage the tire pressure
sensor.
CAUTION
Page 605 of 708

7-41
7
Maintenance
B
BA
A T
TT
TE
ER
R Y
Y
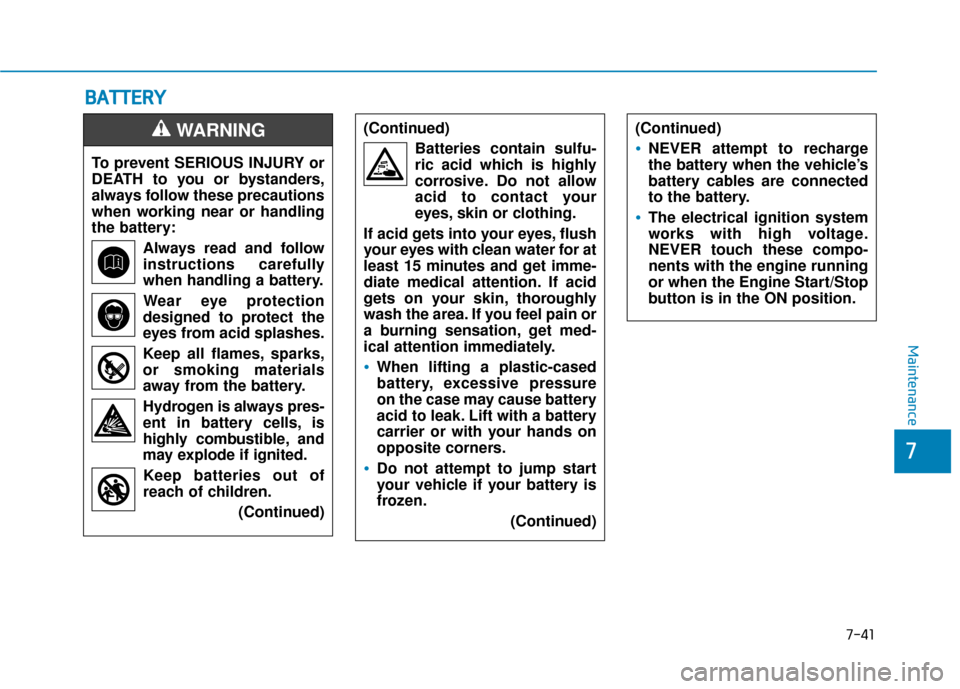
To prevent SERIOUS INJURY or
DEATH to you or bystanders,
always follow these precautions
when working near or handling
the battery:
Always read and follow
instructions carefully
when handling a battery.Wear eye protection
designed to protect the
eyes from acid splashes.
Keep all flames, sparks,
or smoking materials
away from the battery.
Hydrogen is always pres- ent in battery cells, is
highly combustible, and
may explode if ignited.
Keep batteries out of
reach of children.
(Continued)
WARNING (Continued)Batteries contain sulfu-
ric acid which is highly
corrosive. Do not allow
acid to contact your
eyes, skin or clothing.
If acid gets into your eyes, flush
your eyes with clean water for at
least 15 minutes and get imme-
diate medical attention. If acid
gets on your skin, thoroughly
wash the area. If you feel pain or
a burning sensation, get med-
ical attention immediately.
When lifting a plastic-cased
battery, excessive pressure
on the case may cause battery
acid to leak. Lift with a battery
carrier or with your hands on
opposite corners.
Do not attempt to jump start
your vehicle if your battery is
frozen. (Continued)
(Continued)
NEVER attempt to recharge
the battery when the vehicle’s
battery cables are connected
to the battery.
The electrical ignition system
works with high voltage.
NEVER touch these compo-
nents with the engine running
or when the Engine Start/Stop
button is in the ON position.
Page 635 of 708
7-71
7
Maintenance
Fuse Name Fuse rating Protected Component
FUSE
1TCU10APCM
1OPCU10AElectric Oil Pump Unit
EWP10AElectric Water Pump
BATTERY C/FAN15AE/R Junction Block (RLY. 5 (Battery C/FAN))
1ECU20APCM
IGN COIL20AIgnition Coil #1/#2/#3/#4
AMS10ABattery Sensor