2016 Hyundai Santa Fe Sport ignition
[x] Cancel search: ignitionPage 141 of 763
449
Features of your vehicle
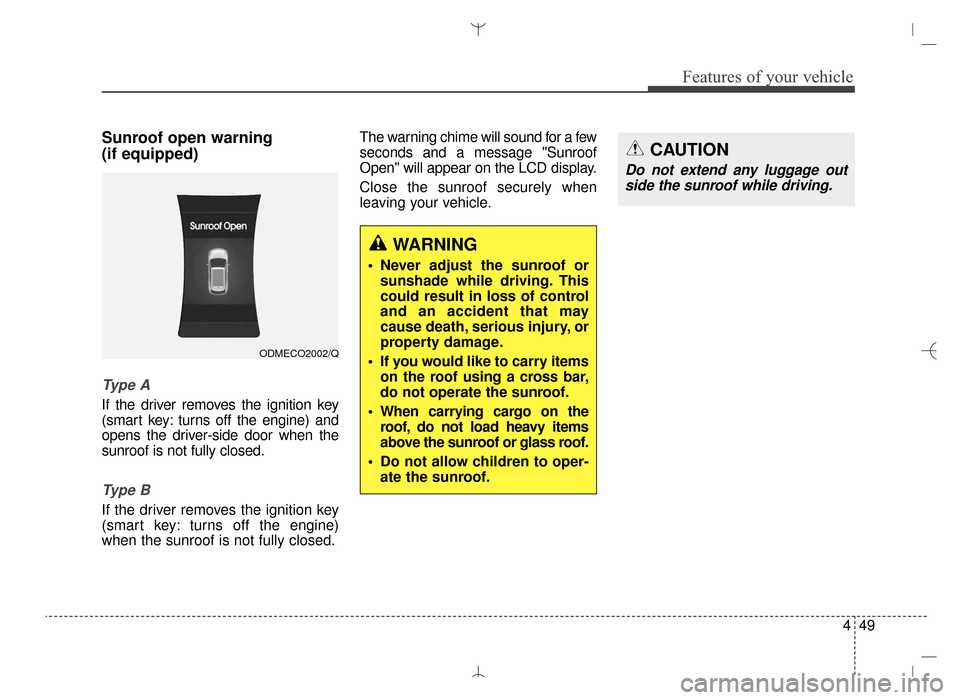
Sunroof open warning
(if equipped)
Type A
If the driver removes the ignition key
(smart key: turns off the engine) and
opens the driver-side door when the
sunroof is not fully closed.
Ty p e B
If the driver removes the ignition key
(smart key: turns off the engine)
when the sunroof is not fully closed.The warning chime will sound for a few
seconds and a message "Sunroof
Open" will appear on the LCD display.
Close the sunroof securely when
leaving your vehicle.
ODMECO2002/Q
WARNING
Never adjust the sunroof or
sunshade while driving. This
could result in loss of control
and an accident that may
cause death, serious injury, or
property damage.
If you would like to carry items on the roof using a cross bar,
do not operate the sunroof.
When carrying cargo on the roof, do not load heavy items
above the sunroof or glass roof.
Do not allow children to oper- ate the sunroof.
CAUTION
Do not extend any luggage outside the sunroof while driving.
AN HMA 4A.QXP 3/5/2015 3:18 PM Page 49
Page 145 of 763
453
Features of your vehicle
Resetting the sunroof
Sunroof needs to be reset if (in the
followings)
- Battery is discharged or discon-nected or the related fuse has been
replaced or disconnected
- The one-touch sliding function of the sunroof does not normally oper-
ate
1.Turn the ignition switch to the ON position.
2.Close the sunshade and sunroof completely if opened.
3.Release the sunroof control lever.
4.Push the sunroof control lever for- ward in the direction of close
(about 10 seconds) until the sun-
roof moves a little. Then, release
the lever. 5.Push the sunroof control lever for-
ward in the direction of close, until
the sunroof operates as follows
again:
The sunshade and sunroof glass
slide open → The sunroof glass
slide close → The sunshade close
Then, release the lever.
When this is complete, the sunroof
system has been reset.
✽ ✽ NOTICE
If you do not reset the sunroof, it
may not work properly.
CAUTION - Sunroof motor
damage
If you try to open the sunroof
when the temperature is belowfreezing or when the sunroof iscovered with snow or ice, theglass or the motor could bedamaged.
CAUTION
Periodically remove any dirt that may accumulate on theguide rail.
If you drive with the sunroof opened right after a car washor rain, water may get insidethe vehicle.
AN HMA 4A.QXP 3/5/2015 3:18 PM Page 53
Page 146 of 763
Features of your vehicle
54
4
Electric power steering (EPS)
The power steering uses a motor to
assist you in steering the vehicle. If
the engine is off or if the power steer-
ing system becomes inoperative, the
vehicle may still be steered, but it will
require increased steering effort.
The motor driven power steering is
controlled by a power steering con-
trol unit which senses the steering
wheel torque and vehicle speed to
command the motor.
The steering becomes heavier as
the vehicle’s speed increases and
becomes lighter as the vehicle’s
speed decreases for optimum steer-
ing control.
Should you notice any change in the
effort required to steer during normal
vehicle operation, have the power
steering checked by an authorized
HYUNDAI dealer.
✽ ✽
NOTICE
The following symptoms may occur
during normal vehicle operation:
• The EPS warning light does not
illuminate.
• The steering gets heavy immedi- ately after turning the ignition
switch on. This happens as the sys-
tem performs the EPS system
diagnostics. When the diagnostics
is completed, the steering wheel
will return to its normal condition.
• A click noise may be heard from the EPS relay after the ignition
switch is turned to the ON or
LOCK (OFF) position.
• A motor noise may be heard when the vehicle is at a stop or at a low
driving speed.
• If the Electric Power Steering System does not operate normally,
the warning light will illuminate on
the instrument cluster. The steer-
ing wheel may become difficult to
control or operate abnormally.
Take your vehicle to an authorized
HYUNDAI dealer and have the
vehicle checked as soon as possible. (Continued)
STEERING WHEEL
CAUTION
If the Electric Power Steering
System does not operate nor-mally, the warning light willilluminate on the instrumentcluster. The steering wheelmay become difficult to con-trol or operate abnormally.Take your vehicle to anauthorized HYUNDAI dealerand have the vehicle checkedas soon as possible.
When you operate the steer- ing wheel in low temperature,abnormal noise could occur. Iftemperature rises, the noisewill disappear. This is a normalcondition.
When the vehicle is stationary, if you turn the steering wheelall the way to the left or rightcontinuously, the steeringwheel becomes heavier fromthe end. But this is for yoursafety, not system malfunc-tion. As time passes, thesteering wheel return to itsnormal condition.
AN HMA 4A.QXP 3/5/2015 3:18 PM Page 54
Page 148 of 763
Features of your vehicle
56
4
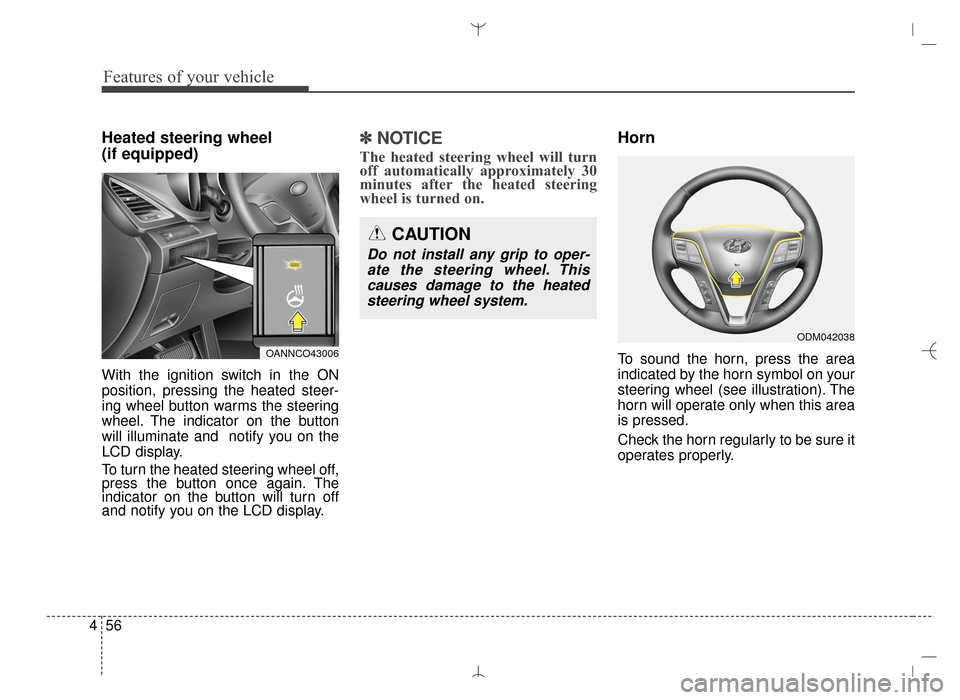
Heated steering wheel
(if equipped)
With the ignition switch in the ON
position, pressing the heated steer-
ing wheel button warms the steering
wheel. The indicator on the button
will illuminate and notify you on the
LCD display.
To turn the heated steering wheel off,
press the button once again. The
indicator on the button will turn off
and notify you on the LCD display.
✽ ✽
NOTICE
The heated steering wheel will turn
off automatically approximately 30
minutes after the heated steering
wheel is turned on.
Horn
To sound the horn, press the area
indicated by the horn symbol on your
steering wheel (see illustration). The
horn will operate only when this area
is pressed.
Check the horn regularly to be sure it
operates properly.
CAUTION
Do not install any grip to oper-
ate the steering wheel. Thiscauses damage to the heatedsteering wheel system.
OANNCO43006
ODM042038
AN HMA 4A.QXP 3/5/2015 3:18 PM Page 56
Page 154 of 763
Features of your vehicle
62
4
Automatic-dimming function
Your mirror will automatically dim
upon detecting glare from the vehi-
cles traveling behind you. The auto-
dimming function can be controlled
by pushing the ON/OFF Button:
1. Pressing the button turns the auto-
dimming function OFF which is
indicated by the green Status
Indicator LED turning off.
2. Pressing the button again turns the auto-dimming function ON
which is indicated by the green
Status Indicator LED turning on.
✽ ✽NOTICE
The mirror defaults to the ON posi-
tion each time the vehicle is started.
Z-Nav™ Compass Display
The NVS™ Mirror in your vehicle is
also equipped with a Z-Nav™
Compass that shows the vehicle
Compass heading in the Display
Window using the 8 basic cardinal
headings (N, NE, E, SE, etc.). Compass function
The Compass can be turned ON and
OFF and will remember the last state
when the ignition is cycled. To turn
the display feature ON/OFF:
1. Press and release the button to
turn the display feature OFF.
2. Press and release the button again to turn the display back ON.
Additional options can be set with
press and hold sequences of the
button and are detailed below.
There is a difference between mag-
netic north and true north. The com-
pass in the mirror can compensate
for this difference when it knows the
Magnetic Zone in which it is operat-
ing. This is set either by the dealer or
by the user. The operating Zone
Numbers for North America are
shown in the figure on the following
section.
AN HMA 4A.QXP 3/5/2015 3:18 PM Page 62
Page 157 of 763
465
Features of your vehicle
Programming HomeLink®
✽
✽NOTICE
• When programming a garage
door opener, it is advised to park
the vehicle outside of the garage.
• It is recommended that a new bat- tery be placed in the hand-held
transmitter of the device being pro-
grammed to HomeLink
®for quick-
er training and accurate transmis-
sion of the radio-frequency signal.
• Some vehicles may require the ignition switch to be turned to the
second (or "accessories") position
for programming and/or opera-
tion of HomeLink.
• In the event that there are still pro- gramming difficulties or questions
after following the programming
steps listed below, contact
HomeLink
®at: www.homelink.com
or 1-800-355-3515.
Standard programming
To train most devices, follow these
instructions:
1. For first-time programming, press
and hold the two outside buttons,
HomeLink
®Channel 1 and Channel
3 Buttons, until the indicator light
begins to flash (after 20 seconds).
Release both buttons. Do not hold
the buttons for longer than 30 sec-
onds.
2. Position the end of your hand-held transmitter 1-3 inches (2-8 cm)
away from the HomeLink
®buttons
while keeping the indicator light in
view.
3. Simultaneously press and hold both the HomeLink
®and hand-
held transmitter button. DO NOT
release the buttons until step 4
has been completed.
4. While continuing to hold the but- tons the red Indicator Status LED
will flash slowly and then rapidly
after HomeLink
®successfully
trains to the frequency signal from
the hand-held transmitter. Release
both buttons. 5. Press and hold the just-trained
HomeLink
®button and observe
the red Status Indicator LED. If the
indicator light stays on constantly,
programming is complete and
your device should activate when
the HomeLink
®button is pressed
and released.
6. To program the remaining two HomeLink
®buttons, follow steps 2
through 5.
AN HMA 4A.QXP 3/5/2015 3:18 PM Page 65
Page 162 of 763
Features of your vehicle
70
4
Compass function
The Compass can be turned ON and
OFF and will remember the last state
when the ignition is cycled. To turn
the display feature ON/OFF:
1. Press and release the button
within 1 second to turn the display
feature OFF.
2. Press and release the button again within 1 second to turn the
display back ON.
Additional options can be set with
press and hold sequences of the
button and are detailed below.
There is a difference between mag-
netic north and true north. The com-
pass in the mirror can compensate
for this difference when it knows the
Magnetic Zone in which it is operat-
ing. This is set either by the dealer or
by the user. The operating Zone
Numbers for North America are
shown in the figure on the following
section.
B520C05NF
AN HMA 4A.QXP 3/5/2015 3:18 PM Page 70
Page 164 of 763
Features of your vehicle
72
4
Retain the original transmitter of the
RF device you are programming for
use in other vehicles as well as for
future HomeLink
®programming. It is
also suggested that upon the sale of
the vehicle, the programmed
HomeLink
®buttons be erased for
security purposes. Programming HomeLink
®
✽ ✽
NOTICE
• When programming a garage
door opener, it is advised to park
the vehicle outside of the garage.
• It is recommended that a new bat- tery be placed in the hand-held
transmitter of the device being pro-
grammed to HomeLink
®for quick-
er training and accurate transmis-
sion of the radio-frequency signal.
• Some vehicles may require the ignition switch to be turned to the
second (or "accessories") position
for programming and/or opera-
tion of HomeLink.
• In the event that there are still pro- gramming difficulties or questions
after following the programming
steps listed below, contact
HomeLink
®at: www.homelink.com
or 1-800-355-3515.
WARNING
Before programming HomeLink®
to a garage door opener or gate
operator, make sure that people
and objects are out of the way of
the device to prevent potential
harm or damage. Do not use
HomeLink
®with any garage
door opener that lacks the safe-
ty stop and reverse features
required by U.S. federal safety
standards (this includes any
garage door opener model man-
ufactured before April 1, 1982).
A garage door that cannot
detect an object - signaling the
door to stop and reverse - does
not meet current U.S. federal
safety standards. Using a
garage door opener without
these features increases the
risk of serious injury or death.
AN HMA 4A.QXP 3/5/2015 3:18 PM Page 72