2016 Hyundai Santa Fe Sport electrical
[x] Cancel search: electricalPage 536 of 763
Driving your vehicle
65
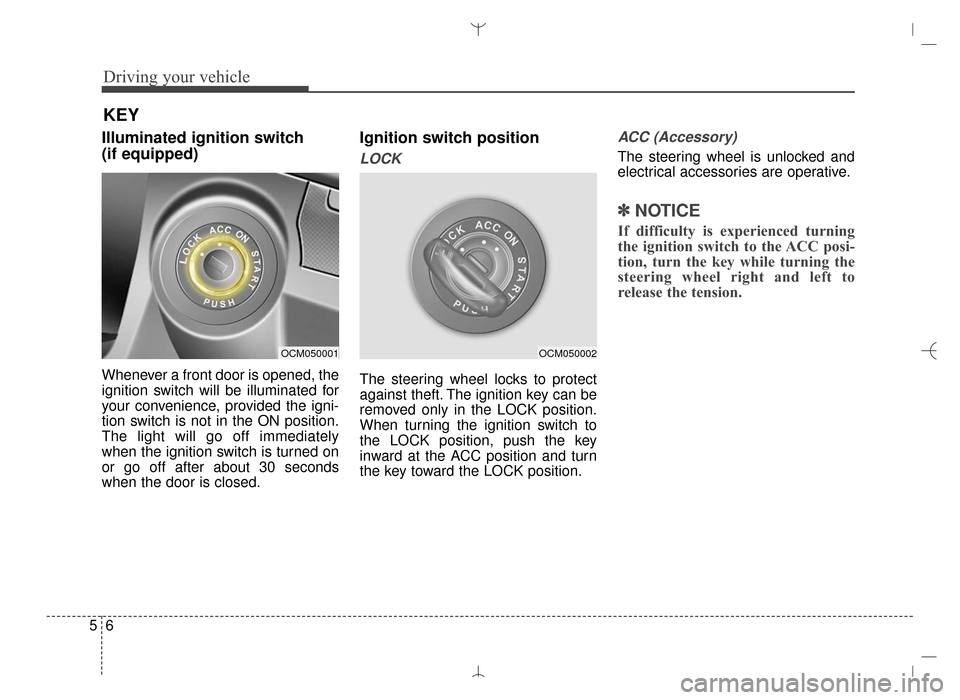
Illuminated ignition switch
(if equipped)
Whenever a front door is opened, the
ignition switch will be illuminated for
your convenience, provided the igni-
tion switch is not in the ON position.
The light will go off immediately
when the ignition switch is turned on
or go off after about 30 seconds
when the door is closed.
Ignition switch position
LOCK
The steering wheel locks to protect
against theft. The ignition key can be
removed only in the LOCK position.
When turning the ignition switch to
the LOCK position, push the key
inward at the ACC position and turn
the key toward the LOCK position.
ACC (Accessory)
The steering wheel is unlocked and
electrical accessories are operative.
✽ ✽NOTICE
If difficulty is experienced turning
the ignition switch to the ACC posi-
tion, turn the key while turning the
steering wheel right and left to
release the tension.
OCM050001OCM050002
KEY
AN HMA 5.QXP 2015-02-03 ¿ ¨˜ 1:20 Page 6
Page 540 of 763
Driving your vehicle
10
5
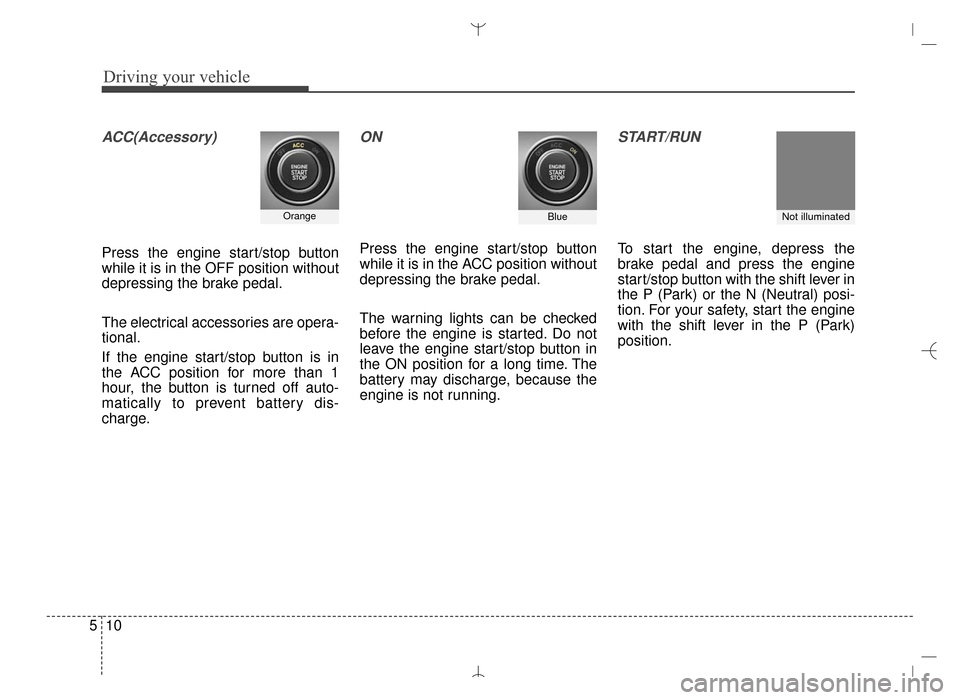
ACC(Accessory)
Press the engine start/stop button
while it is in the OFF position without
depressing the brake pedal.
The electrical accessories are opera-
tional.
If the engine start/stop button is in
the ACC position for more than 1
hour, the button is turned off auto-
matically to prevent battery dis-
charge.
ON
Press the engine start/stop button
while it is in the ACC position without
depressing the brake pedal.
The warning lights can be checked
before the engine is started. Do not
leave the engine start/stop button in
the ON position for a long time. The
battery may discharge, because the
engine is not running.
START/RUN
To start the engine, depress the
brake pedal and press the engine
start/stop button with the shift lever in
the P (Park) or the N (Neutral) posi-
tion. For your safety, start the engine
with the shift lever in the P (Park)
position.
Not illuminated OrangeBlue
AN HMA 5.QXP 2015-02-03 ¿ ¨˜ 1:20 Page 10
Page 603 of 763
573
Driving your vehicle
Driving with a trailer
Towing a trailer requires a certain
amount of experience. Before setting
out for the open road, you must get to
know your trailer. Acquaint yourself
with the feel of handling and braking
with the added weight of the trailer.
And always keep in mind that the
vehicle you are driving is now a good
deal longer and not nearly so respon-
sive as your vehicle is by itself.
Before you start, check the trailer
hitch and platform, safety chains,
electrical connector(s), lights, tires
and mirror adjustment. If the trailer
has electric brakes, start your vehicle
and trailer moving and then apply the
trailer brake controller by hand to be
sure the brakes are working. This lets
you check your electrical connection
at the same time.
During your trip, check occasionally
to be sure that the load is secure,
and that the lights and any trailer
brakes are still working.
Following distance
Stay at least twice as far behind the
vehicle ahead as you would when
driving your vehicle without a trailer.
This can help you avoid situations
that require heavy braking and sud-
den turns.
Passing
You’ll need more passing distance
up ahead when you’re towing a trail-
er. And, because of the increased
vehicle length, you’ll need to go
much farther beyond the passed
vehicle before you can return to your
lane. Due to the added load to the
engine when going uphill the vehicle
may also take longer to pass than it
would on flat ground.
Backing up
Hold the bottom of the steering wheel
with one hand. Then, to move the trail-
er to the left, just move your hand to
the left. To move the trailer to the right,
move your hand to the right. Always
back up slowly and, if possible, have
someone guide you.
Making turns
When you’re turning with a trailer,
make wider turns than normal. Do
this so your trailer won’t strike soft
shoulders, curbs, road signs, trees,
or other objects near the edge of the
road. Avoid jerky or sudden maneu-
vers. Signal well in advance before
turning or lane changes.
AN HMA 5.QXP 2015-02-03 ¿ ¨˜ 1:21 Page 73
Page 620 of 763
65
What to do in an emergency
EMERGENCY STARTING
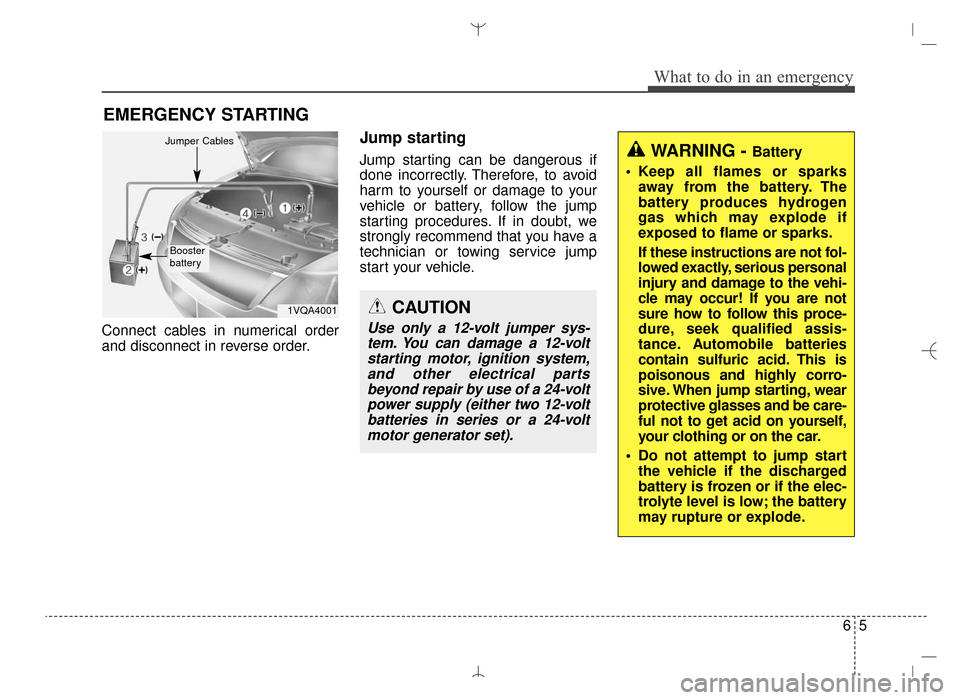
Connect cables in numerical order
and disconnect in reverse order.
Jump starting
Jump starting can be dangerous if
done incorrectly. Therefore, to avoid
harm to yourself or damage to your
vehicle or battery, follow the jump
starting procedures. If in doubt, we
strongly recommend that you have a
technician or towing service jump
start your vehicle.
CAUTION
Use only a 12-volt jumper sys-tem. You can damage a 12-voltstarting motor, ignition system,and other electrical partsbeyond repair by use of a 24-voltpower supply (either two 12-voltbatteries in series or a 24-voltmotor generator set).
WARNING - Battery
• Keep all flames or sparks away from the battery. The
battery produces hydrogen
gas which may explode if
exposed to flame or sparks.
If these instructions are not fol-
lowed exactly, serious personal
injury and damage to the vehi-
cle may occur! If you are not
sure how to follow this proce-
dure, seek qualified assis-
tance. Automobile batteries
contain sulfuric acid. This is
poisonous and highly corro-
sive. When jump starting, wear
protective glasses and be care-
ful not to get acid on yourself,
your clothing or on the car.
Do not attempt to jump start the vehicle if the discharged
battery is frozen or if the elec-
trolyte level is low; the battery
may rupture or explode.
1VQA4001
Jumper Cables
Booster
battery
AN HMA 6.QXP 2015-02-03 ¿ ¨˜ 1:36 Page 5
Page 621 of 763
What to do in an emergency
66
Jump starting procedure
✽
✽NOTICE
If the battery is discharged, the
engine can be started using a battery
of another vehicle and two jumper
cables. Only use jumper cables with
fully insulated clamp handles.
To prevent personal injury or dam-
age to both vehicles, adhere strictly
to the following procedure.
1.Make sure the booster battery is
12-volt and that its negative termi-
nal is grounded.
2.If the booster battery is in another vehicle, do not allow the vehicles to
touch.
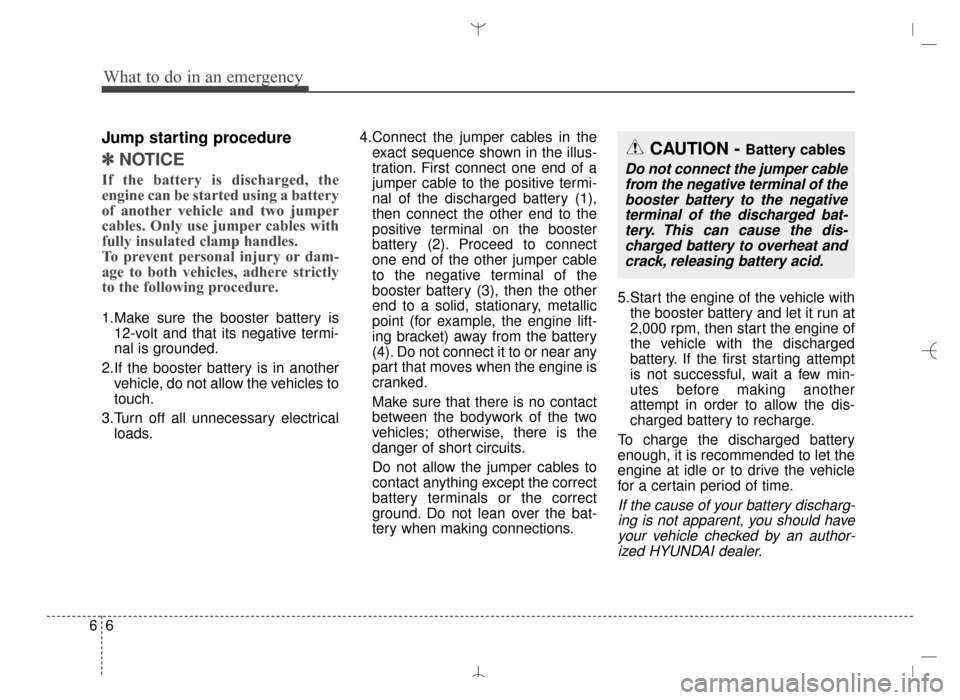
3.Turn off all unnecessary electrical loads. 4.Connect the jumper cables in the
exact sequence shown in the illus-
tration. First connect one end of a
jumper cable to the positive termi-
nal of the discharged battery (1),
then connect the other end to the
positive terminal on the booster
battery (2). Proceed to connect
one end of the other jumper cable
to the negative terminal of the
booster battery (3), then the other
end to a solid, stationary, metallic
point (for example, the engine lift-
ing bracket) away from the battery
(4). Do not connect it to or near any
part that moves when the engine is
cranked.
Make sure that there is no contact
between the bodywork of the two
vehicles; otherwise, there is the
danger of short circuits.
Do not allow the jumper cables to
contact anything except the correct
battery terminals or the correct
ground. Do not lean over the bat-
tery when making connections. 5.Start the engine of the vehicle with
the booster battery and let it run at
2,000 rpm, then start the engine of
the vehicle with the discharged
battery. If the first starting attempt
is not successful, wait a few min-
utes before making another
attempt in order to allow the dis-
charged battery to recharge.
To charge the discharged battery
enough, it is recommended to let the
engine at idle or to drive the vehicle
for a certain period of time.
If the cause of your battery discharg- ing is not apparent, you should haveyour vehicle checked by an author-ized HYUNDAI dealer.
CAUTION - Battery cables
Do not connect the jumper cablefrom the negative terminal of thebooster battery to the negativeterminal of the discharged bat-tery. This can cause the dis-charged battery to overheat andcrack, releasing battery acid.
AN HMA 6.QXP 2015-02-03 ¿ ¨˜ 1:36 Page 6
Page 690 of 763
Maintenance
42
7
Battery recharging
Your vehicle has a maintenance-free,
calcium-based battery.
If the battery becomes discharged
in a short time (because, for exam-
ple, the headlights or interior lights
were left on while the vehicle was
not in use), recharge it by slow
charging (trickle) for 10 hours.
If the battery gradually discharges because of high electric load while
the vehicle is being used, recharge
it at 20-30A for two hours.(Continued)
When lifting a plastic-casedbattery, excessive pressure
on the case may cause battery
acid to leak, resulting in per-
sonal injury. Lift with a battery
carrier or with your hands on
opposite corners.
Never attempt to recharge the battery when the battery
cables are connected.
The electrical ignition system works with high voltage.
Never touch these compo-
nents with the engine running
or the ignition switched on.
Failure to follow the above
warnings can result in serious
bodily injury or death.CALIFORNIA PROPO-
SITION 65 WARNING
Battery posts, terminals, and
related accessories contain
lead and lead compounds,
chemicals known to the State of
California to cause cancer, birth
defects, and reproductive harm.
Batteries also contain other
chemicals known to the State of
California to cause cancer.
Wash hands after handling.
CAUTION
Always charge the battery fully to prevent battery casedamage in low temperaturearea.
If you connect unauthorized electronic devices to the bat-tery, the battery may dis-charge. Never use unautho-rized devices.
AN HMA 7.QXP 3/5/2015 3:25 PM Page 42
Page 707 of 763
759
Maintenance
FUSES
A vehicle’s electrical system is pro-
tected from electrical overload dam-
age by fuses.This vehicle has 2 fuse panels, one
located in the driver’s side panel bol-
ster, the other in the engine compart-
ment near the battery.
If any of your vehicle’s lights, acces-
sories, or controls do not work, check
the appropriate circuit fuse. If a fuse
has blown, the element inside the
fuse will be melted.
If the electrical system does not
work, first check the driver’s side
fuse panel.
Always replace a blown fuse with
one of the same rating.
Before replacing an open fuse, dis-
connect the negative battery cable.
If the replacement fuse blows, this
indicates an electrical problem. Avoid
using the system involved and imme-
diately consult an authorized
HYUNDAI dealer.
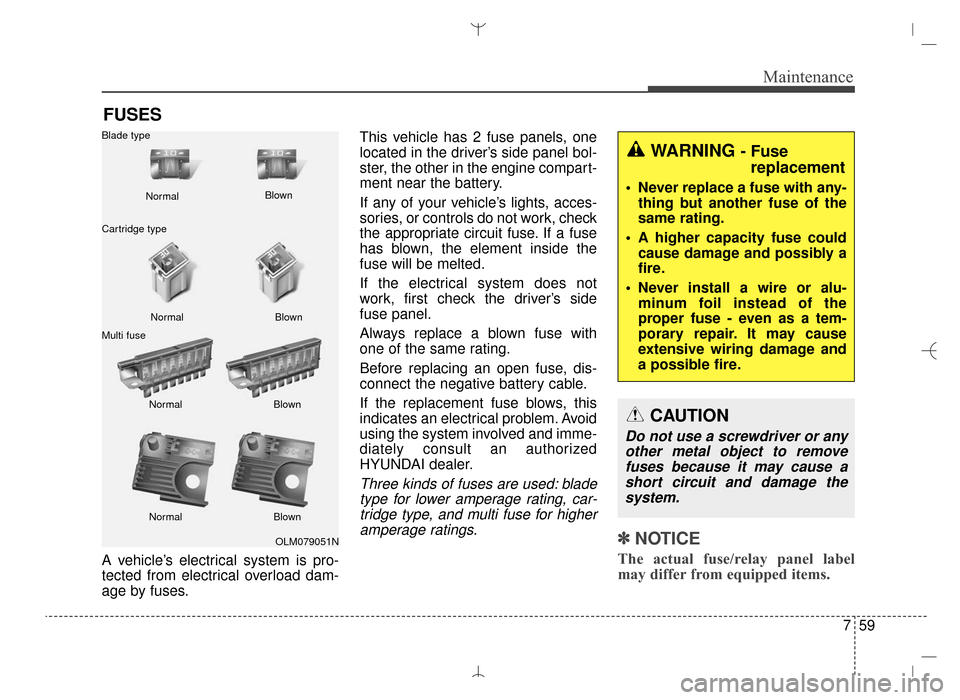
Three kinds of fuses are used: blade
type for lower amperage rating, car-tridge type, and multi fuse for higheramperage ratings.
✽ ✽ NOTICE
The actual fuse/relay panel label
may differ from equipped items.
OLM079051N
Normal
Normal
Blade type
Cartridge type
Multi fuse Blown
Blown
Normal Blown
Normal Blown
WARNING - Fuse
replacement
Never replace a fuse with any-
thing but another fuse of the
same rating.
A higher capacity fuse could cause damage and possibly a
fire.
Never install a wire or alu- minum foil instead of the
proper fuse - even as a tem-
porary repair. It may cause
extensive wiring damage and
a possible fire.
CAUTION
Do not use a screwdriver or anyother metal object to removefuses because it may cause ashort circuit and damage thesystem.
AN HMA 7.QXP 3/5/2015 3:25 PM Page 59
Page 709 of 763
761
Maintenance
If the headlights or other electrical
components do not work and the
fuses are OK, check the fuse block in
the engine compartment. If a fuse is
blown, it must be replaced.Fuse switch
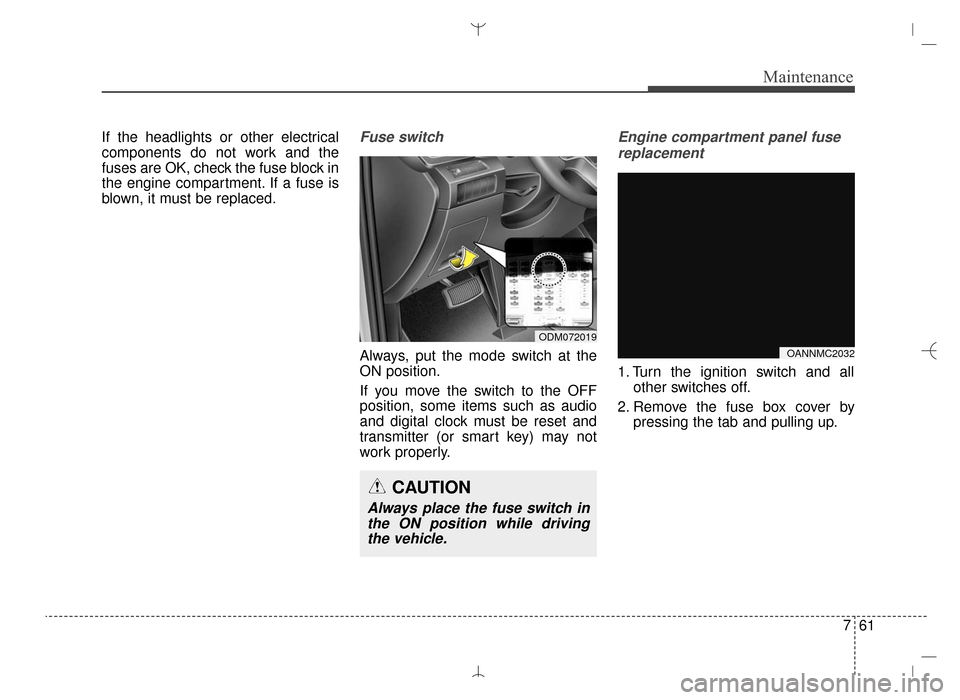
Always, put the mode switch at the
ON position.
If you move the switch to the OFF
position, some items such as audio
and digital clock must be reset and
transmitter (or smart key) may not
work properly.
Engine compartment panel fusereplacement
1. Turn the ignition switch and all other switches off.
2. Remove the fuse box cover by pressing the tab and pulling up.
ODM072019
CAUTION
Always place the fuse switch inthe ON position while drivingthe vehicle.
OANNMC2032
AN HMA 7.QXP 3/5/2015 3:25 PM Page 61