Page 156 of 759

459
Features of your vehicle
MIRRORS
Inside rearview mirror
Adjust the rearview mirror so that the
center view through the rear window
is seen. Make this adjustment before
you start driving.
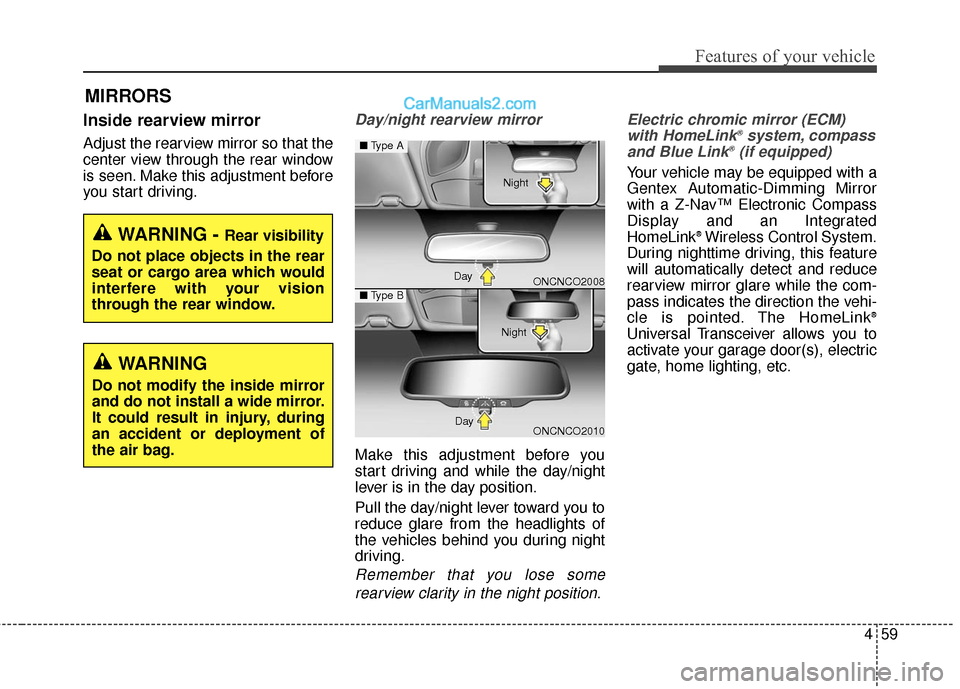
Day/night rearview mirror
Make this adjustment before you
start driving and while the day/night
lever is in the day position.
Pull the day/night lever toward you to
reduce glare from the headlights of
the vehicles behind you during night
driving.
Remember that you lose somerearview clarity in the night position. Electric chromic mirror (ECM)
with HomeLink
®system, compass
and Blue Link®(if equipped)
Your vehicle may be equipped with a
Gentex Automatic-Dimming Mirror
with a Z-Nav™ Electronic Compass
Display and an Integrated
HomeLink
®Wireless Control System.
During nighttime driving, this feature
will automatically detect and reduce
rearview mirror glare while the com-
pass indicates the direction the vehi-
cle is pointed. The HomeLink
®
Universal Transceiver allows you to
activate your garage door(s), electric
gate, home lighting, etc.
WARNING - Rear visibility
Do not place objects in the rear
seat or cargo area which would
interfere with your vision
through the rear window.
WARNING
Do not modify the inside mirror
and do not install a wide mirror.
It could result in injury, during
an accident or deployment of
the air bag.
ONCNCO2008
ONCNCO2010
■ Type A
■Type B
Day Night
Day Night
Page 168 of 759
471
Features of your vehicle
INSTRUMENT CLUSTER
1. Tachometer
2. Speedometer
3. Engine coolant temperature gauge
4. Fuel gauge
5. LCD display
6. Warning and indicator lights (if equipped)
7. Turn signal indicator lights
ODMNMM2054/ODMNMM2055
■
■Type A
❈The actual cluster in the vehicle may differ
from the illustration.
For more details, refer to the "Gauges" in
this chapter.
■
■ Type B
Page 171 of 759

Features of your vehicle
74
4
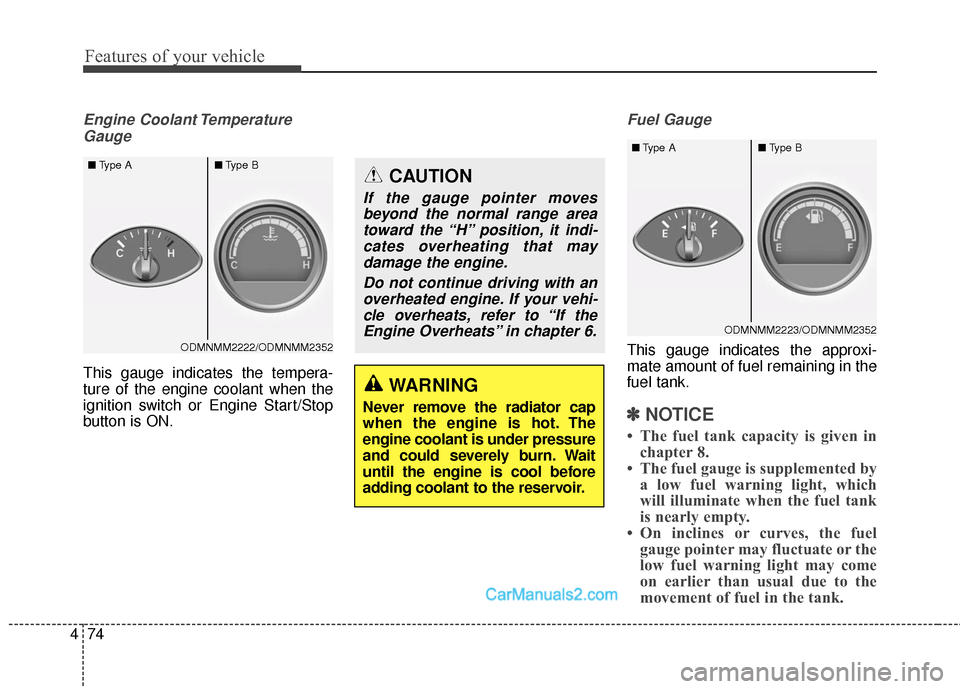
Engine Coolant Temperature
Gauge
This gauge indicates the tempera-
ture of the engine coolant when the
ignition switch or Engine Start/Stop
button is ON.
Fuel Gauge
This gauge indicates the approxi-
mate amount of fuel remaining in the
fuel tank.
✽ ✽ NOTICE
• The fuel tank capacity is given in
chapter 8.
• The fuel gauge is supplemented by a low fuel warning light, which
will illuminate when the fuel tank
is nearly empty.
• On inclines or curves, the fuel gauge pointer may fluctuate or the
low fuel warning light may come
on earlier than usual due to the
movement of fuel in the tank.
WARNING
Never remove the radiator cap
when the engine is hot. The
engine coolant is under pressure
and could severely burn. Wait
until the engine is cool before
adding coolant to the reservoir.
CAUTION
If the gauge pointer moves
beyond the normal range areatoward the “H” position, it indi-cates overheating that maydamage the engine.
Do not continue driving with anoverheated engine. If your vehi-cle overheats, refer to “If theEngine Overheats” in chapter 6.
ODMNMM2222/ODMNMM2352
■
Type A ■Type B
ODMNMM2223/ODMNMM2352
■
Type A ■Type B
Page 172 of 759

475
Features of your vehicle
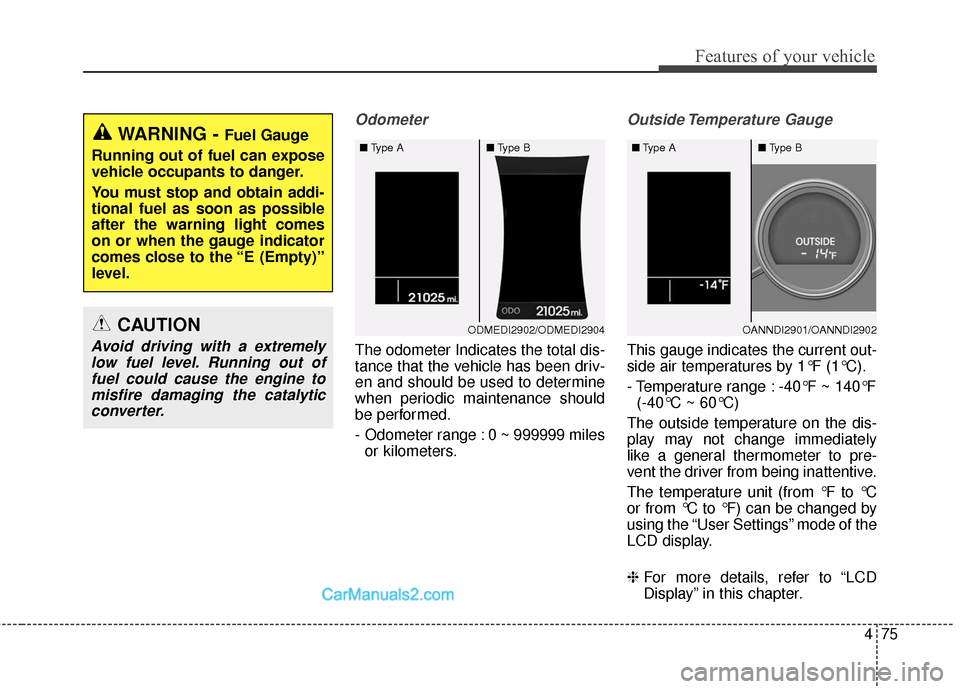
Odometer
The odometer Indicates the total dis-
tance that the vehicle has been driv-
en and should be used to determine
when periodic maintenance should
be performed.
- Odometer range : 0 ~ 999999 milesor kilometers.
Outside Temperature Gauge
This gauge indicates the current out-
side air temperatures by 1°F (1°C).
- Temperature range : -40°F ~ 140°F (-40°C ~ 60°C)
The outside temperature on the dis-
play may not change immediately
like a general thermometer to pre-
vent the driver from being inattentive.
The temperature unit (from °F to °C
or from °C to °F) can be changed by
using the “User Settings” mode of the
LCD display.
❈ For more details, refer to “LCD
Display” in this chapter.
WARNING - Fuel Gauge
Running out of fuel can expose
vehicle occupants to danger.
You must stop and obtain addi-
tional fuel as soon as possible
after the warning light comes
on or when the gauge indicator
comes close to the “E (Empty)”
level.
CAUTION
Avoid driving with a extremely low fuel level. Running out offuel could cause the engine tomisfire damaging the catalyticconverter.
ODMEDI2902/ODMEDI2904
■
Type A ■Type BOANNDI2901/OANNDI2902
■
Type A ■Type B
Page 177 of 759

Features of your vehicle
80
4
Two Press Unlock (if equipped)
Off (not checked) :
The two press unlock function will
be deactivated. Therefore, all doors
will unlock if the door is unlocked.
On (checked) : The driver’s door will unlock if the
door is unlocked. When the door is
unlocked again within 4 seconds,
all doors will unlock.
Power Liftgate (Power Tailgate)
(if equipped)
If this item is checked, the power lift-
gate (power tailgate) system function
will be activated.
Smart Liftgate (Smart Tailgate)
(if equipped)
If this item is checked, the Smart
Liftgate (Smart Tailgate) system func-
tion will be activated.
For more details, refer to "Liftgate
(Tailgate)" in this chapter. Horn Feedback (if equipped)
Off (not checked) :
The Horn feedback operation will
be deactivated.
On (checked) : After locking the door by pressing
the lock button on the transmitter, if
you press the lock button again
within 4 seconds, the warning
sound will operate once to indicate
that all doors are locked.Lamp
Head Lamp Delay (if equipped)
If this item is checked, the headlamp
delay and headlamp welcome func-
tion will be activated.
Welcome Light (if equipped)
If this item is checked, the welcome
light function of the puddle lamp will
be activated.
Auto Triple Turn
(One-touch triple turn signal)
(if equipped)
If this item is checked, the lane
change signals will blink 3 times when
the turn signal lever is moved slightly.
One Touch Turn Signal (if equipped)
Off:
The one touch turn signal function
will be deactivated.
3, 5, 7 Flashing : The lane change signals will blink
3, 5, or 7 times when the turn sig-
nal lever is moved slightly.
For more details, refer to ''Light'' in
this chapter.
Page 182 of 759
485
Features of your vehicle
Key not detected (for smart key system)
This warning message illuminates if the smart key is not detected
when you press the Engine
Start/Stop Button.
Press start button again
(for smart key system)
This warning message illuminates if you can not operate the Engine
Start/Stop Button when there is a
problem with the Engine Start/Stop
Button system.
It means that you could start the engine by pressing the Engine
Start/ Stop Button once more.
If the warning illuminates each time you press the Engine
Start/Stop Button, have your vehi-
cle inspected by an authorized
HYUNDAI dealer.
Press start button with smart key
(for smart key system)
This warning message illuminates if you press the Engine Start/Stop
Button while the warning message
“Key not detected” is illuminating.
At this time, the immobilizer indica- tor light blinks.
ODMEDI2010/ODMEDI2038
■
Type A
■Type BODMEDI2011/ODMEDI2039
■
Type A
■Type BODMEDI2012/ODMEDI2040
■
Type A
■Type B
Page 190 of 759
493
Features of your vehicle
Warning lights
✽
✽NOTICE - Warning lights
Make sure that all warning lights
are OFF after starting the engine. If
any light is still ON, this indicates a
situation that needs attention.
Air bag Warning Light
This warning light illuminates:
Once you set the ignition switch or
Engine Start/Stop Button to the ON
position.
- It illuminates for approximately 6seconds and then goes off.
When there is a malfunction with the SRS.
In this case, have your vehicle
inspected by an authorized
HYUNDAI dealer.
Seat Belt Warning Light
This warning light informs the driver
that the seat belt is not fastened.
For more details, refer to the “Seat
Belts” in chapter 3.
WARNING AND INDICATOR LIGHTS
Page 191 of 759

Features of your vehicle
94
4
Parking Brake & Brake
Fluid Warning Light
This warning light illuminates:
Once you set the ignition switch or Engine Start/Stop Button to the ON
position.
- It illuminates for approximately 3seconds
- It remains on if the parking brake is applied.
When the parking brake is applied.
When the brake fluid level in the reservoir is low.
- If the warning light illuminateswith the parking brake released, it
indicates the brake fluid level in
reservoir is low.
If the brake fluid level in the reservoir
is low:
1. Drive carefully to the nearest safe location and stop your vehicle.
2. With the engine stopped, check the brake fluid level immediately and add
fluid as required (For more details,
refer to “Brake Fluid” in chapter 7). Then check all brake components
for fluid leaks. If any leak on the
brake system is still found, the
warning light remains on, or the
brakes do not operate properly, do
not drive the vehicle.
In this case, have your vehicle
towed to an authorized HYUNDAI
dealer and inspected.
Dual-diagonal braking system
Your vehicle is equipped with dual-
diagonal braking systems. This
means you still have braking on two
wheels even if one of the dual sys-
tems should fail.
With only one of the dual systems
working, more than normal pedal
travel and greater pedal pressure are
required to stop the vehicle.
Also, the vehicle will not stop in as
short a distance with only a portion
of the brake system working.
If the brakes fail while you are driv-
ing, shift to a lower gear for addition-
al engine braking and stop the vehi-
cle as soon as it is safe to do so.
WARNING - Parking
Brake & Brake Fluid
Warning Light
Driving the vehicle with a warn-
ing light ON is dangerous. If the
Parking Brake & Brake Fluid
Warning Light illuminates with
the parking brake released, it
indicates that the brake fluid
level is low.
In this case, have your vehicle
inspected by an authorized
HYUNDAI dealer.