2016 Hyundai Santa Fe battery
[x] Cancel search: batteryPage 218 of 759
4121
Features of your vehicle
✽
✽NOTICE
When the lamp is turned on by
pressing the lens (1), the lamp does
not turn off even if the switch is in
the OFF position (3).
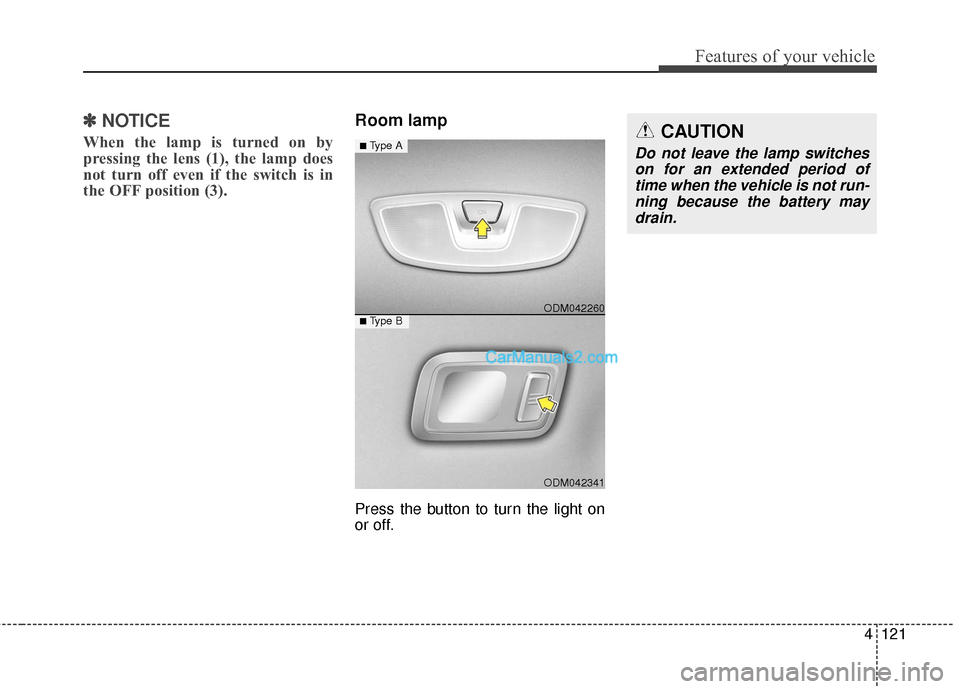
Room lamp
Press the button to turn the light on
or off.
ODM042341
■Type B ODM042260
■Type ACAUTION
Do not leave the lamp switches
on for an extended period oftime when the vehicle is not run-ning because the battery maydrain.
Page 237 of 759
Features of your vehicle
140
4
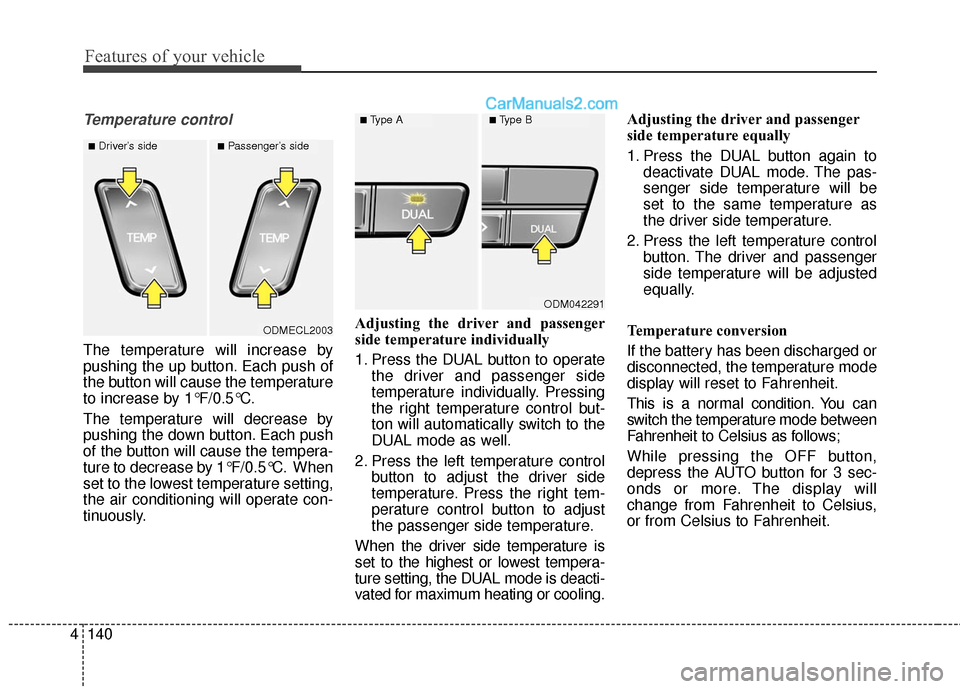
Temperature control
The temperature will increase by
pushing the up button. Each push of
the button will cause the temperature
to increase by 1°F/0.5°C.
The temperature will decrease by
pushing the down button. Each push
of the button will cause the tempera-
ture to decrease by 1°F/0.5°C. When
set to the lowest temperature setting,
the air conditioning will operate con-
tinuously. Adjusting the driver and passenger
side temperature individually
1. Press the DUAL button to operate
the driver and passenger side
temperature individually. Pressing
the right temperature control but-
ton will automatically switch to the
DUAL mode as well.
2. Press the left temperature control button to adjust the driver side
temperature. Press the right tem-
perature control button to adjust
the passenger side temperature.
When the driver side temperature is
set to the highest or lowest tempera-
ture setting, the DUAL mode is deacti-
vated for maximum heating or cooling. Adjusting the driver and passenger
side temperature equally
1. Press the DUAL button again to
deactivate DUAL mode. The pas-
senger side temperature will be
set to the same temperature as
the driver side temperature.
2. Press the left temperature control button. The driver and passenger
side temperature will be adjusted
equally.
Temperature conversion
If the battery has been discharged or
disconnected, the temperature mode
display will reset to Fahrenheit.
This is a normal condition. You can
switch the temperature mode between
Fahrenheit to Celsius as follows;
While pressing the OFF button,
depress the AUTO button for 3 sec-
onds or more. The display will
change from Fahrenheit to Celsius,
or from Celsius to Fahrenheit.
ODM042291
■Type A■Type B
ODMECL2003
■Driver’s side■Passenger’s side
Page 243 of 759

Features of your vehicle
146
4
Auto defogging system
(if equipped)
Auto defogging reduces the probabil-
ity of fogging up the inside of the
windshield by automatically sensing
the moisture of inside the windshield.
The auto defogging system operates
when the heater or air conditioning is
on.
This indicator illuminates
when the auto defogging
system senses the mois-
ture of inside the wind-
shield and operates. If more moisture is in the vehicle, the
automated steps operate as follows:
If auto defogging does not defog the
window at step 1, outside air position,
step 2, blowing air toward the wind-
shield occurs.
Step 1 : Outside air position
Step 2 : Blowing air toward the wind-
shield
Step 3 : Increasing air flow toward the windshield
Step 4 : Operating the air conditioning
Step 5 : Maximizing the air conditioning
The auto defogging system is auto-
matically activated when the condi-
tions are met. However, if you would
like to cancel the auto defogging sys-
tem, press the front defroster button
4 times within 2 seconds while press-
ing the AUTO button. The indicator of
the front defroster button will blink 3
times to notify you that the system is
cancelled. To use the auto defogging
system again, follow the procedures
mentioned above.
If the battery has been disconnected
or discharged, it resets to the auto
defogging status.
✽ ✽ NOTICE
When the air conditioning is turned
on and the outside air position is
selected by the auto defogging sys-
tem, if you try to turn off the air con-
ditioning and select the recirculated
air position, the indicator will blink
3 times and the air conditioning will
not be turned off and recirculated
air position will not be selected.
ONCNCO2038
CAUTION
Do not remove the sensor cover
located on the upper end of thedriver side windshield glass.Damage to system parts couldoccur and may not be coveredby your vehicle warranty.
Page 249 of 759
Features of your vehicle
152
4
To use the vanity mirror, pull down the
visor and slide the mirror cover (3).
Adjust the sunvisor extension (if
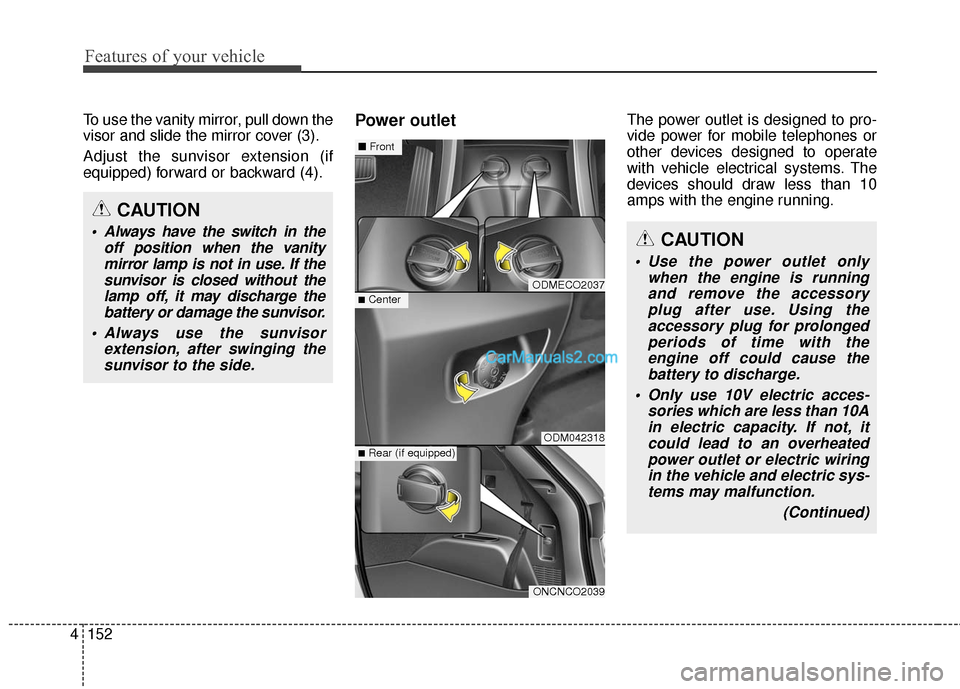
equipped) forward or backward (4).Power outletThe power outlet is designed to pro-
vide power for mobile telephones or
other devices designed to operate
with vehicle electrical systems. The
devices should draw less than 10
amps with the engine running.
CAUTION
Use the power outlet only
when the engine is runningand remove the accessoryplug after use. Using theaccessory plug for prolongedperiods of time with theengine off could cause thebattery to discharge.
Only use 10V electric acces- sories which are less than 10Ain electric capacity. If not, itcould lead to an overheatedpower outlet or electric wiringin the vehicle and electric sys-tems may malfunction.
(Continued)
CAUTION
Always have the switch in theoff position when the vanitymirror lamp is not in use. If thesunvisor is closed without thelamp off, it may discharge thebattery or damage the sunvisor.
Always use the sunvisor extension, after swinging thesunvisor to the side.
ODMECO2037
ODM042318
ONCNCO2039
■Center
■ Front
■Rear (if equipped)
Page 250 of 759
4153
Features of your vehicle
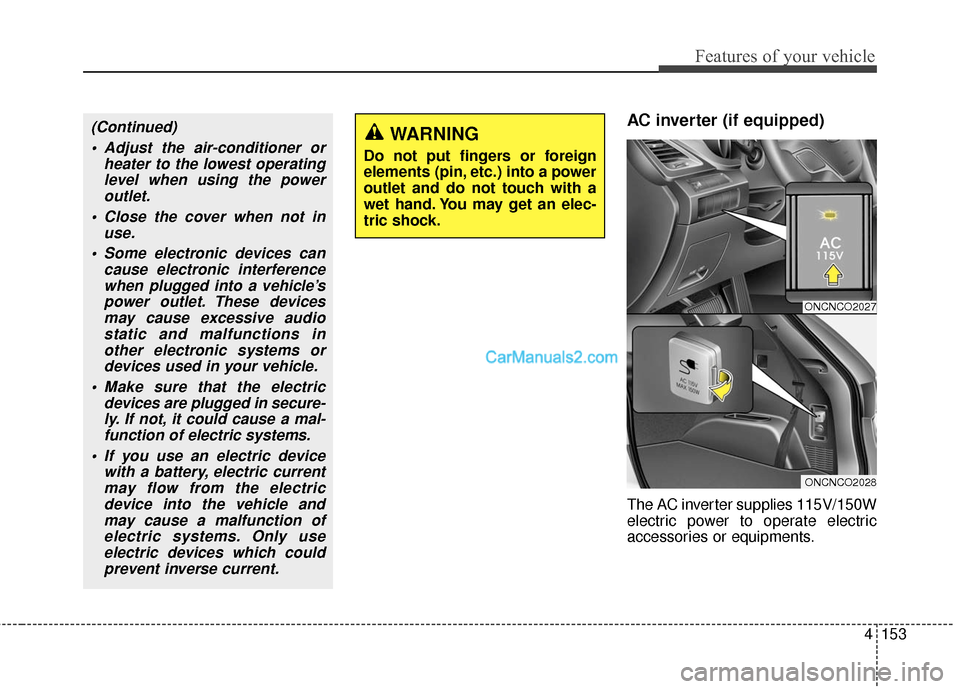
AC inverter (if equipped)
The AC inverter supplies 115V/150W
electric power to operate electric
accessories or equipments.
ONCNCO2027
ONCNCO2028
(Continued) Adjust the air-conditioner or heater to the lowest operatinglevel when using the poweroutlet.
Close the cover when not in use.
Some electronic devices can cause electronic interferencewhen plugged into a vehicle’spower outlet. These devicesmay cause excessive audiostatic and malfunctions inother electronic systems ordevices used in your vehicle.
Make sure that the electric devices are plugged in secure-ly. If not, it could cause a mal-function of electric systems.
If you use an electric device with a battery, electric currentmay flow from the electricdevice into the vehicle andmay cause a malfunction ofelectric systems. Only useelectric devices which couldprevent inverse current.WARNING
Do not put fingers or foreign
elements (pin, etc.) into a power
outlet and do not touch with a
wet hand. You may get an elec-
tric shock.
Page 251 of 759
Features of your vehicle
154
4
If you wish to use the AC inverter,press
the AC inverter button while the engine
is running. The light on the AC inverter
button will illuminate.
If you press the AC inverter button
again, the AC inverter will be deacti-
vated and the light on the AC invert-
er button will turn off.
✽ ✽
NOTICE
When turning on the AC inverter, the
indicator on the AC inverter button
is delayed while the system conducts
a self-check.
(Continued)
Some electronic accessories or equipments can cause elec-tronic interference. It maycause excessive audio noiseand malfunctions in otherelectronic systems or devicesin the vehicle.
Do not use broken electronic accessories or equipments,which may damage the ACinverter and electrical sys-tems of the vehicle.
Do not use two or more elec- tronic accessories or equip-ments at the same time. It maycause damage to the electricalsystems of the vehicle.
When the input voltage is under 11V, the outlet LED will blinkand the AC inverter will turn offautomatically. If the input volt-age goes up to normal, the ACinverter will turn on again.
Do not use extensions or power strips.
WARNING
To reduce a risk of serious or
fatal injuries:
Do not use a heated electricdevice such as a coffeepot,
toaster, heater, iron, etc.
Do not insert foreign objects into the outlet and do not
touch the outlet as you may
get shocked.
Do not let children touch the AC inverter.
CAUTION
To prevent the battery from being discharged, do not usethe AC inverter while theengine is not running.
When not using the AC invert- er,make sure to turn off the ACinverter (the indicator on thebutton does not illuminate) andclose the AC inverter cover.
After using an electronic accessory or equipment, pullthe plug out. Leaving theaccessory or equipmentplugged in for a long time maycause battery discharge.
Do not use an electronic acces- sory or equipment with thepower consumption greaterthan 150W(115V).
(Continued)
Page 264 of 759
4167
Features of your vehicle
(Continued) Turn on the car ignition before using this device. Do not oper-ate the audio system for longperiods of time with the ignitionturned off as such operationsmay lead to battery discharge.
Do not subject the device to severe shock or impact. Directpressure onto the front side ofthe monitor may cause dam-age to the LCD or touchscreen.
When cleaning the device, make sure to turn off thedevice and use a dry andsmooth cloth. Never usetough materials, chemicalcloths, or solvents (alcohol,benzene, thinners, etc.) assuch materials may damagethe device panel or causecolor/quality deterioration.
(Continued)CAUTION
Operating the device whiledriving could lead to accidentsdue to a lack of attention toexternal surroundings. Firstpark the vehicle before operat-ing the device.
Adjust the volume to levels that allow the driver to hear soundsfrom outside of the vehicle.Driving in a state where exter-nal sounds cannot be heardmay lead to accidents.
Pay attention to the volume set- ting when turning the deviceon. A sudden output of extremevolume upon turning thedevice on could lead to hearingimpairment. (Adjust the volumeto a suitable levels before turn-ing off the device.)
(Continued)
(Continued)
Please refrain from use if thescreen is blank or no sound
can be heard as these signs
may indicate product malfunc-
tion. Continued use in such
conditions could lead to acci-
dents(fires, electric shock) or
product malfunctions.
Do not touch the antenna dur- ing thunder or lightening as
such acts may lead to light-
ning induced electric shock.
Do not stop or park in park- ing-restricted areas to operate
the product. Such acts could
lead to traffic accidents.
Use the system with the vehi- cle ignition turned on.
Prolonged use with the igni-
tion turned off could result in
battery discharge.
Page 267 of 759
Features of your vehicle
170
4
✽
✽
NOTICE - USING THE
iPod®DEVICE
• Some iPod®models may not
support communication proto-
col and files may not properly
play.
Supported iPod
®models:
- iPhone®3GS/4
- iPod®touch 1st~4th generation
- iPod®nano 1st~6th generation
- iPod®classic
• The order of search or playback of songs in the iPod
®can be dif-
ferent from the order searched
in the audio system.
• If the iPod
®is disabled due to its
own malfunction, reset the
iPod
®. (Reset: Refer to iPod®
manual)
• An iPod®may not operate nor-
mally on low battery. (Continued)(Continued)
• Some iPod
®devices, such as the
iPhone®, can be connected
through the Bluetooth®Wireless
Technology interface. The
device must have audio
Bluetooth
®Wireless Technology
capability (such as for stereo
headphone Bluetooth
®Wireless
Technology).
The device can play, but it will
not be controlled by the audio
system.
• To use iPod
®features within the
audio, use the cable provided
upon purchasing an iPod
®
device.
• Skipping or improper operation may occur depending on the
characteristics of your iPod
®/
iPhone®device.
• If your iPhone®is connected to
both the Bluetooth®Wireless
Technology and USB, the sound
may not be properly played. In
your iPhone
®, select the Dock
connector or Bluetooth®
Wireless Technology to change
the sound output (source).
(Continued)(Continued)
• When connecting iPod
®with the
iPod®Power Cable, insert the
connector to the multimedia
socket completely. If not insert-
ed completely, communications
between iPod
®and audio may
be interrupted.
• When adjusting the sound effects of the iPod
®and the
audio system, the sound effects
of both devices will overlap and
might reduce or distort the
quality of the sound.
• Deactivate (turn off) the equal- izer function of an iPod
®when
adjusting the audio system’s
volume, and turn off the equal-
izer of the audio system when
using the equalizer of an iPod
®.
• When not using iPod®with car
audio, detach the iPod®cable
from iPod®. Otherwise, iPod®
may remain in accessory mode,
and may not work properly.