Page 210 of 759
4113
Features of your vehicle
Parking light position ( )
When the light switch is in the park-
ing light position, the tail, position,
license plate lights and the tail light
indicator will turn on.
Headlight position ( )
When the light switch is in the head-
light position, the head, tail, license
and instrument panel lights will turn
on.
✽ ✽NOTICE
The ignition switch must be in the
ON position to turn on the head-
lights.
ONCNCO2016
ONCNCO2017
■
Type A
■ Type B
ONCNCO2018
ONCNCO2019
■
Type A
■ Type B
Page 211 of 759
Features of your vehicle
114
4
Auto light position (if equipped)
When the light switch is in the AUTO
light position, the taillights and head-
lights will be turned ON or OFF auto-
matically depending on the amount
of light outside the vehicle.
High beam operation
To turn on the high beam headlights,
push the lever away from you. Pull it
back for low beams.
The high beam indicator will light
when the headlight high beams are
switched on.
To prevent the battery from being
discharged, do not leave the lights
on for a prolonged time while the
engine is not running.
ONCNCO2020
CAUTION
• Never place anything over
sensor (1) located on theinstrument panel. This willensure better auto-light sys-tem control.
Don’t clean the sensor using a window cleaner. The cleanermay leave a light film whichcould interfere with sensoroperation.
If your vehicle has window tint or other types of metallic coat-ing on the front windshield,the Auto light system may notwork properly.
ODMCCO2013
Page 212 of 759
4115
Features of your vehicle
To flash the headlights, pull the lever
towards you. It will return to the nor-
mal (low beam) position when
released. The headlight switch does
not need to be on to use this flashing
feature.
Turn signals and lane change
signals
The ignition switch must be on for the
turn signals to function. To turn on
the turn signals, move the lever up or
down (A). Green arrow indicators on
the instrument panel indicate which
turn signal is operating. They will
self-cancel after a turn is completed.
If the indicator continues to flash
after a turn, manually return the lever
to the OFF position.
WARNING
Do not use the high beams
when there are other vehicles.
Using high beam could obstruct
the other driver's vision.
ONCNCO2022
ONCNCO2023
Page 221 of 759

Features of your vehicle
124
4
✽
✽
NOTICE
If you want to defrost and defog the
front windshield, refer to
“Windshield defrosting and defog-
ging” in this section.
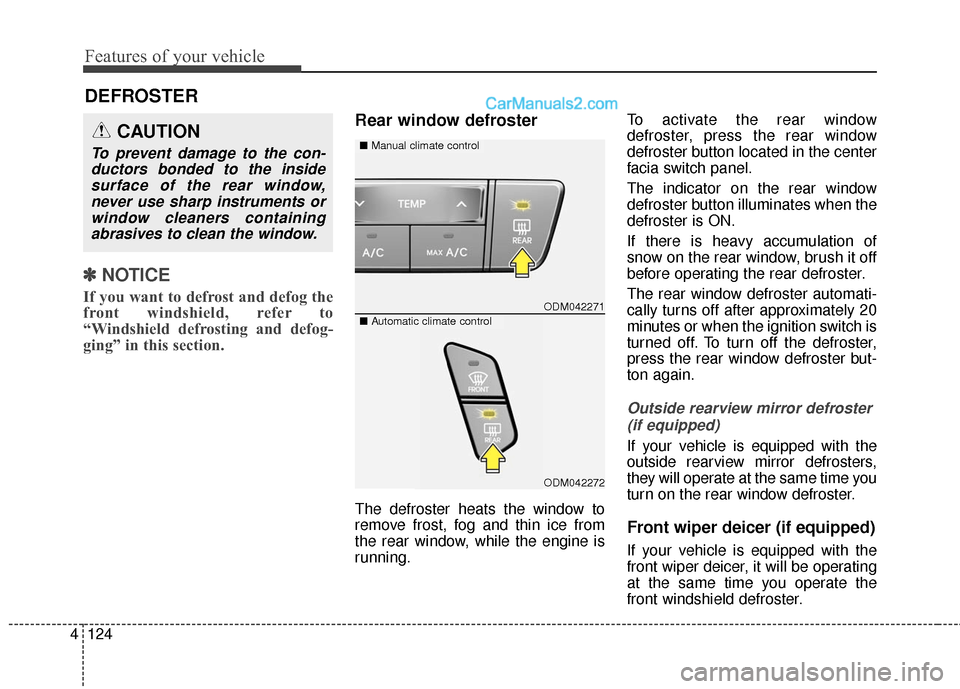
Rear window defroster
The defroster heats the window to
remove frost, fog and thin ice from
the rear window, while the engine is
running. To activate the rear window
defroster, press the rear window
defroster button located in the center
facia switch panel.
The indicator on the rear window
defroster button illuminates when the
defroster is ON.
If there is heavy accumulation of
snow on the rear window, brush it off
before operating the rear defroster.
The rear window defroster automati-
cally turns off after approximately 20
minutes or when the ignition switch is
turned off. To turn off the defroster,
press the rear window defroster but-
ton again.
Outside rearview mirror defroster
(if equipped)
If your vehicle is equipped with the
outside rearview mirror defrosters,
they will operate at the same time you
turn on the rear window defroster.
Front wiper deicer (if equipped)
If your vehicle is equipped with the
front wiper deicer, it will be operating
at the same time you operate the
front windshield defroster.
DEFROSTER
ODM042271
■ Manual climate controlCAUTION
To prevent damage to the con-
ductors bonded to the insidesurface of the rear window,never use sharp instruments orwindow cleaners containingabrasives to clean the window.
■ Automatic climate control
ODM042272
Page 223 of 759

Features of your vehicle
126
4
Heating and air conditioning
1. Start the engine.
2. Set the mode to the desired posi-
tion.
For improving the effectiveness of
heating and cooling;- Heating:
- Cooling:
3. Set the temperature control to the desired position.
4. Set the air intake control to the outside (fresh) air position. (if
equipped)
5. Set the fan speed control to the desired speed.
6. If air conditioning is desired, turn the air conditioning system (if
equipped) on.
ONCNCL2003
❈
❈
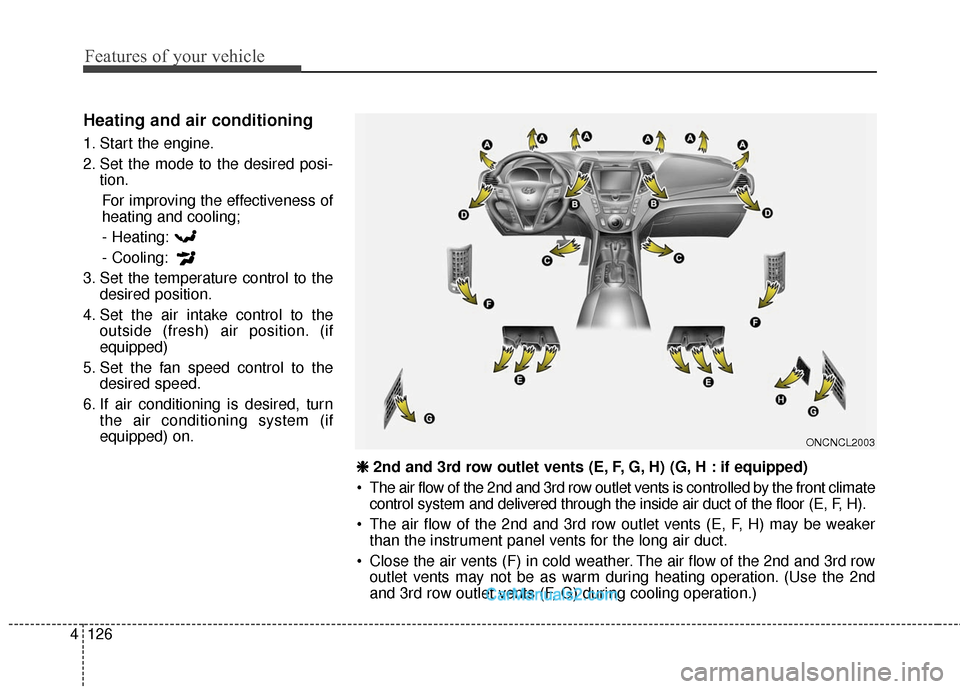
2nd and 3rd row outlet vents (E, F, G, H) (G, H : if equipped)
The air flow of the 2nd and 3rd row outlet vents is controlled by the front climate control system and delivered through the inside air duct of the floor (E, F, H).
The air flow of the 2nd and 3rd row outlet vents (E, F, H) may be weaker than the instrument panel vents for the long air duct.
Close the air vents (F) in cold weather. The air flow of the 2nd and 3rd row outlet vents may not be as warm during heating operation. (Use the 2nd
and 3rd row outlet vents (F, G) during cooling operation.)
Page 225 of 759
Features of your vehicle
128
4
Instrument panel vents
The outlet vents can be opened or
closed separately using the thumb-
wheel.
Also, you can adjust the direction of
air delivered from these vents using
the vent control lever as shown.
Temperature control
The temperature control switch
allows you to control the temperature
of the airflow in the vehicle.
To change the temperature:
(red) switch to
increase temperature.
(blue) switch to decrease temperature.
The temperature status will be dis-
played at the above switch panel as
an indicator.
Air intake control
This is used to select outside (fresh)
air position or recirculated air position.
To change the air intake control posi-
tion, push the control button.
ODM042280
ODM042279ONCNCL2004
ODM042281
■Type A
■ Type B
Page 235 of 759

Features of your vehicle
138
4
✽
✽
NOTICE
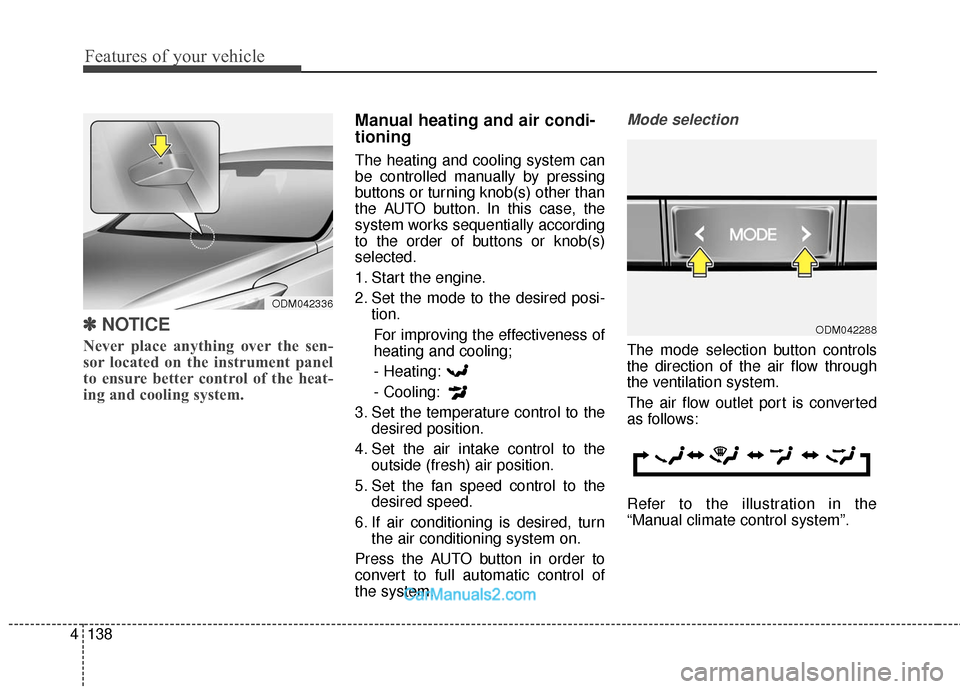
Never place anything over the sen-
sor located on the instrument panel
to ensure better control of the heat-
ing and cooling system.
Manual heating and air condi-
tioning
The heating and cooling system can
be controlled manually by pressing
buttons or turning knob(s) other than
the AUTO button. In this case, the
system works sequentially according
to the order of buttons or knob(s)
selected.
1. Start the engine.
2. Set the mode to the desired posi-
tion.
For improving the effectiveness of
heating and cooling;- Heating:
- Cooling:
3. Set the temperature control to the desired position.
4. Set the air intake control to the outside (fresh) air position.
5. Set the fan speed control to the desired speed.
6. If air conditioning is desired, turn the air conditioning system on.
Press the AUTO button in order to
convert to full automatic control of
the system.
Mode selection
The mode selection button controls
the direction of the air flow through
the ventilation system.
The air flow outlet port is converted
as follows:
Refer to the illustration in the
“Manual climate control system”.
ODM042288
ODM042336
Page 236 of 759
4139
Features of your vehicle
Face-Level
Air flow is directed toward the upper
body and face. Additionally, each
outlet can be controlled to direct the
air discharged from the outlet.
Bi-Level
Air flow is directed towards the face
and the floor.
Floor-Level
Most of the air flow is directed to the
floor, with a small amount of the air
being directed to the windshield and
side window defrosters.
Floor & Defrost
Most of the air flow is directed to the
floor and the windshield with a small
amount directed to the side window
defrosters. Defrost-Level
Most of the air flow is directed to the
windshield with a small amount of air
directed to the side window defrosters.
Instrument panel vents
The outlet vents can be opened or
closed separately using the thumb-
wheel.
Also, you can adjust the direction of
air delivered from these vents using
the vent control lever as shown.
ODM042279ODM042289