Page 36 of 759
Safety features of your vehicle
16
3
2. Slide the seat to the position you
desire.
3. Release the lever and make sure the seat is locked in place.
Adjust the seat before driving, and
make sure the seat is locked securely
by trying to move forward and back-
ward without using the lever. If the
seat moves, it is not locked properly.Seatback angle
To recline the seatback:
1. Pull up the seatback recline lever.
2. Hold the lever and adjust the seat- back of the seat to the position you
desire. 3. Release the lever and make sure
the seatback is locked in place. (The
lever MUST return to its original
position for the seatback to lock.)
OANNSA2022
ONCDSA3125
■7-seater
■6-seater
Page 38 of 759
Safety features of your vehicle
18
3
Removal and installation
- 2nd row
To remove the headrest :
1. Raise it as far as it can go then press the release button (1) while
pulling the headrest up (2).
To reinstall the headrest :
1. Put the headrest poles (3) into the holes while pressing the release
button (1).
2. Adjust it to the appropriate height.
Fold the headrest - 3rd row
To fold the headrest :
Pull the strap.OANNSA2025
WARNING
Make sure the headrest locks in position after adjusting it to
properly protect the occu-
pants.
After installing the headrest, make sure that it is installed
in the right direction.
A headrest installed reversely
could increase whiplash
injury during rear impact.
ONCESA2106
Page 41 of 759

321
Safety features of your vehicle
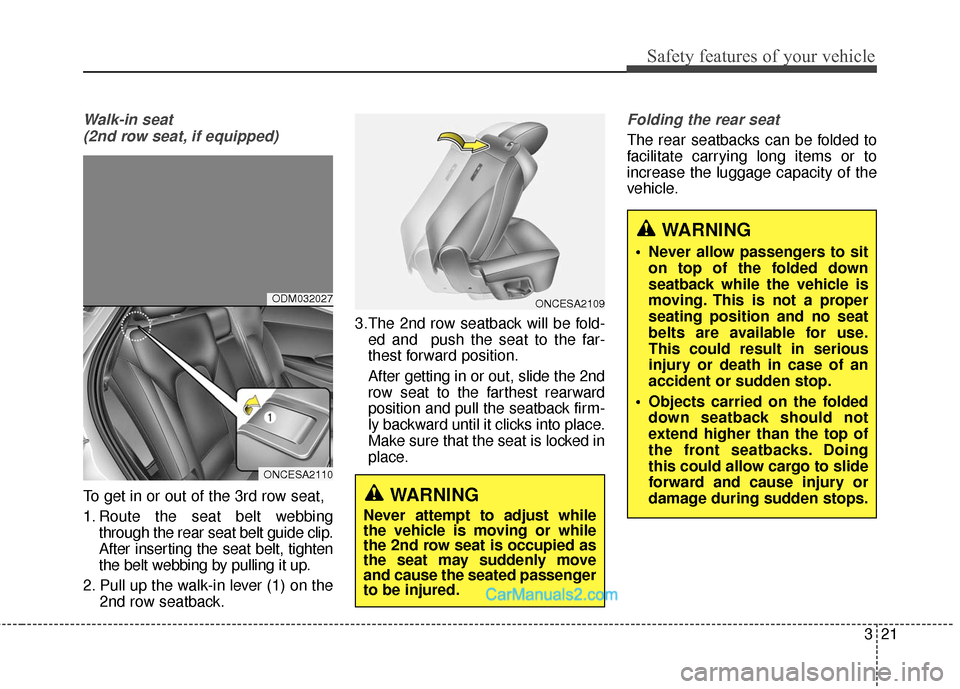
Walk-in seat (2nd row seat, if equipped)
To get in or out of the 3rd row seat,
1. Route the seat belt webbing through the rear seat belt guide clip.
After inserting the seat belt, tighten
the belt webbing by pulling it up.
2. Pull up the walk-in lever (1) on the 2nd row seatback. 3.The 2nd row seatback will be fold-
ed and push the seat to the far-
thest forward position.
After getting in or out, slide the 2nd
row seat to the farthest rearward
position and pull the seatback firm-
ly backward until it clicks into place.
Make sure that the seat is locked in
place.
Folding the rear seat
The rear seatbacks can be folded to
facilitate carrying long items or to
increase the luggage capacity of the
vehicle.
ODM032027
ONCESA2110
ONCESA2109
WARNING
Never attempt to adjust while
the vehicle is moving or while
the 2nd row seat is occupied as
the seat may suddenly move
and cause the seated passenger
to be injured.
WARNING
Never allow passengers to siton top of the folded down
seatback while the vehicle is
moving. This is not a proper
seating position and no seat
belts are available for use.
This could result in serious
injury or death in case of an
accident or sudden stop.
Objects carried on the folded down seatback should not
extend higher than the top of
the front seatbacks. Doing
this could allow cargo to slide
forward and cause injury or
damage during sudden stops.
Page 43 of 759
323
Safety features of your vehicle
4.Pull on the seatback folding lever,then fold the seat toward the front
of the vehicle. When you return the
seatback to its upright position,
always be sure it has locked into
position by pushing on the top of
the seatback.
5.To use the rear seat, lift and pull the seatback backward by pulling
on the folding lever (2nd row) or
strap (3rd row).
Pull the seatback firmly until it
clicks into place.
Make sure the seatback is locked
in place.
6.Return the rear seat belt to the proper position.■ 2nd row seat
■3rd row seat
OANNSA2026/ONCESA2100/OANNSA2027/ONCESA2102
Page 44 of 759
Safety features of your vehicle
24
3
2nd row seat folding
(from outside, if equipped)
Pull the 2nd row seat back folding
lever out.
The 2nd row seat back will be folded.
If you pull the left side lever (1) out,
left side seat back and center seat
back will be folded.
If you pull the right side lever (2) out,
right side seat back will be folded.
To fold down the rear center seat-back (for 2nd row seat)
1. Lower the rear headrests to the lowest position.
2. Push the center seatback folding lever up, then fold the seat toward
the front of the vehicle.
When you return the seatback to its
upright position, always be sure it
has locked into position by pushing
on the top of the seatback.
ONCDSA3116
WARNING - Rear seat folding
Do not fold the rear seats (2nd &
3rd row seats), if passengers,
pets or luggage are in the rear
seats.
It may cause injury or damage
to passengers, pets or luggage.
ONCESA2104
Page 49 of 759

329
Safety features of your vehicle
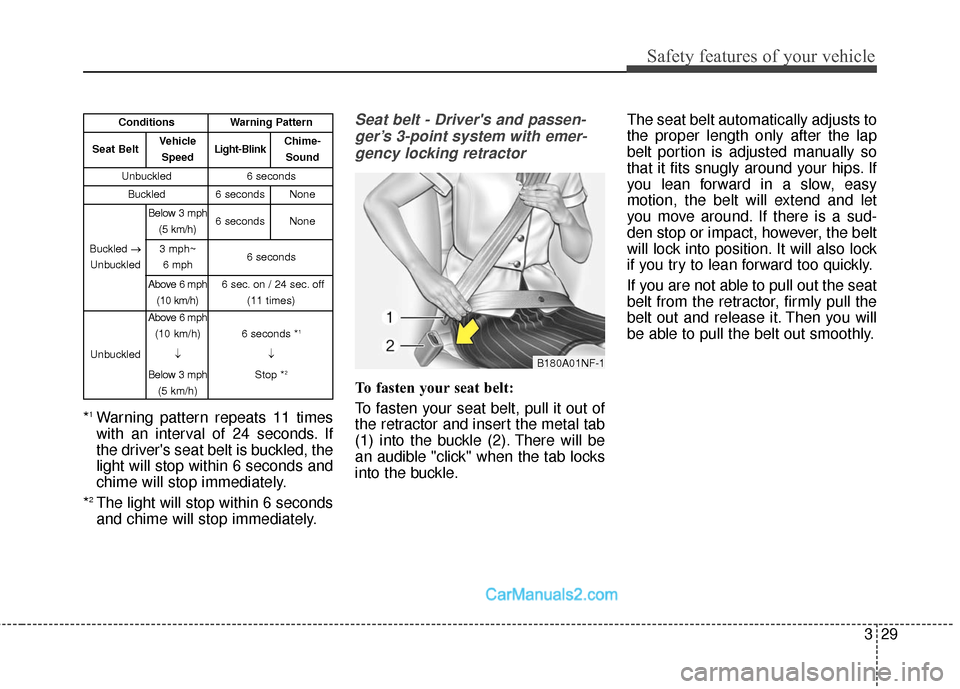
*1Warning pattern repeats 11 times
with an interval of 24 seconds. If
the driver's seat belt is buckled, the
light will stop within 6 seconds and
chime will stop immediately.
*
2The light will stop within 6 seconds
and chime will stop immediately.
Seat belt - Driver's and passen- ger’s 3-point system with emer-gency locking retractor
To fasten your seat belt:
To fasten your seat belt, pull it out of
the retractor and insert the metal tab
(1) into the buckle (2). There will be
an audible "click" when the tab locks
into the buckle. The seat belt automatically adjusts to
the proper length only after the lap
belt portion is adjusted manually so
that it fits snugly around your hips. If
you lean forward in a slow, easy
motion, the belt will extend and let
you move around. If there is a sud-
den stop or impact, however, the belt
will lock into position. It will also lock
if you try to lean forward too quickly.
If you are not able to pull out the seat
belt from the retractor, firmly pull the
belt out and release it. Then you will
be able to pull the belt out smoothly.
B180A01NF-1
ConditionsWarning Pattern
Seat BeltVehicle
SpeedLight-BlinkChime-Sound
Unbuckled6 seconds
Buckled6 secondsNone
Buckled →
Unbuckled
Below 3 mph (5 km/h)6 secondsNone
3 mph~6 mph6 seconds
Above 6 mph (10 km/h)6 sec. on / 24 sec. off (11 times)
Unbuckled
Above 6 mph(10 km/h)
↓
Below 3 mph (5 km/h)
6 seconds *1
↓
Stop *
2
Page 50 of 759

Safety features of your vehicle
30
3
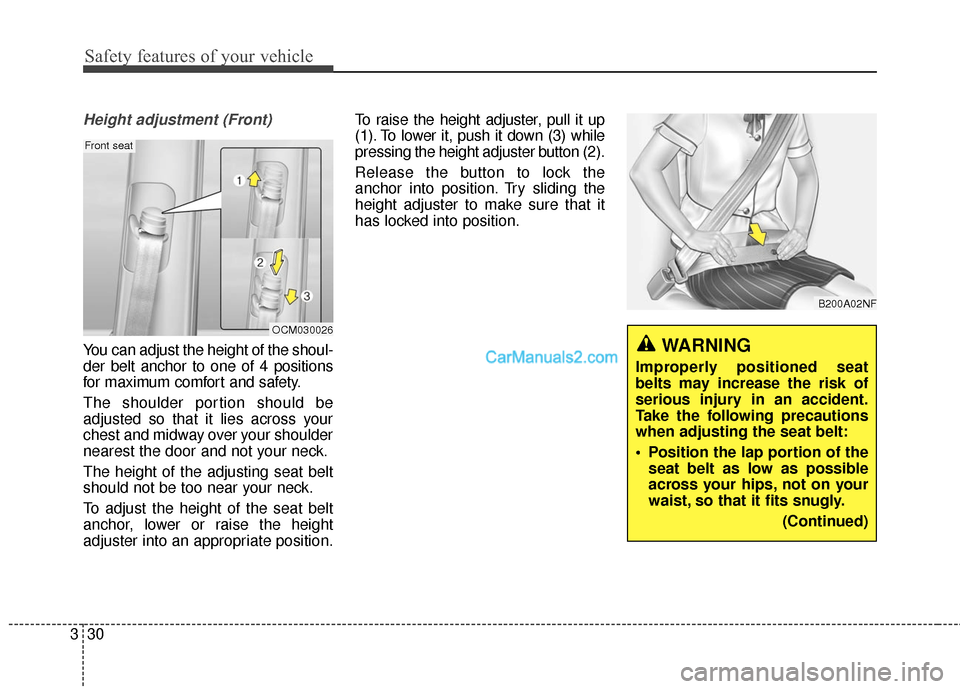
Height adjustment (Front)
You can adjust the height of the shoul-
der belt anchor to one of 4 positions
for maximum comfort and safety.
The shoulder portion should be
adjusted so that it lies across your
chest and midway over your shoulder
nearest the door and not your neck.
The height of the adjusting seat belt
should not be too near your neck.
To adjust the height of the seat belt
anchor, lower or raise the height
adjuster into an appropriate position. To raise the height adjuster, pull it up
(1). To lower it, push it down (3) while
pressing the height adjuster button (2).
Release the button to lock the
anchor into position. Try sliding the
height adjuster to make sure that it
has locked into position.
OCM030026
Front seat
B200A02NF
WARNING
Improperly positioned seat
belts may increase the risk of
serious injury in an accident.
Take the following precautions
when adjusting the seat belt:
Position the lap portion of the
seat belt as low as possible
across your hips, not on your
waist, so that it fits snugly.
(Continued)
Page 51 of 759

331
Safety features of your vehicle
Seat belts - Rear seat 3-point sys-tem with combination lockingretractor
To fasten your seat belt:
Combination retractor type seat belts
are installed in the rear seat positions
to help accommodate the installation
of child restraint systems. Although a
combination retractor is also installed
in the front passenger seat position, it
is strongly recommended that children
always be seated in the rear seat.
NEVER place any infant restraint sys-
tem in the front seat of the vehicle.
This type of seat belt combines the
features of both an emergency lock-
ing retractor seat belt and an auto-
matic locking retractor seat belt. To
fasten your seat belt, pull it out of the
retractor and insert the metal tab into
the buckle. There will be an audible
"click" when the tab locks into the
buckle. When not securing a child
restraint, the seat belt operates in the
same way as the driver's seat belt
(Emergency Locking Retractor Type).
It automatically adjusts to the proper
length only after the lap belt portion of
the seat belt is adjusted manually so
that it fits snugly around your hips. When the seat belt is fully extended
from the retractor to allow the instal-
lation of a child restraint system, the
seat belt operation changes to allow
the belt to retract, but not to extend
(Automatic Locking Retractor Type).
Refer to “Using a child restraint sys-
tem” in this section.
To convert from the automatic lock-
ing feature to the emergency locking
operation mode, allow the unbuckled
seat belt to fully retract.
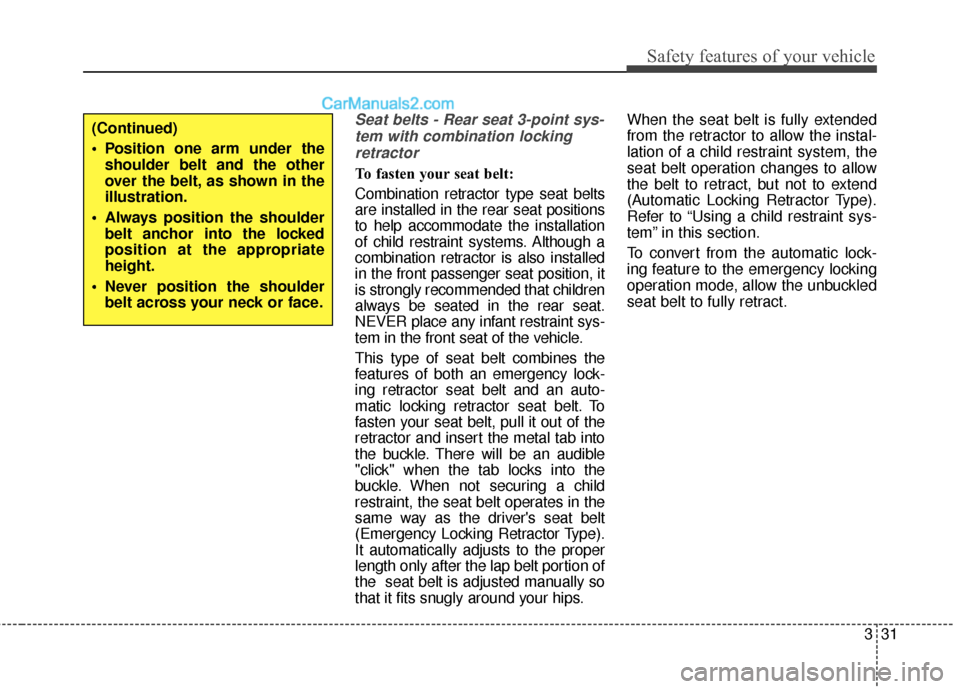
(Continued)
Position one arm under the
shoulder belt and the other
over the belt, as shown in the
illustration.
Always position the shoulder belt anchor into the locked
position at the appropriate
height.
Never position the shoulder belt across your neck or face.