2016 HYUNDAI I800 reset
[x] Cancel search: resetPage 184 of 419

Features of your vehicle
110 4
Power outlet (if equipped)
The power outlet is designed to provide
power for mobile telephones or other
devices designed to operate with vehicle
electrical systems. The devices should
draw less than 10 amps with the engine
running.
Digital clock (if equipped)
Whenever the battery terminals or relat-
ed fuses are disconnected, you must
reset the time.
When the ignition switch is in the ACC or
ON position, the clock buttons operate as
follows:
OTQ047116R
WARNING
Do not put a finger or a foreign ele-
ment (pin, etc.) into a power outlet
and do not touch with a wet hand.
You may get an electric shock.
OTQ047119
WARNING
Do not adjust the clock whilst driv-
ing. You may lose your steering
control and cause an accident that
results in severe personal injury or
death.
CAUTION
• Use the power outlet only when
the engine is running and remove
the accessory plug after use.
Using the accessory plug for pro-
longed periods of time with the
engine off could cause the bat-
tery to discharge.
• Only use 12V electric accessories
which are less than 10A in elec-
tric capacity.
• Adjust the air-conditioner or
heater to the lowest operating
level when using the power outlet.
• Close the cover when not in use.
• Some electronic devices can
cause electronic interference
when plugged into a vehicle’s
power outlet. These devices may
cause excessive audio static and
malfunctions in other electronic
systems or devices used in your
vehicle.
procarmanuals.com
Page 185 of 419

4111
Features of your vehicle
Hour (1)
Pressing the H button with your finger, a
pencil or similar object will advance the
time displayed by one hour.
Minute (2)
Pressing the M button with your finger, a
pencil or similar object will advance the
time displayed by one minute.
Reset (3)
To clear away minutes, press the R but-
ton with your finger, a pencil or similar
object. Then the clock will be set precise-
ly on the hour.
For example, if the R button is pressed
whilst the time is between 9:01 and 9:29,
the display will be reset to 9:00.
9:01 ~ 9:29 display changed to 9:00
9:30 ~ 9:59 display changed to 10:00
Display conversion (if equipped)
To change the 12 hour format to the 24
hour format, press the R button until the
display blinks.
For example, if the R button is pressed
whilst the time is 10:15 p.m., the display
will be changed to 22:15.
Clothes hanger (if equipped)
OTQ047122
CAUTION
Do not hang heavy clothes, since
those may damage the hook.
WARNING
Do not hang other objects except
clothes. In an accident it may cause
vehicle damage or personal injury.
procarmanuals.com
Page 188 of 419

Features of your vehicle
114 4
Steering wheel audio control
(if equipped)
The steering wheel audio remote control
button is installed to promote safe driv-
ing.
VOLUME (VOL +/-) (1)
• Press the lever upward (+) to increase
the volume.
• Press the lever downward (-) to
decrease the volume.
SEEK/PRESET ( / ) (2)
The SEEK/PRESET button has different
functions based on the system mode. For
the following functions the button should
be pressed for 0.8 seconds or more.
RADIO mode
It will function as the AUTO SEEK select
button.
CD/USB mode
It will function as the FF/REW button.If the SEEK/PRESET button is pressed
for less than 0.8 second, it will work as
follows in each mode.
RADIO mode
It will function as the PRESET STATION
buttons.
CD/USB / i Pod mode
It will function as TRACK UP/DOWN but-
ton.
MODE (3)
Press the button to change audio source.
FM (1~2)
➟ AM ➟ CD ➟ USB/AUX ➟FM...
MUTE (4)
Press the button to mute the sound.
Detailed information for audio control
buttons are described in the following
pages in this section.
OTQ045124
CAUTION
Do not operate audio remote con-
trol buttons simultaneously.
procarmanuals.com
Page 197 of 419

4123
Features of your vehicle
✽NOTICE - USING THE iPod®
DEVICE
• Some iPod®models may not support
communication protocol and files may
not properly play.
Supported iPod
®models:
- iPod®Mini
- iPod®4th (Photo) ~ 6th (Classic)
generation
- iPod
®Nano 1st~4th generation
- iPod®Touch 1st~2nd generation
• The order of search or playback of
songs in the iPod
®can be different
from the order searched in the audio
system.
• If the iPod
®disabled due to its own
malfunction, reset the iPod®. (Reset:
Refer to iPod®manual)
• An iPod®may not operate normally
on low battery.
(Continued)(Continued)
• Some iPod
®devices, such as the
iPhone®, can be connected through
the Bluetooth®Wireless Technology
interface. The device must have audio
Bluetooth
®Wireless Technology capa-
bility (such as for stereo headphone
Bluetooth
®Wireless Technology ). The
device can play, but it will not be con-
trolled by the audio system.
• To use iPod
®features within the
audio, use the cable provided upon
purchasing an iPod
®d device.
• Skipping or improper operation may
occur depending on the characteris-
tics of your iPod
®/iPhone®device.
• If your iPhone®is connected to both
the Bluetooth®Wireless Technology
and USB, the sound may not be prop-
erly played. In your iPhone
®, select
the Dock connector orBluetooth®
Wireless Technology to change the
sound output (source).
(Continued)(Continued)
• When connecting
iPod®with theiPod®Power Cable, insert the connec-
tor to the multimedia socket complete-
ly. If not inserted completely, communi-
cations between
iPod®and audio may
be interrupted.
• When adjusting the sound effects of
the
iPod®and the audio system, the
sound effects of both devices will over-
lap and might reduce or distort the
quality of the sound.
• Deactivate (turn off) the equalizer
function of an
iPod®when adjusting
the audio system’s volume, and turn
off the equalizer of the audio system
when using the equalizer of an
iPod®.
• When not using iPod®with car audio,
detach the iPod®cable from iPod®.
Otherwise, iPod®may remain in
accessory mode, and may not work
properly.
procarmanuals.com
Page 201 of 419

4127
Features of your vehicle
SYSTEM CONTROLLERS AND
FUNCTIONS
❈Display and settings may differ
depending on the selected audio.
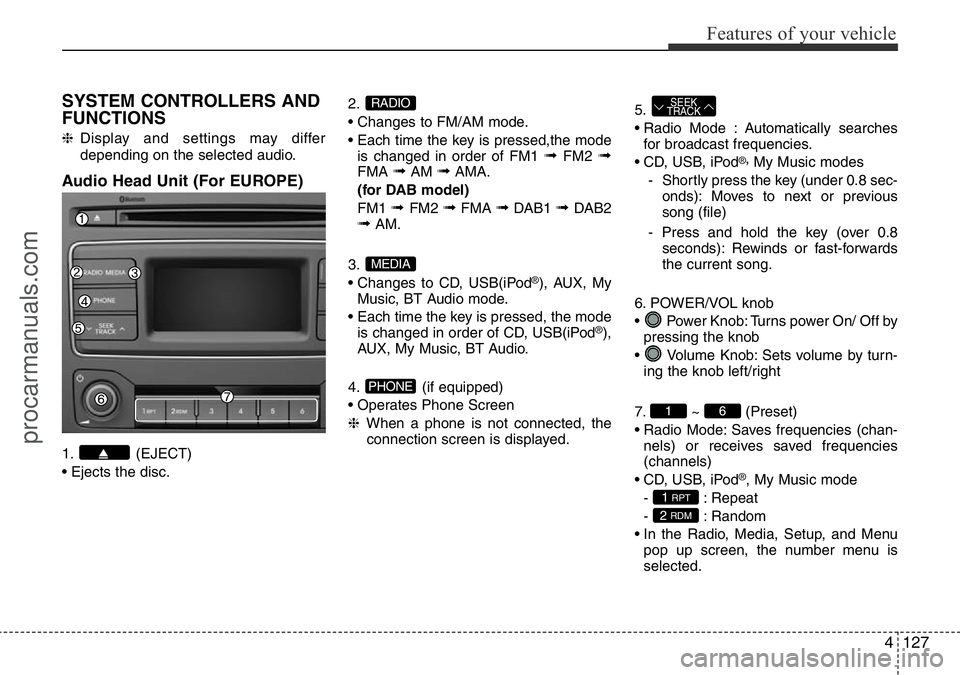
Audio Head Unit (For EUROPE)
1. (EJECT)
• Ejects the disc.2.
• Changes to FM/AM mode.
• Each time the key is pressed,the mode
is changed in order of FM1
➟FM2 ➟FMA ➟AM ➟AMA.
(for DAB model)
FM1
➟ FM2 ➟FMA ➟DAB1 ➟ DAB2➟AM.
3.
• Changes to CD, USB(iPod
®), AUX, My
Music, BT Audio mode.
• Each time the key is pressed, the mode
is changed in order of CD, USB(iPod
®),
AUX, My Music, BT Audio.
4. (if equipped)
• Operates Phone Screen
❈When a phone is not connected, the
connection screen is displayed.5.
• Radio Mode : Automatically searches
for broadcast frequencies.
• CD, USB, iPod
®,My Music modes
- Shortly press the key (under 0.8 sec-
onds): Moves to next or previous
song (file)
- Press and hold the key (over 0.8
seconds): Rewinds or fast-forwards
the current song.
6. POWER/VOL knob
• Power Knob: Turns power On/ Off by
pressing the knob
• Volume Knob: Sets volume by turn-
ing the knob left/right
7. ~ (Preset)
• Radio Mode: Saves frequencies (chan-
nels) or receives saved frequencies
(channels)
• CD, USB, iPod
®, My Music mode
- : Repeat
- : Random
• In the Radio, Media, Setup, and Menu
pop up screen, the number menu is
selected.
2 RDM
1 RPT
61
SEEK
TRACK
PHONE
MEDIA
RADIO
procarmanuals.com
Page 204 of 419

Features of your vehicle
130 4
SYSTEM CONTROLLERS AND
FUNCTIONS
❈Display and settings may differ
depending on the selected audio.
Audio Head Unit (Except EUROPE)
1. (EJECT)
• Ejects the disc.2.
• Changes to FM/AM mode.
• Each time the key is pressed,the mode
is changed in order of FM1
➟FM2 ➟AM.
3.
• Changes to CD, USB(iPod
®), AUX, My
Music, BT Audio mode.
• Each time the key is pressed, the mode
is changed in order of CD, USB(iPod
®),
AUX, My Music, BT Audio.
4. (if equipped)
• Operates Phone Screen
❈When a phone is not connected, the
connection screen is displayed.
5.
• Radio Mode : Automatically searches
for broadcast frequencies.
• CD, USB, iPod
®, My Music modes
- Shortly press the key (under 0.8 sec-
onds): Moves to next or previous song
(file)
- Press and hold the key (over 0.8 sec-
onds): Rewinds or fast-forwards the
current song.6. PWR/VOL knob
• Power Knob: Turns power On/ Off by
pressing the knob
• Volume Knob: Sets volume by turn-
ing the knob left/right
7. ~ (Preset)
• Radio Mode: Saves frequencies (chan-
nels) or receives saved frequencies
(channels)
• CD, USB, iPod
®, My Music mode
- : Repeat
- : Random
• In the Radio, Media, Setup, and Menu
pop up screen, the number menu is
selected.
2 RDM
1 RPT
61
SEEK
TRACK
PHONE
MEDIA
RADIO
procarmanuals.com
Page 219 of 419

4145
Features of your vehicle
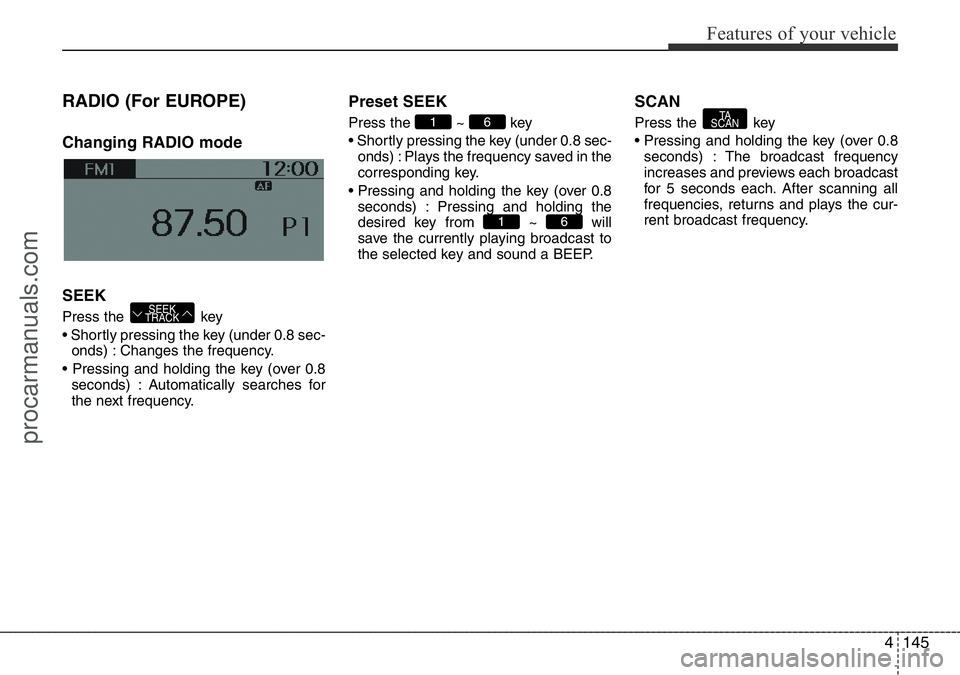
RADIO (For EUROPE)
Changing RADIO mode
SEEK
Press the key
• Shortly pressing the key (under 0.8 sec-
onds) : Changes the frequency.
• Pressing and holding the key (over 0.8
seconds) : Automatically searches for
the next frequency.
Preset SEEK
Press the ~ key
• Shortly pressing the key (under 0.8 sec-
onds) : Plays the frequency saved in the
corresponding key.
• Pressing and holding the key (over 0.8
seconds) : Pressing and holding the
desired key from ~ will
save the currently playing broadcast to
the selected key and sound a BEEP.
SCAN
Press the key
• Pressing and holding the key (over 0.8
seconds) : The broadcast frequency
increases and previews each broadcast
for 5 seconds each. After scanning all
frequencies, returns and plays the cur-
rent broadcast frequency.TA
SCAN
61
61
SEEK
TRACK
procarmanuals.com
Page 220 of 419

Features of your vehicle
146 4
Selecting through manual
search
Turn the TUNE knob left/right to adjust
the frequency.
Traffic Announcement (TA)
Shortly pressing the key (under
0.8 seconds) : Set / TA Traffic
Announcement) mode.
MENU
Within key are the A.Store (Auto
Store) and Info functions.
AST (Auto Store)
Press the key Set [ AST]
through TUNE knob or key.
Select AST (Auto Store) to save frequen-
cies with superior reception to presets
~ . If no frequencies are
received, then the most recently received
frequency will be broadcast.
❈Saves only to the Preset memory
~ of FMA or AMA mode.
AF (Alternative Frequency)
Press the key Set [ AF]
through TUNE knob or key.
The Alternative Frequency option can be
turned On/Off.
Region
Press the key Set [ Region]
through TUNE knob or key.
The Region option can be turned On/Off.
News
Press the key Set [ News]
through TUNE knob or key.
The News option can be turned On/Off.
Info Volume
Info Volume refers to the sound volume
upon receiving News or Traffic information.
The info volume can be controlled by turn-
ing the VOL knob left/right whilst a news
or traffic broadcast is playing.
❈AF, Region, and News are RDS Radio
menus.
4
MENU
3MENU
2RDMMENU
61
61
1 RPTMENU
MENU
OffOn
TA
SCAN
procarmanuals.com