2016 Hyundai H-1 (Grand Starex) warning
[x] Cancel search: warningPage 141 of 332
473
Features of your vehicle
D280100BEN
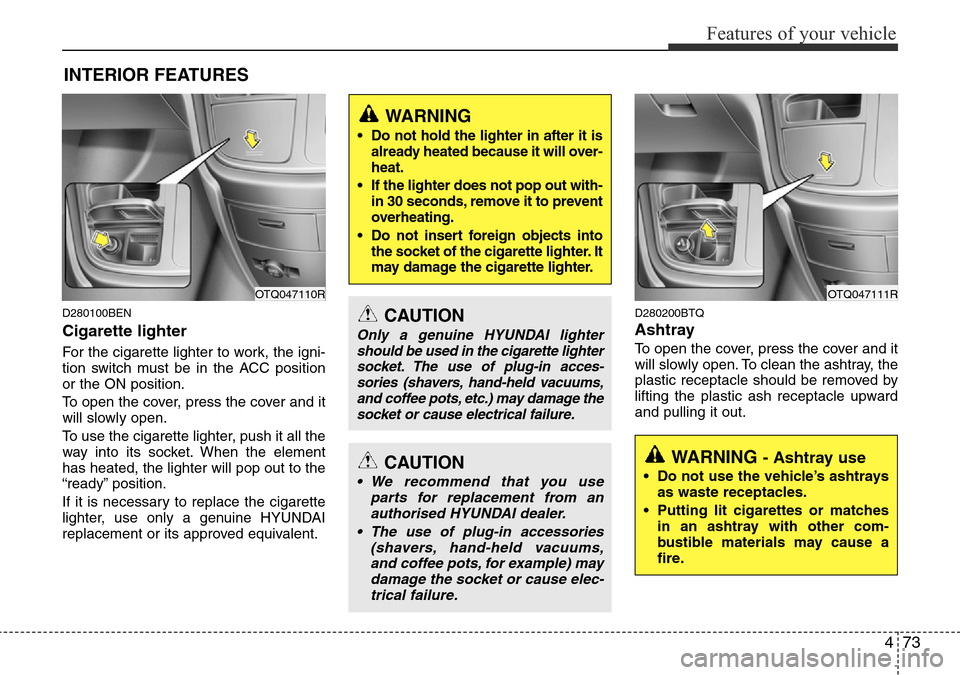
Cigarette lighter
For the cigarette lighter to work, the igni-
tion switch must be in the ACC position
or the ON position.
To open the cover, press the cover and it
will slowly open.
To use the cigarette lighter, push it all the
way into its socket. When the element
has heated, the lighter will pop out to the
“ready” position.
If it is necessary to replace the cigarette
lighter, use only a genuine HYUNDAI
replacement or its approved equivalent.
D280200BTQ
Ashtray
To open the cover, press the cover and it
will slowly open. To clean the ashtray, the
plastic receptacle should be removed by
lifting the plastic ash receptacle upward
and pulling it out.
INTERIOR FEATURES
CAUTION
Only a genuine HYUNDAI lighter
should be used in the cigarette lighter
socket. The use of plug-in acces-
sories (shavers, hand-held vacuums,
and coffee pots, etc.) may damage the
socket or cause electrical failure.
WARNING
• Do not hold the lighter in after it is
already heated because it will over-
heat.
• If the lighter does not pop out with-
in 30 seconds, remove it to prevent
overheating.
• Do not insert foreign objects into
the socket of the cigarette lighter. It
may damage the cigarette lighter.
OTQ047110R
CAUTION
• We recommend that you use
parts for replacement from an
authorised HYUNDAI dealer.
• The use of plug-in accessories
(shavers, hand-held vacuums,
and coffee pots, for example) may
damage the socket or cause elec-
trical failure.
WARNING - Ashtray use
• Do not use the vehicle’s ashtrays
as waste receptacles.
• Putting lit cigarettes or matches
in an ashtray with other com-
bustible materials may cause a
fire.
OTQ047111R
Page 142 of 332
Features of your vehicle
74 4
D280300BTQ-EA
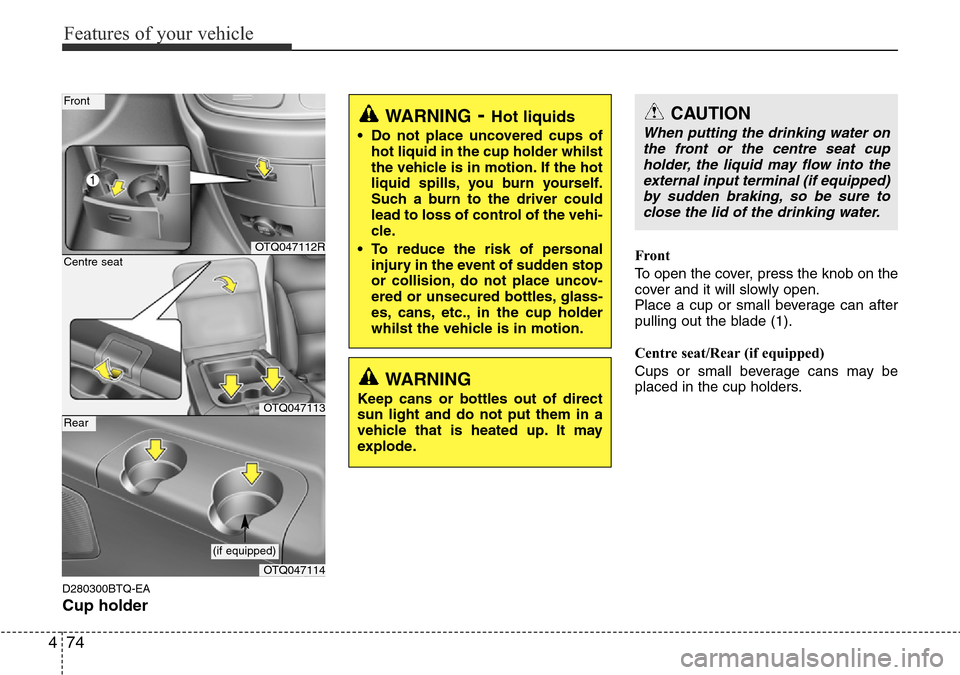
Cup holder
Front
To open the cover, press the knob on the
cover and it will slowly open.
Place a cup or small beverage can after
pulling out the blade (1).
Centre seat/Rear (if equipped)
Cups or small beverage cans may be
placed in the cup holders.
WARNING- Hot liquids
• Do not place uncovered cups of
hot liquid in the cup holder whilst
the vehicle is in motion. If the hot
liquid spills, you burn yourself.
Such a burn to the driver could
lead to loss of control of the vehi-
cle.
• To reduce the risk of personal
injury in the event of sudden stop
or collision, do not place uncov-
ered or unsecured bottles, glass-
es, cans, etc., in the cup holder
whilst the vehicle is in motion.
OTQ047112R
OTQ047113
Front
Centre seat
OTQ047114
Rear
(if equipped)
WARNING
Keep cans or bottles out of direct
sun light and do not put them in a
vehicle that is heated up. It may
explode.
CAUTION
When putting the drinking water on
the front or the centre seat cup
holder, the liquid may flow into the
external input terminal (if equipped)
by sudden braking, so be sure to
close the lid of the drinking water.
Page 143 of 332

475
Features of your vehicle
D280400BTQ
Sunvisor
Use the sunvisor to shield direct light
through the front or side windows.
To use a sunvisor, pull it downward.
To use a sunvisor for a side window, pull
it downward, unsnap it from the bracket
(1) and swing it to the side (2).
To use the vanity mirror (if equipped), pull
down the visor and slide the mirror cover
(3).
Adjust the sunvisor forward or backward
(4, if equipped).
The ticket holder (5) is provided for hold-
ing a tollgate ticket. (if equipped)
* : if equipped
D280500AEN
Power outlet (if equipped)
The power outlet is designed to provide
power for mobile telephones or other
devices designed to operate with vehicle
electrical systems. The devices should
draw less than 10 amps with the engine
running.
OTQ047115ROTQ047116R
CAUTION- Vanity mirror
lamp (if equipped)
Close the vanity mirror cover
securely and return the sunvisor to
its original position after use. If the
vanity mirror is not closed securely,
the lamp will stay on and could
result in battery discharge and pos-
sible sunvisor damage.
WARNING
Do not put a finger or a foreign ele-
ment (pin, etc.) into a power outlet
and do not touch with a wet hand.
You may get an electric shock.
WARNING
For your safety, do not obstruct your
vision when using the sunvisor.
Page 144 of 332
Features of your vehicle
76 4
D280600AEN
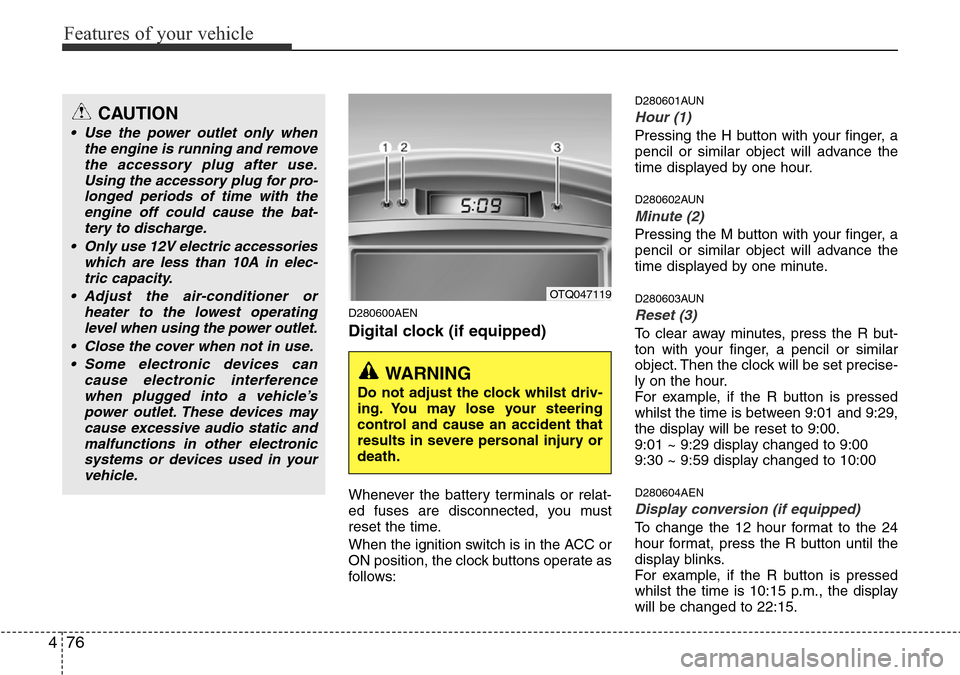
Digital clock (if equipped)
Whenever the battery terminals or relat-
ed fuses are disconnected, you must
reset the time.
When the ignition switch is in the ACC or
ON position, the clock buttons operate as
follows:
D280601AUN
Hour (1)
Pressing the H button with your finger, a
pencil or similar object will advance the
time displayed by one hour.
D280602AUN
Minute (2)
Pressing the M button with your finger, a
pencil or similar object will advance the
time displayed by one minute.
D280603AUN
Reset (3)
To clear away minutes, press the R but-
ton with your finger, a pencil or similar
object. Then the clock will be set precise-
ly on the hour.
For example, if the R button is pressed
whilst the time is between 9:01 and 9:29,
the display will be reset to 9:00.
9:01 ~ 9:29 display changed to 9:00
9:30 ~ 9:59 display changed to 10:00
D280604AEN
Display conversion (if equipped)
To change the 12 hour format to the 24
hour format, press the R button until the
display blinks.
For example, if the R button is pressed
whilst the time is 10:15 p.m., the display
will be changed to 22:15.
OTQ047119
WARNING
Do not adjust the clock whilst driv-
ing. You may lose your steering
control and cause an accident that
results in severe personal injury or
death.
CAUTION
• Use the power outlet only when
the engine is running and remove
the accessory plug after use.
Using the accessory plug for pro-
longed periods of time with the
engine off could cause the bat-
tery to discharge.
• Only use 12V electric accessories
which are less than 10A in elec-
tric capacity.
• Adjust the air-conditioner or
heater to the lowest operating
level when using the power outlet.
• Close the cover when not in use.
• Some electronic devices can
cause electronic interference
when plugged into a vehicle’s
power outlet. These devices may
cause excessive audio static and
malfunctions in other electronic
systems or devices used in your
vehicle.
Page 145 of 332

477
Features of your vehicle
D280800AEN
Clothes hanger (if equipped)
D280900BTQ
Floor mat anchor(s) (if equipped)
When using a floor mat on the front floor
carpet, make sure it attaches to the floor
mat anchor(s) in your vehicle. This keeps
the floor mat from sliding forward.
OTQ047122
CAUTION
Do not hang heavy clothes, since
those may damage the hook.
OXM049228
OCM039200N
Type A
Type C
Type B
WARNING
The following must be observed
when installing ANY floor mat to
the vehicle.
• Ensure that the floor mats are
securely attached to the vehicle’s
floor mat anchor(s) before driving
the vehicle.
• Do not use ANY floor mat that
cannot be firmly attached to the
vehicle’s floor mat anchors.
• Do not stack floor mats on top of
one another (e.g. all-weather rub-
ber mat on top of a carpeted floor
mat). Only a single floor mat
should be installed in each posi-
tion.
IMPORTANT – Your vehicle was
manufactured with driver’s side
floor mat anchors that are
designed to securely hold the
floor mat in place. To avoid any
interference with pedal operation,
we recommend that the HYUNDAI
floor mats designed for use in
your vehicle be installed.
WARNING
Do not hang other objects except
clothes. In an accident it may cause
vehicle damage or personal injury.
Page 150 of 332
Features of your vehicle
82 4
Using a mobile phone or a two-way
radio
When a mobile phone is used inside the
vehicle, noise may be produced from the
audio equipment. This does not mean
that something is wrong with the audio
equipment. In such a case, use the
mobile phone at a place as far as possi-
ble from the audio equipment.
Care of disc (if equipped)
• If the temperature inside the car is too
high, open the car windows for ventila-
tion before using your car audio.
• It is illegal to copy and use MP3/WMA/
AAC/WAVE files without permission.
Use CDs that are created only by law-
ful means.
• Do not apply volatile agents such as
benzene and thinner, normal cleaners
and magnetic sprays made for ana-
logue disc onto CDs.
• To prevent the disc surface from get-
ting damaged. Hold and carry CDs by
the edges or the edges of the centre
hole only.
• Clean the disc surface with a piece of
soft cloth before playback (wipe it from
the centre to the outside edge).
• Do not damage the disc surface or
attach pieces of sticky tape or paper
onto it.
• Make sure on undesirable matter other
than CDs are inserted into the CD
player (Do not insert more than one
CD at a time).
• Keep CDs in their cases after use to
protect them from scratches or dirt.• Depending on the type of CD-R/CD-
RW CDs, certain CDs may not operate
normally according to manufacturing
companies or making and recording
methods. In such circumstances, if you
still continue to use those CDs, they
may cause the malfunction of your car
audio system.
✽NOTICE- Playing an
Incompatible Copy-Protected
Audio CD
Some copy protected CDs, which do not
comply with the international audio CD
standards (Red Book), may not play on
your car audio. Please note that if you
try to play copy protected CDs and the
CD player does not perform correctly
the CDs maybe defective, not the CD
player.
CAUTION
When using a communication sys-
tem such a mobile phone or a radio
set inside the vehicle, a separate
external antenna must be fitted.
When a mobile phone or a radio set
is used with an internal antenna
alone, it may interfere with the vehi-
cle's electrical system and adverse-
ly affect safe operation of the vehi-
cle.
WARNING
Don't use a mobile phone when you
are driving. You should stop at a
safe place to use a mobile phone.
Page 164 of 332
Features of your vehicle
96 4
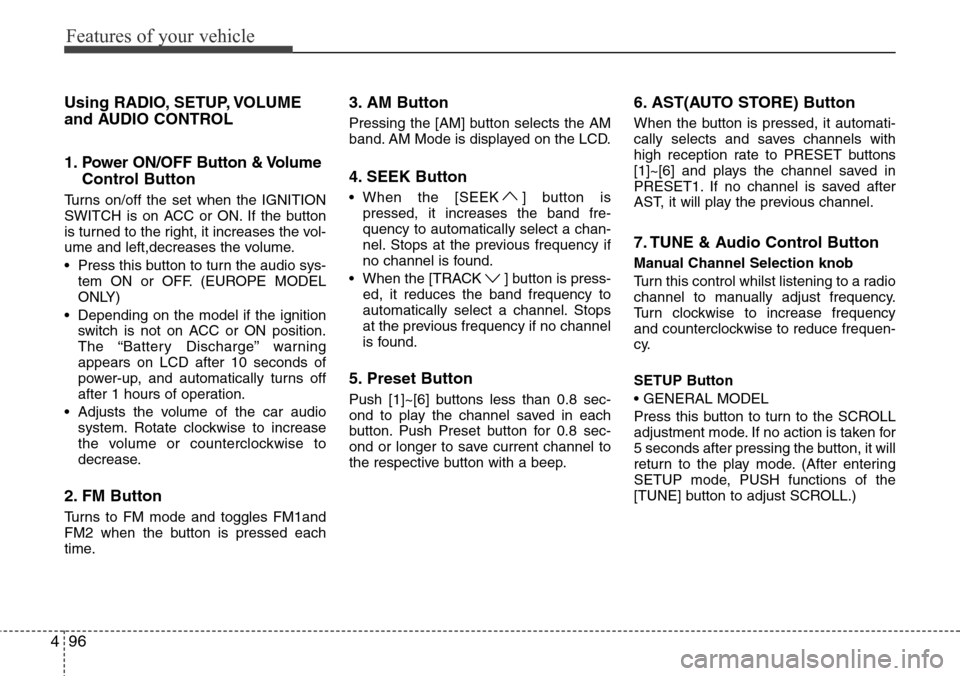
Using RADIO, SETUP, VOLUME
and AUDIO CONTROL
1. Power ON/OFF Button & Volume
Control Button
Turns on/off the set when the IGNITION
SWITCH is on ACC or ON. If the button
is turned to the right, it increases the vol-
ume and left,decreases the volume.
• Press this button to turn the audio sys-
tem ON or OFF. (EUROPE MODEL
ONLY)
• Depending on the model if the ignition
switch is not on ACC or ON position.
The “Battery Discharge” warning
appears on LCD after 10 seconds of
power-up, and automatically turns off
after 1 hours of operation.
• Adjusts the volume of the car audio
system. Rotate clockwise to increase
the volume or counterclockwise to
decrease.
2. FM Button
Turns to FM mode and toggles FM1and
FM2 when the button is pressed each
time.
3. AM Button
Pressing the [AM] button selects the AM
band. AM Mode is displayed on the LCD.
4. SEEK Button
• When the [SEEK ] button is
pressed, it increases the band fre-
quency to automatically select a chan-
nel. Stops at the previous frequency if
no channel is found.
• When the [TRACK ] button is press-
ed, it reduces the band frequency to
automatically select a channel. Stops
at the previous frequency if no channel
is found.
5. Preset Button
Push [1]~[6] buttons less than 0.8 sec-
ond to play the channel saved in each
button. Push Preset button for 0.8 sec-
ond or longer to save current channel to
the respective button with a beep.
6. AST(AUTO STORE) Button
When the button is pressed, it automati-
cally selects and saves channels with
high reception rate to PRESET buttons
[1]~[6] and plays the channel saved in
PRESET1. If no channel is saved after
AST, it will play the previous channel.
7. TUNE & Audio Control Button
Manual Channel Selection knob
Turn this control whilst listening to a radio
channel to manually adjust frequency.
Turn clockwise to increase frequency
and counterclockwise to reduce frequen-
cy.
SETUP Button
• GENERAL MODEL
Press this button to turn to the SCROLL
adjustment mode. If no action is taken for
5 seconds after pressing the button, it will
return to the play mode. (After entering
SETUP mode, PUSH functions of the
[TUNE] button to adjust SCROLL.)
Page 187 of 332
Driving your vehicle
2 5
E010000AEN-EA
WARNING- ENGINE EXHAUST CAN BE DANGEROUS!
Engine exhaust fumes can be extremely dangerous. If, at any time, you smell exhaust fumes inside the vehicle, open the win-
dows immediately.
• Do not inhale exhaust fumes.
Exhaust fumes contain carbon monoxide, a colourless, odourless gas that can cause unconsciousness and death by asphyx-
iation.
• Be sure the exhaust system does not leak.
The exhaust system should be checked whenever the vehicle is raised to change the oil or for any other purpose. If you hear
a change in the sound of the exhaust or if you drive over something that strikes the underneath side of the vehicle, we rec-
ommend that the system be checked by an authorised HYUNDAI dealer.
• Do not run the engine in an enclosed area.
Letting the engine idle in your garage, even with the garage door open, is a hazardous practice. Never run the engine in your
garage any longer than it takes to start the engine and back the car out.
• Avoid idling the engine for prolonged periods with people inside the car.
If it is necessary to idle the engine for a prolonged period with people inside the car, be sure to do so only in an open area
with the air intake set at "Fresh" and fan operating at one of the higher speeds so fresh air is drawn into the interior.
If you must drive with the tailgate open because you are carrying objects that make this necessary:
1. Close all windows.
2. Open side vents.
3. Set the air intake control at "Fresh", the air flow control at "Floor" or "Face" and the fan at one of the higher speeds.
To assure proper operation of the ventilation system, be sure the ventilation air intakes located just in front of the windshield are
kept clear of snow, ice, leaves or other obstructions.