2016 Hyundai Genesis fuel
[x] Cancel search: fuelPage 93 of 502

LCD display ...........................................................3-57
LCD Modes ........................................................................3-57
Trip Computer Mode.......................................................3-58
Turn By Turn (TBT) Mode ............................................3-59
ASCC/LDWS/LKAS Mode ..............................................3-59
A/V Mode..........................................................................3-59
Information Mode ...........................................................3-60
User Settings Mode ........................................................3-62
Warning Messages..........................................................3-69
Trip computer .......................................................3-80
Overview............................................................................3-80
Trip Modes ........................................................................3-80
Trip A/B .............................................................................3-80
Fuel Economy...................................................................3-81
Warning and indicator lights ..............................3-84
Warning lights ..................................................................3-84
Indicator Lights ................................................................3-93
Head Up Display (HUD) .......................................3-98
Description ........................................................................3-98
Head Up Display ON/OFF .............................................3-99
Head Up Display Information .......................................3-99
Head Up Display Setting .............................................3-100
Light .....................................................................3-101
Exterior lights ................................................................3-101
Smart High Beam ..........................................................3-103
Traffic change ...............................................................3-109
Welcome system ...........................................................3-109
Interior lights..................................................................3-111
Wipers and washers ..........................................3-116
Windscreen wipers ......................................................3-116
Windscreen washers ...................................................3-118
Driver assist system ..........................................3-119
Rearview camera...........................................................3-119
Parking assist system ..................................................3-120
Smart Parking Assist System (SPAS) .......................3-123
Parking guide system (For Europe) .........................3-142
Around View Monitoring (AVM) System .................3-143
Defroster .............................................................3-145
Rear window defroster ...............................................3-145
Automatic climate control system ...................3-147
Automatic heating and air conditioning ..................3-148
Manual heating and air conditioning .......................3-149
System operation ..........................................................3-157
Climate control air filter ............................................3-160
3
Page 101 of 502

3-10
Convenient features of your vehicle
Immobiliser System
The immobiliser system protects your
vehicle from theft. If an improperly
coded key (or other device) is used,
the engine’s fuel system is disabled.
When the Engine Start/Stop button
is in the ON position, the immobiliser
system indicator should come on
briefly, then go off. If the indicator
starts to blink, the system does not
recognise the coding of the key.
Press the Engine Start/Stop button
to the OFF position, then press the
Engine Start/Stop button to the ON
position again.
The system may not recognise your
key’s coding if another immobiliser
key or other metal object (i.e., key
chain) is near the key. The engine
may not start because the metal may
interrupt the transponder signal from
transmitting normally.
If the system repeatedly does not
recognise the coding of the key, it is
recommended that you contact your
HYUNDAI dealer.Do not attempt to alter this system or
add other devices to it. Electrical
problems could result that may make
your vehicle inoperable.
In order to prevent theft of your
vehicle, do not leave spare keys
anywhere in your vehicle. Your
immobiliser password is a cus-
tomer unique password and
should be kept confidential.
WARNING
The transponder in your key is
an important part of the immo-
biliser system. It is designed to
give years of trouble-free serv-
ice, however you should avoid
exposure to moisture, static
electricity and rough handling.
Immobiliser system malfunc-
tion could occur.
CAUTION
Page 138 of 502

3-47
Convenient features of your vehicle
3
Opening the fuel filler door
1. Turn the engine off.
2. Push the fuel filler door opener
button.3. Pull the fuel filler door (1) out to
fully open.
4. To remove the fuel tank cap (2),
turn it counterclockwise. You may
hear a hissing noise as the pres-
sure inside the tank equalises.
Place the cap on the fuel filler door.
✽NOTICE
If the fuel filler door does not open
because ice has formed around it, tap
lightly or push on the door to break
the ice and release the door. Do not
pry on the door. If necessary, spray
around the door with an approved
de-icer fluid (do not use radiator
anti-freeze) or move the vehicle to a
warm place and allow the ice to melt.
Closing the fuel filler door
1. To install the fuel tank cap, turn it
clockwise until it “clicks” one time.
2. Close the fuel filler door until it is
latched securely.
FUEL FILLER DOOR
ODH043032
ODH044031R
Petrol is highly flammable and
explosive. Failure to follow
these guidelines may result in
SERIOUS INJURY or DEATH:
•Read and follow all warnings
posted at the petrol station.
•Before refuelling, note the
location of the Emergency
Petrol Shut-Off, if available, at
the petrol station.
•Before touching the fuel noz-
zle, you should eliminate the
potential build-up of static
electricity by touching a metal
part of the vehicle, a safe dis-
tance away from the fuel filler
neck, nozzle, or other petrol
source, with your bare hand.
(Continued)
WARNING
Page 139 of 502

3-48
Convenient features of your vehicle
(Continued)
•Do not use mobile phones
whilst refuelling. Electric cur-
rent and/or electronic interfer-
ence from mobile phones can
potentially ignite fuel vapours
and cause a fire.
•Do not get back into a vehicle
once you have begun refu-
elling. You can generate a
build-up of static electricity by
touching, rubbing or sliding
against any item or fabric capa-
ble of producing static electric-
ity. Static electricity discharge
can ignite fuel vapours causing
a fire. If you must re-enter the
vehicle, you should once again
eliminate potentially danger-
ous static electricity discharge
by touching a metal part of the
vehicle, away from the fuel filler
neck, nozzle or other petrol
source, with your bare hand.
(Continued)
(Continued)
•When using an approved
portable fuel container, be
sure to place the container on
the ground prior to refuelling.
Static electricity discharge
from the container can ignite
fuel vapours causing a fire.
Once refuelling has begun,
contact between your bare
hand and the vehicle should
be maintained until the filling
is complete.
•Use only approved portable
plastic fuel containers designed
to carry and store petrol.
(Continued)
(Continued)
•When refuelling, always move
the shift lever to the P (Park)
position, set the parking
brake, and place the Engine
Start/Stop button to the OFF
position. Sparks produced by
electrical components related
to the engine can ignite fuel
vapours causing a fire.
•Do not use matches or a
lighter and do not smoke or
leave a lit cigarette in your
vehicle whilst at a petrol sta-
tion, especially during refu-
elling.
•Do not over-fill or top-off your
vehicle tank, which can cause
petrol spillage.
(Continued)
Page 140 of 502

3-49
Convenient features of your vehicle
3
✽NOTICE
• Make sure to refuel your vehicle
according to the "Fuel
Requirements" suggested in the
Introduction chapter.
• Do not spill fuel on the exterior
surfaces of the vehicle. Any type of
fuel spilled on painted surfaces
may damage the paint.
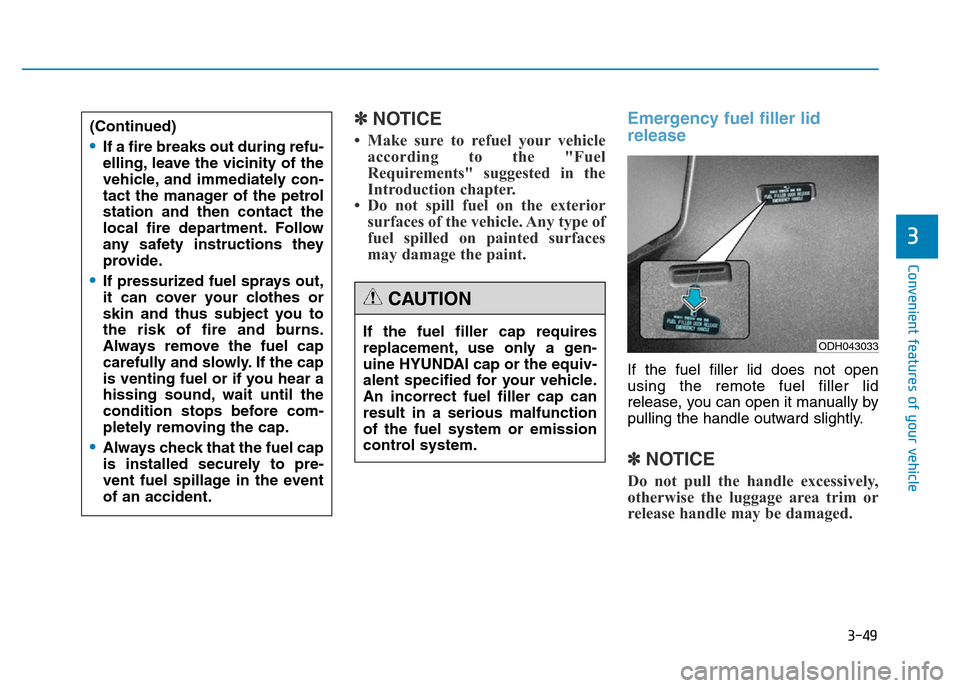
Emergency fuel filler lid
release
If the fuel filler lid does not open
using the remote fuel filler lid
release, you can open it manually by
pulling the handle outward slightly.
✽NOTICE
Do not pull the handle excessively,
otherwise the luggage area trim or
release handle may be damaged.
If the fuel filler cap requires
replacement, use only a gen-
uine HYUNDAI cap or the equiv-
alent specified for your vehicle.
An incorrect fuel filler cap can
result in a serious malfunction
of the fuel system or emission
control system.
CAUTION
(Continued)
•If a fire breaks out during refu-
elling, leave the vicinity of the
vehicle, and immediately con-
tact the manager of the petrol
station and then contact the
local fire department. Follow
any safety instructions they
provide.
•If pressurized fuel sprays out,
it can cover your clothes or
skin and thus subject you to
the risk of fire and burns.
Always remove the fuel cap
carefully and slowly. If the cap
is venting fuel or if you hear a
hissing sound, wait until the
condition stops before com-
pletely removing the cap.
•Always check that the fuel cap
is installed securely to pre-
vent fuel spillage in the event
of an accident.
ODH043033
Page 141 of 502

3-50
Convenient features of your vehicle
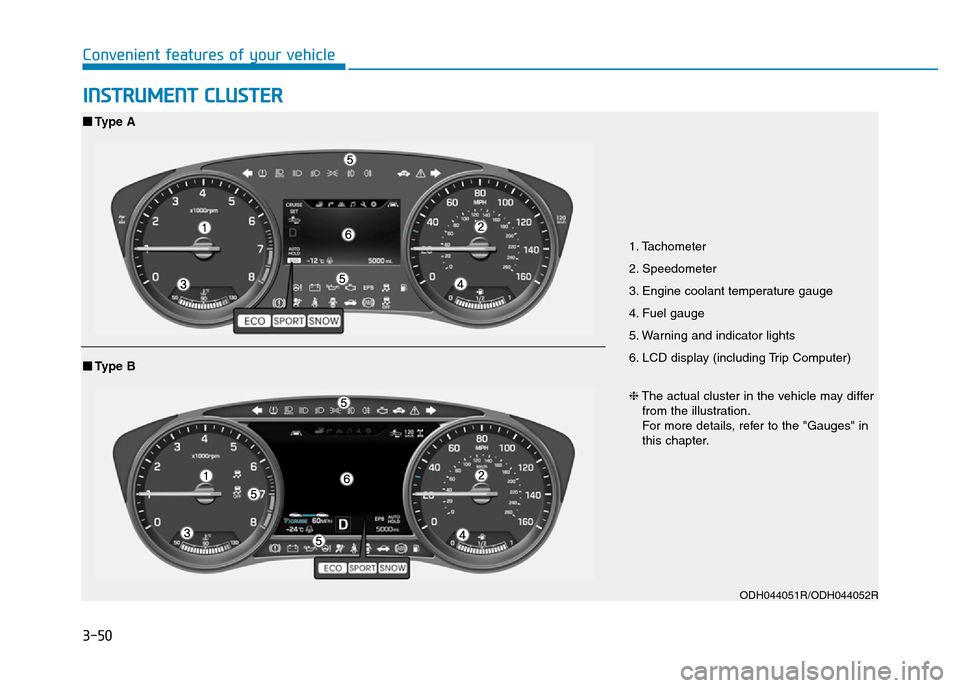
INSTRUMENT CLUSTER
1. Tachometer
2. Speedometer
3. Engine coolant temperature gauge
4. Fuel gauge
5. Warning and indicator lights
6. LCD display (including Trip Computer)
ODH044051R/ODH044052R
■Type A
❈The actual cluster in the vehicle may differ
from the illustration.
For more details, refer to the "Gauges" in
this chapter.
■Type B
Page 145 of 502

3-54
Convenient features of your vehicle
Fuel Gauge
This gauge indicates the approxi-
mate amount of fuel remaining in the
fuel tank.
✽NOTICE
• The fuel tank capacity is given in
chapter 8.
• The fuel gauge is supplemented by
a low fuel warning light, which
will illuminate when the fuel tank
is nearly empty.
• On inclines or curves, the fuel
gauge pointer may fluctuate or the
low fuel warning light may come
on earlier than usual due to the
movement of fuel in the tank.
ODH043057
ODH043057L
■Type A
■Type B
Fuel Gauge
Running out of fuel can expose
vehicle occupants to danger.
You must stop and obtain addi-
tional fuel as soon as possible
after the warning light comes
on or when the gauge indicator
comes close to the "0 or E
(Empty)" level.
WARNING
Avoid driving with an extremely
low fuel level. Running out of
fuel could cause the engine to
misfire damaging the catalytic
converter.
CAUTION
Page 148 of 502

3-57
Convenient features of your vehicle
3
LCD Modes
LCD DISPLAY
For controlling the LCD modes, refer to "LCD Display Control" in this chapter.
Modes SymbolExplanation
Trip Computer This mode displays driving information such as the tripmeter, fuel economy, and so on.
For more details, refer to "Trip Computer" in this chapter.
Turn By Turn (TBT)
(if equipped)This mode displays the state of the navigation.
ASCC/LDWS/LKAS
(if equipped)
This mode displays the state of the Advanced Smart Cruise Control (ASCC),
Lane Departure Warning System (LDWS) and Lane Keeping Assist
System(LKAS).
For more details, refer to “Advanced Smart Cruise Control (ASCC)”,
“Lane Departure Warning System (LDWS)” and Lane Keeping Assist System
(LKAS) in chapter 5.
A/VThis mode displays the state of the A/V system.
Information
This mode informs of the tyre pressure information, service interval (mileage or
days) and warning messages related to the advanced smart cruise control system,
pre-safe seat belt, and so on.
User SettingsIn this mode, you can change settings of the doors, lamps, and so on.
or