2016 HYUNDAI GENESIS COUPE ULTIMATE ECO mode
[x] Cancel search: ECO modePage 273 of 475
Features of your vehicle
190
4
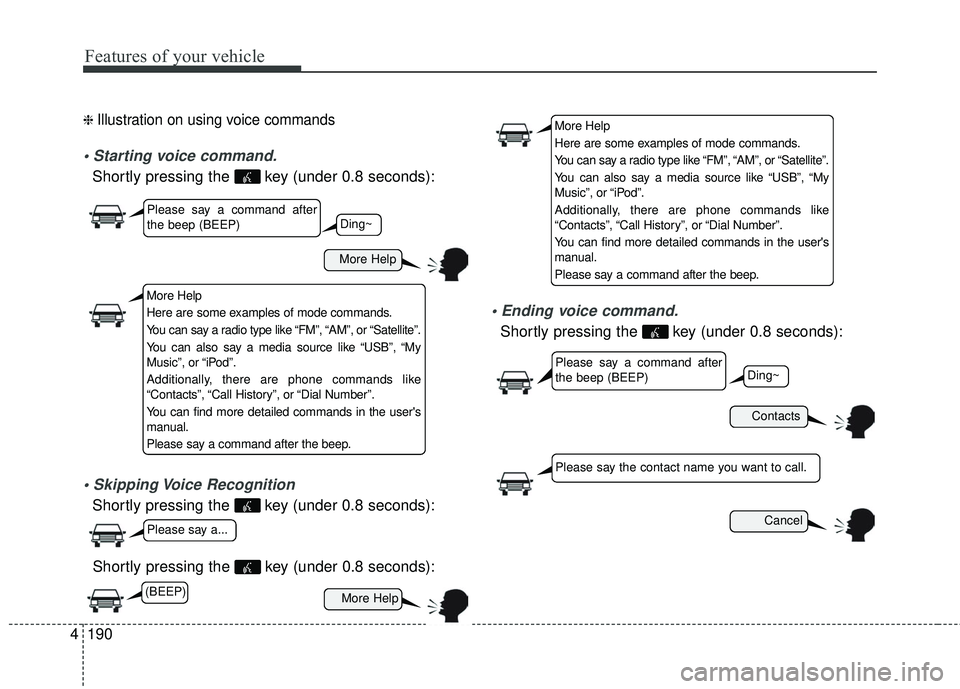
❈ Illustration on using voice commands
Shortly pressing the key (under 0.8 seconds):
Shortly pressing the key (under 0.8 seconds):
Shortly pressing the key (under 0.8 seconds):
voice command.
Shortly pressing the key (under 0.8 seconds):
More Help
Contacts
Cancel
More Help
Please say a command after
the beep (BEEP)
Please say a command after
the beep (BEEP)
Please say a...
Please say the contact name you want to call.
Ding~
Ding~
More Help
Here are some examples of mode commands.
You can say a radio type like “FM”, “AM”, or “Satellite”.
You can also say a media source like “USB”, “My
Music”, or “iPod”.
Additionally, there are phone commands like
“Contacts”, “Call History”, or “Dial Number”.
You can find more detailed commands in the user's
manual.
Please say a command after the beep.
(BEEP)
Page 274 of 475
4191
Features of your vehicle
CommandFunction
More Help Provides guidance on commands that can be
used anywhere in the system.
Help Provides guidance on commands that can be
used within the current mode.
Call
Ex) Call “John Smith”
Phone Provides guidance on Phone related com- mands. After saying this command, say
“Favorites”, “Dial Number”, “Call History” or
“Contacts” execute corresponding functions.
Favorites Displays the Favorite screen.
Call History Displays the Call History screen.
Contacts Displays the Contacts screen. After sayingthis command, say the name of a contact
saved in the Contacts to automatically con-
nect the call.
Dial Number Displays the Dial number screen. After saying this command, you can say the number that
you want to call.
RedialConnects the last dialed call number.
Tutorial Pro vides guidance on how to use voice
recognition and Bluetooth®connections.
Command Function
When listening to the radio, displays the
next radio screen. (FM1➟FM2➟AM➟XM1➟XM2➟XM3➟FM1)
Radio
When listening to a different mode, displays
the most recently played radio screen.
When currently listening to the FM radio,
maintains the current state.
When listening to a different mode, displaysthe most recently played FM screen.
FM1(FM One) Displays the FM1 screen.
FM2(FM Two) Displays the FM2 screen.
AM Displays the AM screen.
FM Preset 1~6 Plays the most recently played broadcast
saved in FM Preset 1~6.
AM Preset 1~6 Plays the broadcast saved in AM Preset 1~6.
FM 87.5~107.9 Plays the FM broadcast of the corresponding
frequency.
AM 530~1710 Plays the AM broadcast of the corresponding
frequency.
XM (Satellite)
When currently listening to the SiriusXM®,
maintains the current state.
When listening to a different mode, displaysthe most recently played SiriusXM®screen.
(Call by Name)
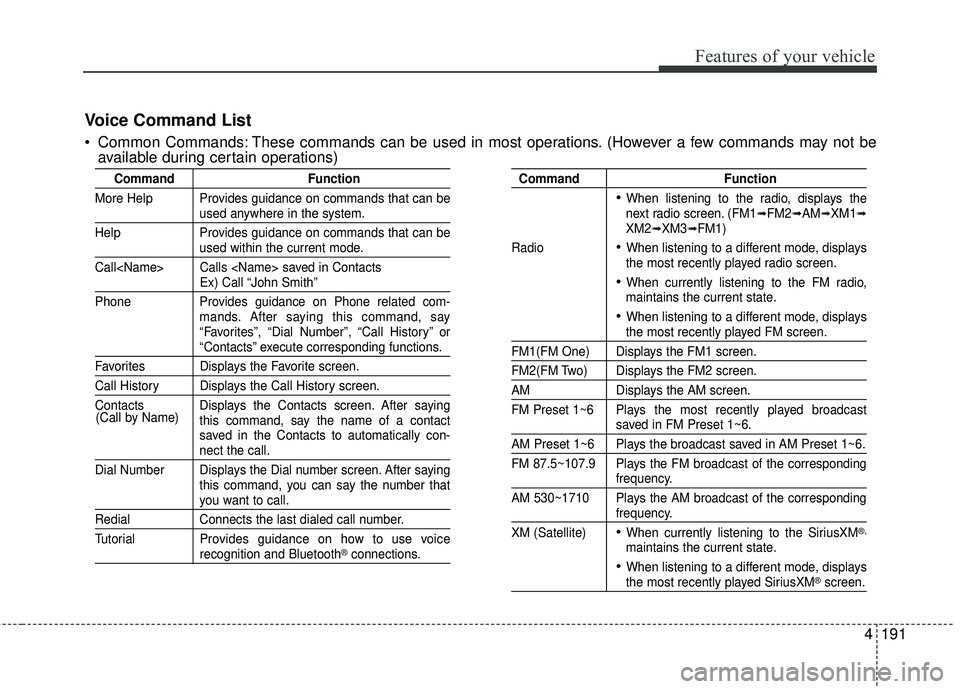
Voice Command List
Common Commands: These commands can be used in most operations. (However a few commands may not be
available during certain operations)
Page 294 of 475
57
Driving your vehicle
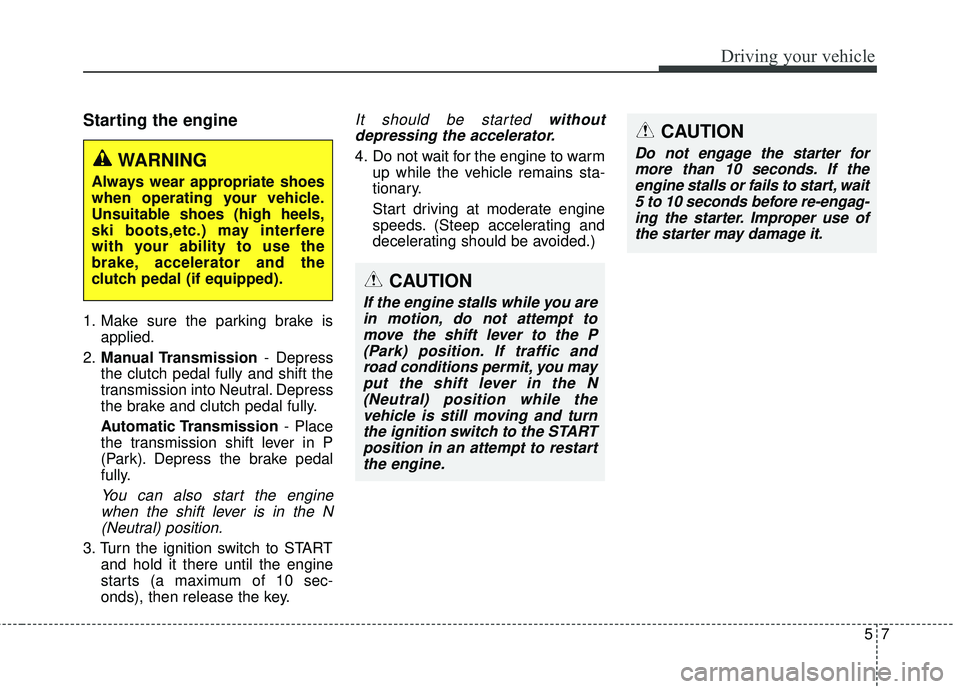
Starting the engine
1. Make sure the parking brake isapplied.
2. Manual Transmission - Depress
the clutch pedal fully and shift the
transmission into Neutral. Depress
the brake and clutch pedal fully.
Automatic Transmission - Place
the transmission shift lever in P
(Park). Depress the brake pedal
fully.
You can also start the engine when the shift lever is in the N(Neutral) position.
3. Turn the ignition switch to START and hold it there until the engine
starts (a maximum of 10 sec-
onds), then release the key.
It should be started withoutdepressing the accelerator.
4. Do not wait for the engine to warm up while the vehicle remains sta-
tionary.
Start driving at moderate engine
speeds. (Steep accelerating and
decelerating should be avoided.)WARNING
Always wear appropriate shoes
when operating your vehicle.
Unsuitable shoes (high heels,
ski boots,etc.) may interfere
with your ability to use the
brake, accelerator and the
clutch pedal (if equipped).
CAUTION
If the engine stalls while you arein motion, do not attempt tomove the shift lever to the P(Park) position. If traffic androad conditions permit, you mayput the shift lever in the N(Neutral) position while thevehicle is still moving and turnthe ignition switch to the STARTposition in an attempt to restartthe engine.
CAUTION
Do not engage the starter formore than 10 seconds. If theengine stalls or fails to start, wait5 to 10 seconds before re-engag-ing the starter. Improper use ofthe starter may damage it.
Page 298 of 475
511
Driving your vehicle
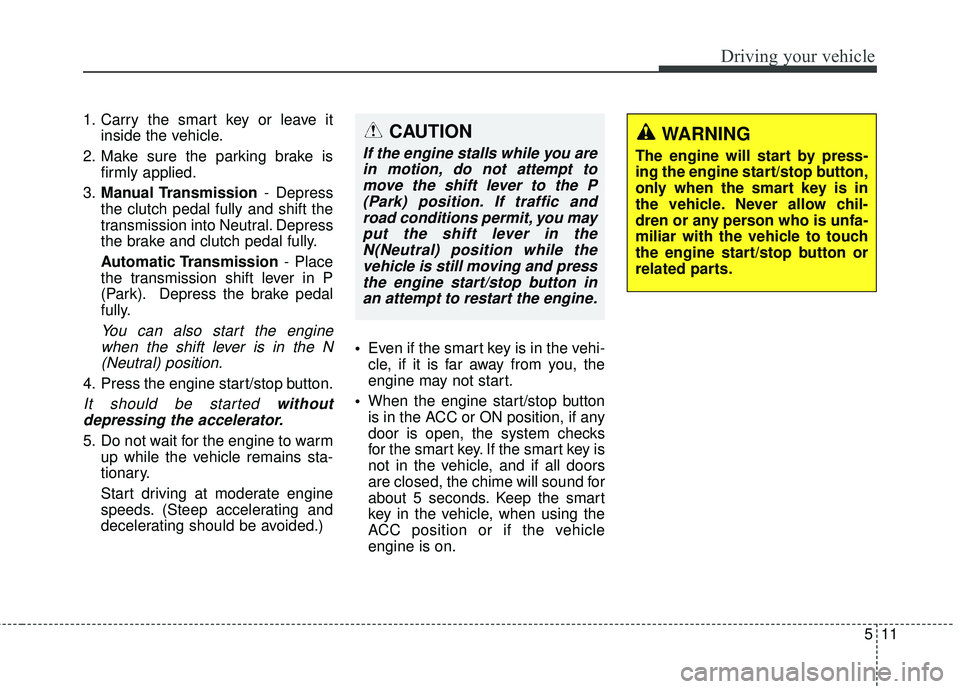
1. Carry the smart key or leave itinside the vehicle.
2. Make sure the parking brake is firmly applied.
3. Manual Transmission - Depress
the clutch pedal fully and shift the
transmission into Neutral. Depress
the brake and clutch pedal fully.
Automatic Transmission - Place
the transmission shift lever in P
(Park). Depress the brake pedal
fully.
You can also start the engine when the shift lever is in the N(Neutral) position.
4. Press the engine start/stop button.
It should be started withoutdepressing the accelerator.
5. Do not wait for the engine to warm up while the vehicle remains sta-
tionary.
Start driving at moderate engine
speeds. (Steep accelerating and
decelerating should be avoided.)
Even if the smart key is in the vehi-
cle, if it is far away from you, the
engine may not start.
When the engine start/stop button
is in the ACC or ON position, if any
door is open, the system checks
for the smart key. If the smart key is
not in the vehicle, and if all doors
are closed, the chime will sound for
about 5 seconds. Keep the smart
key in the vehicle, when using the
ACC position or if the vehicle
engine is on.
WARNING
The engine will start by press-
ing the engine start/stop button,
only when the smart key is in
the vehicle. Never allow chil-
dren or any person who is unfa-
miliar with the vehicle to touch
the engine start/stop button or
related parts.
CAUTION
If the engine stalls while you are
in motion, do not attempt tomove the shift lever to the P(Park) position. If traffic androad conditions permit, you mayput the shift lever in theN(Neutral) position while thevehicle is still moving and pressthe engine start/stop button inan attempt to restart the engine.
Page 307 of 475
Driving your vehicle
20
5
D (Drive)
This is the normal forward driving
position. The transmission will auto-
matically shift through a 8-gear
sequence, providing the best fuel
economy and power.
For extra power when passing anoth-
er vehicle or climbing grades,
depress the accelerator fully, at
which time the transmission will
automatically downshift to the next
lower gear (or gears, as appropri-
ate).
✽ ✽
NOTICE
Always come to a complete stop
before shifting into D (Drive).
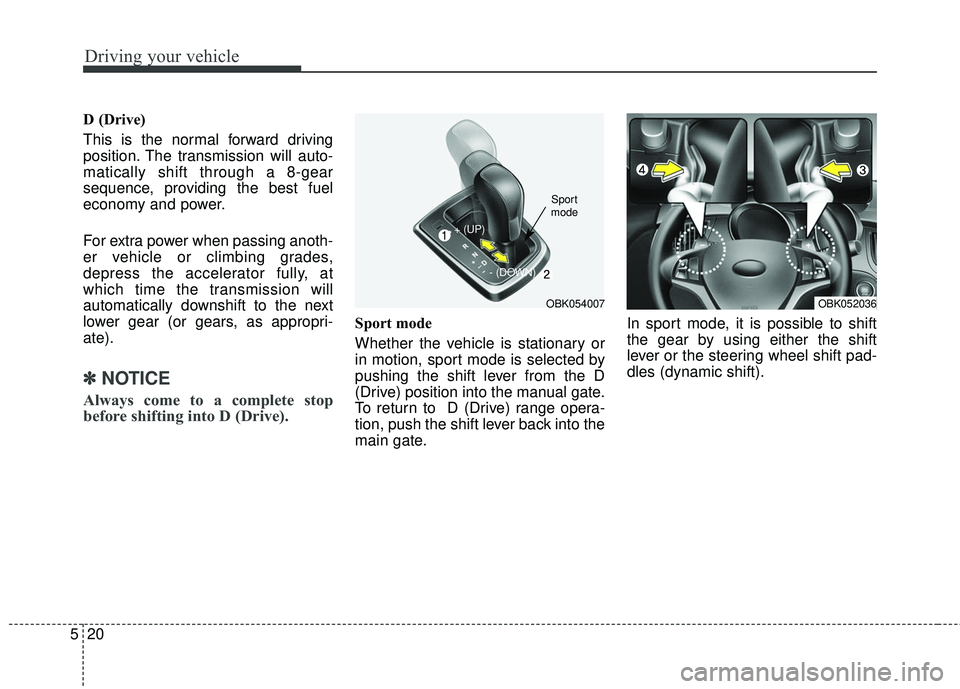
Sport mode
Whether the vehicle is stationary or
in motion, sport mode is selected by
pushing the shift lever from the D
(Drive) position into the manual gate.
To return to D (Drive) range opera-
tion, push the shift lever back into the
main gate. In sport mode, it is possible to shift
the gear by using either the shift
lever or the steering wheel shift pad-
dles (dynamic shift).
OBK054007
+ (UP)
- (DO
WN)
Sport
mode
OBK052036
Page 321 of 475
Driving your vehicle
34
5
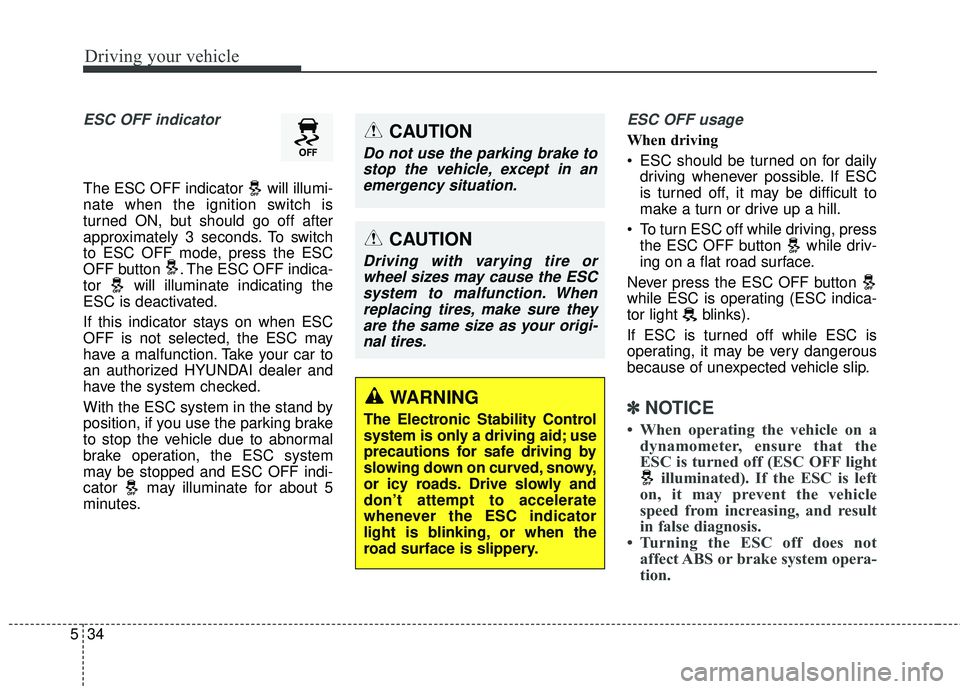
ESC OFF indicator
The ESC OFF indicator will illumi-
nate when the ignition switch is
turned ON, but should go off after
approximately 3 seconds. To switch
to ESC OFF mode, press the ESC
OFF button . The ESC OFF indica-
tor will illuminate indicating the
ESC is deactivated.
If this indicator stays on when ESC
OFF is not selected, the ESC may
have a malfunction. Take your car to
an authorized HYUNDAI dealer and
have the system checked.
With the ESC system in the stand by
position, if you use the parking brake
to stop the vehicle due to abnormal
brake operation, the ESC system
may be stopped and ESC OFF indi-
cator may illuminate for about 5
minutes.
ESC OFF usage
When driving
ESC should be turned on for daily
driving whenever possible. If ESC
is turned off, it may be difficult to
make a turn or drive up a hill.
To turn ESC off while driving, press the ESC OFF button while driv-
ing on a flat road surface.
Never press the ESC OFF button
while ESC is operating (ESC indica-
tor light blinks).
If ESC is turned off while ESC is
operating, it may be very dangerous
because of unexpected vehicle slip.
✽ ✽ NOTICE
• When operating the vehicle on a
dynamometer, ensure that the
ESC is turned off (ESC OFF light illuminated). If the ESC is left
on, it may prevent the vehicle
speed from increasing, and result
in false diagnosis.
• Turning the ESC off does not affect ABS or brake system opera-
tion.
CAUTION
Driving with varying tire or
wheel sizes may cause the ESCsystem to malfunction. Whenreplacing tires, make sure theyare the same size as your origi-nal tires.
WARNING
The Electronic Stability Control
system is only a driving aid; use
precautions for safe driving by
slowing down on curved, snowy,
or icy roads. Drive slowly and
don’t attempt to accelerate
whenever the ESC indicator
light is blinking, or when the
road surface is slippery.
CAUTION
Do not use the parking brake tostop the vehicle, except in anemergency situation.
Page 328 of 475

541
Driving your vehicle
Your vehicle's fuel economy depends
mainly on your style of driving, where
you drive and when you drive.
Each of these factors affects how
many miles (kilometers) you can get
from a gallon (liter) of fuel. To operate
your vehicle as economically as possi-
ble, use the following driving sugges-
tions to help save money in both fuel
and repairs:
Drive smoothly. Accelerate at a mod-erate rate. Don't make "jack-rabbit"
starts or full-throttle shifts and main-
tain a steady cruising speed. Don't
race between stoplights. Try to adjust
your speed to that of the other traffic
so you don't have to change speeds
unnecessarily. Avoid heavy traffic
whenever possible. Always maintain
a safe distance from other vehicles
so you can avoid unnecessary brak-
ing. This also reduces brake wear.
Drive at a moderate speed. The faster you drive the more fuel your
vehicle uses. Driving at a moderate
speed, in the highest gear appropri-
ate for the conditions, especially on
the highway, is one of the most effec-
tive ways to reduce fuel consump-
tion. Don't "ride" the brake or clutch
pedal. This can increase fuel con-
sumption and also increase wear
on these components. In addition,
driving with your foot resting on the
brake pedal may cause the brakes
to overheat, which reduces their
effectiveness and may lead to
more serious consequences.
Take care of your tires. Keep them inflated to the recommended pres-
sure. Incorrect inflation, either too
much or too little, results in unnec-
essary tire wear. Check the tire
pressures at least once a month.
Be sure that the wheels are aligned correctly. Improper align-
ment can result from hitting curbs
or driving too fast over irregular
surfaces. Poor alignment causes
faster tire wear and may also result
in other problems as well as
greater fuel consumption. Keep your car in good condition.
For better fuel economy and
reduced maintenance costs, main-
tain your car in accordance with
the maintenance schedule in sec-
tion 7. If you drive your car in
severe conditions, more frequent
maintenance is required (see sec-
tion 7 for details).
Keep your car clean. For maximum service, your vehicle should be
kept clean and free of corrosive
materials. It is especially important
that mud, dirt, ice, etc. not be
allowed to accumulate on the
underside of the car. This extra
weight can result in increased fuel
consumption and also contribute to
corrosion.
Travel lightly. Don't carry unneces- sary weight in your car. Weight
reduces fuel economy.
Don't let the engine idle longer than necessary. If you are waiting
(and not in traffic), turn off your
engine and restart only when
you're ready to go.
ECONOMICAL OPERATION
Page 421 of 475

Maintenance
52
7
Outward Facing Sidewall : The side
of a asymmetrical tire that has a par-
ticular side that faces outward when
mounted on a vehicle. The outward
facing sidewall bears white lettering
or bears manufacturer, brand, and/or
model name molding that is higher or
deeper than the same moldings on
the inner facing sidewall.
Passenger (P-Metric) Tire : A tire
used on passenger cars and some
light duty trucks and multipurpose
vehicles.
Ply: A layer of rubber-coated parallel
cords
Pneumatic tire: A mechanical device
made of rubber, chemicals, fabric and
steel or other materials, that, when
mounted on an automotive wheel
provides the traction and contains the
gas or fluid that sustains the load.
Production options weight : The
combined weight of installed regular
production options weighing over 5
lb.(2.3 kg) in excess of the standard
items which they replace, not previ-
ously considered in curb weight or
accessory weight, including heavy
duty brakes, ride levelers, roof rack,
heavy duty battery, and special trim. Recommended Inflation Pressure
:
Vehicle manufacturer's recommend-
ed tire inflation pressure and shown
on the tire placard.
Radial Ply Tire : A pneumatic tire in
which the ply cords that extend to the
beads are laid at 90 degrees to the
centerline of the tread.
Rim: A metal support for a tire and
upon which the tire beads are seat-
ed.
Sidewall: The portion of a tire
between the tread and the bead.
Speed Rating: An alphanumeric
code assigned to a tire indicating the
maximum speed at which a tire can
operate.
Traction: The friction between the
tire and the road surface. The
amount of grip provided.
Tread: The portion of a tire that
comes into contact with the road.
Treadwear Indicators: Narrow
bands, sometimes called "wear
bars", that show across the tread of a
tire when only 2/32 inch of tread
remains. UTQGS: Uniform Tire Quality
Grading Standards, a tire information
system that provides consumers with
ratings for a tire's traction, tempera-
ture and treadwear. Ratings are
determined by tire manufacturers
using government testing proce-
dures. The ratings are molded into
the sidewall of the tire.
Vehicle Capacity Weight
: The num-
ber of designated seating positions
multiplied by 150 lbs. (68 kg) plus the
rated cargo and luggage load.
Vehicle Maximum Load on the
Tire: Load on an individual tire due to
curb and accessory weight plus
maximum occupant and cargo
weight.
Vehicle Normal Load on the Tire :
Load on an individual tire that is
determined by distributing to each
axle its share of the curb weight,
accessory weight, and normal occu-
pant weight and dividing by 2.
Vehicle Placard: A label permanent-
ly attached to a vehicle showing the
original equipment tire size and rec-
ommended inflation pressure.