Page 166 of 475
483
Features of your vehicle
Daytime running light
(if equipped)
Daytime Running Lights (DRL) can
make it easier for others to see the
front of your vehicle during the day.
DRL can be helpful in many different
driving conditions, and it is especially
helpful after dawn and before sunset.
The DRL system turns OFF when:
1. The multifunction switch is in theOFF position. (if equipped)
2. The headlights are ON.
3. The turn signal is ON. (the blinking side of the DRL will turn off)
4. The hazard warning light is ON.
5. The parking brake is applied.
6. Engine stops.
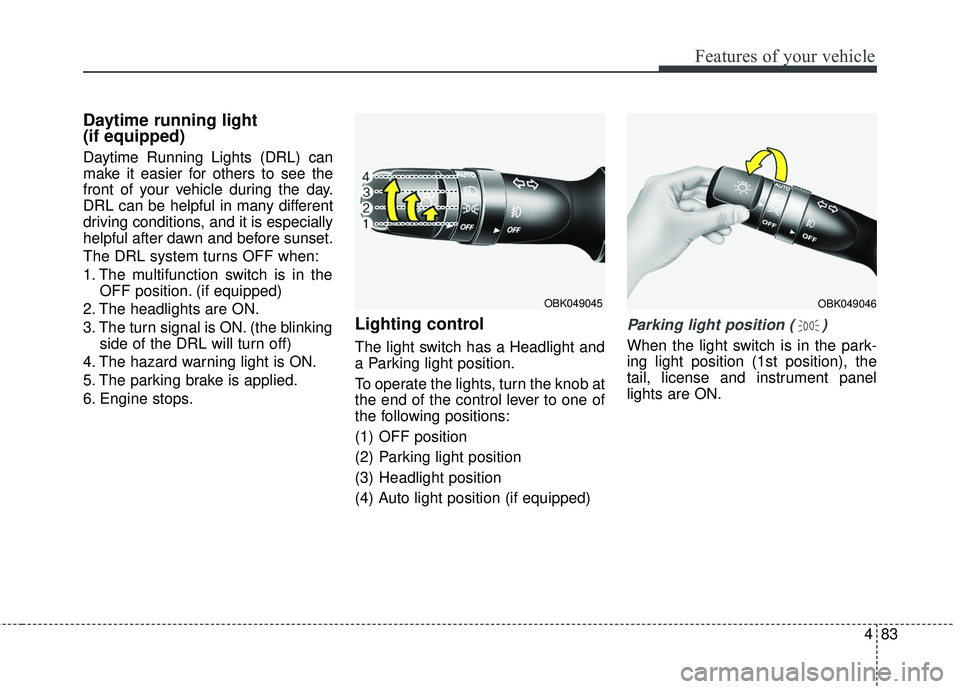
Lighting control
The light switch has a Headlight and
a Parking light position.
To operate the lights, turn the knob at
the end of the control lever to one of
the following positions:
(1) OFF position
(2) Parking light position
(3) Headlight position
(4) Auto light position (if equipped)
Parking light position ( )
When the light switch is in the park-
ing light position (1st position), the
tail, license and instrument panel
lights are ON.
OBK049046OBK049045
Page 167 of 475
Features of your vehicle
84
4
Headlight position ( )
When the light switch is in the head-
light position (2nd position), the
head, tail, license and instrument
panel lights are ON.
✽ ✽
NOTICE
The ignition switch must be in the
ON position to turn on the head-
lights.
Auto light position (if equipped)
When the light switch is in the AUTO
light position, the taillights and head-
lights will be turned ON or OFF auto-
matically depending on the amount
of light outside the vehicle.
OBK049048
CAUTION
Never place anything over
sensor (1) located on theinstrument panel. This willensure better auto-light sys-tem control.
Don’t clean the sensor using a window cleaner. The cleanermay leave a light film whichcould interfere with sensoroperation.
If your vehicle has window tint or other types of metallic coat-ing on the front windshield,the Auto light system may notwork properly.
OBK049047
Page 168 of 475
485
Features of your vehicle
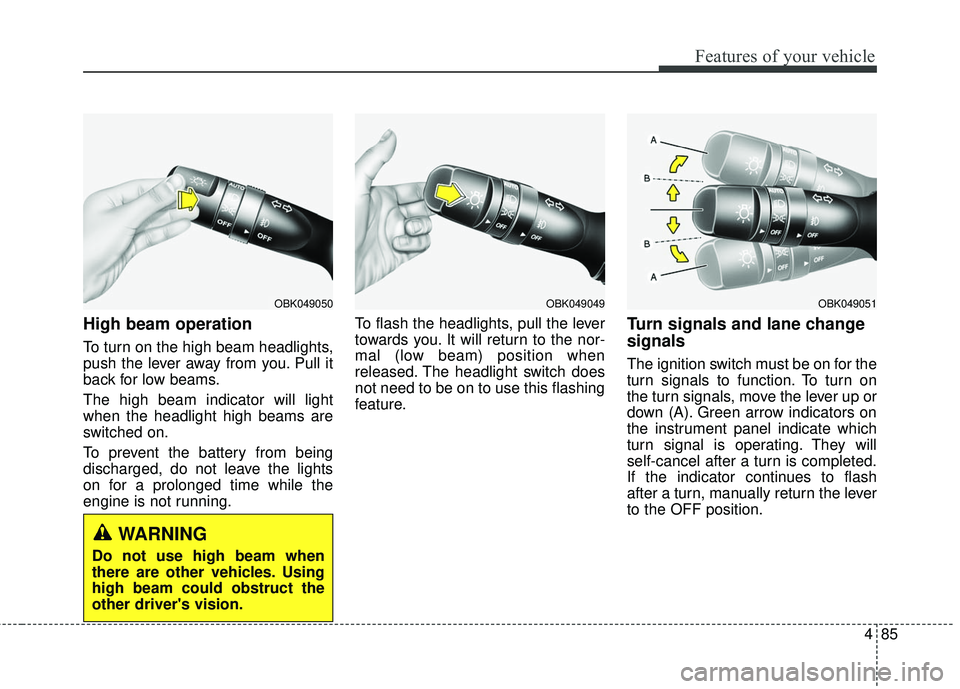
High beam operation
To turn on the high beam headlights,
push the lever away from you. Pull it
back for low beams.
The high beam indicator will light
when the headlight high beams are
switched on.
To prevent the battery from being
discharged, do not leave the lights
on for a prolonged time while the
engine is not running.To flash the headlights, pull the lever
towards you. It will return to the nor-
mal (low beam) position when
released. The headlight switch does
not need to be on to use this flashing
feature.
Turn signals and lane change
signals
The ignition switch must be on for the
turn signals to function. To turn on
the turn signals, move the lever up or
down (A). Green arrow indicators on
the instrument panel indicate which
turn signal is operating. They will
self-cancel after a turn is completed.
If the indicator continues to flash
after a turn, manually return the lever
to the OFF position.
OBK049051OBK049049OBK049050
WARNING
Do not use high beam when
there are other vehicles. Using
high beam could obstruct the
other driver's vision.
Page 174 of 475

491
Features of your vehicle
✽
✽NOTICE
If you want to defrost and defog the
front windshield, refer to
“Windshield defrosting and defog-
ging” in this section.
Rear window defroster
The defroster heats the window to
remove frost, fog and thin ice from
the rear window, while the engine is
running.
To activate the rear window
defroster, press the rear window
defroster button located in the center
facia switch panel. The indicator on
the rear window defroster button illu-
minates when the defroster is ON.
If there is heavy accumulation of
snow on the rear window, brush it off
before operating the rear defroster. The rear window defroster automati-
cally turns off after approximately 20
minutes or when the ignition switch is
turned off. To turn off the defroster,
press the rear window defroster but-
ton again.
Outside rearview mirror defroster
(if equipped)
If your vehicle is equipped with the
outside rearview mirror defrosters,
they will operate at the same time
you turn on the rear window
defroster.
Front windshield deicer
(if equipped)
If your vehicle is equipped with the
front windshield deicer, it will be
operating at the same time you oper-
ate the rear window defroster.
CAUTION
To prevent damage to the con-ductors bonded to the insidesurface of the rear window,never use sharp instruments orwindow cleaners containingabrasives to clean the window.
DEFROSTER
OBK042100
Page 178 of 475
495
Features of your vehicle
MAX A/C-Level (B,D)
The MAX A/C mode is used to cool
the inside of the vehicle faster.
Air flow is directed toward the upper
body and face with a small amount of
the air being directed to the floor.
In this mode, the air conditioning and
the recirculated air position will be
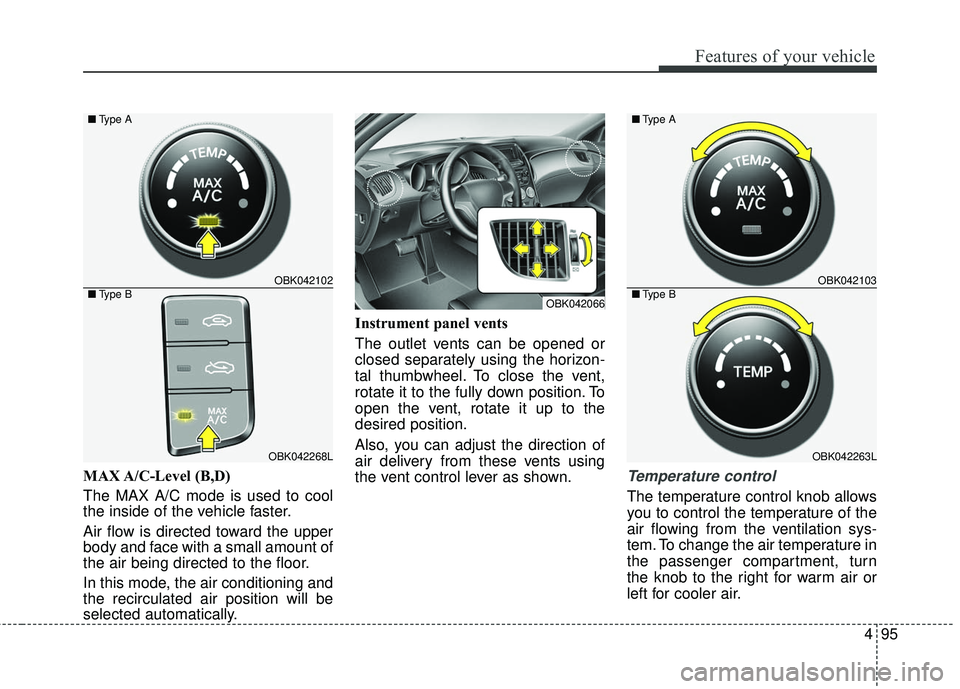
selected automatically.Instrument panel vents
The outlet vents can be opened or
closed separately using the horizon-
tal thumbwheel. To close the vent,
rotate it to the fully down position. To
open the vent, rotate it up to the
desired position.
Also, you can adjust the direction of
air delivery from these vents using
the vent control lever as shown.Temperature control
The temperature control knob allows
you to control the temperature of the
air flowing from the ventilation sys-
tem. To change the air temperature in
the passenger compartment, turn
the knob to the right for warm air or
left for cooler air.
OBK042102
OBK042268L
■
Type A
■ Type B
OBK042066
OBK042103
OBK042263L
■
Type A
■ Type B
Page 188 of 475

4105
Features of your vehicle
✽
✽NOTICE
Never place anything over the sen-
sor located on the instrument panel
to ensure better control of the heat-
ing and cooling system.
Manual heating and air condi-
tioning
The heating and cooling system can
be controlled manually by pushing
buttons other than the AUTO button.
In this case, the system works
sequentially according to the order of
buttons selected.
When pressing any button except the
AUTO button while using automatic
operation, the functions not selected
will be controlled automatically.
1. Start the engine.
2. Set the mode to the desired position.
For improving the effectiveness of
heating and cooling;
- Heating:
- Cooling:
3. Set the temperature control to the desired position.
4. Set the air intake control to the outside (fresh) air position.
5. Set the fan speed control to the desired speed.
6. If air conditioning is desired, turn the air conditioning system on.
Press the AUTO button in order to
convert to full automatic control of
the system.
Mode selection
The mode selection button controls
the direction of the air flow through
the ventilation system.
The air flow outlet port is converted
as follows:
OBK042232
■
Type A, C
■ Type B, DOBK049062
Page 190 of 475
4107
Features of your vehicle
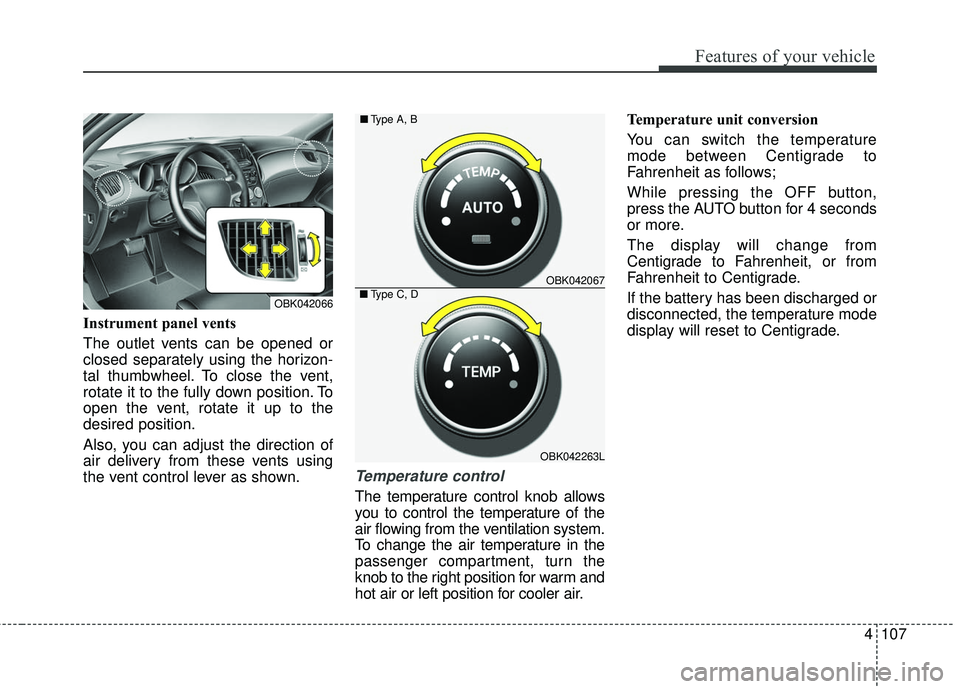
Instrument panel vents
The outlet vents can be opened or
closed separately using the horizon-
tal thumbwheel. To close the vent,
rotate it to the fully down position. To
open the vent, rotate it up to the
desired position.
Also, you can adjust the direction of
air delivery from these vents using
the vent control lever as shown.
Temperature control
The temperature control knob allows
you to control the temperature of the
air flowing from the ventilation system.
To change the air temperature in the
passenger compartment, turn the
knob to the right position for warm and
hot air or left position for cooler air.Temperature unit conversion
You can switch the temperature
mode between Centigrade to
Fahrenheit as follows;
While pressing the OFF button,
press the AUTO button for 4 seconds
or more.
The display will change from
Centigrade to Fahrenheit, or from
Fahrenheit to Centigrade.
If the battery has been discharged or
disconnected, the temperature mode
display will reset to Centigrade.
OBK042067
OBK042263L
■
Type A, B
■Type C, DOBK042066
Page 425 of 475
Maintenance
56
7
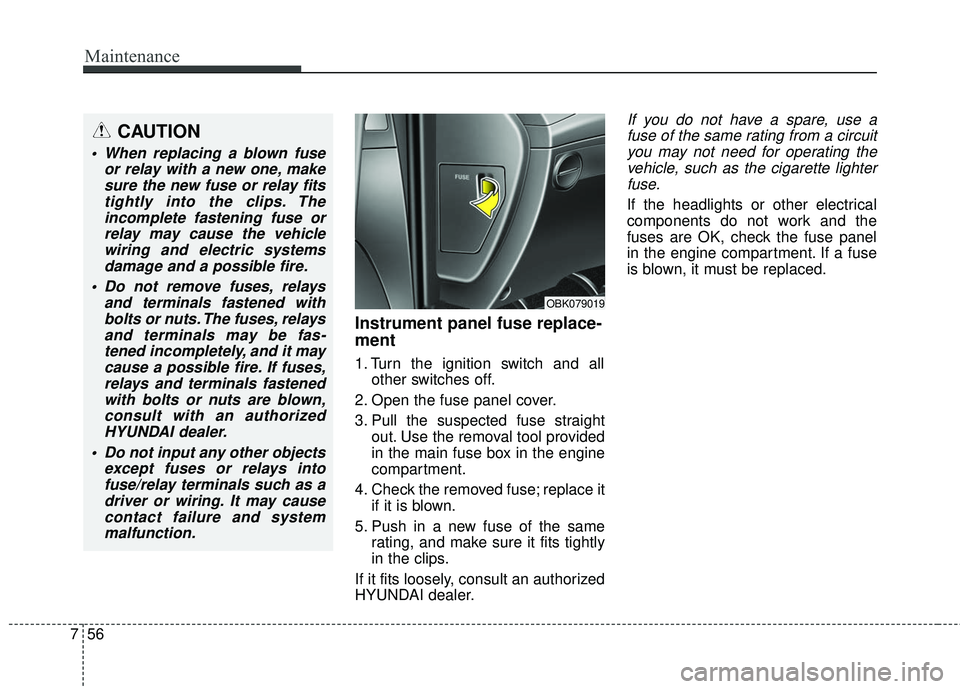
Instrument panel fuse replace-
ment
1. Turn the ignition switch and all
other switches off.
2. Open the fuse panel cover.
3. Pull the suspected fuse straight out. Use the removal tool provided
in the main fuse box in the engine
compartment.
4. Check the removed fuse; replace it if it is blown.
5. Push in a new fuse of the same rating, and make sure it fits tightly
in the clips.
If it fits loosely, consult an authorized
HYUNDAI dealer.
If you do not have a spare, use a fuse of the same rating from a circuityou may not need for operating thevehicle, such as the cigarette lighterfuse.
If the headlights or other electrical
components do not work and the
fuses are OK, check the fuse panel
in the engine compartment. If a fuse
is blown, it must be replaced.
OBK079019
CAUTION
When replacing a blown fuse or relay with a new one, makesure the new fuse or relay fitstightly into the clips. Theincomplete fastening fuse orrelay may cause the vehiclewiring and electric systemsdamage and a possible fire.
Do not remove fuses, relays and terminals fastened withbolts or nuts. The fuses, relaysand terminals may be fas-tened incompletely, and it maycause a possible fire. If fuses,relays and terminals fastenedwith bolts or nuts are blown,consult with an authorizedHYUNDAI dealer.
Do not input any other objects except fuses or relays intofuse/relay terminals such as adriver or wiring. It may causecontact failure and systemmalfunction.