Page 124 of 475

441
Features of your vehicle
4. Firmly press, hold for 5 secondsand release the programmed
HomeLink
®button up to two sepa-
rate times to activate the door. If the
door does not activate, press and
hold the just-trained HomeLink
®
button and observe the indicator
light.
stantly, programming is complete
and your device should activate
when the HomeLink
®button is
pressed and released.
for 2 seconds and then turns to
a constant light, continue with
"Programming" steps 5-7 to com-
plete the programming of a rolling
code equipped device (most com-
monly a garage door opener).
5. At the garage door opener receiv- er (motor-head unit) in the garage,
locate the "leam" or "smart" but-
ton. This can usually be found
where the hanging antenna wire is
attached to the motor-head unit. 6. Firmly press and release the
"leam" or "smart" button. (The
name and color of the button vary
by manufacturer). There are 30
seconds to initiate step 7.
7. Return to the vehicle and firmly press, hold for 2 seconds
and release the programmed
HomeLink
®button. Repeat the
"press/hold/release" sequence a
second time, and, depending on
the brand of the garage door
opener (or other rolling code
equipped device), repeat this
sequence a third time to complete
the programming process.
HomeLink
®should now activate your
rolling code equipped device. Gate operator & Canadian
programming
During programming, your handheld
transmitter may automatically stop
transmitting. Continue to press
the Integrated HomeLink
®Wireless
Control System button (note steps
2 through 4 in the Standard
Programming portion of this docu-
ment) while you press and re-press
("cycle") your handheld transmitter
every two seconds until the frequen-
cy signal has been learned. The indi-
cator light will flash slowly and then
rapidly after several seconds upon
successful training.
Operating HomeLink
®
To operate, simply press and release
the programmed HomeLink®button.
Activation will now occur for the
trained device (i.e. garage door open-
er, gate operator, security system,
entry door lock, home/office lighting,
etc.). For convenience, the hand-held
transmitter of the device may also be
used at any time.
procarmanuals.com
Page 149 of 475

Features of your vehicle
66
4
Shift pattern indicator
The indicator displays which auto-
matic transmission shift position is
selected.
Charging system warn-
ing light
This warning light indicates a mal-
function of either the generator or
electrical charging system.
If the warning light comes on while
the vehicle is in motion:
1. Drive to the nearest safe location.
2. With the engine off, check the gen- erator drive belt for looseness or
breakage.
3. If the belt is adjusted properly, a problem exists somewhere in the
electrical charging system. Have
an authorized HYUNDAI dealer
correct the problem as soon as
possible.
Front fog light indicator
(if equipped)
This light comes on when the front
fog lights are ON.
Trunk lid open warninglight
This warning light illuminates when
the trunk lid is not closed securely
with the ignition in any position.
Door ajar warning light
This warning light illuminates when a
door is not closed securely with the
ignition switch in any position.
Immobilizer indicator
Without smart key system
This light illuminates when the immo-
bilizer key is inserted and turned to
the ON position to start the engine.
At this time, you can start the engine.
The light goes out after the engine is
running.
If this light blinks when the ignition
switch is in the ON position before
starting the engine, have the system
checked by an authorized HYUNDAI
dealer.
With smart key system (if equipped)
If any of the following occurs in a
vehicle equipped with the smart key,
the immobilizer indicator illuminates,
blinks or the light goes off.
procarmanuals.com
Page 173 of 475
Features of your vehicle
90
4
Trunk room lamp
The trunk room lamp comes on
when the trunk is opened.
Glove box lamp
The glove box lamp comes on when
the glove box is opened.
The parking lights or headlights must
be ON for the glove box lamp to func-
tion.
Vanity mirror lamp
Pull the sunvisor downward and you
can turn the vanity mirror lamp ON or
OFF by pushing the button.
: To turn the lamp ON.
To turn the lamp OFF.
OBK049056
CAUTION
The trunk room lamp comes on
as long as the trunk lid opens.To prevent unnecessary charg-ing system drain, close thetrunk lid securely after using thetrunk room.
OBK049057OTD049088
CAUTION
To prevent unnecessary charg-ing system drain, turn off thelamp by pushing the O buttonafter using the lamp.
procarmanuals.com
Page 203 of 475

Features of your vehicle
120
4
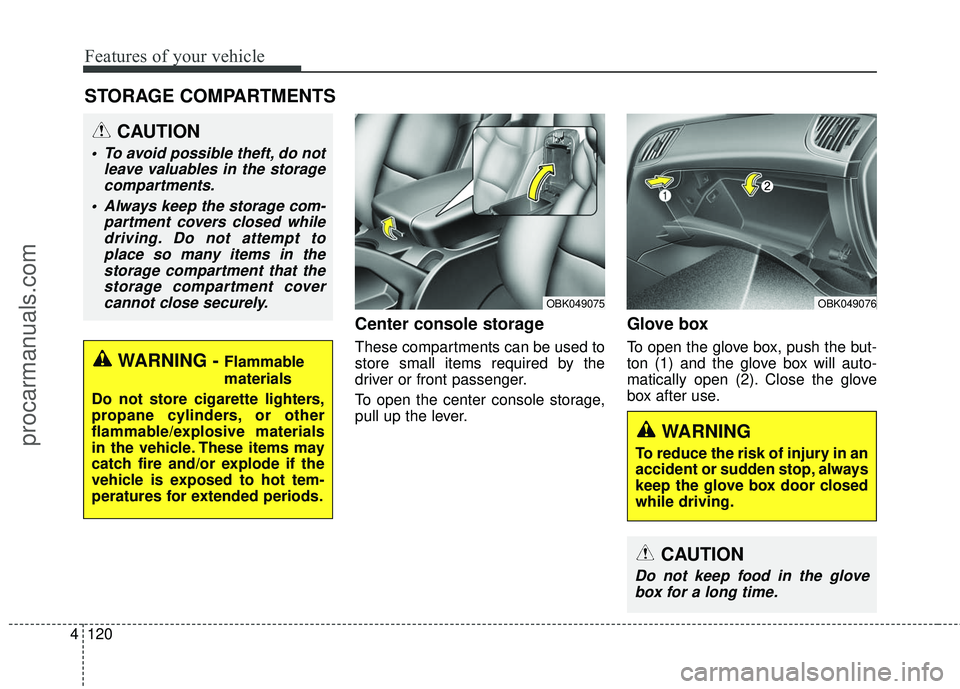
Center console storage
These compartments can be used to
store small items required by the
driver or front passenger.
To open the center console storage,
pull up the lever.
Glove box
To open the glove box, push the but-
ton (1) and the glove box will auto-
matically open (2). Close the glove
box after use.
STORAGE COMPARTMENTS
WARNING - Flammable
materials
Do not store cigarette lighters,
propane cylinders, or other
flammable/explosive materials
in the vehicle. These items may
catch fire and/or explode if the
vehicle is exposed to hot tem-
peratures for extended periods.
CAUTION
To avoid possible theft, do not leave valuables in the storagecompartments.
Always keep the storage com- partment covers closed whiledriving. Do not attempt toplace so many items in thestorage compartment that thestorage compartment covercannot close securely.
OBK049076OBK049075
WARNING
To reduce the risk of injury in an
accident or sudden stop, always
keep the glove box door closed
while driving.
CAUTION
Do not keep food in the glovebox for a long time.
procarmanuals.com
Page 205 of 475

Features of your vehicle
122
4
WARNING- Hot liquids
Do not place uncovered cups of hot liquid in the cup holder
while the vehicle is in motion.
If the hot liquid spills, you
could be burned. Such a burn
to the driver could lead to loss
of control of the vehicle.
To reduce the risk of personal injury in the event of sudden
stop or collision, do not place
uncovered or unsecured bot-
tles, glasses, cans, etc., in the
cup holder while the vehicle is
in motion.
WARNING
Keep cans or bottles out of
direct sun light and do not put
them in a vehicle that is heated
up. It may explode.
CAUTION
When cleaning spilled liquid, do
not dry the cup holder at hightemperatures. This may damagethe chrome part of the cup holder.
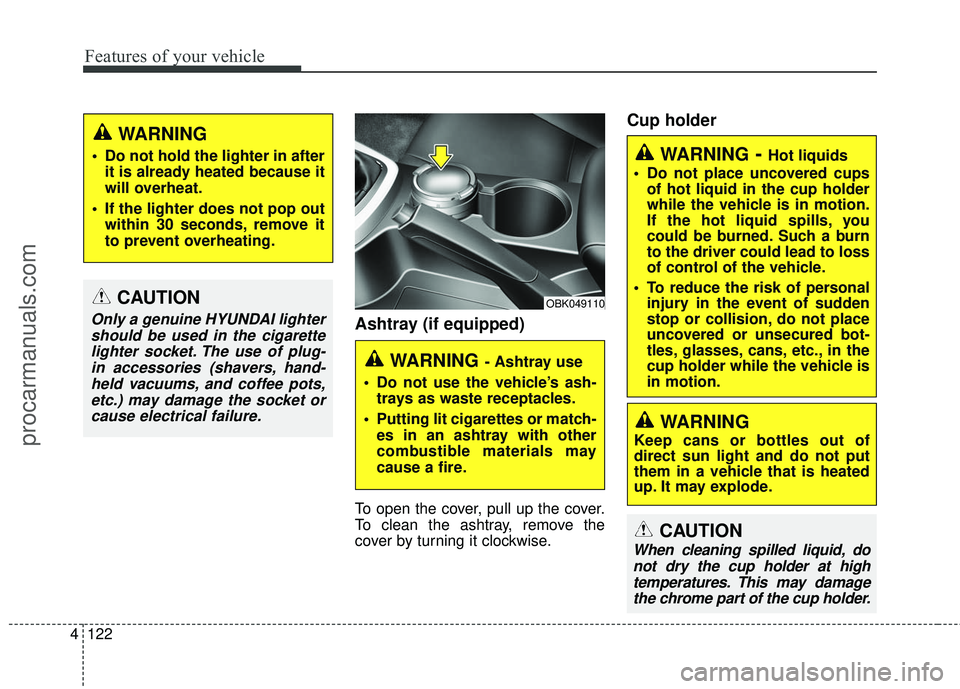
Ashtray (if equipped)
To open the cover, pull up the cover.
To clean the ashtray, remove the
cover by turning it clockwise.
Cup holder
CAUTION
Only a genuine HYUNDAI lightershould be used in the cigarettelighter socket. The use of plug-in accessories (shavers, hand-held vacuums, and coffee pots,etc.) may damage the socket orcause electrical failure.
WARNING
Do not hold the lighter in after it is already heated because it
will overheat.
If the lighter does not pop out within 30 seconds, remove it
to prevent overheating.
WARNING - Ashtray use
Do not use the vehicle’s ash- trays as waste receptacles.
Putting lit cigarettes or match- es in an ashtray with other
combustible materials may
cause a fire.
OBK049110
procarmanuals.com
Page 206 of 475
4123
Features of your vehicle
Cups or small beverage cans may be
placed in the cup holders.Sunvisor
Use the sunvisor to shield direct light
through the front or side windows.
To use the sunvisor, pull it down-
ward.
To use the sunvisor for the side win-
dow, pull it downward, unsnap it from
the bracket (1) and swing it to the
side (2).
To use the vanity mirror, pull down
the visor and slide the mirror cover
(3).
Adjust the sunvisor extension for-
ward or backward (4). (if equipped)
The ticket holder (5) is provided for
holding a tollgate ticket.
OBK049079OEN046157
WARNING
Close the vanity mirror coversecurely and return the sunvi-
sor to its original position
after use.
For your safety, don't obstruct your field of vision when
using the sunvisor.
procarmanuals.com
Page 209 of 475

Features of your vehicle
126
4
CAUTION
To prevent damage to the goods
or the vehicle, care should betaken when carrying fragile orbulky objects in the luggagecompartment.
WARNING
Avoid eye injury. DO NOT over-
stretch the luggage net,
ALWAYS keep your face and
body out of the luggage net’s
recoil path. DO NOT use when
the strap has visible signs of
wear or damage.
Luggage net (holder)
(if equipped)
To keep items from shifting in the
cargo area, you can use the 4 hold-
ers located in the cargo area to
attach the luggage net.
If necessary, contact your authorized
HYUNDAI dealer to obtain a luggage
net.
WARNING
The following must be observed
when installing ANY floor mat
to the vehicle.
Ensure that the floor mats are
securely attached to the vehi-
cle's floor mat anchor(s) before
driving the vehicle.
Do not use ANY floor mat that cannot be firmly attached to
the vehicle's floor mat anchors.
Do not stack floor mats on top of one another (e.g. all-weath-
er rubber mat on top of a car-
peted floor mat). Only a single
floor mat should be installed
in each position.
IMPORTANT - Your vehicle was
manufactured with driver's side
floor mat anchors that are
designed to securely hold the
floor mat in place. To avoid any
interference with pedal opera-
tion, HYUNDAI recommends
that only the HYUNDAI floor mat
designed for use in your vehicle
be installed.
OBK049132
procarmanuals.com
Page 263 of 475
![HYUNDAI COUPE 2016 Owners Manual Features of your vehicle
180
4
[Non SSP supported device]
(SSP: Secure Simple Pairing)
4. After a few moments, a screen is
displayed where the passkey is
entered.
Enter the passkey "0000" to pair
your HYUNDAI COUPE 2016 Owners Manual Features of your vehicle
180
4
[Non SSP supported device]
(SSP: Secure Simple Pairing)
4. After a few moments, a screen is
displayed where the passkey is
entered.
Enter the passkey "0000" to pair
your](/manual-img/35/57912/w960_57912-262.png)
Features of your vehicle
180
4
[Non SSP supported device]
(SSP: Secure Simple Pairing)
4. After a few moments, a screen is
displayed where the passkey is
entered.
Enter the passkey "0000" to pair
your
Bluetooth®Wireless
Technology device with the car
audio system.
[SSP supported device]
4. After a few moments, a screen is displayed 6 digits passkey.
Check the passkey on your
Bluetooth®Wireless Technology
device and confirm.
5. Once pairing is complete, the fol- lowing screen is displayed.
✽ ✽NOTICE
If Bluetooth®Wireless Technology
devices are paired but none are cur-
rently connected, pressing the key or the key on the
steering wheel displays the following
screen. Press the [Pair] button to
pair a new device or press the
[Connect] to connect a previously
paired device.
Pairing through [PHONE]
Setup
Press the key Select
[Phone] Select [Pair Phone]
Select TUNE knob
1. The following steps are the same
as those described in the section
"When No Devices have been
Paired" on the previous page.SETUP
PHONE
procarmanuals.com