2016 Hyundai Azera seats
[x] Cancel search: seatsPage 51 of 521

331
Safety features of your vehicle
To install a child restraint system on
the outboard or center rear seats, do
the following:
1. Place the child restraint system onthe seat and route the lap/shoulder
belt around or through the restraint,
following the restraint manufactur-
er’s instructions. Be sure the seat
belt webbing is not twisted.
2. Fasten the lap/shoulder belt latch into the buckle. Listen for the dis-
tinct “click” sound.
Position the release button so that itis easy to access in case of an emer-gency.
3. Pull the shoulder portion of the seat belt all the way out. When the
shoulder portion of the seat belt is
fully extended, it will shift the
retractor to the “Automatic Locking”
(child restraint) mode. 4. Slowly allow the shoulder portion of
the seat belt to retract and listen for
an audible “clicking” or “ratcheting”
sound. This indicates that the retrac-
tor is in the “Automatic Locking”
mode. If no distinct sound is heard,
repeat steps 3 and 4.
OEN036101OEN036102OEN036103
Page 53 of 521
333
Safety features of your vehicle
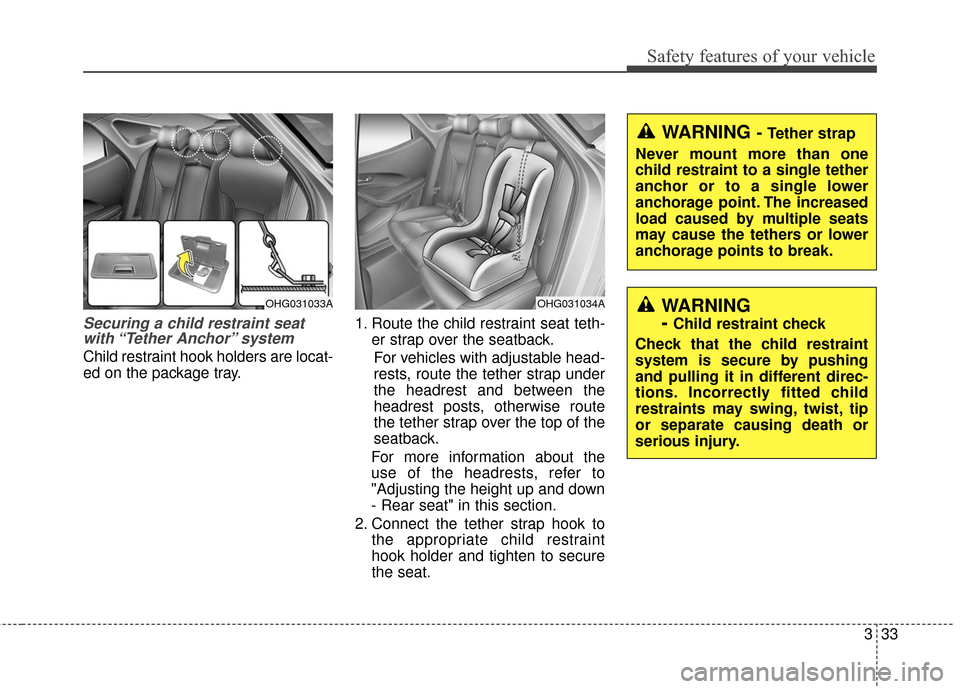
Securing a child restraint seatwith “Tether Anchor” system
Child restraint hook holders are locat-
ed on the package tray. 1. Route the child restraint seat teth-
er strap over the seatback.
For vehicles with adjustable head-
rests, route the tether strap under
the headrest and between the
headrest posts, otherwise route
the tether strap over the top of the
seatback.
For more information about the
use of the headrests, refer to
"Adjusting the height up and down
- Rear seat" in this section.
2. Connect the tether strap hook to the appropriate child restraint
hook holder and tighten to secure
the seat.
OHG031034A
WARNING - Tether strap
Never mount more than one
child restraint to a single tether
anchor or to a single lower
anchorage point. The increased
load caused by multiple seats
may cause the tethers or lower
anchorage points to break.
WARNING
-
Child restraint check
Check that the child restraint
system is secure by pushing
and pulling it in different direc-
tions. Incorrectly fitted child
restraints may swing, twist, tip
or separate causing death or
serious injury.
OHG031033A
Page 54 of 521
Safety features of your vehicle
34
3
Securing a child restraint seat
with child seat lower anchor sys-tem
Some child seat manufacturers
make child restraint seats that are
labeled as LATCH or LATCH-com-
patible child restraint seats. LATCH
stands for "Lower Anchors and
Tethers for Children". These seats
include two rigid or webbing mount-
ed attachments that connect to two
LATCH anchors at specific seating
positions in your vehicle. This type of
child restraint seat eliminates the
need to use seat belts to attach the
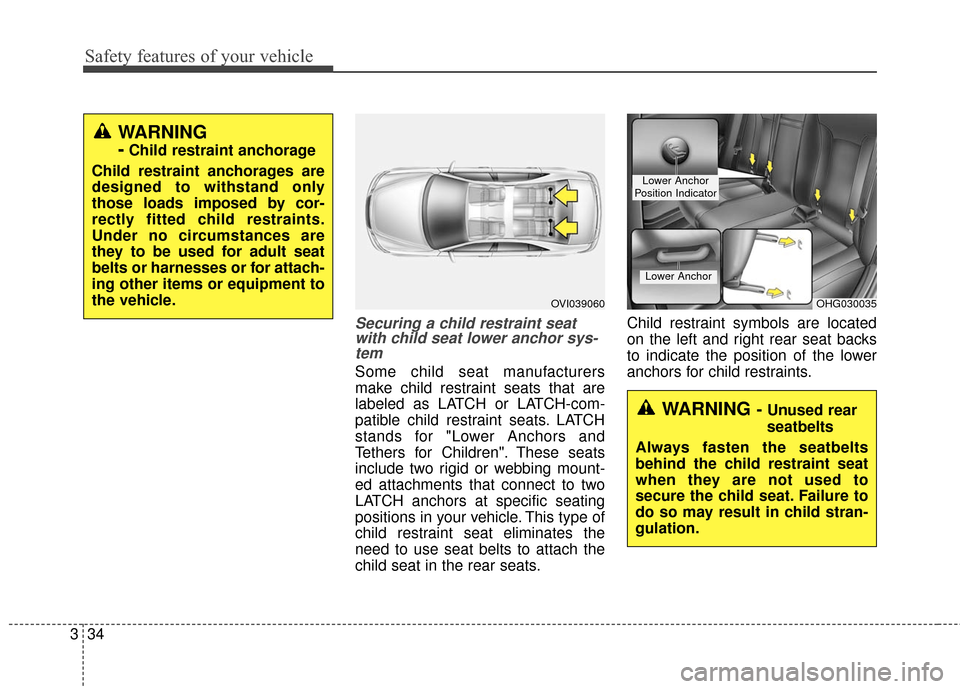
child seat in the rear seats. Child restraint symbols are located
on the left and right rear seat backs
to indicate the position of the lower
anchors for child restraints.
WARNING
-
Child restraint anchorage
Child restraint anchorages are
designed to withstand only
those loads imposed by cor-
rectly fitted child restraints.
Under no circumstances are
they to be used for adult seat
belts or harnesses or for attach-
ing other items or equipment to
the vehicle.
OVI039060OHG030035
Lower Anchor
Lower Anchor
Position Indicator
WARNING - Unused rear
seatbelts
Always fasten the seatbelts
behind the child restraint seat
when they are not used to
secure the child seat. Failure to
do so may result in child stran-
gulation.
Page 55 of 521
335
Safety features of your vehicle
LATCH anchors have been provided
in your vehicle. The LATCH anchors
are located in the left and right out-
board rear seating positions. Their
locations are shown in the illustration.
There is no LATCH anchor provided
for the center rear seating position.
The LATCH anchors are located
between the seatback and the seat
cushion of the rear seat left and right
outboard seating positions. When
you install your child's restraint sys-
tem using the LATCH anchors, buck-
le the shoulder lap belt, then lock the
retractor and pull the belt to remove
the slack in the belt so it lies flat
against the vehicle seat.Follow the child seat manufacturer’s
instructions to properly install child
restraint seats with LATCH or
LATCH-compatible attachments.
Once you have installed the LATCH
child restraint, assure that the seat is
properly attached to the LATCH and
tether anchors.
Also, test the child restraint seat
before you place the child in it. Tilt
the seat from side to side. Also try to
tug the seat forward. Check to see if
the anchors hold the seat in place.
✽ ✽
NOTICE
The recommended weight for the
LATCH system is under 65 lbs (30
kg).
How to calculate the child restraint
weight :
Child restraint weight =
65 lbs (30 kg) - Child weightWARNING
If the child restraint is not
anchored properly, the risk of a
child being seriously injured or
killed in a collision greatly
increases.
WARNING
- LATCH lower anchors
Never attempt to attach a
LATCH equipped seat in the
center seating position. LATCH
lower anchors are only to be
used with the left and right rear
outboard seating positions. You
may damage the anchors or the
anchors may fail and break in a
collision.
WARNING
Do not place anything around
the lower anchors. Also make
sure that the seat belt is not
caught in the lower anchors.
Page 59 of 521

339
Safety features of your vehicle
Air bag warning indicator
Air bag warning light
The purpose of the air bag warning
light in your instrument panel is to
alert you of a potential problem with
your air bag - Supplemental
Restraint System (SRS).
When the ignition switch is turned
ON, the warning light should illumi-
nate for approximately 6 seconds,
then go off.
SRS components and func-
tions
The SRS consists of the following
components:
1. Driver's front air bag module
2. Passenger's front air bag module
3. Side impact air bag modules
4. Curtain air bag modules
5. Retractor pre-tensioner assemblies
6. Air bag warning light
7. SRS control module (SRSCM)/Rollover sensor
8. Front impact sensors
9. Side impact sensors
10. Rear side impact sensors
11. Driver’s knee air bag module
W7-147
WARNING - Air bag
deployment
When children are seated in the
rear outboard seats of a vehicle
equipped with side and/or cur-
tain air bags, install the child
restraint system as far away
from the door side as possible.
Inflation of the side and/or cur-
tain air bags could cause seri-
ous injury or death to an infant
or child.
OHG034064N
Page 68 of 521

Safety features of your vehicle
48
3
Your vehicle is equipped with an
Advanced Supplemental Restraint
(Air Bag) System (SRS) and the
lap/shoulder belts at both the driver
and passenger seating positions.
The indications of the system's pres-
ence are the letters "AIR BAG"
embossed on the air bag pad cover
in the steering wheel and/or on the
cover of the driver's side knee bolster
located below the steering wheel and
the passenger's side front panel pad
above the glove box.
The SRS consists of air bags
installed under the pad covers in the
center of the steering wheel, in the
knee bolster below the steering
wheel column and the passenger's
side front panel above the glove box.
The purpose of the SRS is to provide
the vehicle's driver and/or the front
passenger with additional protection
than that offered by the seat belt sys-
tem alone in case of a frontal impact
of sufficient severity. The SRS uses
sensors to gather information about
the driver's and front passenger's
seat belt usage and impact severity. The seat belt buckle sensors deter-
mine if the driver and front passen-
ger's seat belts are fastened.
These sensors provide the ability to
control the SRS deployment based on
whether or not the seat belts are fas-
tened, and how severe the impact is.
The advanced SRS offers the ability
to control the air bag inflation within
two levels. A first stage level is pro-
vided for moderate-severity impacts.
A second stage level is provided for
more severe impacts.
According to the impact severity and
seat belt usage, the SRSCM (SRS
Control Module) controls the air bag
inflation. Failure to properly wear
seat belts can increase the risk or
severity of injury in an accident.
Additionally, your vehicle is equipped
with an occupant classification sys-
tem in the front passenger's seat.
The occupant classification system
detects the presence of a passenger
in the front passenger's seat and will
turn off the front passenger's air bag
under certain conditions. For more
detail, see "Occupant classification
system" in this section.
WARNING
Do not place any objects
underneath the front seats as
they could interfere with the
occupant classification sys-
tem.
Do not place or charge an electronic device such as a
laptop computer on the front
passenger seat. Its electronic
field may cause the OCS to
switch to the "on" condition
and thus allow the passenger
air bag to deploy needlessly
in a collision, increasing your
repair costs.
Page 72 of 521
Safety features of your vehicle
52
3
They are designed to help protect the
heads of the front seat occupants
and the rear outboard seat occupants
in certain side impact collisions.
The curtain air bags are designed to
deploy only during certain side
impact collisions, depending on the
crash severity, angle, speed and
impact. The curtain air bags are not
designed to deploy in all side impact
situations or in all rollover situations.
Curtain airbags are deployed if the
rollover or the possible rollover event
is detected by ACU (Airbag Control
Unit).✽ ✽
NOTICE
Never try to open or repair any com-
ponents of the side curtain air bag
system. This should only be done by
an authorized HYUNDAI dealer.WARNING
Do not allow the passengers to
lean their heads or bodies onto
doors, put their arms on the
doors, stretch their arms out of
the window, or place objects
between the doors and passen-
gers when they are seated on
seats equipped with side
impact and/or curtain air bags.
Failure to follow this instruction
could result in injury or death to
vehicle occupants in a crash.
Page 78 of 521
Safety features of your vehicle
58
3
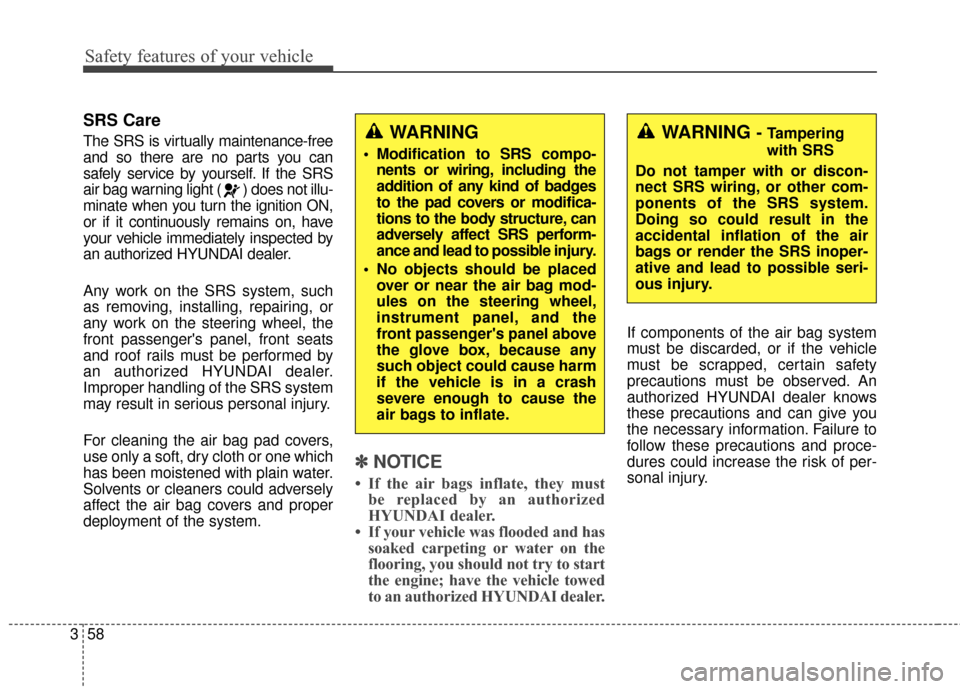
SRS Care
The SRS is virtually maintenance-free
and so there are no parts you can
safely service by yourself. If the SRS
air bag warning light ( ) does not illu-
minate when you turn the ignition ON,
or if it continuously remains on, have
your vehicle immediately inspected by
an authorized HYUNDAI dealer.
Any work on the SRS system, such
as removing, installing, repairing, or
any work on the steering wheel, the
front passenger's panel, front seats
and roof rails must be performed by
an authorized HYUNDAI dealer.
Improper handling of the SRS system
may result in serious personal injury.
For cleaning the air bag pad covers,
use only a soft, dry cloth or one which
has been moistened with plain water.
Solvents or cleaners could adversely
affect the air bag covers and proper
deployment of the system.
✽ ✽
NOTICE
• If the air bags inflate, they must
be replaced by an authorized
HYUNDAI dealer.
• If your vehicle was flooded and has soaked carpeting or water on the
flooring, you should not try to start
the engine; have the vehicle towed
to an authorized HYUNDAI dealer.
If components of the air bag system
must be discarded, or if the vehicle
must be scrapped, certain safety
precautions must be observed. An
authorized HYUNDAI dealer knows
these precautions and can give you
the necessary information. Failure to
follow these precautions and proce-
dures could increase the risk of per-
sonal injury.
WARNING
Modification to SRS compo-
nents or wiring, including the
addition of any kind of badges
to the pad covers or modifica-
tions to the body structure, can
adversely affect SRS perform-
ance and lead to possible injury.
No objects should be placed over or near the air bag mod-
ules on the steering wheel,
instrument panel, and the
front passenger's panel above
the glove box, because any
such object could cause harm
if the vehicle is in a crash
severe enough to cause the
air bags to inflate.
WARNING - Tampering
with SRS
Do not tamper with or discon-
nect SRS wiring, or other com-
ponents of the SRS system.
Doing so could result in the
accidental inflation of the air
bags or render the SRS inoper-
ative and lead to possible seri-
ous injury.