Page 129 of 521

449
Features of your vehicle
To adjust the Zone setting:
1. Determine the desired ZoneNumber based upon your current
location on the Zone Map.
2. Press and hold the button for 6 seconds, the current Zone
Number will appear on the display.
3. Pressing and holding the button again will cause the numbers to
increment (Note: they will repeat
…13, 14, 15, 1, 2, …). Releasing
the button when the desired Zone
Number appears on the display
will set the new Zone.
4. Within about 5 seconds the com- pass will start displaying a com-
pass heading again. There are some conditions that can
cause changes to the vehicle mag-
nets, such as installing a ski rack or
a CB antenna. Body repair work on
the vehicle can also cause changes
to the vehicle's magnetic field. In
these situations, the compass will
need to be re-calibrated to quickly
correct these changes. To re-cali-
brate the compass:
1. Press and hold the button for
more than 9 seconds. When the
compass memory is cleared a "C"
will appear in the display.
2. To calibrate the compass, drive the vehicle in 2 complete circles at
less than 5 mph (8 km/h). Integrated HomeLink®Wireless
Control System
The HomeLink
®Wireless Control
System provides a convenient way to
replace up to three hand-held radio-
frequency (RF) transmitters with a
single built-in device. This innovative
feature will learn the radio frequency
codes of most current transmitters to
operate devices such as gate opera-
tors, garage door openers, entry
door locks, security systems, even
home lighting. Both standard and
rolling code-equipped transmitters
can be programmed by following the
outlined procedures. Additional
HomeLink
®information can be found
at: www.homelink.com or by calling
1-800-355-3515.
Page 177 of 521

497
Features of your vehicle
Non-operational conditions of
rear parking assist system
The rear parking assist system
may not operate properly when:
1. Moisture is frozen to the sensor. (Itwill operate normally when the
moisture has been cleared.)
2. The sensor is covered with foreign matter, such as snow or water, or
the sensor cover is blocked. (It will
operate normally when the materi-
al is removed or the sensor is no
longer blocked.)
3. Driving on uneven road surfaces (unpaved roads, gravel, bumps,
gradient).
4. Objects generating excessive noise (vehicle horns, loud motor-
cycle engines, or truck air brakes)
are within range of the sensor.
5. Heavy rain or water spray exists.
6. Wireless transmitters or mobile phones are within range of the
sensor.
7. The sensor is covered with snow.
8. Trailer towing The detecting range may decrease
when:
1. The sensor is stained with foreign
matter such as snow or water.
(The sensing range will return to
normal when removed.)
2. Outside air temperature is extremely hot or cold.
The following objects may not be
recognized by the sensor:
1. Sharp or slim objects such as ropes, chains or small poles.
2. Objects which tend to absorb the sensor frequency such as clothes,
spongy material or snow.
3. Undetectable objects smaller than 40 in. (1 m) in height and narrower
than 6 in. (14 cm) in diameter.
Rear parking assist system
precautions
The rear parking assist system maynot sound sequentially depending
on the speed and shapes of the
objects detected.
The rear parking assist system may malfunction if the vehicle bumper
height or sensor installation has
been modified or damaged. Any
non-factory installed equipment or
accessories may also interfere with
the sensor performance.
The sensor may not recognize objects less than 9.84 in. (25 cm)
from the sensor, or it may sense an
incorrect distance. Use caution.
When the sensor is frozen or stained with snow, dirt, or water,
the sensor may be inoperative until
the stains are removed using a soft
cloth.
Do not push, scratch or strike the sensor. Sensor damage could
occur.
Page 193 of 521
4113
Features of your vehicle
AUTOMATIC CLIMATE CONTROL SYSTEM (TYPE A)
1. Fan speed control knob
2. AUTO (automatic control) button
3. OFF button
4. Driver’s temperature control switch
5. Passenger's temperature control switch
6. Front windshield defroster button
7. Rear window defroster button
8. Air conditioning button
9. Mode selection button
10. Air intake control button
11. SYNC button
OHG045516L
Page 194 of 521
Features of your vehicle
114
4
Automatic heating and air condi-
tioning
1. Push the AUTO button.
The modes, fan speeds, air intake
and air-conditioning will be controlled
automatically by setting the tempera-
ture. 2. Set the temperature to the desired
temperature.
✽ ✽NOTICE
• To turn the automatic operation
off, select any button or switch of
the following:
- Mode selection switch
- Air conditioning button
- Front windshield defroster but-ton (Press the button one more
time to deselect the front wind-
shield defroster function. The
'AUTO' sign will illuminate on
the information display once
again.)
- Air intake control button
- Fan speed control knob
The selected function will be con-
trolled manually while other func-
tions operate automatically.
• For your convenience and to improve the effectiveness of the
climate control, use the AUTO
button and set the temperature to
73°F (23°C).
OHG045216OHG045212
■Driver’s side■Passenger’s side
Page 195 of 521

4115
Features of your vehicle
Never place anything over the sensor
located on the instrument panel to
ensure better control of the heating
and cooling system.
Manual heating and air condi-
tioning
The heating and cooling system can
be controlled manually by pushing
buttons other than the AUTO button.
In this case, the system works
sequentially according to the order of
buttons selected.
When pressing any button except the
AUTO button while using automatic
operation, the functions not selected
will be controlled automatically.1. Start the engine.
2. Set the mode to the desired posi-
tion.
To improve the effectiveness of heating and cooling:
- Heating:
- Cooling:
3. Set the temperature control to the desired position.
4. Set the air intake control to the outside (fresh) air position.
5. Set the fan speed control to the desired speed.
6. If air conditioning is desired, turn the air conditioning system on.
Press the AUTO button in order to
convert to full automatic control of
the system.
OHG040143
Page 198 of 521

Features of your vehicle
118
4
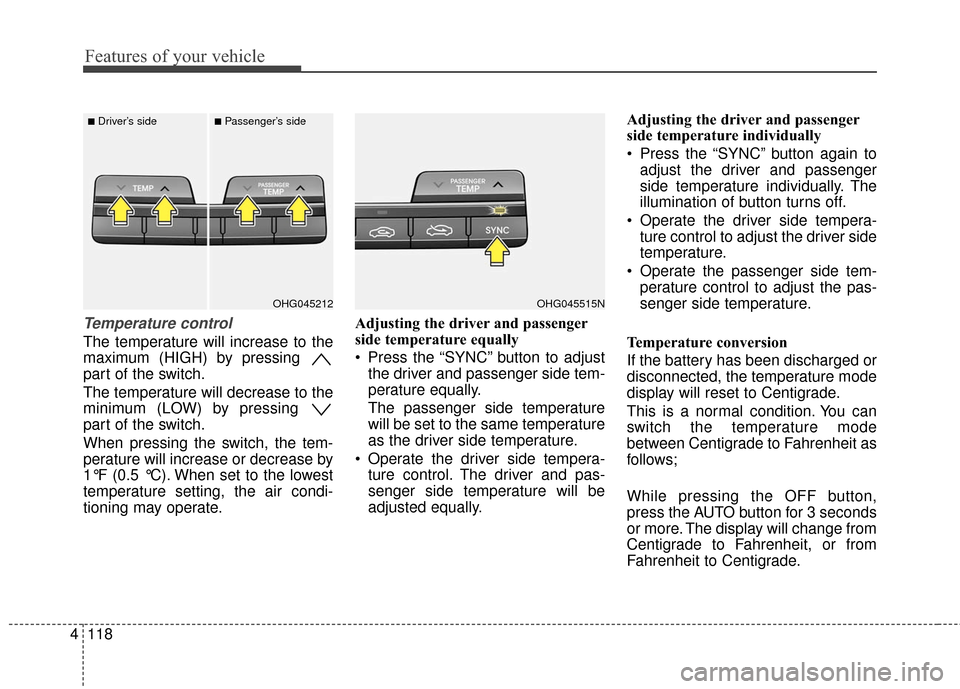
Temperature control
The temperature will increase to the
maximum (HIGH) by pressing
part of the switch.
The temperature will decrease to the
minimum (LOW) by pressing
part of the switch.
When pressing the switch, the tem-
perature will increase or decrease by
1°F (0.5 °C). When set to the lowest
temperature setting, the air condi-
tioning may operate. Adjusting the driver and passenger
side temperature equally
Press the “SYNC” button to adjust
the driver and passenger side tem-
perature equally.
The passenger side temperature
will be set to the same temperature
as the driver side temperature.
Operate the driver side tempera- ture control. The driver and pas-
senger side temperature will be
adjusted equally. Adjusting the driver and passenger
side temperature individually
Press the “SYNC” button again to
adjust the driver and passenger
side temperature individually. The
illumination of button turns off.
Operate the driver side tempera- ture control to adjust the driver side
temperature.
Operate the passenger side tem- perature control to adjust the pas-
senger side temperature.
Temperature conversion
If the battery has been discharged or
disconnected, the temperature mode
display will reset to Centigrade.
This is a normal condition. You can
switch the temperature mode
between Centigrade to Fahrenheit as
follows;
While pressing the OFF button,
press the AUTO button for 3 seconds
or more. The display will change from
Centigrade to Fahrenheit, or from
Fahrenheit to Centigrade.
OHG045515NOHG045212
■Driver’s side■Passenger’s side
Page 199 of 521

4119
Features of your vehicle
Air intake control
This is used to select the outside
(fresh) air position or recirculated air
position.
To change the air intake control posi-
tion, push the control button.Recirculated air position
With the recirculated airposition selected, air
from the passenger
compartment will be
drawn through the heat-
ing system and heated
or cooled according to
the function selected.
Outside (fresh) air position With the outside (fresh)
air position selected, air
enters the vehicle from
outside and is heated or
cooled according to the
function selected.
✽ ✽NOTICE
While driving at high speed with the
recirculation air position mode,
fresh air may automatically enter
the vehicle to provide ventilation of
the inside air.
WARNING
Continuous use of the climate
control system in the recircu-
lated air position can cause
drowsiness or sleepiness, and
loss of vehicle control. Set the
air intake control to the outside
(fresh) air position as much as
possible while driving.
Continued climate control system operation in the recir-
culated air position may allow
humidity to increase inside
vehicle which may fog the
glass and obscure visibility.
Do not sleep in a vehicle with the air conditioning or heating
system on. It may cause seri-
ous harm or death due to a
drop in the oxygen level
and/or body temperature.
OHG045219
Page 200 of 521
Features of your vehicle
120
4
It should be noted that prolonged
operation of the heating in recirculat-
ed air position will cause fogging of
the windshield and side windows and
the air within the passenger com-
partment will become stale.
In addition, prolonged use of the air
conditioning with the recirculated air
position selected, will result in exces-
sively dry air in the passenger com-
partment.
Fan speed control
The fan speed control knob allows
you to control the fan speed of the
airflow in the vehicle.
To change the fan speed:
Turn the knob to the right (+) to
increase fan speed.
Turn the knob to the left (-) to decrease fan speed.
Air conditioning
Press the A/C button to turn the air
conditioning system on (indicator light
will illuminate).
Press the button again to turn the air
conditioning system off.
OHG045217OHG045215