Page 201 of 343

GMC Savana Owner Manual (GMNA-Localizing-U.S./Canada-9159232) -
2016 - crc - 11/11/15
200 Driving and Operating
The fuel cap is behind a hinged fuel
door on the driver side of the
vehicle.
If the vehicle has E85 fuel capability,
the fuel cap will be yellow and state
that E85 or gasoline can be used.
SeeE85 or FlexFuel 0198.
To remove the fuel cap, turn it
slowly counterclockwise.
While refueling, hang the tethered
fuel cap from the hook on the
fuel door.
{Warning
Overfilling the fuel tank by more
than three clicks of a standard fill
nozzle may cause: . Vehicle performance issues,
including engine stalling and
damage to the fuel system.
. Fuel spills.
. Potential fuel fires.
Be careful not to spill fuel. Wait a
few seconds after you have finished
pumping before removing the
nozzle. Clean fuel from painted
surfaces as soon as possible. See
Exterior Care 0284.
When replacing the fuel cap, turn it
clockwise until it clicks. Make sure
the cap is fully installed. The
diagnostic system can determine if
the fuel cap has been left off or
improperly installed. This would
allow fuel to evaporate into the
atmosphere. See Malfunction
Indicator Lamp (Check Engine
Light) 0100.
{Warning
If a fire starts while you are
refueling, do not remove the
nozzle. Shut off the flow of fuel by
shutting off the pump or by
notifying the station attendant.
Leave the area immediately.
Caution
If a new fuel cap is needed, be
sure to get the right type of cap
from your dealer. The wrong type
of fuel cap may not fit properly,
may cause the malfunction
indicator lamp to light, and could
damage the fuel tank and
emissions system. See
Malfunction Indicator Lamp
(Check Engine Light) 0100.
Page 227 of 343

GMC Savana Owner Manual (GMNA-Localizing-U.S./Canada-9159232) -
2016 - crc - 11/11/15
226 Vehicle Care
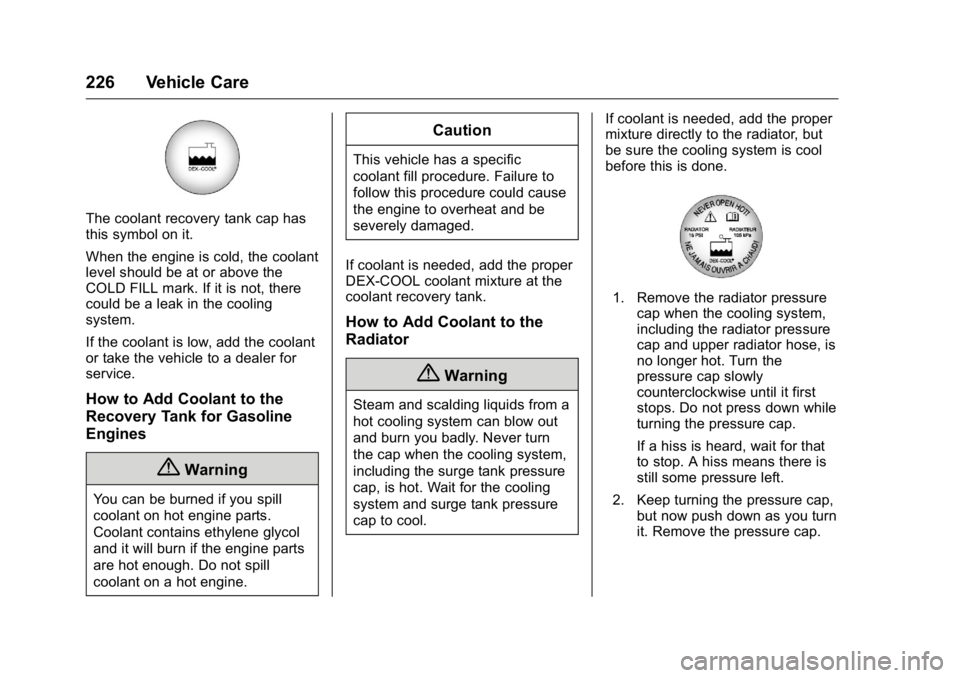
The coolant recovery tank cap has
this symbol on it.
When the engine is cold, the coolant
level should be at or above the
COLD FILL mark. If it is not, there
could be a leak in the cooling
system.
If the coolant is low, add the coolant
or take the vehicle to a dealer for
service.
How to Add Coolant to the
Recovery Tank for Gasoline
Engines
{Warning
You can be burned if you spill
coolant on hot engine parts.
Coolant contains ethylene glycol
and it will burn if the engine parts
are hot enough. Do not spill
coolant on a hot engine.
Caution
This vehicle has a specific
coolant fill procedure. Failure to
follow this procedure could cause
the engine to overheat and be
severely damaged.
If coolant is needed, add the proper
DEX-COOL coolant mixture at the
coolant recovery tank.
How to Add Coolant to the
Radiator
{Warning
Steam and scalding liquids from a
hot cooling system can blow out
and burn you badly. Never turn
the cap when the cooling system,
including the surge tank pressure
cap, is hot. Wait for the cooling
system and surge tank pressure
cap to cool. If coolant is needed, add the proper
mixture directly to the radiator, but
be sure the cooling system is cool
before this is done.
1. Remove the radiator pressure
cap when the cooling system,
including the radiator pressure
cap and upper radiator hose, is
no longer hot. Turn the
pressure cap slowly
counterclockwise until it first
stops. Do not press down while
turning the pressure cap.
If a hiss is heard, wait for that
to stop. A hiss means there is
still some pressure left.
2. Keep turning the pressure cap, but now push down as you turn
it. Remove the pressure cap.
Page 240 of 343
GMC Savana Owner Manual (GMNA-Localizing-U.S./Canada-9159232) -
2016 - crc - 11/11/15
Vehicle Care 239
5. Disconnect the electricalconnector.
6. Turn the bulb counterclockwise one-quarter turn to remove it
from the headlamp assembly.
7. Install the new bulb into the headlamp assembly and
connect the electrical
connector.
8. Reverse the steps to reinstall the headlamp assembly.
To prevent headlamp vibration
and shortened bulb life, be
sure to insert the headlamp assembly tabs in the slots at
the lower portion of the
housing.
Sealed-Beam Headlamp
1. Headlamp Retainer Screws
2. Headlamp Retainer
3. Sealed-Beam
Headlamp Bulb
To replace one of these bulbs:
1. Remove the four screws (1) from the headlamp retainer (2).
Pull the retainer (2) out and set
it aside. 2. Pull the bulb (3) forward to gain
access to the electrical
connector.
3. Disconnect the electrical
connector (2) and remove the
headlamp bulb (1).
4. Reverse Steps 1–3 to reinstall the headlamp.
Page 241 of 343
GMC Savana Owner Manual (GMNA-Localizing-U.S./Canada-9159232) -
2016 - crc - 11/11/15
240 Vehicle Care
Front Turn Signal,
Sidemarker, and Parking
Lamps
1. Front Parking and TurnSignal Lamp
2. Front Sidemarker Lamp
To replace the front turn signal,
sidemarker, and/or parking lamp
bulb(s):
1. Use a small tool to unlatch the outboard clip on the lamp by
pushing inboard and prying the
lamp assembly forward.
2. Remove the lamp from the grille.
3. Turn the bulb socket counterclockwise one-quarter
turn and remove it from the
lamp assembly.
4. Remove the bulb from the socket by pulling it straight out.
5. Replace the bulb.
6. Turn the bulb socket clockwise to reinstall it in the lamp
assembly.
7. Reinstall the lamp assembly into the grille until the outboard
clip snaps into place.
Taillamps
To replace a taillamp/turn signal
lamp or back-up lamp bulb:
1. Remove the two inboard nutsfrom the inside of the taillamp
assembly.
Page 242 of 343

GMC Savana Owner Manual (GMNA-Localizing-U.S./Canada-9159232) -
2016 - crc - 11/11/15
Vehicle Care 241
2. The third nut (3) is under theapplique piece (2) above the
lamp. Remove the two inboard
applique nuts. Pull the
applique (2) straight rearward
slightly to clear the studs. Then
rotate the applique (2) just far
enough to gain access to the
outer push pins (1).
3. Carefully disconnect the push pins (1) from the applique
bracket.
4. Remove the third nut (3) from the upper outboard side of
the lamp.
5. Remove the taillamp assembly from the vehicle.
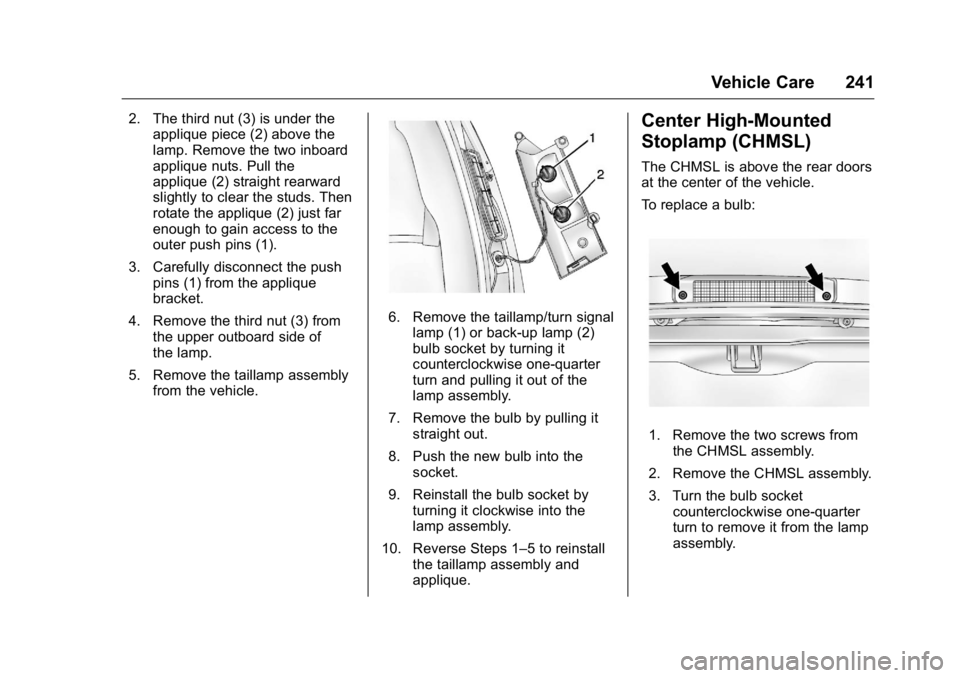
6. Remove the taillamp/turn signal
lamp (1) or back-up lamp (2)
bulb socket by turning it
counterclockwise one-quarter
turn and pulling it out of the
lamp assembly.
7. Remove the bulb by pulling it straight out.
8. Push the new bulb into the socket.
9. Reinstall the bulb socket by turning it clockwise into the
lamp assembly.
10. Reverse Steps 1–5 to reinstall the taillamp assembly and
applique.
Center High-Mounted
Stoplamp (CHMSL)
The CHMSL is above the rear doors
at the center of the vehicle.
To replace a bulb:
1. Remove the two screws fromthe CHMSL assembly.
2. Remove the CHMSL assembly.
3. Turn the bulb socket counterclockwise one-quarter
turn to remove it from the lamp
assembly.
Page 243 of 343

GMC Savana Owner Manual (GMNA-Localizing-U.S./Canada-9159232) -
2016 - crc - 11/11/15
242 Vehicle Care
4. Pull the old bulb straight out ofthe socket and push the new
bulb into the socket.
5. Turn the bulb socket clockwise one-quarter turn to install it in
the lamp assembly.
6. Reinstall the CHMSL assembly and two screws.
Do not block or damage the CHMSL
when items are loaded on the roof
of the vehicle.
License Plate Lamp
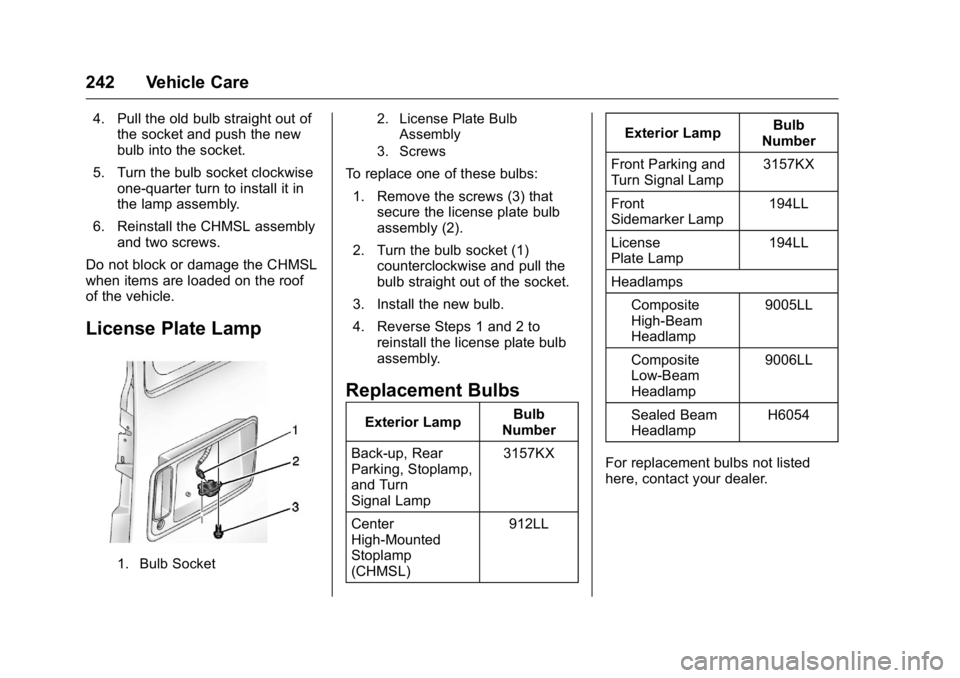
1. Bulb Socket 2. License Plate Bulb
Assembly
3. Screws
To replace one of these bulbs:
1. Remove the screws (3) that secure the license plate bulb
assembly (2).
2. Turn the bulb socket (1) counterclockwise and pull the
bulb straight out of the socket.
3. Install the new bulb.
4. Reverse Steps 1 and 2 to reinstall the license plate bulb
assembly.
Replacement Bulbs
Exterior Lamp Bulb
Number
Back-up, Rear
Parking, Stoplamp,
and Turn
Signal Lamp 3157KX
Center
High-Mounted
Stoplamp
(CHMSL) 912LLExterior Lamp
Bulb
Number
Front Parking and
Turn Signal Lamp 3157KX
Front
Sidemarker Lamp 194LL
License
Plate Lamp 194LL
Headlamps Composite
High-Beam
Headlamp 9005LL
Composite
Low-Beam
Headlamp 9006LL
Sealed Beam
Headlamp H6054
For replacement bulbs not listed
here, contact your dealer.
Page 274 of 343

GMC Savana Owner Manual (GMNA-Localizing-U.S./Canada-9159232) -
2016 - crc - 11/11/15
Vehicle Care 273
4. Turn the wheel wrenchcounterclockwise to lower the
spare tire to the ground.
Continue to turn the wheel
wrench until the spare tire can
be pulled out from under the
vehicle.
5. Remove the wheel wrench, extension(s), and hoist handle
assembly from the hoist shaft.
6. When the tire has beenlowered, pull it closer to reach
the tire retainer and pull it up
through the wheel opening.
For a vehicle that was
completed from a cab and
chassis, refer to the information
from the body supplier/installer. The spare tire is a full-size tire,
like the other tires on the
vehicle.
7. Put the spare tire near the flat tire.
8. Close the passenger side rear door.
Removing the Flat Tire and
Installing the Spare Tire
If the vehicle has plastic wheel nut
caps, loosen them by turning the
wheel wrench counterclockwise.
The wheel nut caps are designed to
remain with the center cap. Remove
the center cap.
If the wheel has a smooth center
piece, place the chisel end of the
wheel wrench in the slot on the
wheel and gently pry it out.
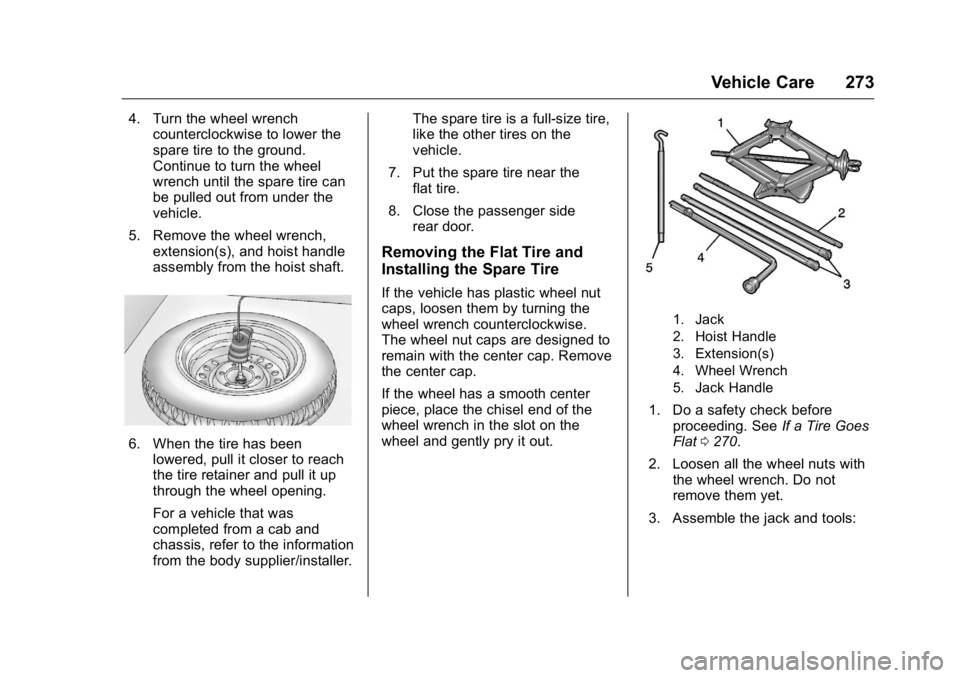
1. Jack
2. Hoist Handle
3. Extension(s)
4. Wheel Wrench
5. Jack Handle
1. Do a safety check beforeproceeding. See If a Tire Goes
Flat 0270.
2. Loosen all the wheel nuts with the wheel wrench. Do not
remove them yet.
3. Assemble the jack and tools:
Page 276 of 343

GMC Savana Owner Manual (GMNA-Localizing-U.S./Canada-9159232) -
2016 - crc - 11/11/15
Vehicle Care 275
{Warning
Getting under a vehicle when it is
jacked up is dangerous. If the
vehicle slips off the jack you could
be badly injured or killed. Never
get under a vehicle when it is
supported only by a jack.
{Warning
Raising the vehicle with the jack
improperly positioned can
damage the vehicle and even
make the vehicle fall. To help
avoid personal injury and vehicle
damage, be sure to fit the jack lift
head into the proper location
before raising the vehicle.
5. Turn the wheel wrench clockwise to raise the vehicle.
Raise the vehicle far enough
off the ground so there is
enough room for the spare tire
to fit.6. Remove all the wheel nuts.
7. Take the flat tire off of themounting surface.
{Warning
Rust or dirt on a wheel, or on the
parts to which it is fastened, can
make wheel nuts become loose
after time. The wheel could come
off and cause an accident. When
changing a wheel, remove any
rust or dirt from places where the
wheel attaches to the vehicle. In
an emergency, a cloth or a paper
(Continued)
Warning (Continued)
towel can be used; however, use
a scraper or wire brush later to
remove all rust or dirt.
8. Remove any rust or dirt fromthe wheel bolts, mounting
surfaces, and spare wheel.