2016 FORD TAURUS instrument cluster
[x] Cancel search: instrument clusterPage 5 of 424

Voice Control...................................................65
Cruise Control..................................................65
Information Display Control.......................65
Heated Steering Wheel...............................65
Pedals
Adjusting the Pedals
....................................66
Wipers and Washers
Windshield Wipers
.........................................67
Autowipers........................................................67
Windshield Washers.....................................68
Lighting
General Information.....................................69
Lighting Control..............................................69
Autolamps........................................................70
Instrument Lighting Dimmer
.......................71
Headlamp Exit Delay......................................71
Daytime Running Lamps
..............................71
Automatic High Beam Control..................72
Direction Indicators
........................................73
Interior Lamps..................................................73
Windows and Mirrors
Power Windows
..............................................75
Global Opening
...............................................76
Exterior Mirrors
................................................76
Interior Mirror
....................................................78
Sun Visors
.........................................................78
Sun Shades
......................................................78
Moonroof...........................................................79
Instrument Cluster
Gauges...............................................................80
Warning Lamps and Indicators
.................82
Audible Warnings and Indicators.............85 Information Displays
General Information.....................................86
Information Messages
.................................95
Climate Control
Manual Climate Control
............................106
Automatic Climate Control - Vehicles Without: Touchscreen Display............107
Automatic Climate Control - Vehicles With: Premium AM/FM/CD.................108
Automatic Climate Control - Vehicles With: Sony Audio System
......................110
Hints on Controlling the Interior Climate..........................................................112
Heated Windows and Mirrors...................114
Cabin Air Filter.................................................114
Remote Start...................................................115
Seats
Sitting in the Correct Position...................116
Head Restraints
.............................................116
Manual Seats
..................................................118
Power Seats
....................................................119
Memory Function..........................................122
Rear Seats.......................................................123
Heated Seats
..................................................124
Climate Controlled Seats
..........................125
Rear Seat Armrest........................................126
Universal Garage Door Opener
Universal Garage Door Opener................127
Auxiliary Power Points
Auxiliary Power Points................................132
Storage Compartments
Center Console
..............................................133
Overhead Console........................................133
2
Taurus (CPH) Canada/United States of America, enUSA, First Printing Table of Contents
Page 7 of 424

Fuel Shutoff....................................................213
Jump Starting the Vehicle.........................214
Post-Crash Alert System...........................216
Customer Assistance
Getting the Services You Need................217
In California (U.S. Only)
.............................218
The Better Business Bureau (BBB) Auto Line Program (U.S. Only)......................219
Utilizing the Mediation/Arbitration Program (Canada Only)
.......................220
Getting Assistance Outside the U.S. and Canada........................................................220
Ordering Additional Owner's Literature......................................................221
Reporting Safety Defects (U.S. Only).............................................................222
Reporting Safety Defects (Canada Only).............................................................222
Fuses
Fuse Specification Chart
..........................224
Changing a Fuse...........................................232
Maintenance
General Information
...................................234
Opening and Closing the Hood..............234
Under Hood Overview - 2.0L EcoBoost™................................................236
Under Hood Overview - 3.5L Ecoboost™.................................................237
Under Hood Overview - 3.5L Duratec........................................................238
Engine Oil Dipstick - 2.0L EcoBoost™................................................239
Engine Oil Dipstick - 3.5L Duratec/3.5L Ecoboost™................................................239
Engine Oil Check..........................................239
Oil Change Indicator Reset
......................240
Engine Coolant Check...............................240
Automatic Transmission Fluid Check - 2.0L EcoBoost™
......................................244 Automatic Transmission Fluid Check -
3.5L Duratec/3.5L Ecoboost™..........244
Brake Fluid Check........................................248
Power Steering Fluid Check
....................248
Washer Fluid Check
....................................248
Fuel Filter
........................................................249
Changing the 12V Battery.........................249
Checking the Wiper Blades
.......................251
Changing the Wiper Blades
......................251
Adjusting the Headlamps.........................252
Changing a Bulb...........................................253
Bulb Specification Chart...........................254
Changing the Engine Air Filter
................256
Vehicle Care
General Information....................................257
Cleaning Products
.......................................257
Cleaning the Exterior...................................257
Waxing.............................................................258
Cleaning the Engine
....................................259
Cleaning the Windows and Wiper Blades..........................................................259
Cleaning the Interior...................................260
Cleaning the Instrument Panel and Instrument Cluster Lens.......................260
Cleaning Leather Seats..............................261
Repairing Minor Paint Damage...............261
Cleaning the Alloy Wheels........................261
Vehicle Storage
.............................................262
Wheels and Tires
General Information
...................................264
Tire Sealant and Inflator Kit....................264
Tire Care
..........................................................270
Using Summer Tires
...................................283
Using Snow Chains
.....................................283
Tire Pressure Monitoring System..........284
Changing a Road Wheel
...........................288
Technical Specifications
...........................293
4
Taurus (CPH) Canada/United States of America, enUSA, First Printing Table of Contents
Page 44 of 424

The system consists of the following:
•
Safety canopy curtain airbags located
above the trim panels over the front
and rear side windows identified by a
label or wording on the headliner or
roof-pillar trim.
• A flexible headliner which opens above
the side doors to allow air curtain
deployment · Crash sensors and monitoring
system with a readiness
indicator. See Crash Sensors
and Airbag Indicator (page 41).
Children 12 years old and under should
always be properly restrained in the rear
seats. The Safety Canopy will not interfere
with children restrained using a properly
installed child or booster seat because it
is designed to inflate downward from the
headliner above the doors along the side
window opening.
The design and development of the Safety
Canopy included recommended testing
procedures that were developed by a
group of automotive safety experts known
as the Side Airbag Technical Working
Group. These recommended testing
procedures help reduce the risk of injuries
related to the deployment of side airbags
(including the Safety Canopy). CRASH SENSORS AND
AIRBAG INDICATOR WARNING
Modifying or adding equipment to
the front end of the vehicle (including
frame, bumper, front end body
structure and tow hooks) may affect the
performance of the airbag system,
increasing the risk of injury. Do not modify
the front end of the vehicle. Your vehicle has a collection of crash and
occupant sensors which provide
information to the restraints control
module. The restraints control module
deploys (activates) the front seatbelt
pretensioners, driver airbag, passenger
airbag, seat mounted side airbags and the
Safety Canopy. Based on the type of crash,
the restraints control module will deploy
the appropriate safety devices.
The restraints control module also
monitors the readiness of the above safety
devices plus the crash and occupant
sensors. The readiness of the safety
system is indicated by a warning indicator
light in the instrument cluster or by a
backup tone if the warning light is not
working. Routine maintenance of the
airbag is not required.
A difficulty with the system is indicated by
one or more of the following:
The readiness light will not
illuminate immediately after the
ignition is turned on.
• The readiness light will either flash or
stay lit.
• A series of five beeps will be heard. The
tone pattern will repeat periodically
until the problem, the light or both are
repaired.
41
Taurus (CPH) Canada/United States of America, enUSA, First Printing Supplementary Restraints SystemE75004
Page 74 of 424

INSTRUMENT LIGHTING
DIMMER
Note:
If you disconnect and connect the
battery, or fully discharge and charge the
battery, the lighting level will switch to the
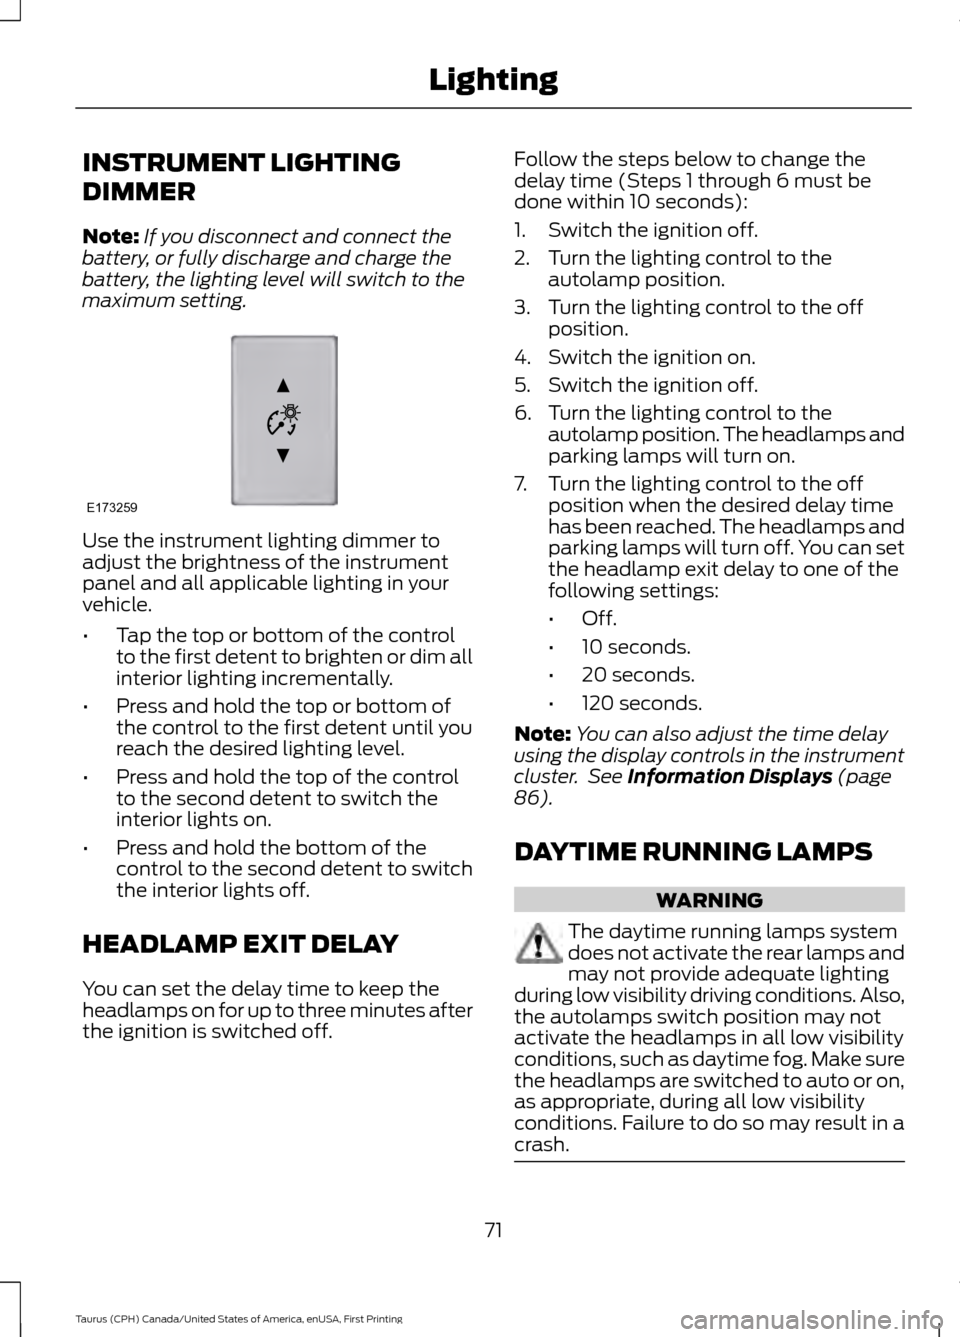
maximum setting. Use the instrument lighting dimmer to
adjust the brightness of the instrument
panel and all applicable lighting in your
vehicle.
•
Tap the top or bottom of the control
to the first detent to brighten or dim all
interior lighting incrementally.
• Press and hold the top or bottom of
the control to the first detent until you
reach the desired lighting level.
• Press and hold the top of the control
to the second detent to switch the
interior lights on.
• Press and hold the bottom of the
control to the second detent to switch
the interior lights off.
HEADLAMP EXIT DELAY
You can set the delay time to keep the
headlamps on for up to three minutes after
the ignition is switched off. Follow the steps below to change the
delay time (Steps 1 through 6 must be
done within 10 seconds):
1. Switch the ignition off.
2. Turn the lighting control to the
autolamp position.
3. Turn the lighting control to the off position.
4. Switch the ignition on.
5. Switch the ignition off.
6. Turn the lighting control to the autolamp position. The headlamps and
parking lamps will turn on.
7. Turn the lighting control to the off position when the desired delay time
has been reached. The headlamps and
parking lamps will turn off. You can set
the headlamp exit delay to one of the
following settings:
•Off.
• 10 seconds.
• 20 seconds.
• 120 seconds.
Note: You can also adjust the time delay
using the display controls in the instrument
cluster. See Information Displays (page
86).
DAYTIME RUNNING LAMPS WARNING
The daytime running lamps system
does not activate the rear lamps and
may not provide adequate lighting
during low visibility driving conditions. Also,
the autolamps switch position may not
activate the headlamps in all low visibility
conditions, such as daytime fog. Make sure
the headlamps are switched to auto or on,
as appropriate, during all low visibility
conditions. Failure to do so may result in a
crash. 71
Taurus (CPH) Canada/United States of America, enUSA, First Printing LightingE173259
Page 75 of 424

The daytime running lamps turn on when:
1. The ignition is switched to the on
position.
2. The lighting control is in the off position, parking lamps position or the
autolamps position, and the sensor
detects daylight.
AUTOMATIC HIGH BEAM
CONTROL (If Equipped)
The system will automatically turn on your
high beams if it is dark enough and no other
traffic is present. When it detects the
headlights of an approaching vehicle, the
tail lamps of the preceding vehicle or street
lighting, the system will turn off the high
beams before they distract other drivers.
The low beams remain on.
Note: If it appears that automatic control
of the high beams is not functioning
properly, check the windshield in front of
the camera for a blockage. A clear view of
the road is required for proper system
operation. Have any windshield damage in
the area of the camera ’s field-of-view
repaired.
Note: If the system detects a blockage such
as bird droppings, bug splatter, snow or ice,
and you do not observe changes, the system
will go into low beam mode until you clear
the blockage. A message may also appear
in the instrument cluster display noting the
front camera is blocked.
Note: Typical road dust, dirt and water
spots will not affect the performance of the
automatic high beam system. However, in
cold or inclement weather conditions, you
will notice a decrease in the availability of
the high beam system, especially at start
up. If you want to change the beam state
independently of the automatic control, you
may switch the high beams on or off using
the lever. Automatic control will resume
when conditions are correct. Note:
Modification of the vehicle ride height
such as using much larger tires, may
degrade feature performance.
A camera sensor, centrally mounted
behind the windshield of your vehicle,
continuously monitors conditions to decide
when to turn the high beams off and on.
Once the system is active, the high beams
will turn on if:
• The ambient light level is low enough.
• There is no traffic in front of the vehicle.
• The vehicle speed is greater than
32 mph (52 km/h)
.
The high beams will turn off if:
• The system detects the headlamps of
an approaching vehicle or the tail
lamps of a preceding vehicle.
• Vehicle speed falls below
27 mph
(44 km/h).
• The ambient light level is high enough
that high beams are not required.
• The system detects severe rain, snow
or fog.
• The camera is blocked.
Activating the System
Switch on the system using the information
display and autolamps. See Information
Displays
(page 86).
Switch the lighting control to the
autolamps position. See
Autolamps
(page 70).
72
Taurus (CPH) Canada/United States of America, enUSA, First Printing Lighting
Page 83 of 424

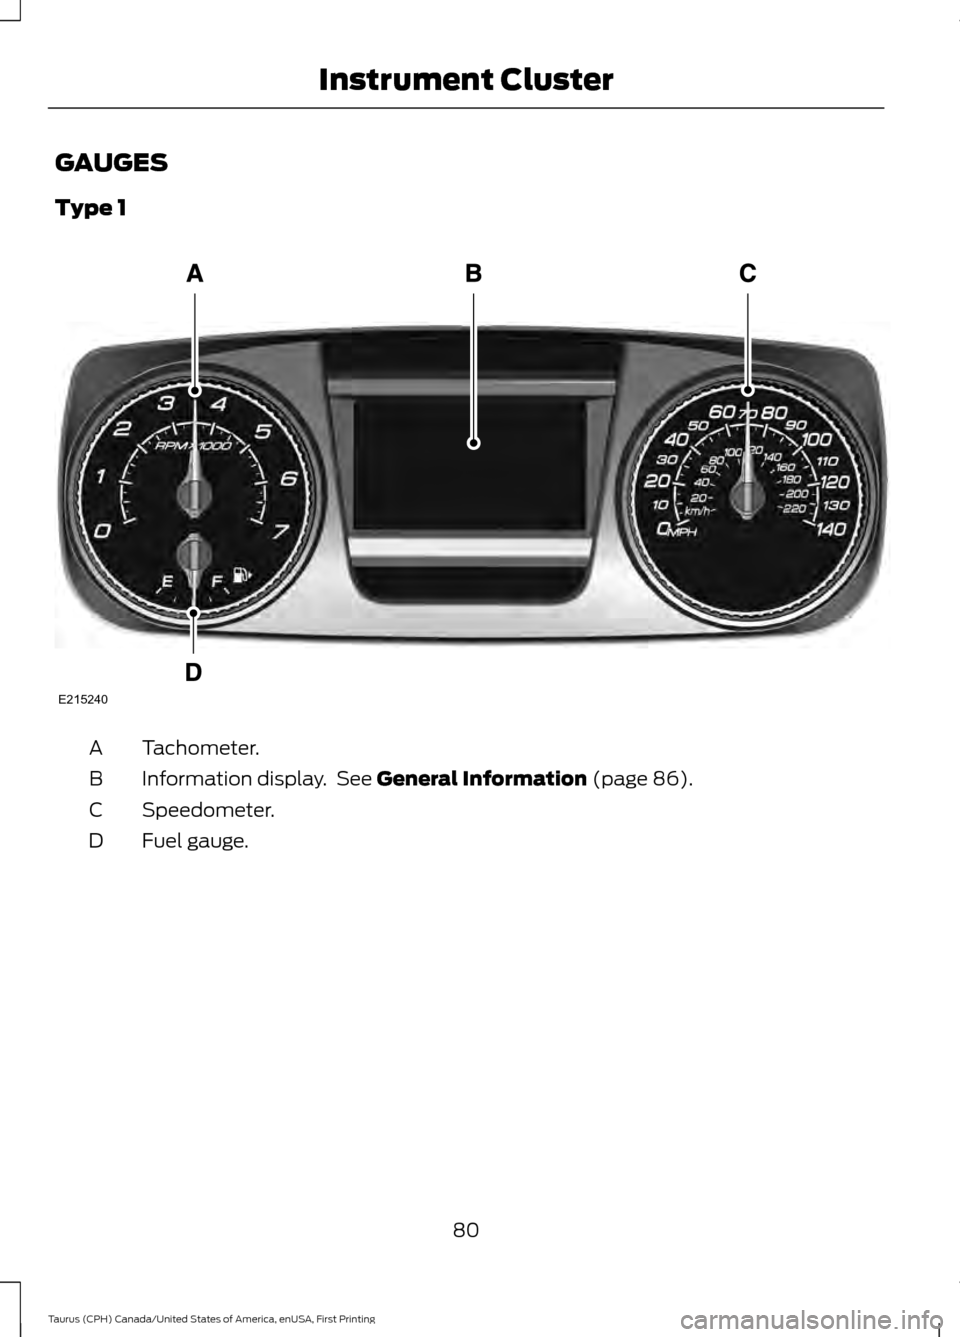
GAUGES
Type 1
Tachometer.
A
Information display. See General Information (page 86).
B
Speedometer.
C
Fuel gauge.
D
80
Taurus (CPH) Canada/United States of America, enUSA, First Printing Instrument ClusterE215240
Page 84 of 424

Type 2
Left information display. See General Information (page 86).
A
Speedometer.
B
Right information display. See your SYNC information.
C
Information Display
Odometer
Located in the bottom of the information
display. Registers the accumulated
distance your vehicle has traveled.
Compass
Displays the vehicle's heading direction.
Trip Computer
See
General Information (page 86).
Vehicle Settings and Personalization
See
General Information (page 86). Fuel Gauge
Note:
The fuel gauge may vary slightly
when your vehicle is moving or on a gradient.
Switch the ignition on. The fuel gauge will
indicate approximately how much fuel is
left in the fuel tank. The arrow adjacent to
the fuel pump symbol indicates on which
side of your vehicle the fuel filler door is
located.
The needle should move toward F when
you refuel your vehicle. If the needle points
to E after adding fuel, this indicates your
vehicle needs service soon.
After refueling some variability in needle
position is normal:
81
Taurus (CPH) Canada/United States of America, enUSA, First Printing Instrument ClusterE215227
Page 85 of 424

•
It may take a short time for the needle
to reach full after leaving the gas
station. This is normal and depends
upon the slope of pavement at the gas
station.
• The fuel amount dispensed into the
tank is a little less or more than the
gauge indicated. This is normal and
depends upon the slope of pavement
at the gas station.
• If the gas station nozzle shuts off
before the tank is full, try a different
gas pump nozzle.
• There is a small reserve left in the tank
when the fuel gauge reaches empty.
Low Fuel Reminder
A low fuel reminder triggers when the
distance to empty reaches 75 miles (120
km), 50 miles (80 km), 25 miles (40 km),
10 miles (20 km) and 0 miles (0 km) .
Variations:
Note: The low fuel warning and
distance-to-empty warning can appear at
different fuel gauge positions depending on
fuel economy conditions. This variation is
normal.
WARNING LAMPS AND
INDICATORS
The following warning lamps and
indicators alert you to a vehicle condition
that may become serious. Some lamps
illuminate when you start your vehicle to
make sure they work. If any lamps remain
on after starting your vehicle, refer to the
respective system warning lamp for further
information.
Note: Some warning indicators appear in
the information display and function the
same as a warning lamp, but do not display
when you start your vehicle. Adaptive Cruise Control (If Equipped) The speed control system
indicator light changes color to
indicate what mode the system
is in. See Using Adaptive Cruise Control
(page
174).
On (white light): Illuminates when you
switch on the adaptive cruise control
system. Turns off when the speed control
system is turned off.
Engaged (green light): Illuminates when
you engage the adaptive cruise control
system. Turns off when you disengage the
speed control system.
Anti-Lock Braking System If it illuminates when you are
driving, this indicates a
malfunction. You continue to
have the normal braking system (without
ABS) unless the brake system warning
lamp is also illuminated. Have the system
checked by an authorized dealer.
Automatic High Beam Control It will illuminate when this
feature is on. See
Automatic
High Beam Control (page 72).
Battery If it illuminates while driving, it
indicates a malfunction. Switch
off all unnecessary electrical
equipment and have the system checked
by an authorized dealer immediately.
Blind Spot Monitor
(If Equipped) It illuminates when you switch
this feature off or in conjunction
with a message. See Blind Spot
Information System
(page 186).
82
Taurus (CPH) Canada/United States of America, enUSA, First Printing Instrument ClusterE144524 E151262