2016 FORD SUPER DUTY warning
[x] Cancel search: warningPage 50 of 510
Note:
Replacing the battery will not delete
the transmitter from the vehicle. The
transmitter should operate normally.
The remote control uses one coin-type
three-volt lithium battery CR2032 or
equivalent.
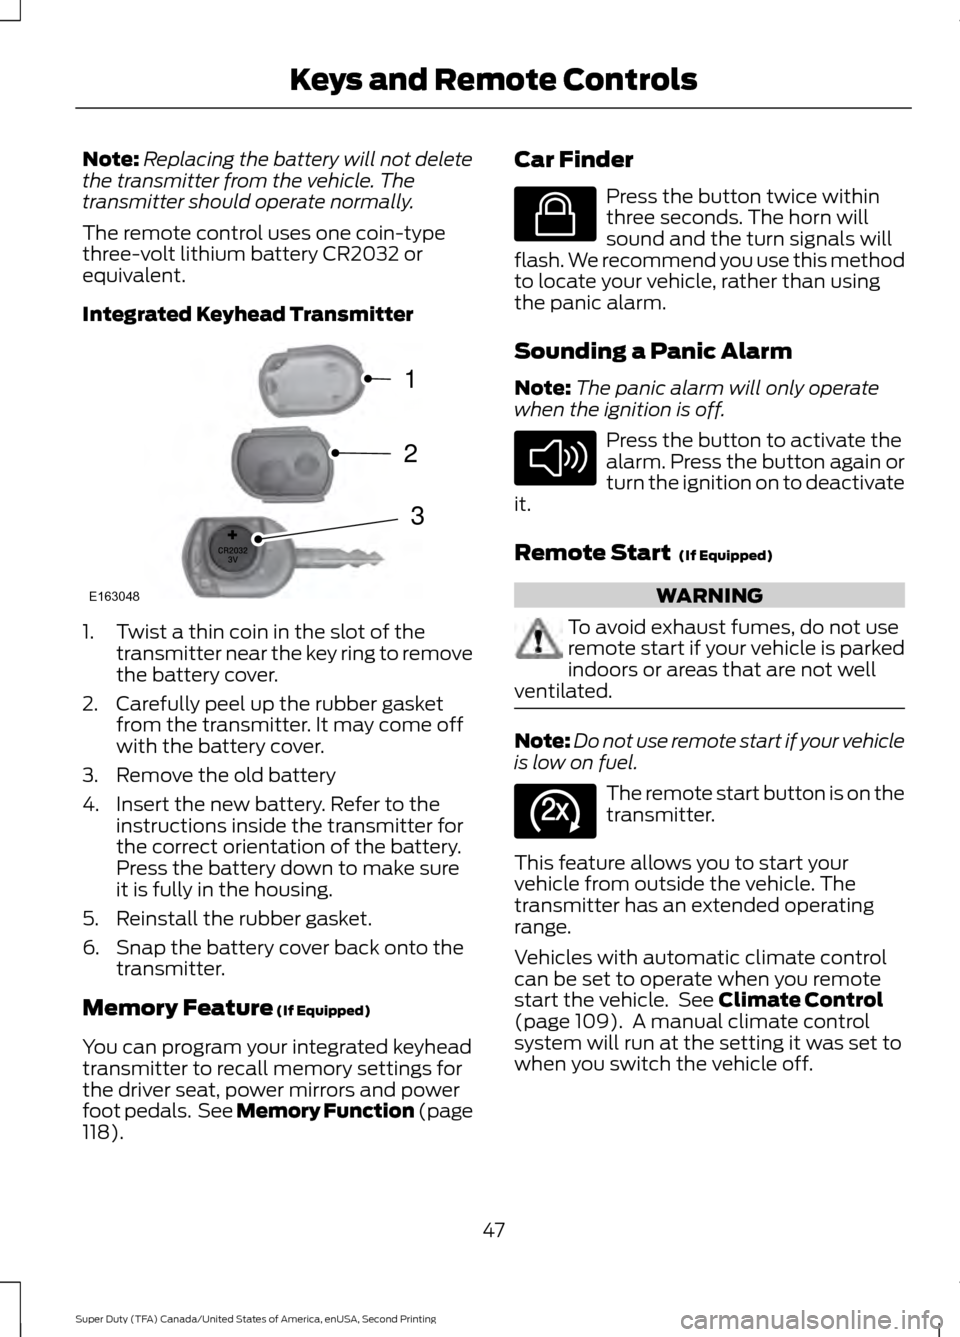
Integrated Keyhead Transmitter 1. Twist a thin coin in the slot of the
transmitter near the key ring to remove
the battery cover.
2. Carefully peel up the rubber gasket from the transmitter. It may come off
with the battery cover.
3. Remove the old battery
4. Insert the new battery. Refer to the instructions inside the transmitter for
the correct orientation of the battery.
Press the battery down to make sure
it is fully in the housing.
5. Reinstall the rubber gasket.
6. Snap the battery cover back onto the transmitter.
Memory Feature (If Equipped)
You can program your integrated keyhead
transmitter to recall memory settings for
the driver seat, power mirrors and power
foot pedals. See Memory Function (page
118
). Car Finder Press the button twice within
three seconds. The horn will
sound and the turn signals will
flash. We recommend you use this method
to locate your vehicle, rather than using
the panic alarm.
Sounding a Panic Alarm
Note: The panic alarm will only operate
when the ignition is off. Press the button to activate the
alarm. Press the button again or
turn the ignition on to deactivate
it.
Remote Start
(If Equipped) WARNING
To avoid exhaust fumes, do not use
remote start if your vehicle is parked
indoors or areas that are not well
ventilated. Note:
Do not use remote start if your vehicle
is low on fuel. The remote start button is on the
transmitter.
This feature allows you to start your
vehicle from outside the vehicle. The
transmitter has an extended operating
range.
Vehicles with automatic climate control
can be set to operate when you remote
start the vehicle. See
Climate Control
(page 109). A manual climate control
system will run at the setting it was set to
when you switch the vehicle off.
47
Super Duty (TFA) Canada/United States of America, enUSA, Second Printing Keys and Remote ControlsE163048
3
2
1 E138623 E138624 E138625
Page 53 of 510
PRINCIPLE OF OPERATION
MyKey allows you to program keys with
restricted driving modes to promote good
driving habits. All but one of the keys
programmed to the vehicle can be
activated with these restricted modes.
Any keys that have not been programmed
are referred to as administrator keys or
admin keys. They can be used to:
•
create a MyKey
• program configurable MyKey settings
• clear all MyKey features.
When you have programmed a MyKey, you
can access the following information using
the information display:
• How many admin keys and MyKeys are
programmed to your vehicle.
• The total distance your vehicle has
traveled using a MyKey.
Note: All MyKeys are programmed to the
same settings. You cannot program them
individually.
Non-configurable Settings
The following settings cannot be changed
by an admin key user:
• Belt-Minder. You cannot disable this
feature. The audio system will mute
when the front seat occupants’ safety
belts are not fastened. Note: If your
vehicle is equipped with AM/FM radio
only, then the radio will not mute.
• Early low fuel. The low fuel warning is
activated earlier, giving the MyKey user
more time to refuel.
• Driver assist features, if equipped on
your vehicle, are forced on: parking aid,
blind spot information system (BLIS)
with cross traffic alert, lane departure
warning and forward collision warning
system. Configurable Settings
With an admin key, you can configure
certain MyKey settings when you first
create a MyKey and before you recycle the
key or restart the vehicle. You can also
change the settings afterward with an
admin key:
•
A vehicle speed limit can be set.
Warnings will be shown in the display
followed by an audible tone when your
vehicle reaches the set speed. You
cannot override the set speed by fully
depressing the accelerator pedal or by
setting cruise control. WARNING
Do not set MyKey maximum speed
limit to a limit that will prevent the
driver from maintaining a safe speed
considering posted speed limits and
prevailing road conditions. The driver is
always responsible to drive in accordance
with local laws and prevailing conditions.
Failure to do so could result in accident or
injury. •
Various vehicle speed minders can be
set. Once you select a speed, it will be
shown in the display, followed by an
audible tone when the preselected
vehicle speed is exceeded.
• Audio system maximum volume of
45%. A message will be shown in the
display when you attempt to exceed
the limited volume. Also, the
speed-sensitive or compensated
automatic volume control will be
disabled. Note:
If your vehicle is
equipped with AM/FM radio only, then
the radio volume will not be limited.
• Always on setting. When this is
selected, you will not be able to turn
off AdvanceTrac (if your vehicle is
equipped with this feature).
50
Super Duty (TFA) Canada/United States of America, enUSA, Second Printing MyKey
™
Page 60 of 510
Programming a Personal Entry Code
To create your own personal entry code:
1. Enter the factory-set code.
2. Press 1·2 on the keypad within five
seconds.
3. Enter your personal 5-digit code. You must enter each number within five
seconds of each other.
4. Press
1·2 on the keypad to save
personal code 1.
The doors will lock then unlock to confirm
that programming was successful.
To program additional personal entry
codes, repeat Steps 1-3, then for Step 4:
• press
3·4 to save personal code 2
• press
5·6 to save personal code 3
• press
7·8 to save personal code 4
• press
9·0 to save personal code 5.
You may also program a personal entry
code through the information display.
Tips:
• Do not set a code that uses five of the
same number.
• Do not use five numbers in sequential
order.
• The factory-set code will work even if
you have set your own personal code.
Recalling Memory Positions (If
Equipped)
The programmed entry codes will recall
driver memory positions as follows:
• Entry code 1 will recall driver 1 memory
positions.
• Entry code 2 will recall driver 2 memory
positions.
Note: Personal entry codes 3, 4 and 5 will
not recall memory positions. Erasing a Personal Code
1. Enter the factory-set 5-digit code.
2. Press and release
1·2 on the keypad
within five seconds.
3. Press and hold
1·2 for two seconds.
You must do this within five seconds
of completing Step 2.
All personal codes will erase and only the
factory-set 5-digit code will work.
Anti-Scan Feature
The keypad will go into an anti-scan mode
if you enter the wrong code seven times
(35 consecutive button presses). This
mode disables the keypad for one minute
and the keypad lamp will flash.
The anti-scan feature will turn off after:
• one minute of keypad inactivity
• pressing the unlock button on the
remote control
• switching the ignition on.
Displaying the Factory Set Code
Note: You will need to have two
programmed passive anti-theft keys for this
procedure.
To display the factory-set code in the
information display:
1. Insert a key into the ignition and switch
the ignition on for a few seconds.
2. Switch the ignition off and remove the
key.
3. Insert the second key into the ignition and switch the ignition on.
The factory-set code will display for a few
seconds.
Note: The code may not display until after
any other warning messages first display.
57
Super Duty (TFA) Canada/United States of America, enUSA, Second Printing Locks
Page 62 of 510
TAILGATE LOCK
The tailgate lock can help prevent theft of
the tailgate.
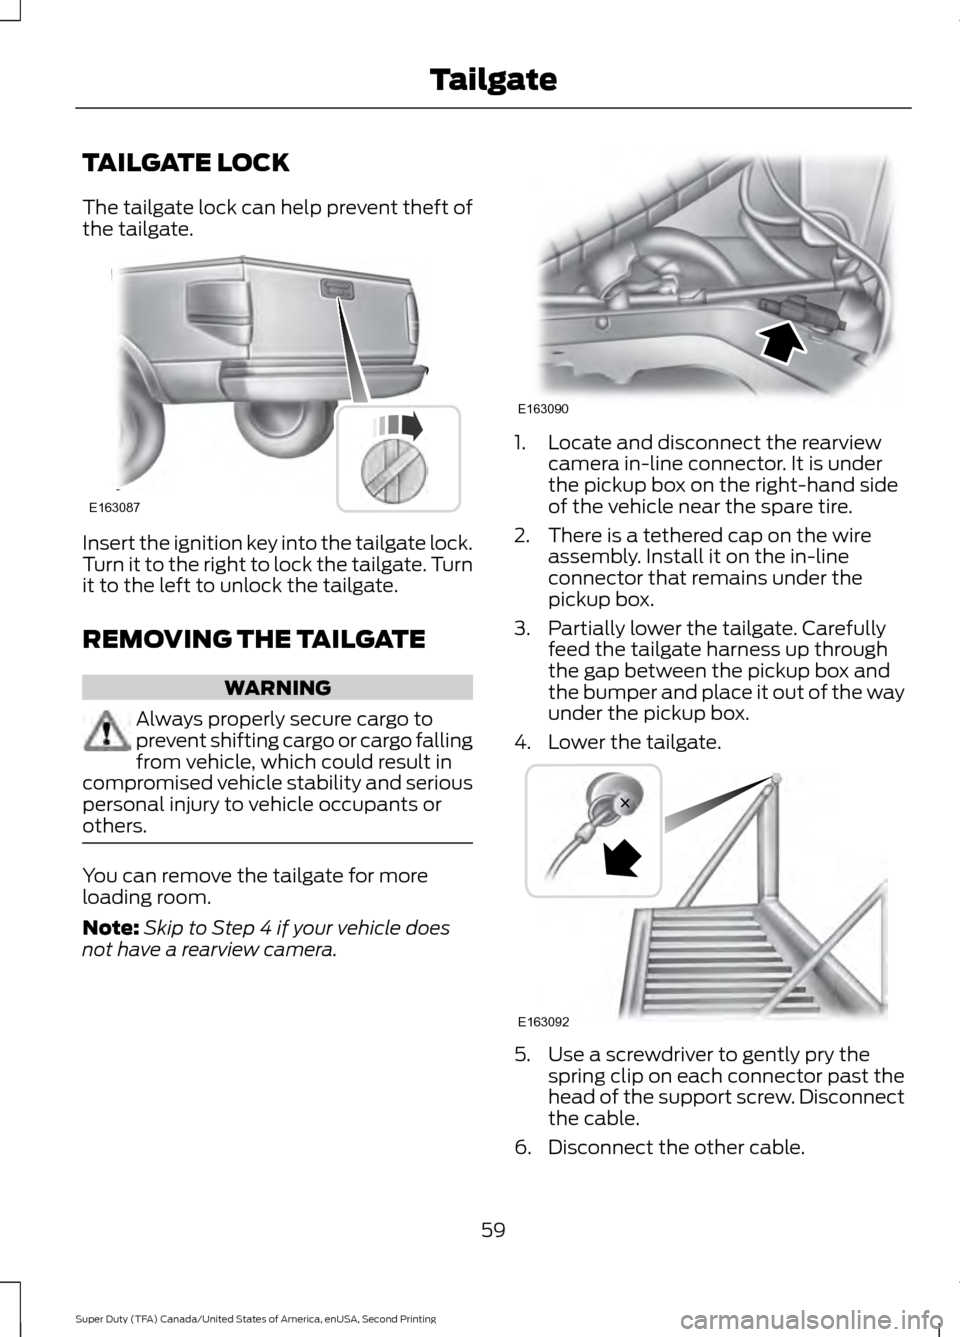
Insert the ignition key into the tailgate lock.
Turn it to the right to lock the tailgate. Turn
it to the left to unlock the tailgate.
REMOVING THE TAILGATE
WARNING
Always properly secure cargo to
prevent shifting cargo or cargo falling
from vehicle, which could result in
compromised vehicle stability and serious
personal injury to vehicle occupants or
others. You can remove the tailgate for more
loading room.
Note:
Skip to Step 4 if your vehicle does
not have a rearview camera. 1. Locate and disconnect the rearview
camera in-line connector. It is under
the pickup box on the right-hand side
of the vehicle near the spare tire.
2. There is a tethered cap on the wire assembly. Install it on the in-line
connector that remains under the
pickup box.
3. Partially lower the tailgate. Carefully feed the tailgate harness up through
the gap between the pickup box and
the bumper and place it out of the way
under the pickup box.
4. Lower the tailgate. 5. Use a screwdriver to gently pry the
spring clip on each connector past the
head of the support screw. Disconnect
the cable.
6. Disconnect the other cable.
59
Super Duty (TFA) Canada/United States of America, enUSA, Second Printing TailgateE163087 E163090 E163092
Page 68 of 510
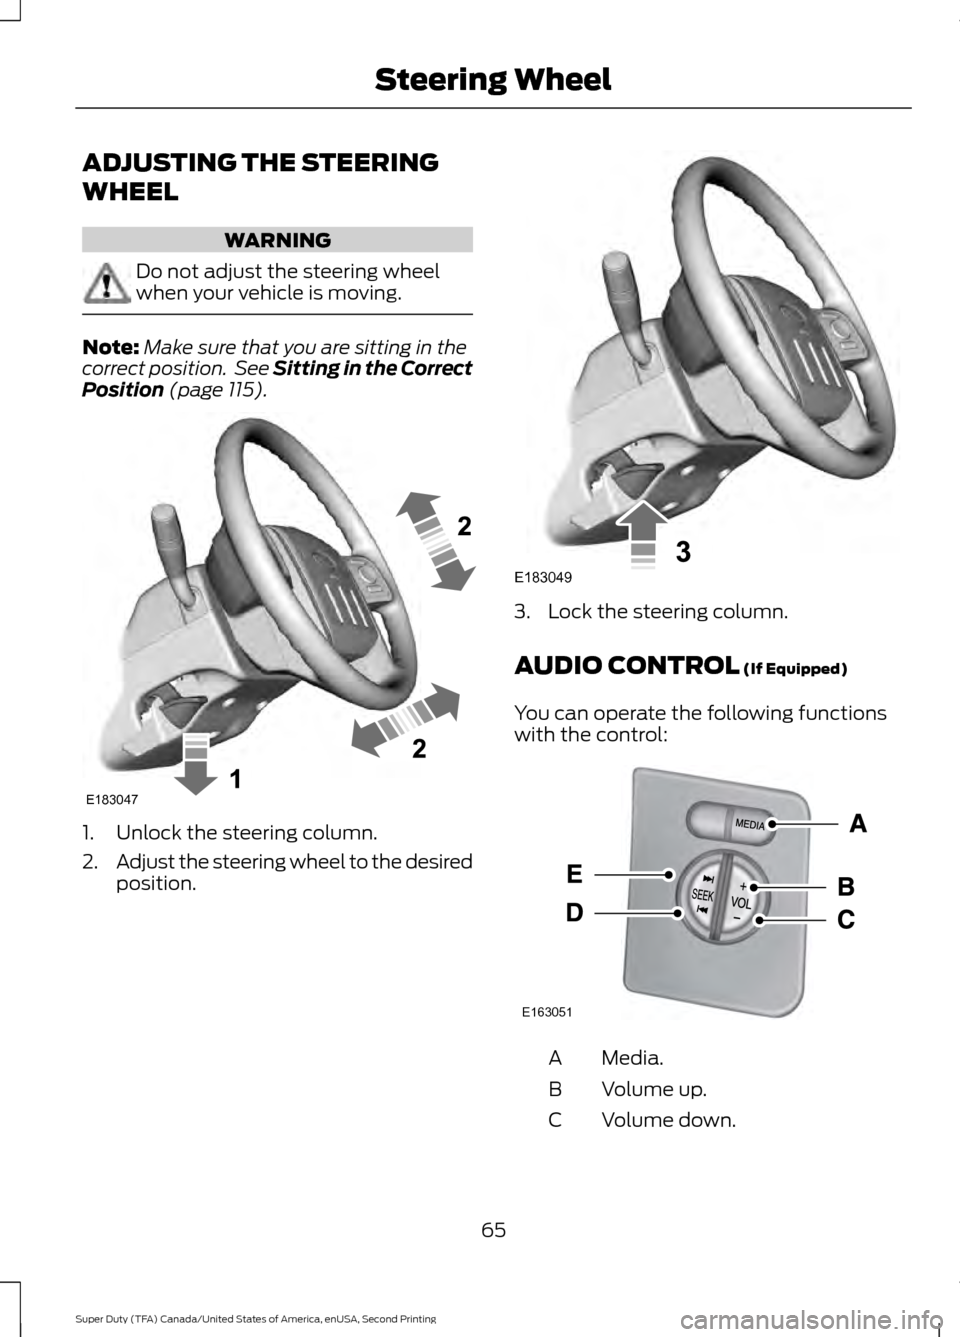
ADJUSTING THE STEERING
WHEEL
WARNING
Do not adjust the steering wheel
when your vehicle is moving.
Note:
Make sure that you are sitting in the
correct position. See Sitting in the Correct
Position (page 115). 1. Unlock the steering column.
2.
Adjust the steering wheel to the desired
position. 3. Lock the steering column.
AUDIO CONTROL
(If Equipped)
You can operate the following functions
with the control: Media.
A
Volume up.
B
Volume down.
C
65
Super Duty (TFA) Canada/United States of America, enUSA, Second Printing Steering WheelE183047 E183049 E163051
Page 71 of 510
ADJUSTING THE PEDALS (If
Equipped) WARNING
Never use the controls while your
feet are on the accelerator and brake
pedals and the vehicle is moving.
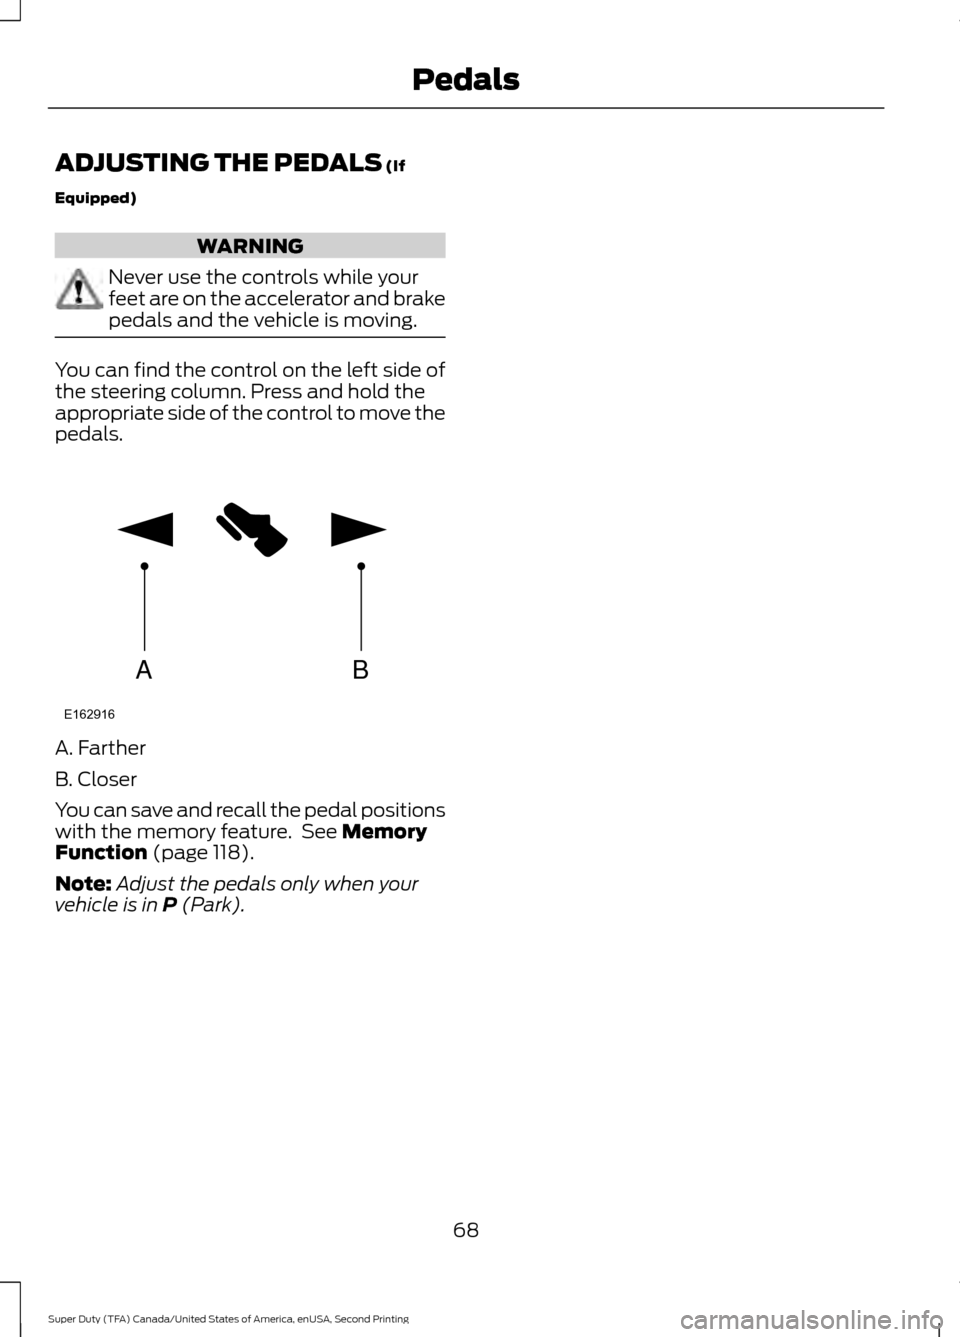
You can find the control on the left side of
the steering column. Press and hold the
appropriate side of the control to move the
pedals.
A. Farther
B. Closer
You can save and recall the pedal positions
with the memory feature. See
Memory
Function (page 118).
Note: Adjust the pedals only when your
vehicle is in
P (Park).
68
Super Duty (TFA) Canada/United States of America, enUSA, Second Printing PedalsAB
E162916
Page 75 of 510

INSTRUMENT LIGHTING
DIMMER
Use to adjust the brightness of the
instrument panel and all applicable lit
components in the vehicle during
headlamp and parking lamp operation.
•
Tap the top or bottom of the control
to brighten/dim all interior lit
components incrementally, or
• Press and hold at the first position the
top or bottom of the control until the
desired lighting level is reached.
• Press and hold the top of the control
to the full on position to activate the
“dome on ” feature. This will turn on the
interior courtesy lights. The lights will
remain on until the bottom of the
control is pressed. DAYTIME RUNNING LAMPS (If
Equipped) WARNING
Always remember to switch your
headlamps on in low light situations
or during inclement weather. The
system does not activate the tail lamps
and may not provide adequate lighting
during these conditions. Failure to activate
your headlamps under these conditions
may result in a collision. The system switches the headlamps on
with a reduced output in daylight
conditions.
To switch the system on:
1. Switch the ignition on.
2. Switch the lighting control to the off,
or parking lamp position.
3. Disengage the parking brake.
4. Make sure the transmission selector lever is not in position P.
FRONT FOG LAMPS
(If Equipped) 72
Super Duty (TFA) Canada/United States of America, enUSA, Second Printing LightingE163270 E163271
A
Page 78 of 510
POWER WINDOWS (If Equipped)
WARNINGS
Do not leave children unattended in
your vehicle and do not let them play
with the power windows. They may
seriously injure themselves. When closing the power windows,
you should verify they are free of
obstructions and make sure that
children and pets are not in the proximity
of the window openings. Note:
You may hear a pulsing noise when
just one of the windows is open. Lower the
opposite window slightly to reduce this
noise.
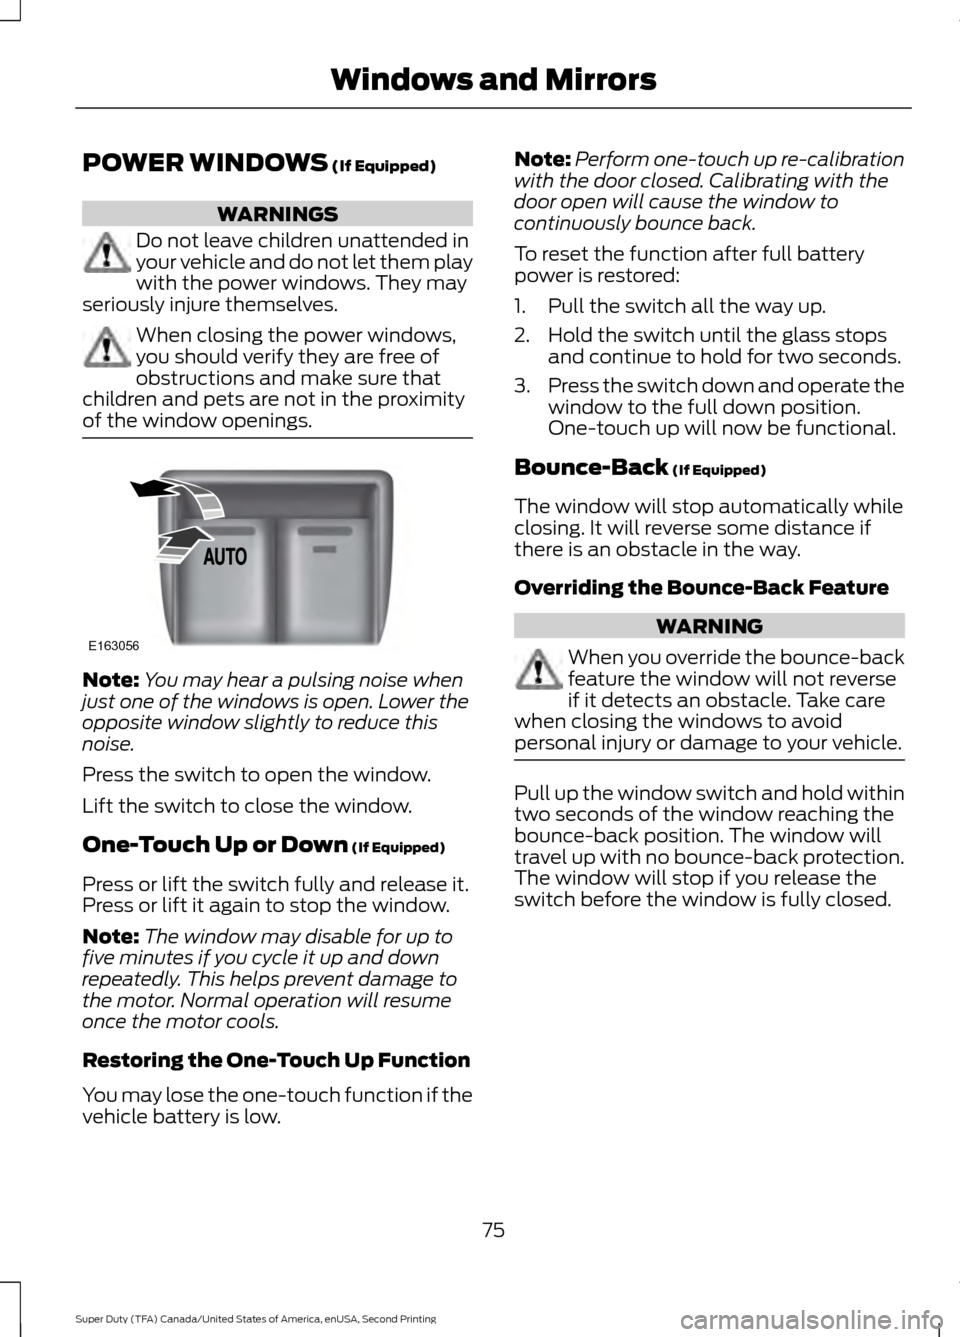
Press the switch to open the window.
Lift the switch to close the window.
One-Touch Up or Down
(If Equipped)
Press or lift the switch fully and release it.
Press or lift it again to stop the window.
Note: The window may disable for up to
five minutes if you cycle it up and down
repeatedly. This helps prevent damage to
the motor. Normal operation will resume
once the motor cools.
Restoring the One-Touch Up Function
You may lose the one-touch function if the
vehicle battery is low. Note:
Perform one-touch up re-calibration
with the door closed. Calibrating with the
door open will cause the window to
continuously bounce back.
To reset the function after full battery
power is restored:
1. Pull the switch all the way up.
2. Hold the switch until the glass stops and continue to hold for two seconds.
3. Press the switch down and operate the
window to the full down position.
One-touch up will now be functional.
Bounce-Back
(If Equipped)
The window will stop automatically while
closing. It will reverse some distance if
there is an obstacle in the way.
Overriding the Bounce-Back Feature WARNING
When you override the bounce-back
feature the window will not reverse
if it detects an obstacle. Take care
when closing the windows to avoid
personal injury or damage to your vehicle. Pull up the window switch and hold within
two seconds of the window reaching the
bounce-back position. The window will
travel up with no bounce-back protection.
The window will stop if you release the
switch before the window is fully closed.
75
Super Duty (TFA) Canada/United States of America, enUSA, Second Printing Windows and MirrorsE163056