2016 FORD FUSION (AMERICAS) ECU
[x] Cancel search: ECUPage 73 of 518

4. Within 10 seconds, place a second
programmed intelligent access key in
the backup slot and press the
START/STOP button.
5. Wait 5 seconds, and then press the START/STOP
button again.
6. Remove the intelligent access key.
7. Wait 5 seconds, then place the unprogrammed intelligent access key
in the backup slot and press the
START/STOP
button.
Programming is now complete. Verify the
remote control functions operate and your
vehicle starts with the new intelligent
access key.
If programming was not successful, wait
10 seconds and repeat Steps 1 through 7.
If you are still unsuccessful, take your
vehicle to your authorized dealer.
ANTI-THEFT ALARM
The system will warn you of an
unauthorized entry to your vehicle. It will
be triggered if any door, the luggage
compartment or the hood is opened
without using the key, remote control or
keyless entry keypad.
The direction indicators will flash and the
horn will sound if unauthorized entry is
attempted while the alarm is armed.
Take all remote controls to an authorized
dealer if there is any potential alarm
problem with your vehicle.
Arming the Alarm
The alarm is ready to arm when there is
not a key in your vehicle. Electronically lock
your vehicle to arm the alarm.
Disarming the Alarm
Disarm the alarm by any of the following
actions: •
Unlock the doors or luggage
compartment with the remote control
or keyless entry keypad.
• Switch your vehicle on or start your
vehicle.
• Use a key in the driver door to unlock
your vehicle, then switch your vehicle
on within 12 seconds.
Note: Pressing the panic button on the
remote control will stop the horn and signal
indicators, but will not disarm the system.
70
Fusion/Mondeo (CC7) Canada/United States of America, enUSA, First Printing Security
Page 114 of 518
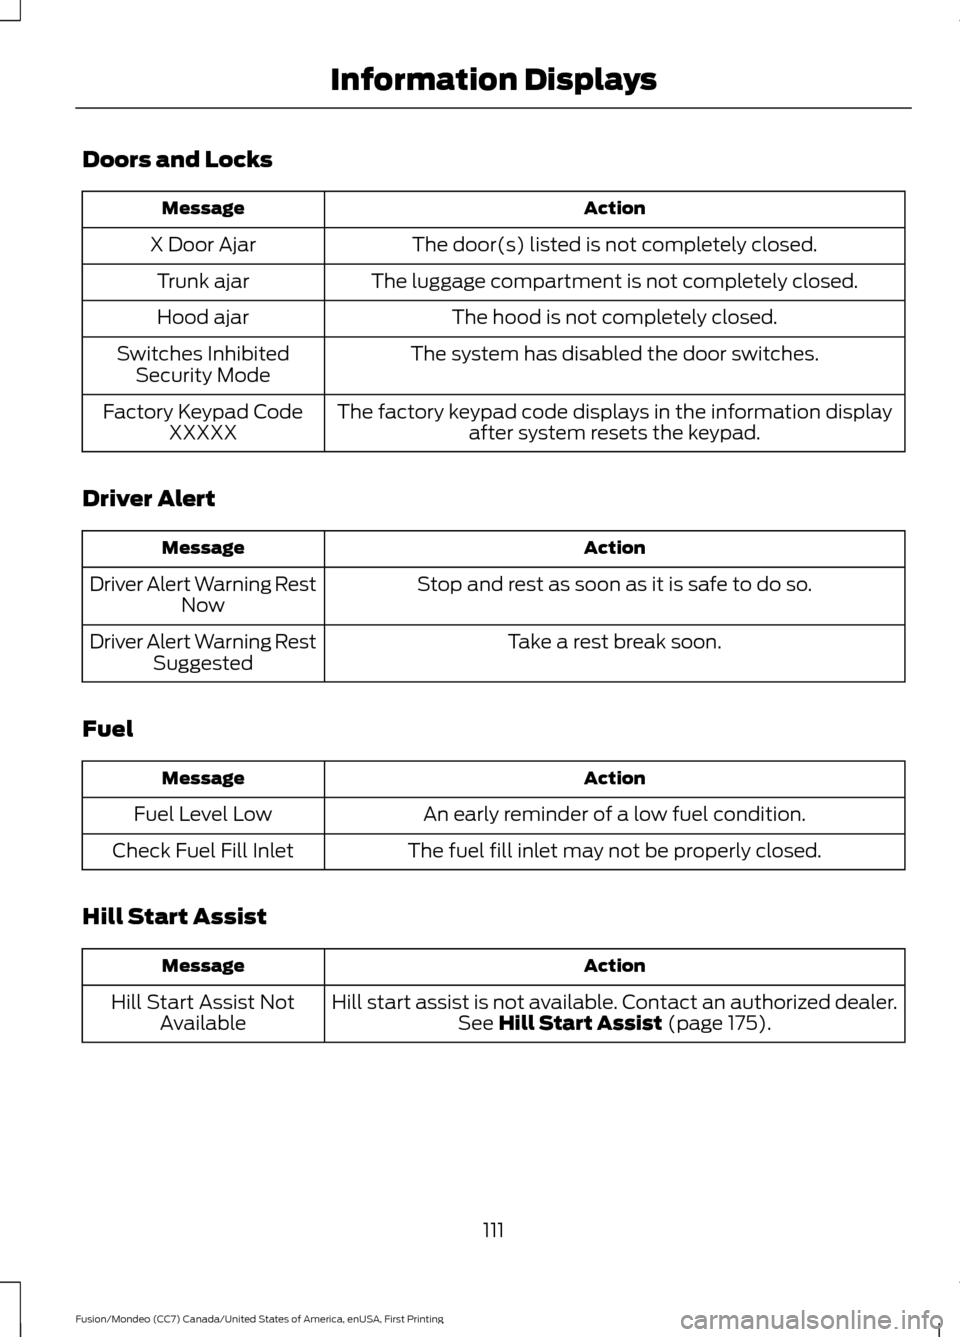
Doors and Locks
Action
Message
The door(s) listed is not completely closed.
X Door Ajar
The luggage compartment is not completely closed.
Trunk ajar
The hood is not completely closed.
Hood ajar
The system has disabled the door switches.
Switches Inhibited
Security Mode
The factory keypad code displays in the information displayafter system resets the keypad.
Factory Keypad Code
XXXXX
Driver Alert Action
Message
Stop and rest as soon as it is safe to do so.
Driver Alert Warning Rest
Now
Take a rest break soon.
Driver Alert Warning Rest
Suggested
Fuel Action
Message
An early reminder of a low fuel condition.
Fuel Level Low
The fuel fill inlet may not be properly closed.
Check Fuel Fill Inlet
Hill Start Assist Action
Message
Hill start assist is not available. Contact an authorized dealer.See Hill Start Assist (page 175).
Hill Start Assist Not
Available
111
Fusion/Mondeo (CC7) Canada/United States of America, enUSA, First Printing Information Displays
Page 138 of 518

Saving a PreSet Position
1. Switch the ignition on.
2. Adjust the seat and exterior mirrors to
your desired position.
3. Press and hold the desired preset button until you hear a single tone.
You can save up to three preset memory
positions. You can save a memory preset
at any time.
Recalling a PreSet Position
Press and release the preset button
associated with your desired driving
position. The seat and mirrors will move to
the position stored for that preset.
Note: A preset memory position can only
be recalled when the ignition is off, or when
the transmission is in park (P) or neutral (N)
if the ignition is on.
You can also recall a preset memory
position by:
• Pressing the unlock button on your
integrated keyhead transmitter or
intelligent access key fob if it is linked
to a preset position.
• Unlocking the intelligent driver door
handle if a linked key fob is present.
• Entering a personal entry code on the
Securicode keypad. See Locks (page
60). Note:
Using a linked key fob to recall your
memory position when the ignition is off
moves the seat to the Easy Entry position.
Note: Pressing any active memory feature
control - power seat, mirror (or any memory
button) during a memory recall cancels the
operation.
Linking a PreSet Position to your
Remote Control or Intelligent
Access Key Fob
Your vehicle can save the preset memory
positions for up to three remote controls
or intelligent access (IA) keys.
1. With the ignition on, move the memory
positions to the desired positions.
2. Press and hold the desired preset button for about five seconds. A tone
will sound after about two seconds.
Continue holding until a second tone
is heard.
3. Within three seconds, press the lock button on the remote control you are
linking.
To unlink a remote control, follow the
same procedure – except in step 3, press
the unlock button on the remote control.
Note: If more than one linked remote
control or intelligent access key is in range,
the memory function moves to the settings
of the first key to initiate a memory recall.
Easy Entry and Exit Feature
If you enable the easy entry and exit
feature, it automatically moves the driver
seat position rearward up to two inches
(five centimeters) when you switch the
ignition off.
The driver seat will return to the previous
position when you switch the ignition on.
You can enable or disable this feature in
the information display. See Information
Displays (page 96).
135
Fusion/Mondeo (CC7) Canada/United States of America, enUSA, First Printing SeatsE142554
Page 142 of 518
HomeLink Wireless Control
System (If Equipped)
WARNING
Do not use the system with any
garage door opener that does not
have the safety stop and reverse
feature as required by U.S. Federal Safety
Standards (this includes any garage door
opener manufactured before April 1, 1982).
A garage door opener which cannot detect
an object, signaling the door to stop and
reverse, does not meet current federal
safety standards. Using a garage door
opener without these features increases
the risk of serious injury or death. Note:
Make sure that the garage door and
security device are free from obstruction
when you are programming. Do not program
the system with the vehicle in the garage.
Note: Make sure you keep the original
remote control transmitter for use in other
vehicles as well as for future system
programming.
Note: We recommend that upon the sale
or lease termination of your vehicle, you
erase the programmed function buttons for
security reasons. See Erasing the function
button codes later in this section.
Note: You can program a maximum of
three devices. To change or replace any of
the three devices after it has been initially
programmed, you must first erase the
current settings. See Erasing the function
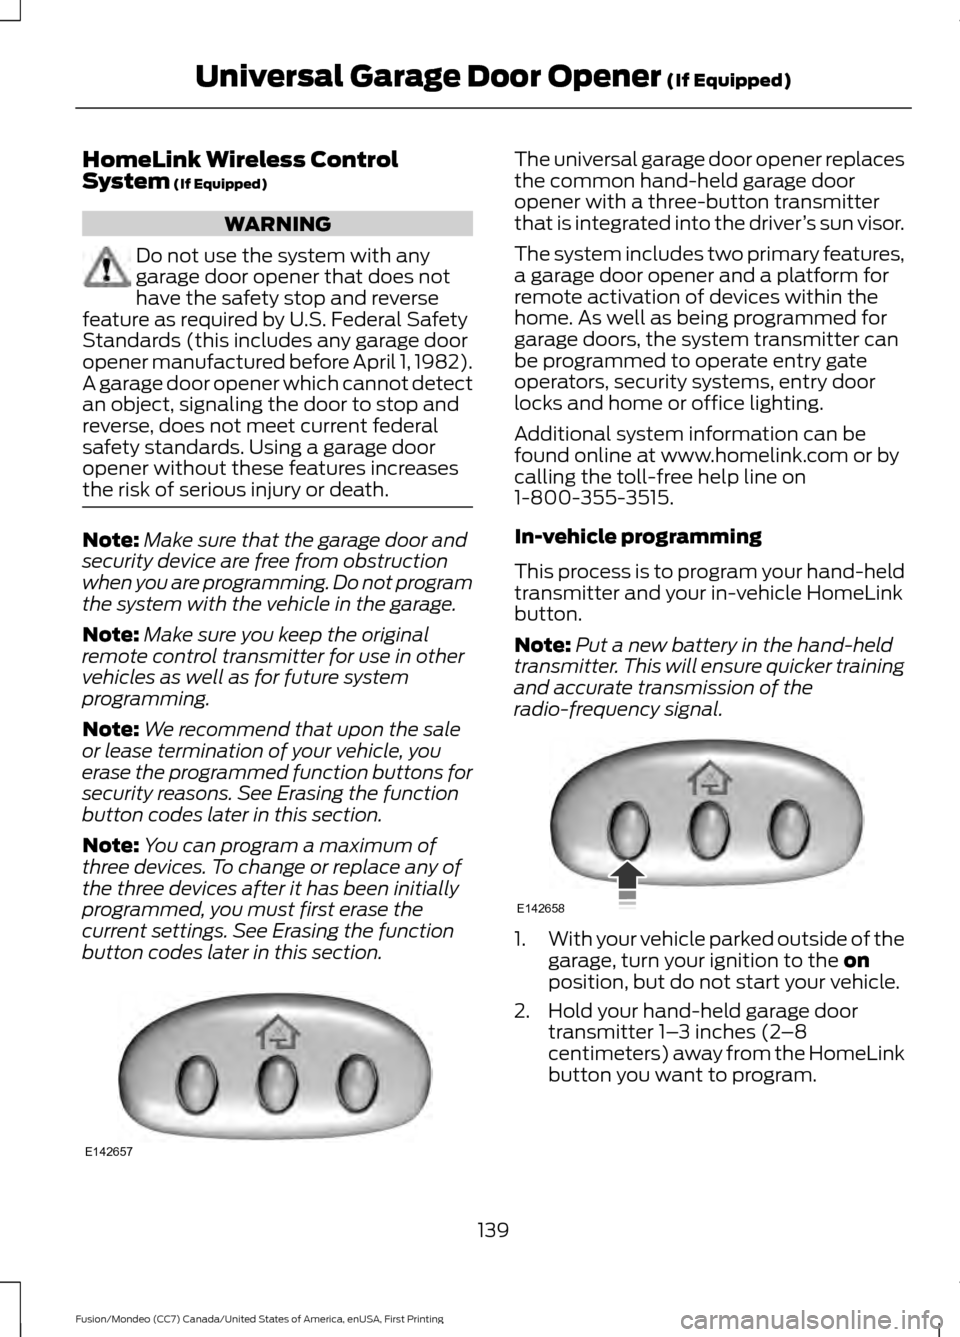
button codes later in this section. The universal garage door opener replaces
the common hand-held garage door
opener with a three-button transmitter
that is integrated into the driver
’s sun visor.
The system includes two primary features,
a garage door opener and a platform for
remote activation of devices within the
home. As well as being programmed for
garage doors, the system transmitter can
be programmed to operate entry gate
operators, security systems, entry door
locks and home or office lighting.
Additional system information can be
found online at www.homelink.com or by
calling the toll-free help line on
1-800-355-3515.
In-vehicle programming
This process is to program your hand-held
transmitter and your in-vehicle HomeLink
button.
Note: Put a new battery in the hand-held
transmitter. This will ensure quicker training
and accurate transmission of the
radio-frequency signal. 1.
With your vehicle parked outside of the
garage, turn your ignition to the
on
position, but do not start your vehicle.
2. Hold your hand-held garage door transmitter 1– 3 inches (2–8
centimeters) away from the HomeLink
button you want to program.
139
Fusion/Mondeo (CC7) Canada/United States of America, enUSA, First Printing Universal Garage Door Opener
(If Equipped)E142657 E142658
Page 166 of 518
AUTOMATIC TRANSMISSION
WARNINGS
Always set the parking brake fully
and latch the gearshift in park (P).
Turn the ignition to the off position
and remove the key whenever you leave
your vehicle. Do not apply the brake pedal and
accelerator pedal simultaneously.
Applying both pedals simultaneously
for more than three seconds will limit
engine rpm, which may result in difficulty
maintaining speed in traffic and could lead
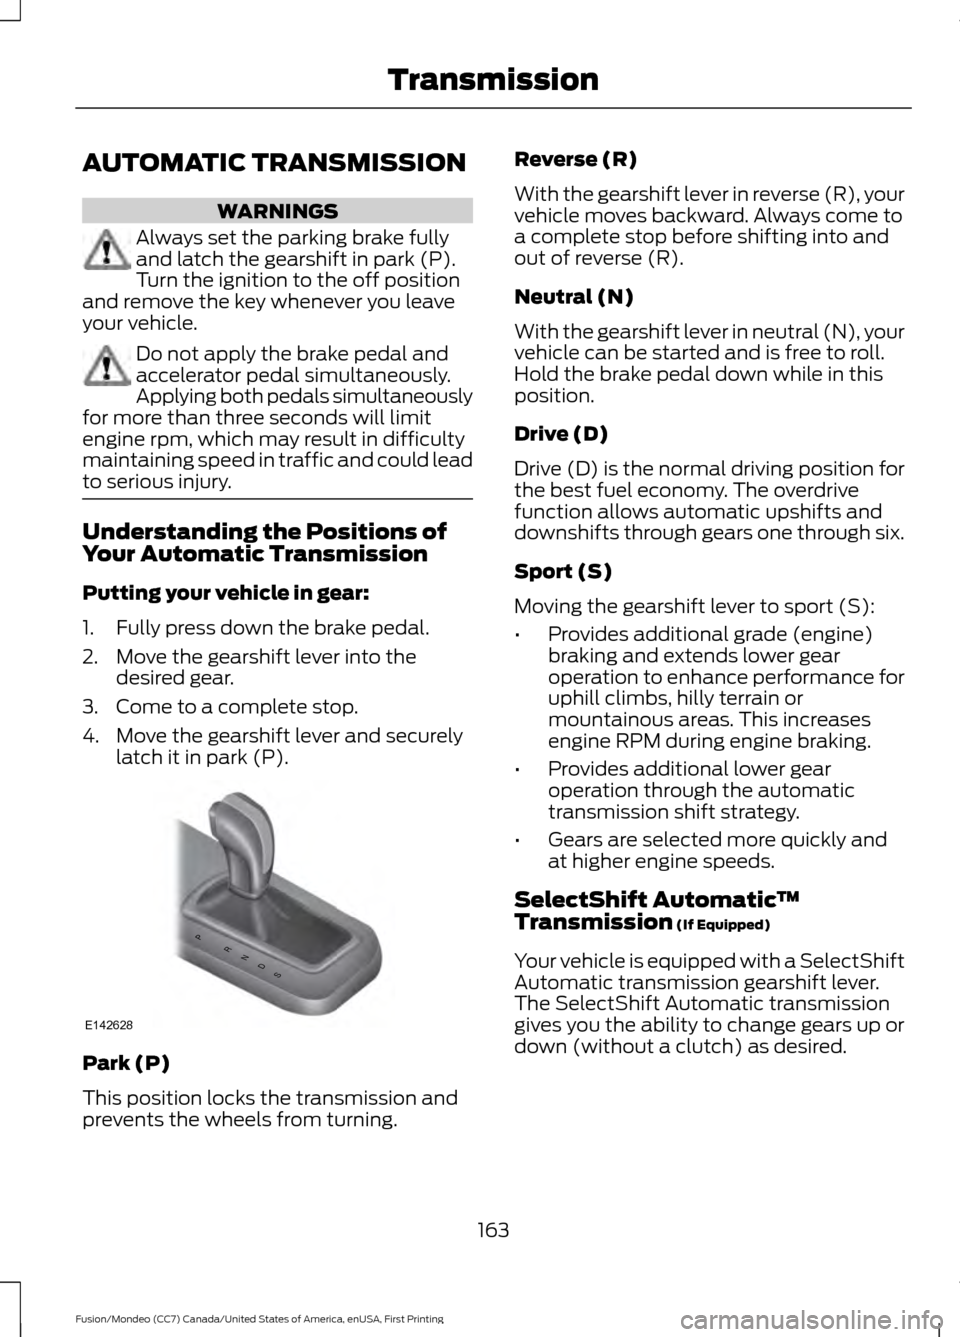
to serious injury. Understanding the Positions of
Your Automatic Transmission
Putting your vehicle in gear:
1. Fully press down the brake pedal.
2. Move the gearshift lever into the
desired gear.
3. Come to a complete stop.
4. Move the gearshift lever and securely latch it in park (P). Park (P)
This position locks the transmission and
prevents the wheels from turning. Reverse (R)
With the gearshift lever in reverse (R), your
vehicle moves backward. Always come to
a complete stop before shifting into and
out of reverse (R).
Neutral (N)
With the gearshift lever in neutral (N), your
vehicle can be started and is free to roll.
Hold the brake pedal down while in this
position.
Drive (D)
Drive (D) is the normal driving position for
the best fuel economy. The overdrive
function allows automatic upshifts and
downshifts through gears one through six.
Sport (S)
Moving the gearshift lever to sport (S):
•
Provides additional grade (engine)
braking and extends lower gear
operation to enhance performance for
uphill climbs, hilly terrain or
mountainous areas. This increases
engine RPM during engine braking.
• Provides additional lower gear
operation through the automatic
transmission shift strategy.
• Gears are selected more quickly and
at higher engine speeds.
SelectShift Automatic ™
Transmission (If Equipped)
Your vehicle is equipped with a SelectShift
Automatic transmission gearshift lever.
The SelectShift Automatic transmission
gives you the ability to change gears up or
down (without a clutch) as desired.
163
Fusion/Mondeo (CC7) Canada/United States of America, enUSA, First Printing TransmissionPRNDS
E142628
Page 178 of 518
Note:
On manual transmission vehicles,
you must fully press the clutch pedal before
the drive away release feature will operate.
Drive as normal using the accelerator and
clutch pedals and the electric parking brake
will be automatically released.
The brake system warning lamp will go off
to confirm that the electric parking brake
has been released.
Note: The electric parking brake drive away
release makes starting on a hill easier. This
feature will release the parking brake
automatically when the vehicle has
sufficient drive force to move up the hill. To
assure drive away release when starting
uphill, press the accelerator pedal quickly.
Driving with a Trailer
Depending on the slope and the weight of
the trailer, your vehicle and trailer may roll
backwards slightly when you start on a
slope.
To prevent this from happening, do the
following:
1. Pull the switch up and hold it in this position.
2. Drive your vehicle, then release the switch when you notice that the engine
has developed sufficient driving force.
Battery With No Charge WARNING
You will not be able to apply or
release the electric parking brake if
the battery is low or has no charge.
If the battery is low or has no charge, use
jumper cables and a booster battery. HILL START ASSIST WARNINGS
The system does not replace the
parking brake. When you leave your
vehicle, always apply the parking
brake. Failure to leave your vehicle securely
parked may lead to a crash or injury. See
Electric Parking Brake (page 173). You must remain in your vehicle
when the system turns on. At all
times, you are responsible for
controlling your vehicle, supervising the
system and intervening, if required. Failure
to take care may result in the loss of
control of your vehicle, serious personal
injury or death. The system will turn off if a
malfunction is apparent or if you rev
the engine excessively. Failure to
take care may result in the loss of control
of your vehicle, serious personal injury or
death. The system makes it easier to pull away
when your vehicle is on a slope without the
need to use the parking brake.
When the system is active, your vehicle
remains stationary on the slope for two to
three seconds after you release the brake
pedal. This allows time to move your foot
from the brake to the accelerator pedal.
The system releases the brakes
automatically once the engine has
developed sufficient drive to prevent your
vehicle from rolling down the slope. This
is an advantage when pulling away on a
slope, for example from a car park ramp,
traffic lights or when reversing uphill into
a parking space.
Note:
The system only functions when you
bring your vehicle to a complete standstill
with the vehicle in an uphill gear (for
example, second (2) when facing uphill or
reverse (R) when facing downhill).
175
Fusion/Mondeo (CC7) Canada/United States of America, enUSA, First Printing Brakes
Page 186 of 518

When you think your vehicle has enough
space in front and behind it, or you hear a
solid tone from the parking aid
(accompanied by a touchscreen display
message and a chime), bring your vehicle
to a complete stop.
When automatic steering is finished, the
touch screen displays a message and a
tone sounds, indicating that the active park
assist process is done. The driver is
responsible for checking the parking job
and making any necessary corrections
before putting the transmission in park (P).
Deactivating the Park Assist
Feature
Manually deactivate the system by:
•
Pressing the active park assist button.
• Grabbing the steering wheel. •
Driving above approximately 50 mph
(80 km/h) for 10 seconds during an
active park search.
• Driving above
6 mph (9 km/h) during
automatic steering.
• Turning off the traction control system.
Certain vehicle conditions can also
deactivate the system, such as:
• Traction control has activated on a
slippery or loose surface.
• There is an anti-lock brake system
activation or failure.
• Something touches the steering wheel.
If a problem occurs with the system, a
warning message is displayed, followed
by a tone. Occasional system messages
may occur in normal operation. For
recurring or frequent system faults, contact
an authorized dealer to have your vehicle
serviced.
Troubleshooting the System The system does not look for a space
The traction control system may be off
The transmission is in Reverse ( R); your vehicle must be moving forward to detect a
parking space The system does not offer a particular space
Something may be contacting the front bumper or side sensors
There is not enough room on both sides of your vehicle in order to park
There is not enough space for the parking maneuver on the opposite side of the parking
space
The parking space is farther than
4.9 ft (1.5 m) or closer than 15.7 in (0.4 m) away.
The transmission is in Reverse ( R); your vehicle must be moving forward to detect a
parking space
Your vehicle is going faster than
22 mph (35 km/h)
183
Fusion/Mondeo (CC7) Canada/United States of America, enUSA, First Printing Parking Aids
Page 227 of 518
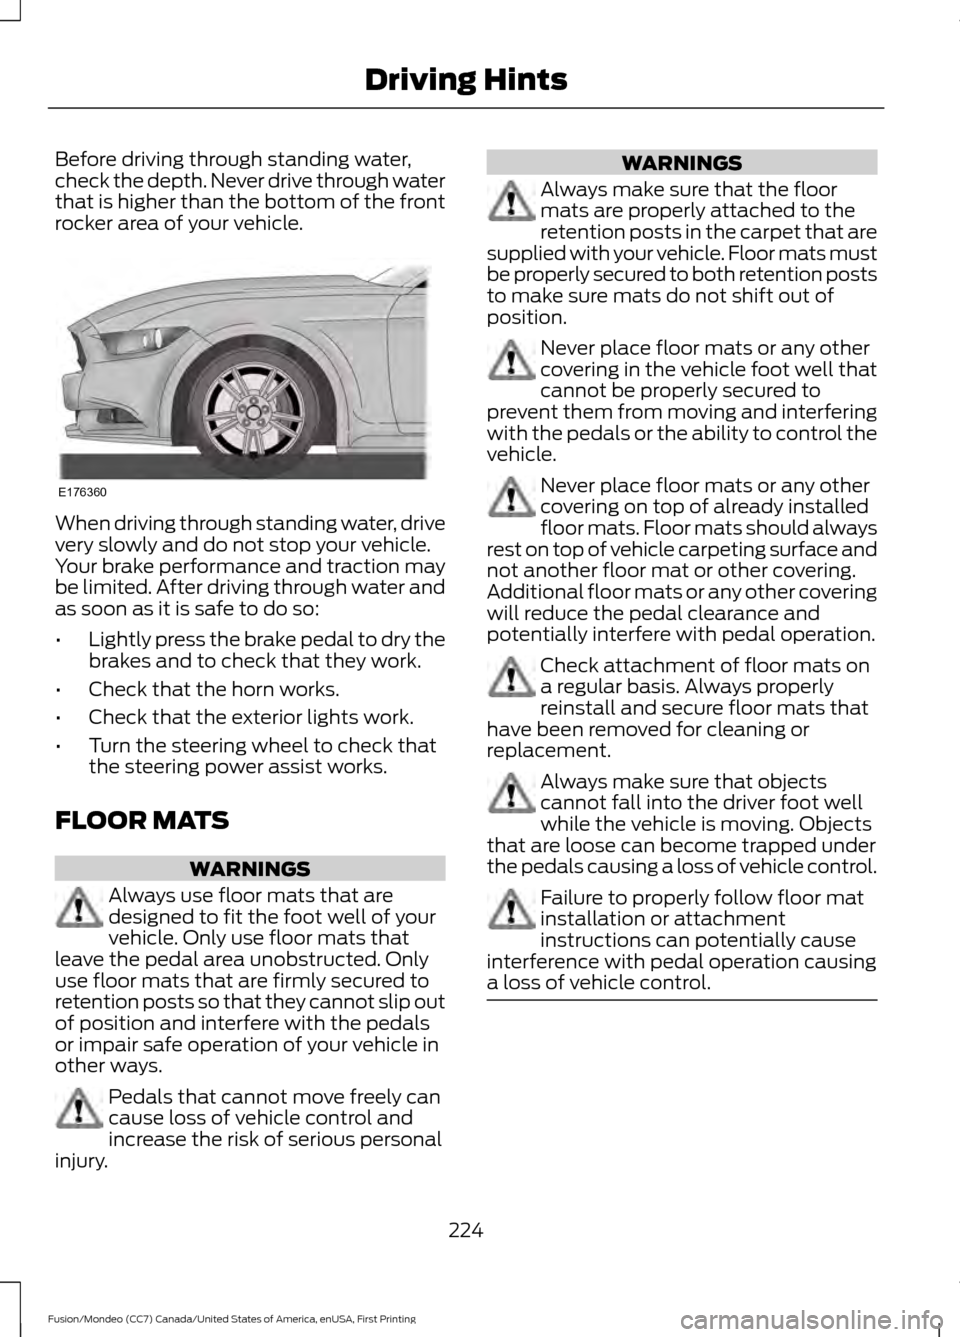
Before driving through standing water,
check the depth. Never drive through water
that is higher than the bottom of the front
rocker area of your vehicle.
When driving through standing water, drive
very slowly and do not stop your vehicle.
Your brake performance and traction may
be limited. After driving through water and
as soon as it is safe to do so:
•
Lightly press the brake pedal to dry the
brakes and to check that they work.
• Check that the horn works.
• Check that the exterior lights work.
• Turn the steering wheel to check that
the steering power assist works.
FLOOR MATS WARNINGS
Always use floor mats that are
designed to fit the foot well of your
vehicle. Only use floor mats that
leave the pedal area unobstructed. Only
use floor mats that are firmly secured to
retention posts so that they cannot slip out
of position and interfere with the pedals
or impair safe operation of your vehicle in
other ways. Pedals that cannot move freely can
cause loss of vehicle control and
increase the risk of serious personal
injury. WARNINGS
Always make sure that the floor
mats are properly attached to the
retention posts in the carpet that are
supplied with your vehicle. Floor mats must
be properly secured to both retention posts
to make sure mats do not shift out of
position. Never place floor mats or any other
covering in the vehicle foot well that
cannot be properly secured to
prevent them from moving and interfering
with the pedals or the ability to control the
vehicle. Never place floor mats or any other
covering on top of already installed
floor mats. Floor mats should always
rest on top of vehicle carpeting surface and
not another floor mat or other covering.
Additional floor mats or any other covering
will reduce the pedal clearance and
potentially interfere with pedal operation. Check attachment of floor mats on
a regular basis. Always properly
reinstall and secure floor mats that
have been removed for cleaning or
replacement. Always make sure that objects
cannot fall into the driver foot well
while the vehicle is moving. Objects
that are loose can become trapped under
the pedals causing a loss of vehicle control. Failure to properly follow floor mat
installation or attachment
instructions can potentially cause
interference with pedal operation causing
a loss of vehicle control. 224
Fusion/Mondeo (CC7) Canada/United States of America, enUSA, First Printing Driving HintsE176360