2016 FORD FUSION (AMERICAS) height
[x] Cancel search: heightPage 84 of 518
Note:
Typical road dust, dirt and water
spots will not affect the performance of the
automatic high beam system . However, in
cold or inclement weather conditions, you
will notice a decrease in the availability of
the high beam system, especially at start
up. If you want to change the beam state
independently of the system, you may
switch the high beams on or off using the
multifunction switch. Automatic control will
resume when conditions are correct.
Note: Modification of the vehicle ride height
such as using much larger tires, may
degrade feature performance.
A camera sensor, centrally mounted
behind the windshield of your vehicle,
continuously monitors conditions to decide
when to switch the high beams off and on.
Once the system is active, the high beams
will switch on if:
• the ambient light level is low enough
• there is no traffic in front of the vehicle
• the vehicle speed is greater than
approximately 32 mph (52 km/h).
The high beams will switch off if:
• the system detects the headlamps of
an approaching vehicle or the tail
lamps of a preceding vehicle.
• vehicle speed falls below
approximately
27 mph (44 km/h)
• the ambient light level is high enough
that high beams are not required
• the system detects severe rain, snow
or fog
• the camera is blocked.
Activating the System
Switch on the system using the information
display and autolamps. See Information
Displays
(page 96). See Autolamps
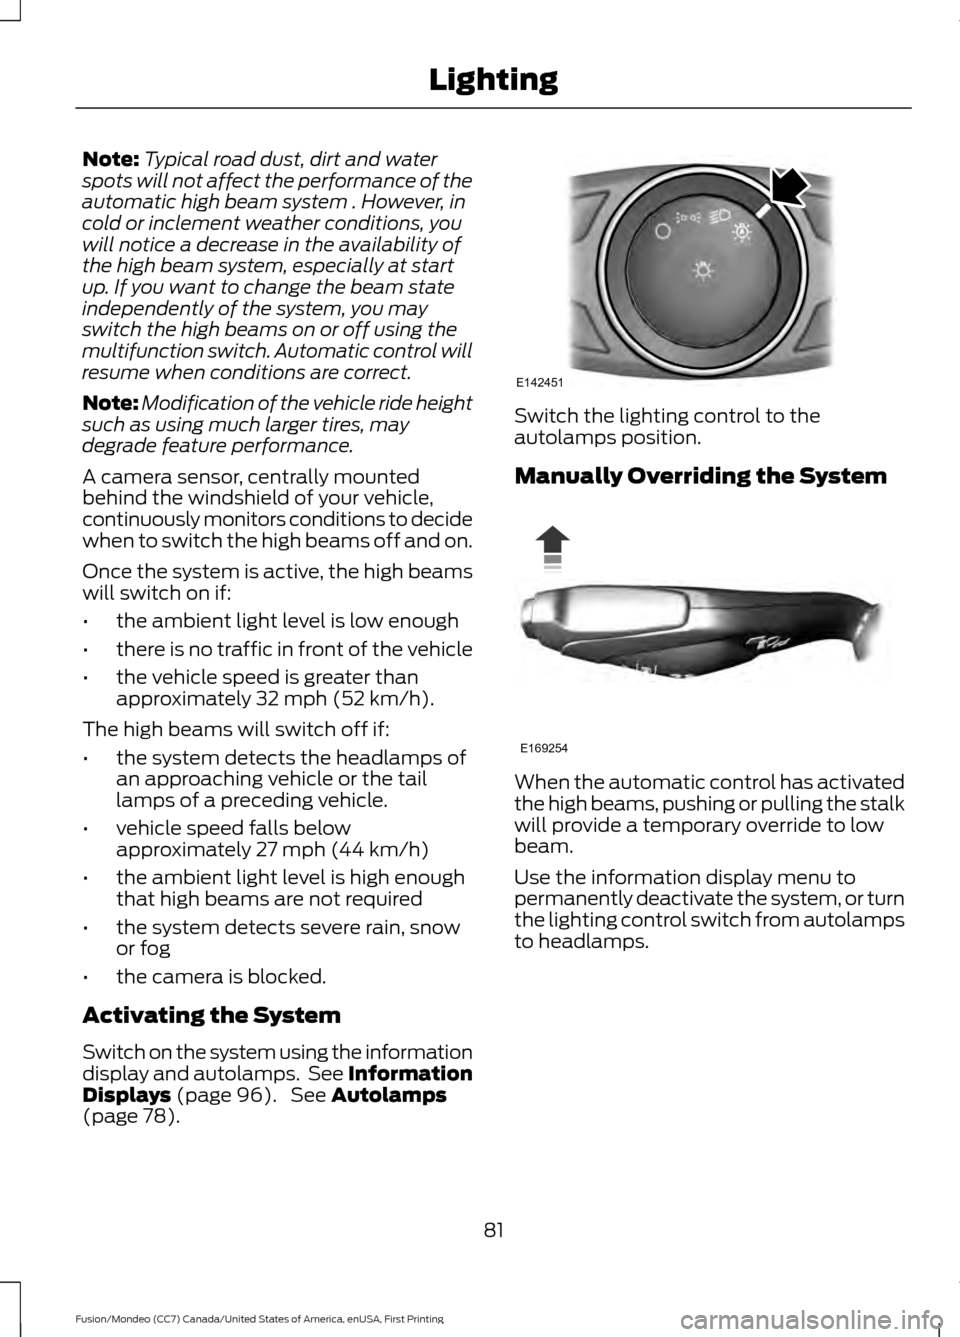
(page 78). Switch the lighting control to the
autolamps position.
Manually Overriding the System
When the automatic control has activated
the high beams, pushing or pulling the stalk
will provide a temporary override to low
beam.
Use the information display menu to
permanently deactivate the system, or turn
the lighting control switch from autolamps
to headlamps.
81
Fusion/Mondeo (CC7) Canada/United States of America, enUSA, First Printing LightingE142451 E169254
Page 135 of 518
1. Adjust the seatback to an upright
driving or riding position.
2. Pivot the head restraint forward toward
your head to the desired position.
After the head restraint reaches the
forward-most tilt position, pivoting it
forward again will then release it to the
rearward, un-tilted position.
MANUAL SEATS WARNINGS
Do not adjust the driver seat or
seatback when your vehicle is
moving.
Rock the seat backward and forward
after releasing the lever to make sure
that it is fully engaged.
Reclining the seatback can cause an
occupant to slide under the seat's
safety belt, resulting in severe
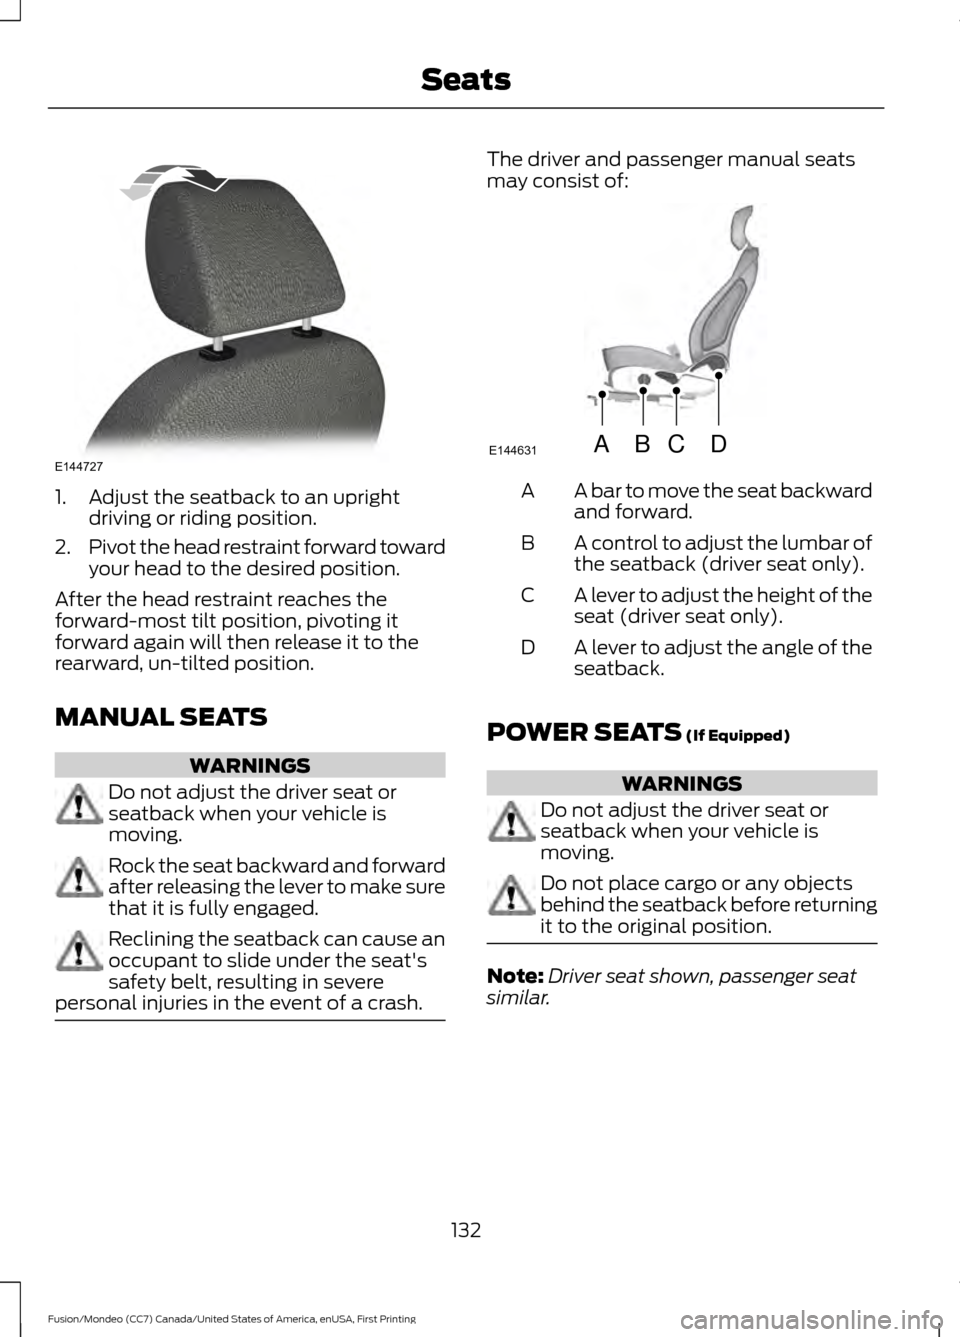
personal injuries in the event of a crash. The driver and passenger manual seats
may consist of:
A bar to move the seat backward
and forward.
A
A control to adjust the lumbar of
the seatback (driver seat only).
B
A lever to adjust the height of the
seat (driver seat only).
C
A lever to adjust the angle of the
seatback.
D
POWER SEATS (If Equipped) WARNINGS
Do not adjust the driver seat or
seatback when your vehicle is
moving.
Do not place cargo or any objects
behind the seatback before returning
it to the original position.
Note:
Driver seat shown, passenger seat
similar.
132
Fusion/Mondeo (CC7) Canada/United States of America, enUSA, First Printing SeatsE144727 ABCD
E144631
Page 261 of 518

CHECKING THE WIPER
BLADES
Run the tip of your fingers over the edge of
the blade to check for roughness.
Clean the wiper blades with washer fluid
or water applied with a soft sponge or
cloth.
CHANGING THE WIPER
BLADES
The wiper arms can be manually moved
when the ignition is off. This allows for ease
of blade replacement and cleaning under
the blades.
1. Pull the wiper blade and arm away
from the glass.
2. Press the locking buttons together.
3. Rotate and remove the wiper blade.
4. Install in the reverse order. Note:
Make sure that the wiper blade locks
into place. Lower the wiper arm and blade
back to the windshield. The wiper arms will
automatically return to their normal position
when the ignition is turned on.
Replace wiper blades at least once per
year for optimum performance.
Poor wiper quality can be improved by
cleaning the wiper blades and the
windshield.
ADJUSTING THE HEADLAMPS
Vertical Aim Adjustment
The headlamps on your vehicle are
properly aimed at the assembly plant. If
your vehicle has been in an accident, the
alignment of your headlamps should be
checked by your authorized dealer.
Headlamp Aiming Target 8 feet (2.4 meters)
A
Center height of lamp to ground
B
25 feet (7.6 meters)
C
Horizontal reference line
D
258
Fusion/Mondeo (CC7) Canada/United States of America, enUSA, First Printing MaintenanceE142463 E129990
1
1 2 E142592
Page 262 of 518

Vertical Aim Adjustment Procedure
1. Park the vehicle directly in front of a
wall or screen on a level surface,
approximately 25 feet (7.6 meters)
away.
2. Measure the height of the headlamp bulb center from the ground and mark
an 8 foot (2.4 meter) horizontal
reference line on the vertical wall or
screen at this height.
Note: To see a clearer light pattern for
adjusting, you may want to block the light
from one headlamp while adjusting the
other.
3. Turn on the low beam headlamps to illuminate the wall or screen and open
the hood. 4. On the wall or screen you will observe
a flat zone of high intensity light
located at the top of the right hand
portion of the beam pattern. If the top
edge of the high intensity light zone is
not at the horizontal reference line, the
headlamp will need to be adjusted. 5. Locate the vertical adjuster on each
headlamp. Using a Phillips #2
screwdriver, turn the adjuster either
clockwise or counterclockwise in order
to adjust the vertical aim of the
headlamp. The horizontal edge of the
brighter light should touch the
horizontal reference line.
6. Close the hood and turn off the lamps.
Horizontal Aim Adjustment
Horizontal aim is not required for this
vehicle and is not adjustable.
259
Fusion/Mondeo (CC7) Canada/United States of America, enUSA, First Printing MaintenanceE142465 E145594
Page 291 of 518
describes the fundamental
characteristics of the tire and also
provides a U.S. DOT Tire
Identification Number for safety
standard certification and in case
of a recall.
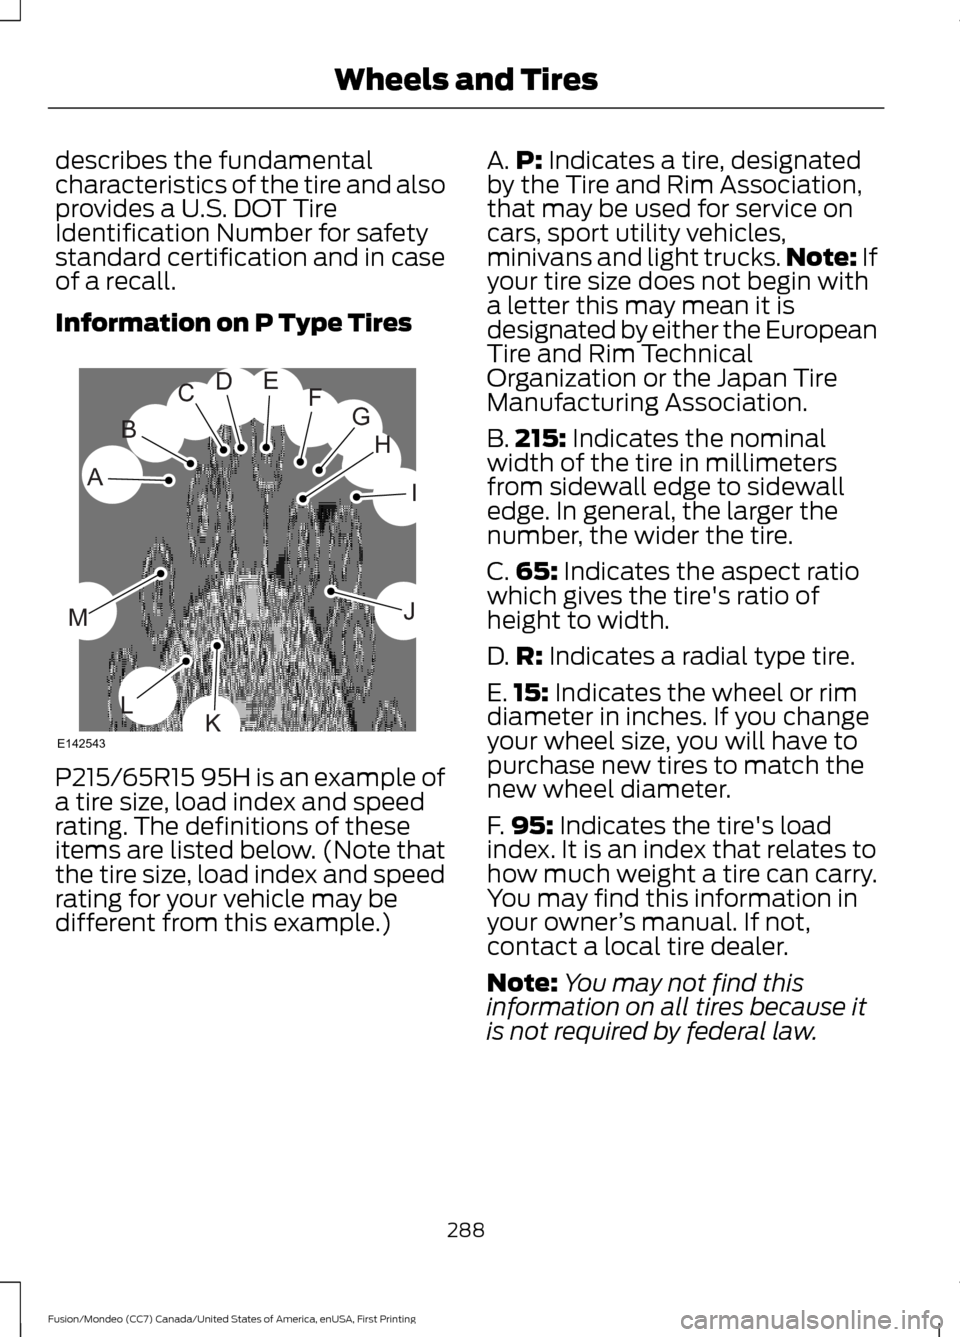
Information on P Type Tires
P215/65R15 95H is an example of
a tire size, load index and speed
rating. The definitions of these
items are listed below. (Note that
the tire size, load index and speed
rating for your vehicle may be
different from this example.) A.
P: Indicates a tire, designated
by the Tire and Rim Association,
that may be used for service on
cars, sport utility vehicles,
minivans and light trucks. Note:
If
your tire size does not begin with
a letter this may mean it is
designated by either the European
Tire and Rim Technical
Organization or the Japan Tire
Manufacturing Association.
B. 215:
Indicates the nominal
width of the tire in millimeters
from sidewall edge to sidewall
edge. In general, the larger the
number, the wider the tire.
C. 65:
Indicates the aspect ratio
which gives the tire's ratio of
height to width.
D. R:
Indicates a radial type tire.
E. 15:
Indicates the wheel or rim
diameter in inches. If you change
your wheel size, you will have to
purchase new tires to match the
new wheel diameter.
F. 95:
Indicates the tire's load
index. It is an index that relates to
how much weight a tire can carry.
You may find this information in
your owner ’s manual. If not,
contact a local tire dealer.
Note: You may not find this
information on all tires because it
is not required by federal law.
288
Fusion/Mondeo (CC7) Canada/United States of America, enUSA, First Printing Wheels and TiresH
I
J
KL
M
A
B
CDEFG
E142543
Page 295 of 518
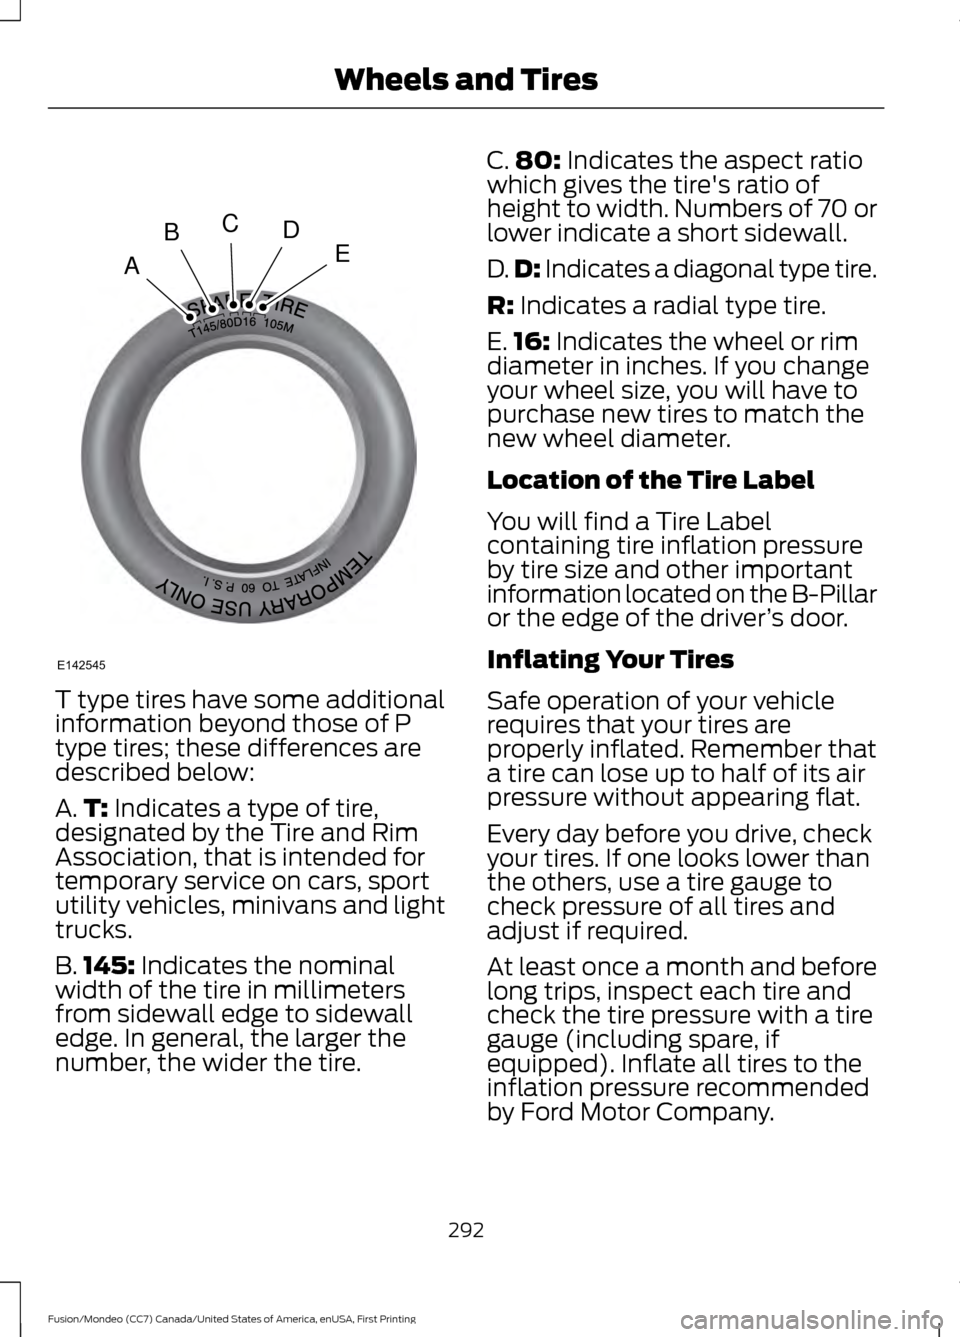
T type tires have some additional
information beyond those of P
type tires; these differences are
described below:
A.
T: Indicates a type of tire,
designated by the Tire and Rim
Association, that is intended for
temporary service on cars, sport
utility vehicles, minivans and light
trucks.
B. 145:
Indicates the nominal
width of the tire in millimeters
from sidewall edge to sidewall
edge. In general, the larger the
number, the wider the tire. C.
80:
Indicates the aspect ratio
which gives the tire's ratio of
height to width. Numbers of 70 or
lower indicate a short sidewall.
D. D:
Indicates a diagonal type tire.
R:
Indicates a radial type tire.
E. 16:
Indicates the wheel or rim
diameter in inches. If you change
your wheel size, you will have to
purchase new tires to match the
new wheel diameter.
Location of the Tire Label
You will find a Tire Label
containing tire inflation pressure
by tire size and other important
information located on the B-Pillar
or the edge of the driver ’s door.
Inflating Your Tires
Safe operation of your vehicle
requires that your tires are
properly inflated. Remember that
a tire can lose up to half of its air
pressure without appearing flat.
Every day before you drive, check
your tires. If one looks lower than
the others, use a tire gauge to
check pressure of all tires and
adjust if required.
At least once a month and before
long trips, inspect each tire and
check the tire pressure with a tire
gauge (including spare, if
equipped). Inflate all tires to the
inflation pressure recommended
by Ford Motor Company.
292
Fusion/Mondeo (CC7) Canada/United States of America, enUSA, First Printing Wheels and TiresA
BCDE
E142545
Page 298 of 518
Inspecting Your Tires and
Wheel Valve Stems
Periodically inspect the tire treads
for uneven or excessive wear and
remove objects such as stones,
nails or glass that may be wedged
in the tread grooves. Check the tire
and valve stems for holes, cracks,
or cuts that may permit air
leakage and repair or replace the
tire and replace the valve stem.
Inspect the tire sidewalls for
cracking, cuts, bruises and other
signs of damage or excessive
wear. If internal damage to the tire
is suspected, have the tire
demounted and inspected in case
it needs to be repaired or replaced.
For your safety, tires that are
damaged or show signs of
excessive wear should not be used
because they are more likely to
blow out or fail.
Improper or inadequate vehicle
maintenance can cause tires to
wear abnormally. Inspect all your
tires, including the spare,
frequently, and replace them if
one or more of the following
conditions exist:
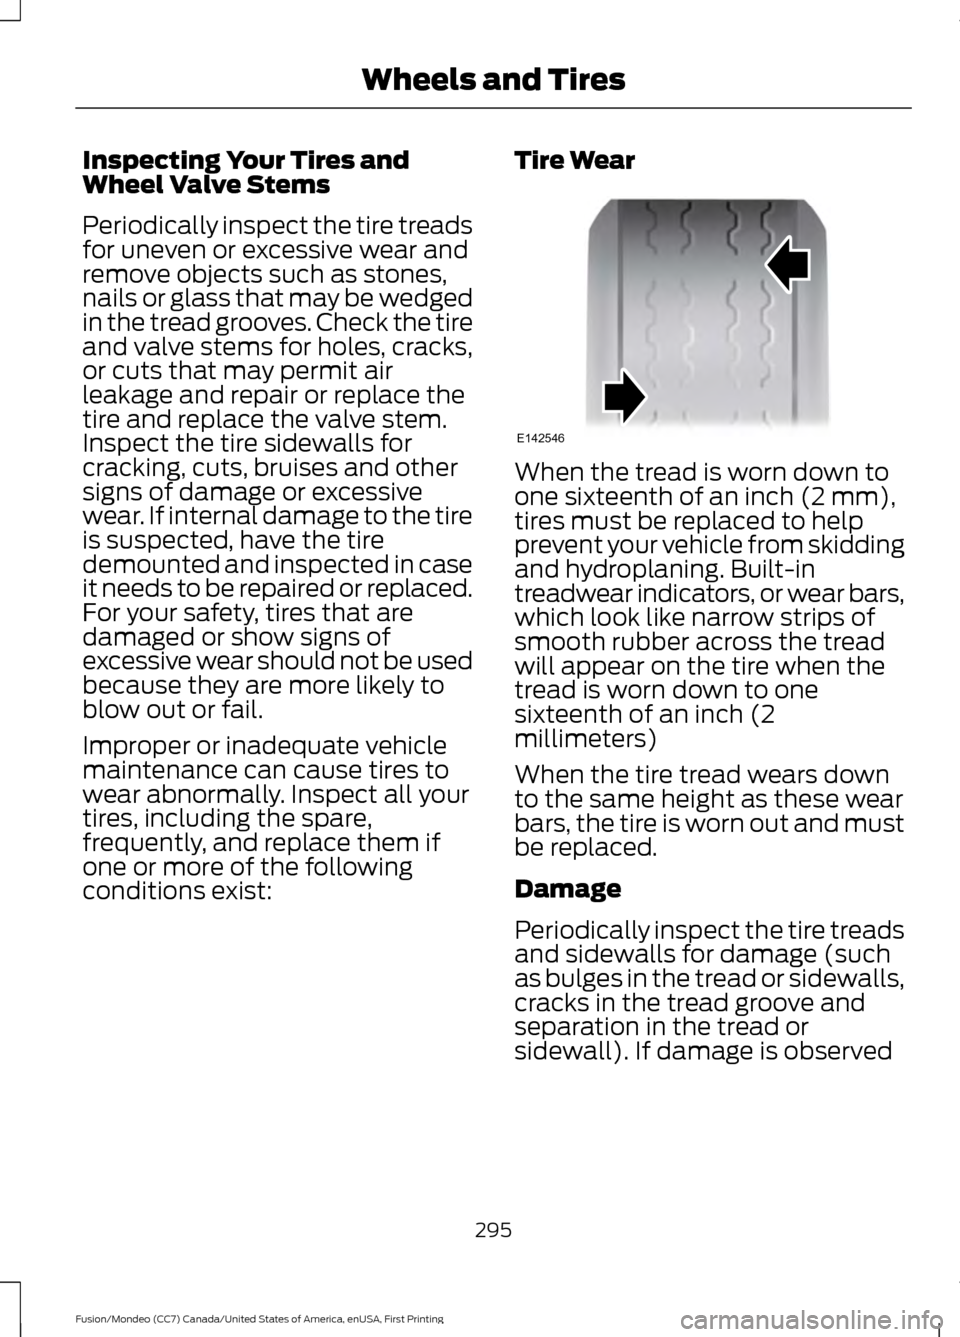
Tire Wear When the tread is worn down to
one sixteenth of an inch (2 mm),
tires must be replaced to help
prevent your vehicle from skidding
and hydroplaning. Built-in
treadwear indicators, or wear bars,
which look like narrow strips of
smooth rubber across the tread
will appear on the tire when the
tread is worn down to one
sixteenth of an inch (2
millimeters)
When the tire tread wears down
to the same height as these wear
bars, the tire is worn out and must
be replaced.
Damage
Periodically inspect the tire treads
and sidewalls for damage (such
as bulges in the tread or sidewalls,
cracks in the tread groove and
separation in the tread or
sidewall). If damage is observed
295
Fusion/Mondeo (CC7) Canada/United States of America, enUSA, First Printing Wheels and TiresE142546
Page 515 of 518

Roadside Assistance..................................226
Vehicles Sold in Canada: Getting Roadside
Assistance....................................................... 226
Vehicles Sold in Canada: Using Roadside Assistance....................................................... 226
Vehicles Sold in the United States: Getting Roadside Assistance................................... 226
Vehicles Sold in the United States: Using Roadside Assistance................................... 226
Roadside Emergencies..............................226
Running-In See: Breaking-In................................................. 223
Running Out of Fuel....................................156 Adding Fuel From a Portable Fuel
Container.......................................................... 156
Filling a Portable Fuel Container.................. 156
S
Safety Belt Height Adjustment
.................34
Safety Belt Minder.........................................35
Belt-Minder™........................................................ 35
Safety Belts
......................................................29
Principle of Operation........................................ 29
Safety Belt Warning Lamp and Indicator Chime..............................................................34
Conditions of operation..................................... 34
Safety Precautions......................................154
Satellite Radio
..............................................338
Satellite Radio Electronic Serial Number
(ESN)................................................................ 339
Satellite Radio Reception Factors..............338
SIRIUS® Satellite Radio Service.................. 338
Troubleshooting................................................. 339
Scheduled Maintenance Record............472
Scheduled Maintenance
..........................464
Seats.................................................................130
Security..............................................................68
Settings...........................................................395 Clock....................................................................... 395
Display................................................................... 396
Settings................................................................ 400
Sound.................................................................... 398
Vehicle................................................................... 398
Side Airbags.....................................................42
Side Curtain Airbags
.....................................44
Sitting in the Correct Position..................130 Snow Chains
See: Using Snow Chains.................................. 301
Special Notices................................................12 New Vehicle Limited Warranty......................... 12
On-board Diagnostics (OBD-II)....................... 12
Special Instructions.............................................. 12
Special Operating Conditions Scheduled Maintenance..............................................470
Exceptions............................................................ 472
Speed Control See: Cruise Control............................................ 188
Spinout Detection
.......................................230
Stability Control............................................178
Principle of Operation....................................... 178
Starter Switch See: Ignition Switch........................................... 146
Starting a Gasoline Engine........................147 Automatic Shutdown....................................... 149
Failure to Start..................................................... 148
Guarding Against Exhaust Fumes...............150
Important Ventilating Information..............150
Switching Off the Vehicle When It Is Moving............................................................... 149
Switching Off the Vehicle When it is Stationary......................................................... 149
Vehicles with an Ignition Key.......................... 147
Vehicles with Keyless Start............................ 148
Starting and Stopping the Engine.........146 General Information.......................................... 146
Steering...........................................................205 Electric Power Steering................................... 205
Steering Wheel.................................................71
Storage Compartments
.............................145
Sunroof See: Moonroof....................................................... 87
Sun Visors
.........................................................87
Illuminated Vanity Mirror................................... 87
Supplementary Restraints System.........38 Principle of Operation........................................ 38
Symbols Glossary
.............................................7
SYNC™ Applications and Services........................................................358
911 Assist............................................................... 358
SYNC Services: Traffic, Directions & Information (TDI) (If Equipped, United
States Only).................................................... 362
Vehicle Health Report (If Equipped, United States Only)................................................... 360
512
Fusion/Mondeo (CC7) Canada/United States of America, enUSA, First Printing Index