2016 FORD FOCUS set clock
[x] Cancel search: set clockPage 30 of 385
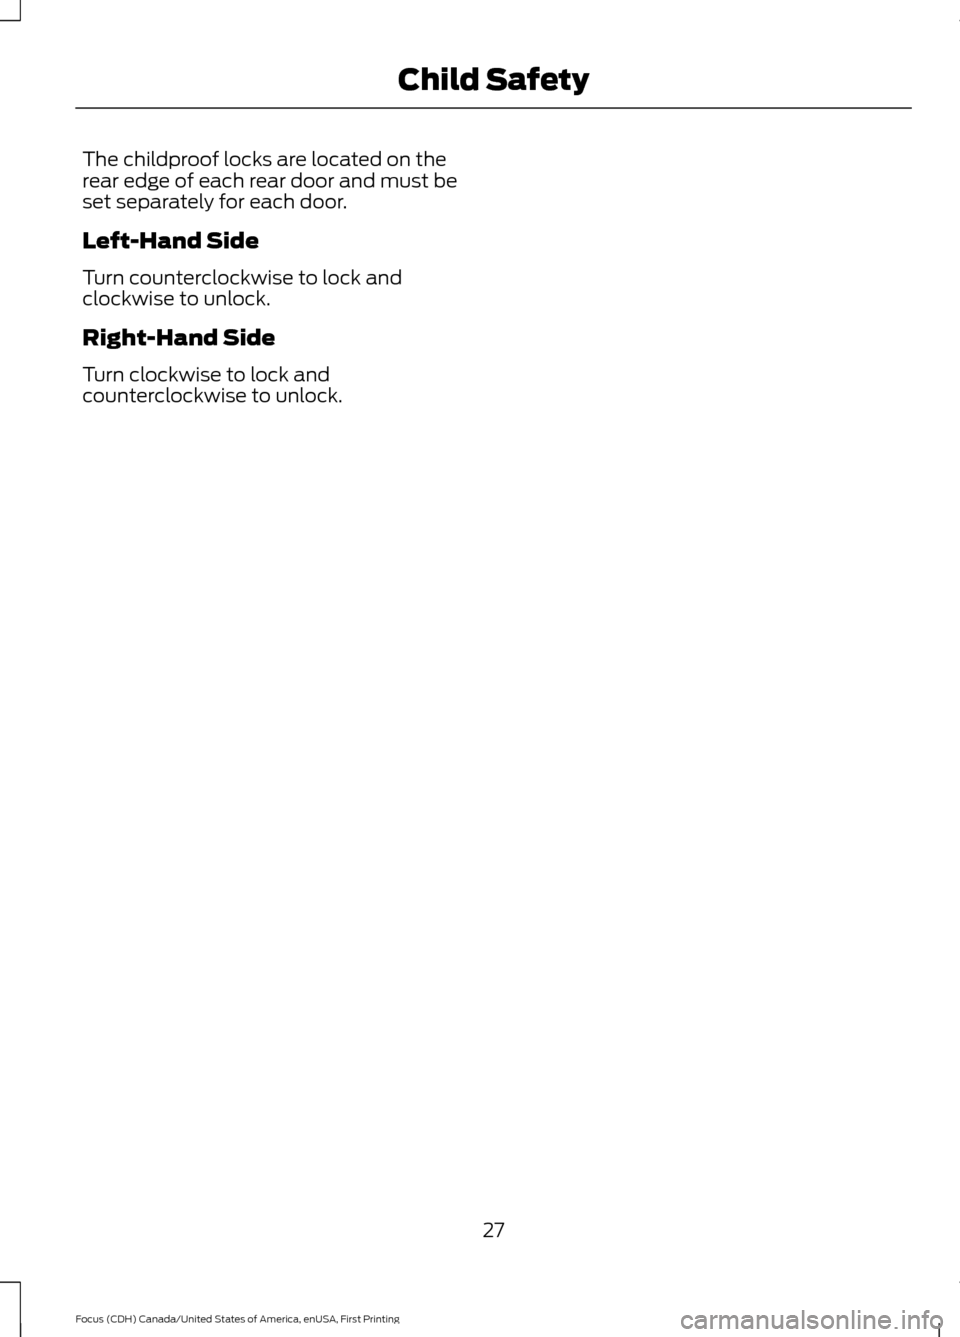
The childproof locks are located on the
rear edge of each rear door and must be
set separately for each door.
Left-Hand Side
Turn counterclockwise to lock and
clockwise to unlock.
Right-Hand Side
Turn clockwise to lock and
counterclockwise to unlock.
27
Focus (CDH) Canada/United States of America, enUSA, First Printing Child Safety
Page 224 of 385
Because your vehicle
’s engine is
electronically-controlled by a computer,
some engine control settings are
maintained by power from the low voltage
battery. Some engine computer settings,
like the idle trim and fuel trim strategy,
optimize the driveability and performance
of the engine. Some other computer
settings, like the clock and radio station
presets, are also maintained in memory by
power from the low voltage battery. When
a technician disconnects and connects the
low voltage battery, these settings are
erased. Complete the following procedure
in order to restore the settings:
1. With the vehicle at a complete stop, set the parking brake.
2. Shift into park (P).
3. Switch off all accessories.
4. Fully press the brake pedal and start the vehicle.
5. Run the engine until it reaches normal operating temperature. While the
engine is warming up, complete the
following: Reset the clock. See Audio
System (page 278). Reset the power
windows bounce-back feature. See
Windows and Mirrors
(page 81).
Reset the radio station presets. See
Audio System
(page 278).
6. Allow the engine to idle for at least one
minute. If the engine turns off, press
the accelerator pedal to start the
engine.
7. While the engine is running, press the brake pedal and shift into neutral (N).
8. Allow the engine to run for at least one
minute by pressing on the accelerator
pedal.
9. Drive the vehicle at least 12 mi (20 km)
to completely relearn the idle and fuel
trim strategy. Note:
If you do not allow the engine to
relearn the idle and fuel trim strategy, the
idle quality of your vehicle may be adversely
affected until the engine computer
eventually relearns the idle trim and fuel
trim strategy.
Make sure that you dispose of old batteries
in an environmentally friendly way. Seek
advice from your local authority about
recycling old batteries.
CHECKING THE WIPER
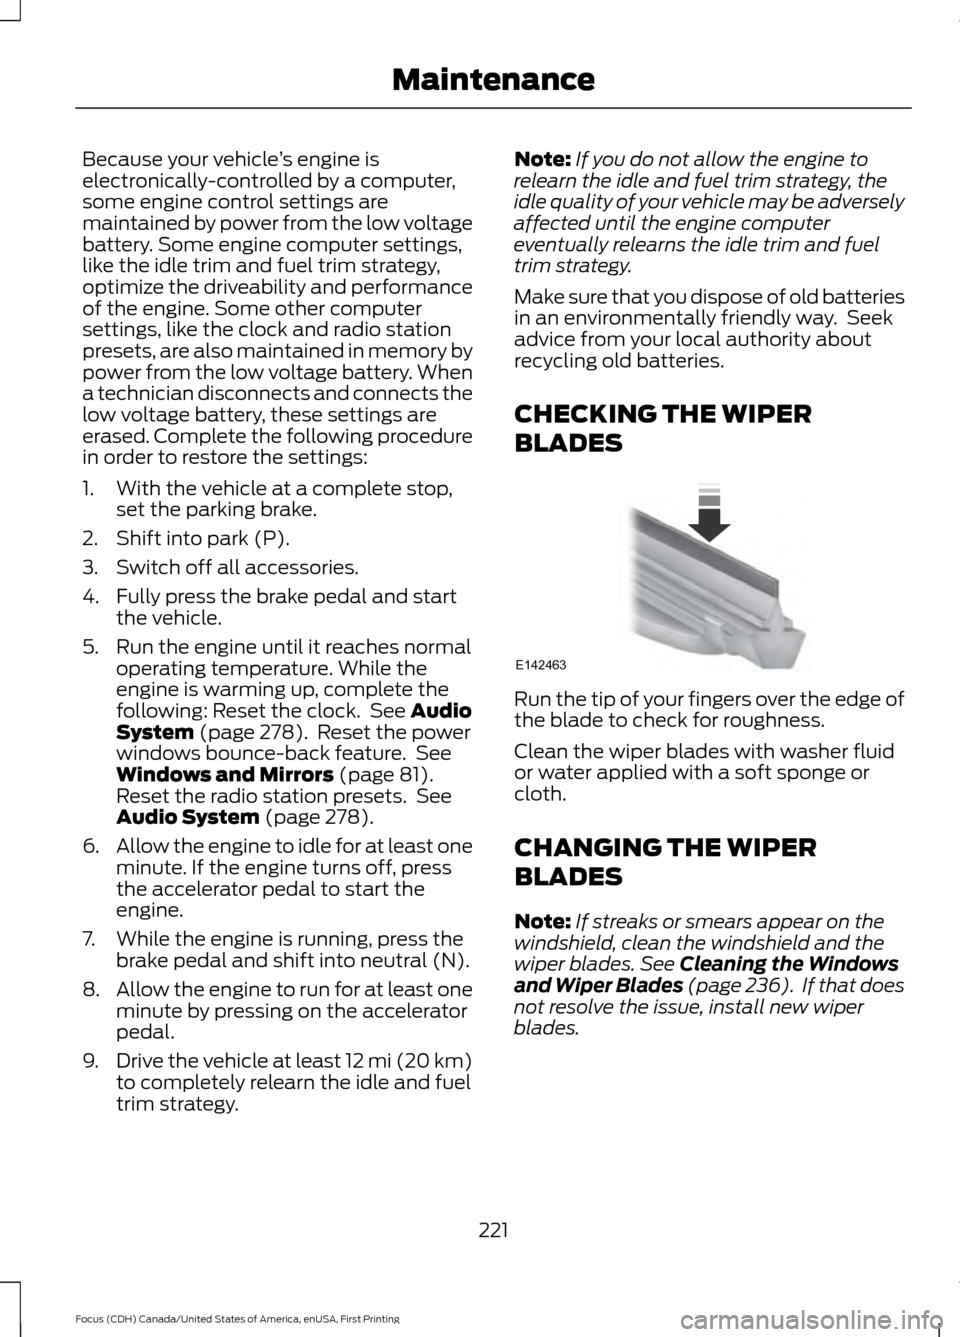
BLADES Run the tip of your fingers over the edge of
the blade to check for roughness.
Clean the wiper blades with washer fluid
or water applied with a soft sponge or
cloth.
CHANGING THE WIPER
BLADES
Note:
If streaks or smears appear on the
windshield, clean the windshield and the
wiper blades.
See Cleaning the Windows
and Wiper Blades (page 236). If that does
not resolve the issue, install new wiper
blades.
221
Focus (CDH) Canada/United States of America, enUSA, First Printing MaintenanceE142463
Page 265 of 385

WARNINGS
Never get underneath a vehicle that
is supported only by a jack. If the
vehicle slips off the jack, you or
someone else could be seriously injured. Do not attempt to change a tire on
the side of the vehicle close to
moving traffic. Pull far enough off the
road to avoid the danger of being hit when
operating the jack or changing the wheel. Always use the jack provided as
original equipment with your vehicle.
If using a jack other than the one
provided as original equipment with your
vehicle, make sure the jack capacity is
adequate for the vehicle weight, including
any vehicle cargo or modifications. Note:
Passengers should not remain in the
vehicle when the vehicle is being jacked.
1. Park on a level surface, set the parking
brake and activate the hazard flashers.
2. Place the transmission in park (P) (automatic transmission) or neutral
(N) (manual transmission) and turn
the engine off.
3. Remove the carpeted wheel cover.
4. Remove the spare tire bolt securing the
spare tire by turning it
counterclockwise.
5. Remove the spare tire from the spare tire compartment
6. Remove the retaining bolt securing the
jack by turning it counterclockwise.
7. Remove the jack. 8. Block the diagonally opposite wheel.
9. Loosen each wheel lug nut one-half
turn counterclockwise, but do not
remove them until the wheel is raised
off the ground.
10. The vehicle jacking points are shown
here, and are depicted on the warning
label on the jack. Note: Jack at the
specified locations to avoid damage
to the vehicle. 11. Indentations in the sills show the
location of the jacking points.
262
Focus (CDH) Canada/United States of America, enUSA, First Printing Wheels and TiresE142551 E145908
Page 284 of 385
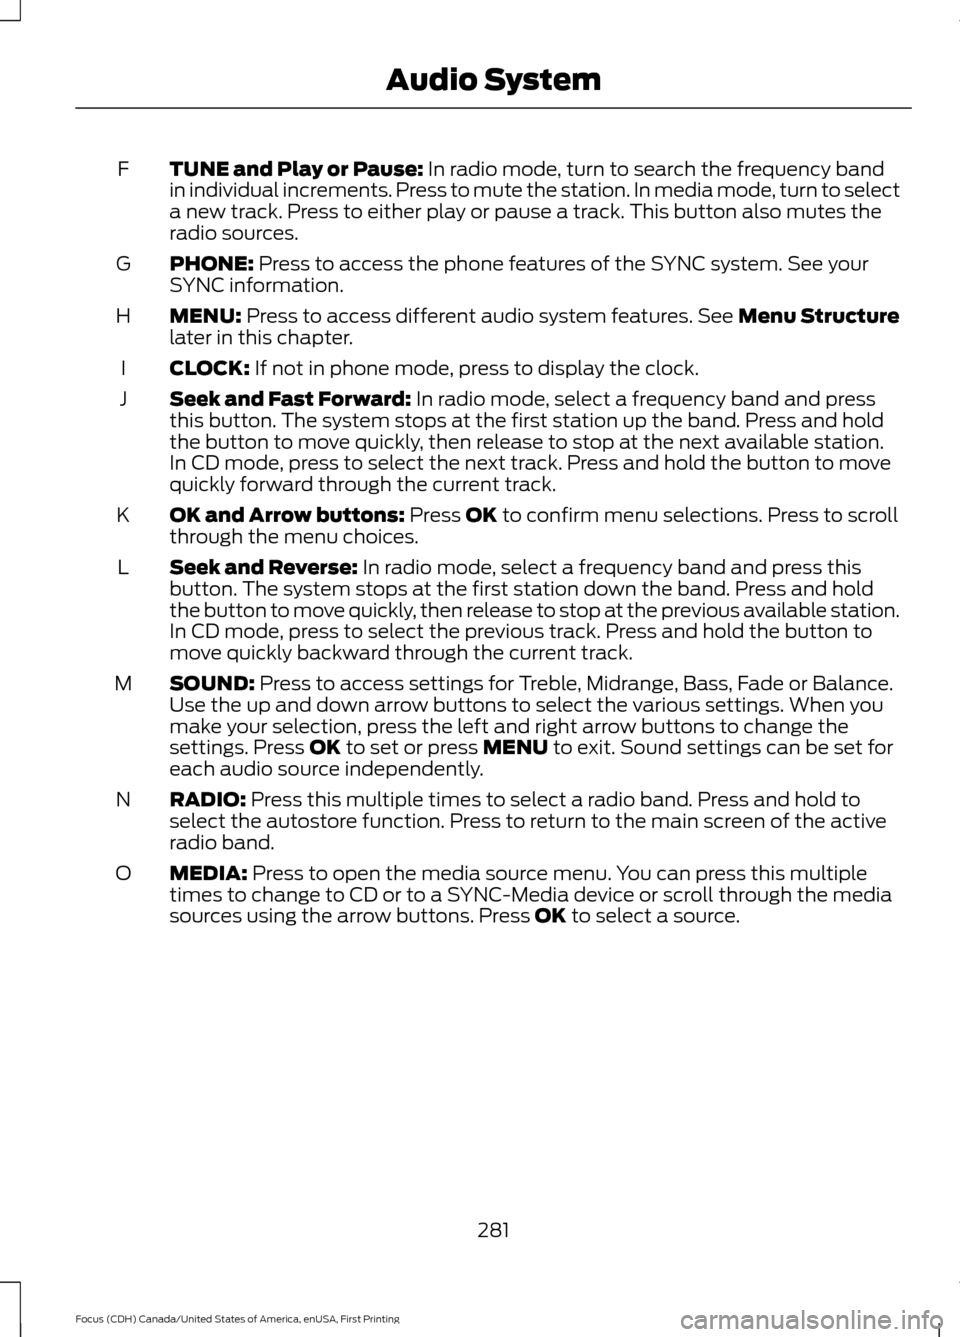
TUNE and Play or Pause: In radio mode, turn to search the frequency band
in individual increments. Press to mute the station. In media mode, turn to select
a new track. Press to either play or pause a track. This button also mutes the
radio sources.
F
PHONE:
Press to access the phone features of the SYNC system. See your
SYNC information.
G
MENU:
Press to access different audio system features. See Menu Structure
later in this chapter.
H
CLOCK:
If not in phone mode, press to display the clock.
I
Seek and Fast Forward:
In radio mode, select a frequency band and press
this button. The system stops at the first station up the band. Press and hold
the button to move quickly, then release to stop at the next available station.
In CD mode, press to select the next track. Press and hold the button to move
quickly forward through the current track.
J
OK and Arrow buttons:
Press OK to confirm menu selections. Press to scroll
through the menu choices.
K
Seek and Reverse:
In radio mode, select a frequency band and press this
button. The system stops at the first station down the band. Press and hold
the button to move quickly, then release to stop at the previous available station.
In CD mode, press to select the previous track. Press and hold the button to
move quickly backward through the current track.
L
SOUND:
Press to access settings for Treble, Midrange, Bass, Fade or Balance.
Use the up and down arrow buttons to select the various settings. When you
make your selection, press the left and right arrow buttons to change the
settings. Press
OK to set or press MENU to exit. Sound settings can be set for
each audio source independently.
M
RADIO:
Press this multiple times to select a radio band. Press and hold to
select the autostore function. Press to return to the main screen of the active
radio band.
N
MEDIA:
Press to open the media source menu. You can press this multiple
times to change to CD or to a SYNC-Media device or scroll through the media
sources using the arrow buttons. Press
OK to select a source.
O
281
Focus (CDH) Canada/United States of America, enUSA, First Printing Audio System
Page 287 of 385
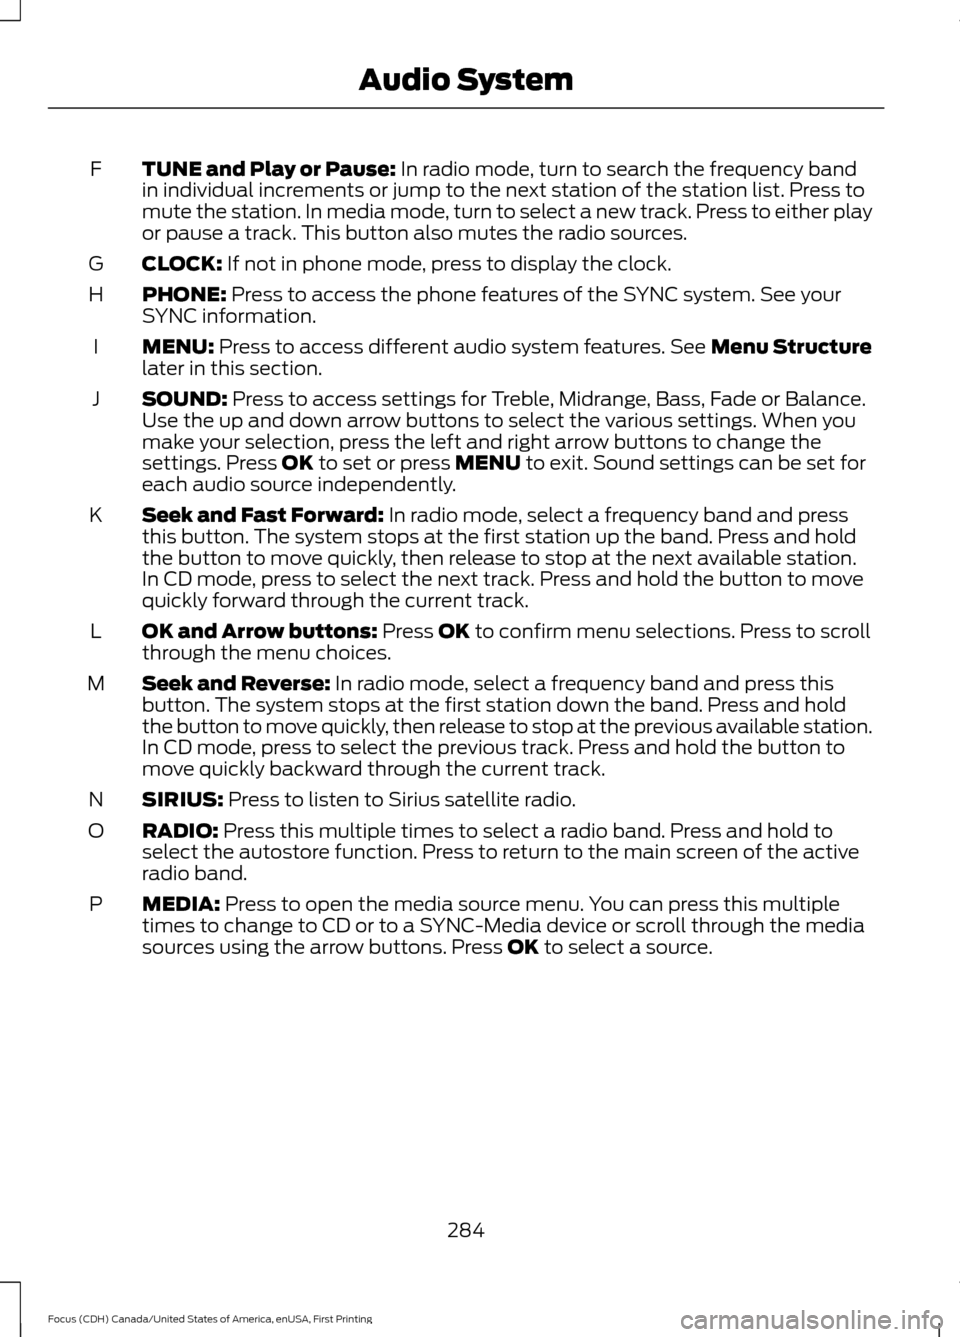
TUNE and Play or Pause: In radio mode, turn to search the frequency band
in individual increments or jump to the next station of the station list. Press to
mute the station. In media mode, turn to select a new track. Press to either play
or pause a track. This button also mutes the radio sources.
F
CLOCK:
If not in phone mode, press to display the clock.
G
PHONE:
Press to access the phone features of the SYNC system. See your
SYNC information.
H
MENU:
Press to access different audio system features. See Menu Structure
later in this section.
I
SOUND:
Press to access settings for Treble, Midrange, Bass, Fade or Balance.
Use the up and down arrow buttons to select the various settings. When you
make your selection, press the left and right arrow buttons to change the
settings. Press
OK to set or press MENU to exit. Sound settings can be set for
each audio source independently.
J
Seek and Fast Forward:
In radio mode, select a frequency band and press
this button. The system stops at the first station up the band. Press and hold
the button to move quickly, then release to stop at the next available station.
In CD mode, press to select the next track. Press and hold the button to move
quickly forward through the current track.
K
OK and Arrow buttons:
Press OK to confirm menu selections. Press to scroll
through the menu choices.
L
Seek and Reverse:
In radio mode, select a frequency band and press this
button. The system stops at the first station down the band. Press and hold
the button to move quickly, then release to stop at the previous available station.
In CD mode, press to select the previous track. Press and hold the button to
move quickly backward through the current track.
M
SIRIUS:
Press to listen to Sirius satellite radio.
N
RADIO:
Press this multiple times to select a radio band. Press and hold to
select the autostore function. Press to return to the main screen of the active
radio band.
O
MEDIA:
Press to open the media source menu. You can press this multiple
times to change to CD or to a SYNC-Media device or scroll through the media
sources using the arrow buttons. Press
OK to select a source.
P
284
Focus (CDH) Canada/United States of America, enUSA, First Printing Audio System
Page 291 of 385
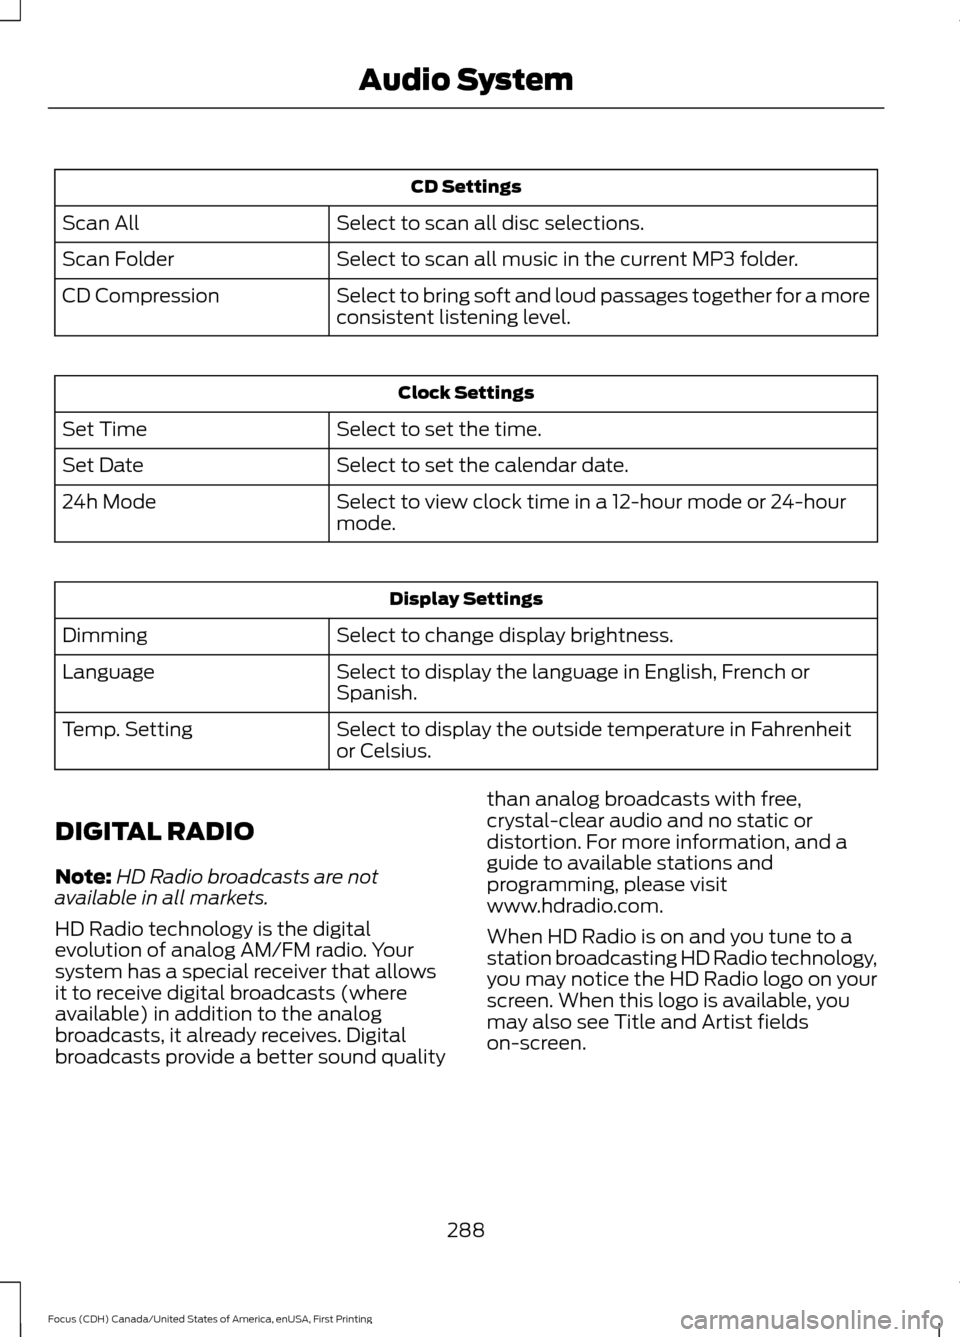
CD Settings
Select to scan all disc selections.
Scan All
Select to scan all music in the current MP3 folder.
Scan Folder
Select to bring soft and loud passages together for a more
consistent listening level.
CD Compression Clock Settings
Select to set the time.
Set Time
Select to set the calendar date.
Set Date
Select to view clock time in a 12-hour mode or 24-hour
mode.
24h Mode Display Settings
Select to change display brightness.
Dimming
Select to display the language in English, French or
Spanish.
Language
Select to display the outside temperature in Fahrenheit
or Celsius.
Temp. Setting
DIGITAL RADIO
Note: HD Radio broadcasts are not
available in all markets.
HD Radio technology is the digital
evolution of analog AM/FM radio. Your
system has a special receiver that allows
it to receive digital broadcasts (where
available) in addition to the analog
broadcasts, it already receives. Digital
broadcasts provide a better sound quality than analog broadcasts with free,
crystal-clear audio and no static or
distortion. For more information, and a
guide to available stations and
programming, please visit
www.hdradio.com.
When HD Radio is on and you tune to a
station broadcasting HD Radio technology,
you may notice the HD Radio logo on your
screen. When this logo is available, you
may also see Title and Artist fields
on-screen.
288
Focus (CDH) Canada/United States of America, enUSA, First Printing Audio System