2016 FORD FOCUS Page 55
[x] Cancel search: Page 55Page 235 of 385
CHANGING THE ENGINE AIR
FILTER
WARNING
To reduce the risk of vehicle damage
and personal burn injuries, do not
start your engine with the air cleaner
removed. Do not remove the air cleaner
while the engine is running. When changing the air filter element, use
only the air filter element listed in the
Motorcraft Parts table. See Motorcraft
Parts (page 267).
For EcoBoost equipped vehicles: When
servicing the air cleaner, it is important that
no foreign material enter the air induction
system. The engine and turbocharger are
susceptible to damage from even small
particles.
Change the air filter element at the proper
interval. See
Scheduled Maintenance
(page 336).
Note: Failure to use the correct air filter
element may result in severe engine
damage. The customer warranty may be
void for any damage to the engine if the
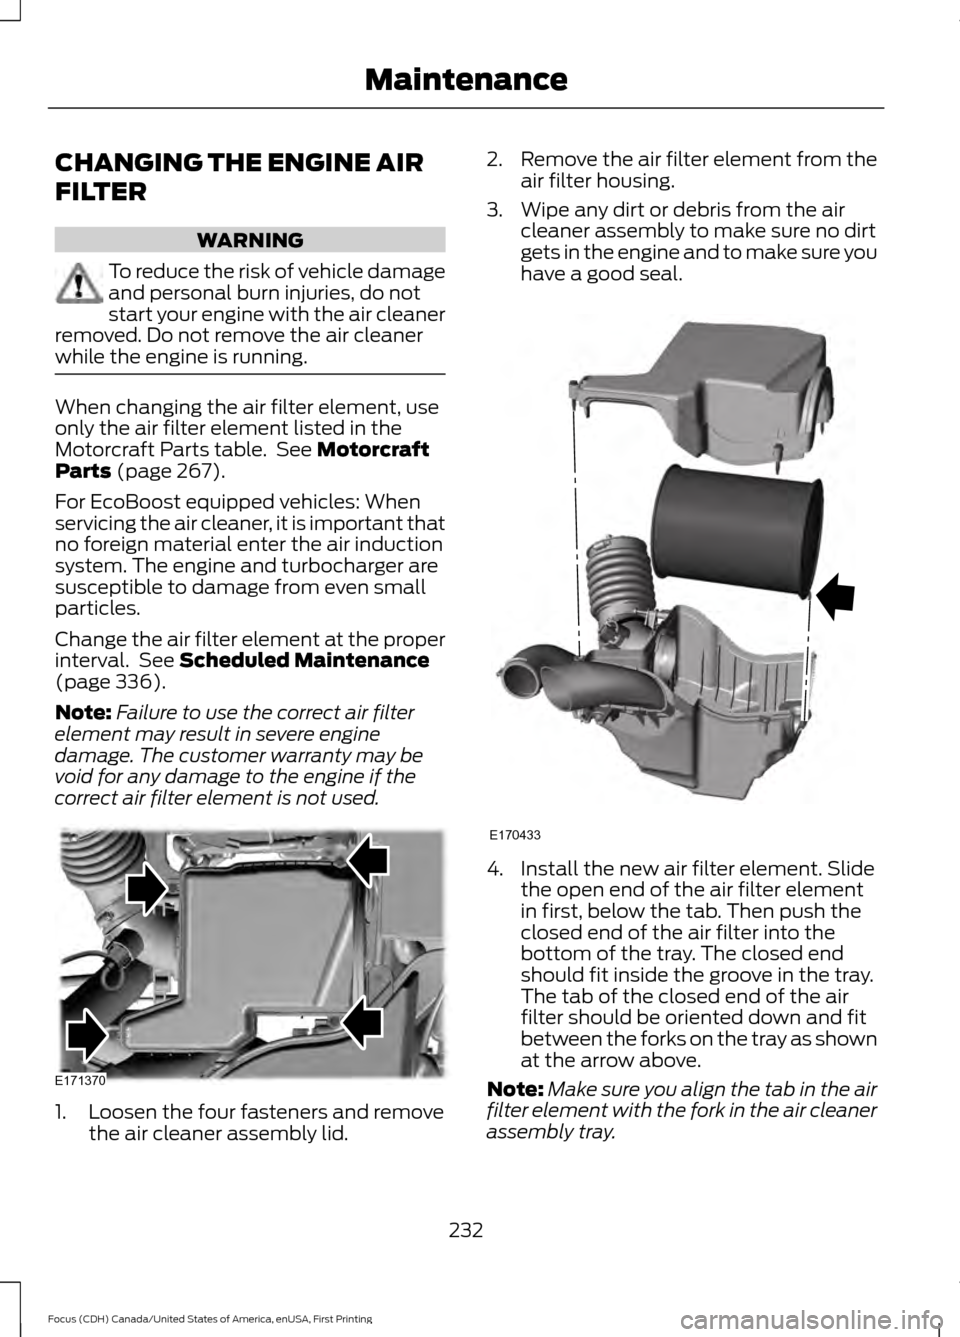
correct air filter element is not used. 1. Loosen the four fasteners and remove
the air cleaner assembly lid. 2.
Remove the air filter element from the
air filter housing.
3. Wipe any dirt or debris from the air cleaner assembly to make sure no dirt
gets in the engine and to make sure you
have a good seal. 4. Install the new air filter element. Slide
the open end of the air filter element
in first, below the tab. Then push the
closed end of the air filter into the
bottom of the tray. The closed end
should fit inside the groove in the tray.
The tab of the closed end of the air
filter should be oriented down and fit
between the forks on the tray as shown
at the arrow above.
Note: Make sure you align the tab in the air
filter element with the fork in the air cleaner
assembly tray.
232
Focus (CDH) Canada/United States of America, enUSA, First Printing MaintenanceE171370 E170433
Page 240 of 385
CLEANING THE INTERIOR
WARNINGS
Do not use cleaning solvents, bleach
or dye on the vehicle
’s safety belts,
as these actions may weaken the
belt webbing. On vehicles equipped with
seat-mounted airbags, do not use
chemical solvents or strong
detergents. Such products could
contaminate the side airbag system and
affect performance of the side airbag in a
collision. For fabric, carpets, cloth seats, safety belts
and seats equipped with side airbags:
•
Remove dust and loose dirt with a
vacuum cleaner.
• Remove light stains and soil with
Motorcraft Professional Strength
Carpet & Upholstery Cleaner.
• If grease or tar is present on the
material, spot-clean the area first with
Motorcraft Spot and Stain Remover. In
Canada, use Motorcraft Multi-Purpose
Cleaner.
• If a ring forms on the fabric after spot
cleaning, clean the entire area
immediately (but do not oversaturate)
or the ring will set.
• Do not use household cleaning
products or glass cleaners, which can
stain and discolor the fabric and affect
the flame retardant abilities of the seat
materials. CLEANING THE INSTRUMENT
PANEL AND INSTRUMENT
CLUSTER LENS WARNING
Do not use chemical solvents or
strong detergents when cleaning the
steering wheel or instrument panel
to avoid contamination of the airbag
system. Note:
Follow the same procedure as
cleaning leather seats for cleaning leather
instrument panels and leather interior trim
surfaces. See Cleaning Leather Seats
(page 238).
Clean the instrument panel and cluster
lens with a clean, damp and soft cloth,
then use a clean, dry and soft cloth to dry
these areas.
• Avoid cleaners or polishes that increase
the gloss of the upper portion of the
instrument panel. The dull finish in this
area helps protect you from
undesirable windshield reflection.
• Do not use any household cleaning
products or glass cleaners as these
may damage the finish of the
instrument panel, interior trim and
cluster lens.
• Wash or wipe your hands clean if you
have been in contact with certain
products such as insect repellent and
suntan lotion to avoid possible damage
to the interior painted surfaces.
• Do not allow air fresheners and hand
sanitizers to spill onto interior surfaces.
If a spill occurs, wipe off immediately.
Your warranty may not cover these
damages.
If a staining liquid like coffee or juice has
been spilled on the instrument panel or on
interior trim surfaces:
237
Focus (CDH) Canada/United States of America, enUSA, First Printing Vehicle Care
Page 258 of 385
Tire and Wheel Alignment
A bad jolt from hitting a curb or
pothole can cause the front end
of your vehicle to become
misaligned or cause damage to
your tires. If your vehicle seems to
pull to one side when you are
driving, the wheels may be out of
alignment. Have an authorized
dealer check the wheel alignment
periodically.
Wheel misalignment in the front
or the rear can cause uneven and
rapid treadwear of your tires and
should be corrected by an
authorized dealer. Front-wheel
drive vehicles and those with an
independent rear suspension (if
equipped) may require alignment
of all four wheels.
The tires should also be balanced
periodically. An unbalanced tire
and wheel assembly may result in
irregular tire wear.
Tire Rotation WARNING
If the tire label shows
different tire pressures for the
front and rear tires and the vehicle
is equipped with a tire pressure
monitoring system, then the
settings for the system sensors
need to be updated. Always
perform the system reset
procedure after tire rotation. If the
system is not reset, it may not
provide a low tire pressure
warning when necessary. See Tire
Pressure Monitoring System
(page 257). Note:
If your tires show uneven
wear ask an authorized dealer to
check for and correct any wheel
misalignment, tire imbalance or
mechanical problem involved
before tire rotation.
Note: Your vehicle may be
equipped with a dissimilar spare
wheel and tire assembly. A
dissimilar spare wheel and tire
assembly is defined as a spare
wheel and tire assembly that is
different in brand, size or
appearance from the road tires and
wheels. If you have a dissimilar
spare wheel and tire assembly it is
intended for temporary use only
and should not be used in a tire
rotation.
Note: After having your tires
rotated, inflation pressure must be
checked and adjusted to the
vehicle requirements.
255
Focus (CDH) Canada/United States of America, enUSA, First Printing Wheels and Tires
Page 263 of 385
How Temperature Affects Your Tire
Pressure
The tire pressure monitoring system
monitors tire pressure in each pneumatic
tire. While driving in a normal manner, a
typical passenger tire inflation pressure
may increase about 2 to 4 psi (14 to 28
kPa) from a cold start situation. If the
vehicle is stationary overnight with the
outside temperature significantly lower
than the daytime temperature, the tire
pressure may decrease about 3 psi (21
kPa) for a drop of 30°F (17°C) in ambient
temperature. This lower pressure value
may be detected by the tire pressure
monitoring system as being significantly
lower than the recommended inflation
pressure and activate the system warning
light for low tire pressure. If the low tire
pressure warning light is on, visually check
each tire to verify that no tire is flat. If one
or more tires are flat, repair as necessary.
Check the air pressure in the road tires. If
any tire is under-inflated, carefully drive
the vehicle to the nearest location where
air can be added to the tires. Inflate all the
tires to the recommended inflation
pressure.
CHANGING A ROAD WHEEL
WARNINGS
The use of tire sealant may damage
your tire pressure monitoring system
and should only be used in roadside
emergencies. If you must use a sealant, the
Ford Tire Mobility Kit sealant should be
used. The tire pressure monitoring system
sensor and valve stem on the wheel must
be replaced by an authorized dealer after
use of the sealant. If the tire pressure monitor sensor
becomes damaged, it will no longer
function. See Tire Pressure
Monitoring System (page 257). Note:
The tire pressure monitoring system
indicator light will illuminate when the spare
tire is in use. To restore the full function of
the monitoring system, all road wheels
equipped with tire pressure monitoring
sensors must be mounted on this vehicle.
If you get a flat tire while driving, do not
apply the brake heavily. Instead, gradually
decrease your speed. Hold the steering
wheel firmly and slowly move to a safe
place on the side of the road.
Have a flat serviced by an authorized
dealer in order to prevent damage to the
system sensors
See Tire Pressure
Monitoring System (page 257). Replace
the spare tire with a road tire as soon as
possible. During repairing or replacing of
the flat tire, have the authorized dealer
inspect the system sensor for damage.
Dissimilar Spare Wheel and Tire
Assembly Information WARNING
Failure to follow these guidelines
could result in an increased risk of
loss of vehicle control, injury or death.
If you have a dissimilar spare wheel and
tire, then it is intended for temporary use
only. This means that if you need to use it,
you should replace it as soon as possible
with a road wheel and tire assembly that
is the same size and type as the road tires
and wheels that were originally provided
by Ford. If the dissimilar spare tire or wheel
is damaged, it should be replaced rather
than repaired.
A dissimilar spare wheel and tire assembly
is defined as a spare wheel and tire
assembly that is different in brand, size or
appearance from the road tires and wheels
and can be one of three types:
260
Focus (CDH) Canada/United States of America, enUSA, First Printing Wheels and Tires
Page 266 of 385
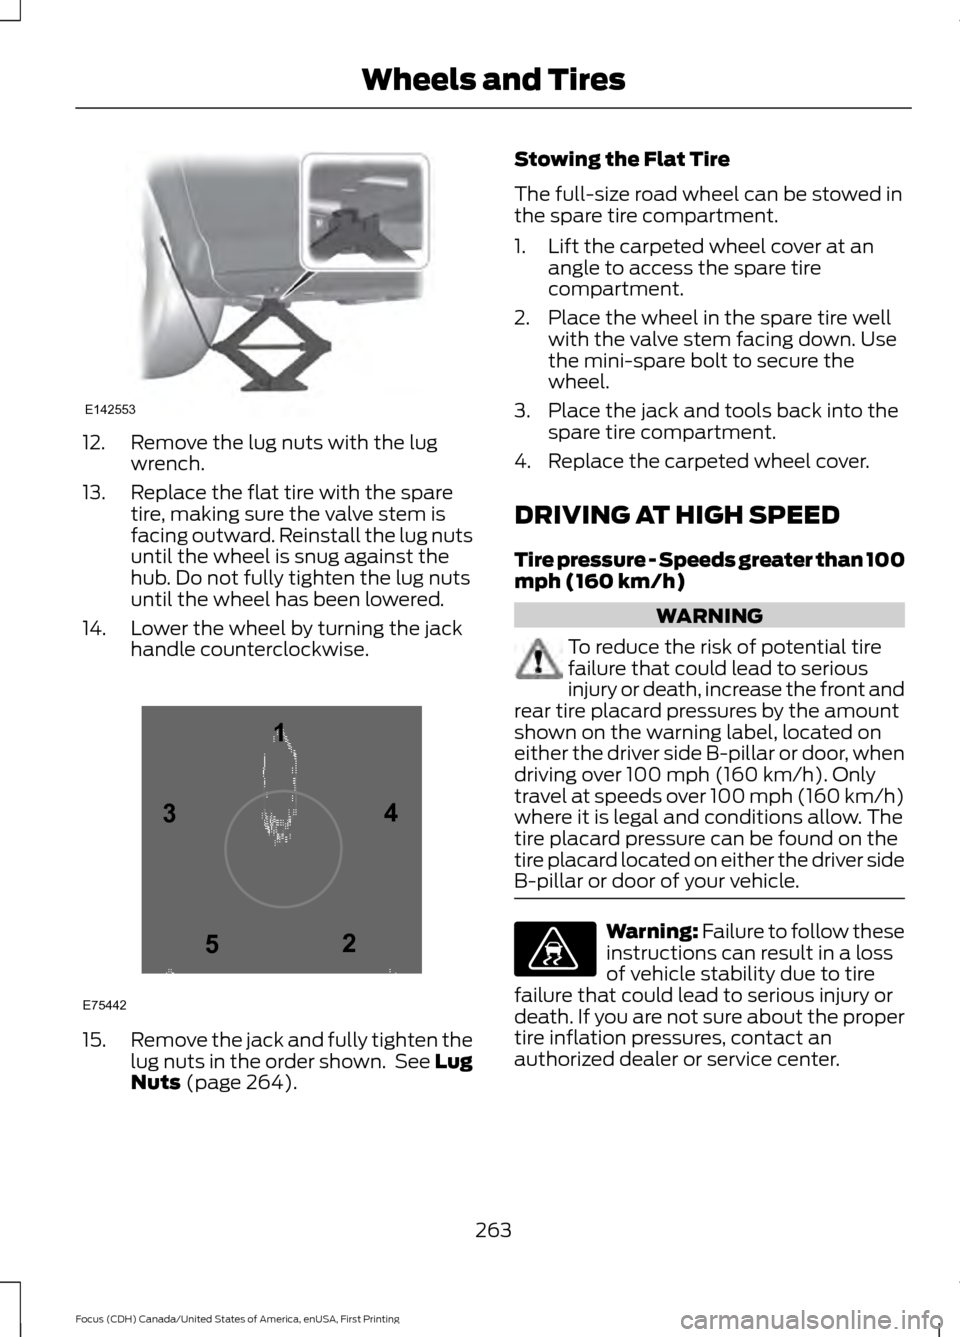
12. Remove the lug nuts with the lug
wrench.
13. Replace the flat tire with the spare tire, making sure the valve stem is
facing outward. Reinstall the lug nuts
until the wheel is snug against the
hub. Do not fully tighten the lug nuts
until the wheel has been lowered.
14. Lower the wheel by turning the jack handle counterclockwise. 15.
Remove the jack and fully tighten the
lug nuts in the order shown. See Lug
Nuts (page 264). Stowing the Flat Tire
The full-size road wheel can be stowed in
the spare tire compartment.
1. Lift the carpeted wheel cover at an
angle to access the spare tire
compartment.
2. Place the wheel in the spare tire well with the valve stem facing down. Use
the mini-spare bolt to secure the
wheel.
3. Place the jack and tools back into the spare tire compartment.
4. Replace the carpeted wheel cover.
DRIVING AT HIGH SPEED
Tire pressure - Speeds greater than 100
mph (160 km/h) WARNING
To reduce the risk of potential tire
failure that could lead to serious
injury or death, increase the front and
rear tire placard pressures by the amount
shown on the warning label, located on
either the driver side B-pillar or door, when
driving over
100 mph (160 km/h). Only
travel at speeds over 100 mph (160 km/h)
where it is legal and conditions allow. The
tire placard pressure can be found on the
tire placard located on either the driver side
B-pillar or door of your vehicle. Warning: Failure to follow these
instructions can result in a loss
of vehicle stability due to tire
failure that could lead to serious injury or
death. If you are not sure about the proper
tire inflation pressures, contact an
authorized dealer or service center.
263
Focus (CDH) Canada/United States of America, enUSA, First Printing Wheels and TiresE142553 12
3
4
5
E75442 E176077
Page 269 of 385

Drivebelt Routing
2.0L GDI EngineMOTORCRAFT PARTS - 1.0L ECOBOOST™
Part Number
Component
FA-1908
Air filter element
FL-910-S
Oil filter
BAGM-48H6-760
Battery
SP-538A
Spark plugs
FP-70
Cabin air filter
WW-2802 (driver side)
Windshield wiper blade
WW-2803 (passenger side)
WW-1295
Rear window wiper blade
We recommend Motorcraft replacement parts available at your Ford dealer or at
fordparts.com for scheduled maintenance. These parts meet or exceed Ford Motor
Company ’s specifications and are engineered for your vehicle. Use of other parts may
impact vehicle performance, emissions and durability. Your warranty may be void for any
damage related to use of other parts.
If a Motorcraft oil filter is not available, use an oil filter that meets industry performance
specification SAE/USCAR-36.
For spark plug replacement, contact an authorized dealer. Replace the spark plugs at the
appropriate intervals. See Scheduled Maintenance (page 336).
266
Focus (CDH) Canada/United States of America, enUSA, First Printing Capacities and SpecificationsE189146
Page 270 of 385

MOTORCRAFT PARTS - 2.0L
Part Number
Component
FA-1908
Air filter element
FL-910-S
Oil filter
BXT-96R-500
Battery - vehicles with manual
transmissions
BXT-96R-590
Battery - vehicles with automatic
transmissions
SP-535
Spark plugs
FP-70
Cabin air filter
WW-2802 (driver side)
Windshield wiper blade
WW-2803 (passenger side)
WW-1295
Rear window wiper blade
We recommend Motorcraft replacement parts available at your Ford dealer or at
fordparts.com for scheduled maintenance. These parts meet or exceed Ford Motor
Company ’s specifications and are engineered for your vehicle. Use of other parts may
impact vehicle performance, emissions and durability. Your warranty may be void for any
damage related to use of other parts.
If a Motorcraft oil filter is not available, use an oil filter that meets industry performance
specification SAE/USCAR-36.
For spark plug replacement, contact an authorized dealer. Replace the spark plugs at the
appropriate intervals. See Scheduled Maintenance (page 336).
267
Focus (CDH) Canada/United States of America, enUSA, First Printing Capacities and Specifications
Page 296 of 385
Action
Condition
Message
Contact SIRIUS at 1-888-
539-7474 to resolve
subscription issues.
Your satellite service is no
longer available.
Questions? Call
1-888-539-7474
Use the channel guide to
turn off the Lock or Skip
function on that station.
All the channels in the
selected category are either
skipped or locked.
None found
Check Channel Guide
No action required.
SIRIUS has updated the
channels available for your
vehicle.
Subscription Updated
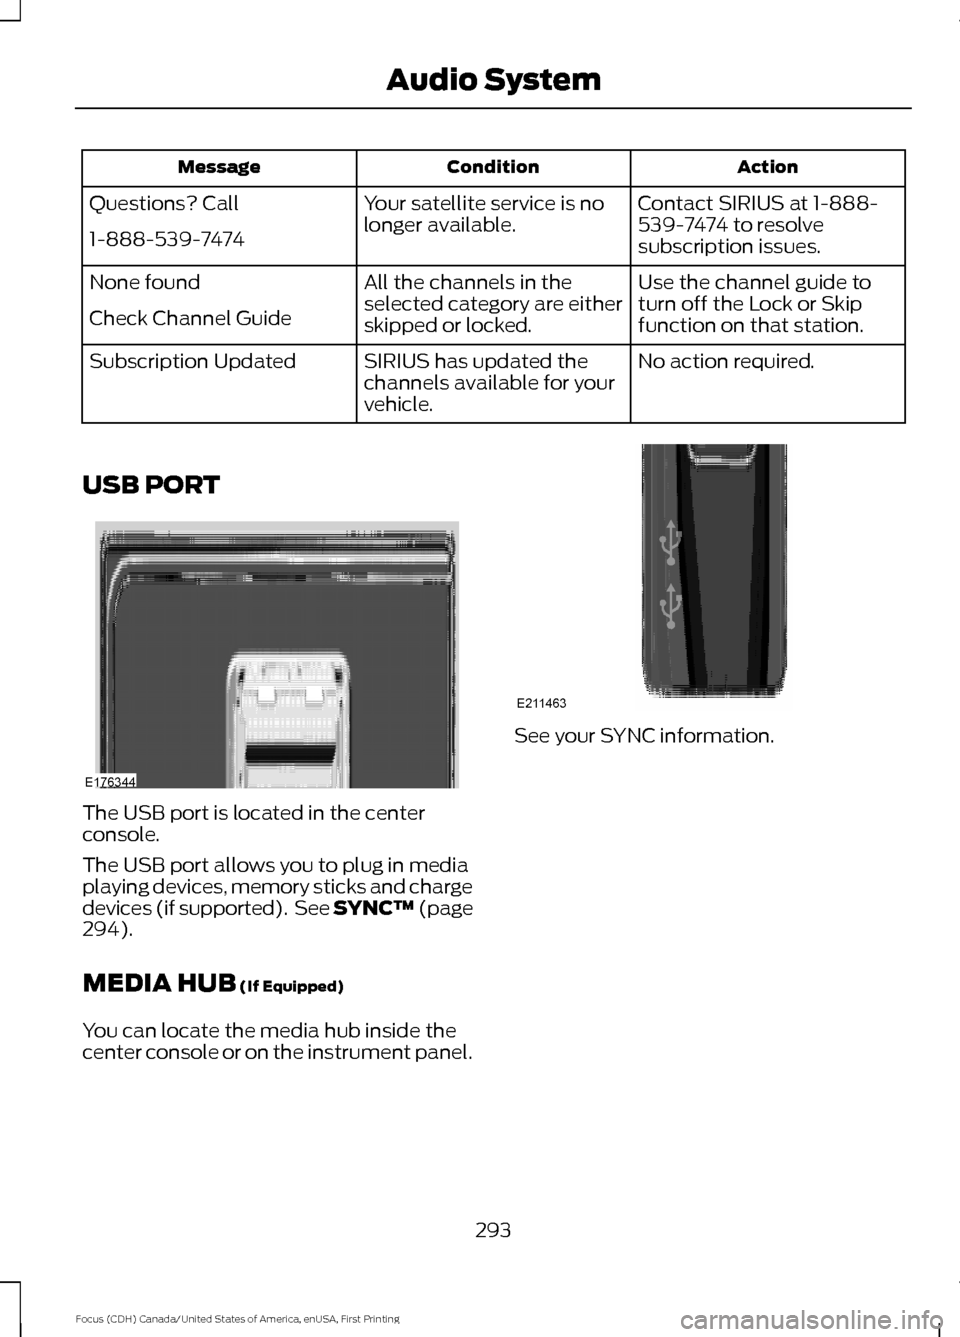
USB PORT The USB port is located in the center
console.
The USB port allows you to plug in media
playing devices, memory sticks and charge
devices (if supported). See SYNC™ (page
294).
MEDIA HUB
(If Equipped)
You can locate the media hub inside the
center console or on the instrument panel. See your SYNC information.
293
Focus (CDH) Canada/United States of America, enUSA, First Printing Audio SystemE176344 E211463